
Subscribe to Our Youtube Channel
Related Manuals for Grace Digital VICTORIA GDI-IRN1941


Summary of Contents for Grace Digital VICTORIA GDI-IRN1941
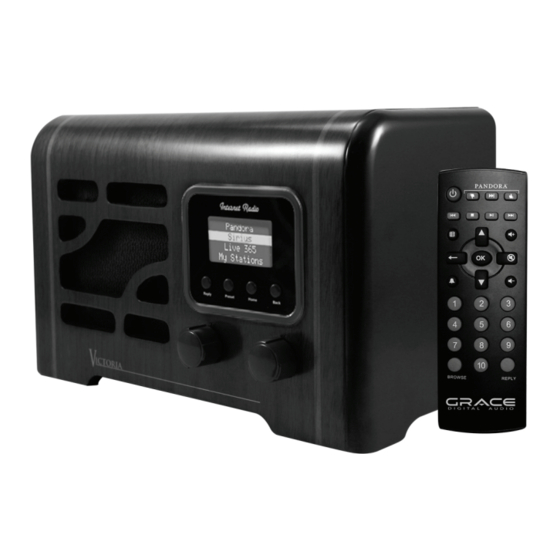
- Page 1 VICTORIA By Grace Digital User’s Guide Model No. GDI-IRN1941 ____________________________________________________________...
-
Page 2: Table Of Contents
Setting the alarm .......................... 21 Setting the sleep timer ......................... 23 Configuring ‘My Stuff’........................24 Registering an account on Grace Digital Audio’s website ............24 Configuring ‘My Profile’ ........................ 24 Configuring ‘My Stations’ ......................25 Configuring ‘My Streams’ ......................25 Configuring ‘My Podcasts’... - Page 3 Settings Menu ........................... 28 Choosing desired option from the Configure menu ..............28 <Network Config> ........................28 <Upgrade Firmware> ........................28 <Language> ..........................28 <Factory Reset> ........................... 28 <Register> ............................ 29 <Clock Setup> ..........................29 <Backlight> ..........................29 <UPnP> ............................29 <Wi-Fi Strength>...
-
Page 4: Important Safety Instructions And Warnings
Important Safety Instructions and Warnings Please read before installation If this Internet radio has been moved from a cold place to a warm place, DO NOT plug it in for 2-3 hours (e.g. from a cold car boot to a warm room). There is a possibility that moisture may have condensed in the Internet radio, this can cause damage to your Internet radio. - Page 5 WARNING: To reduce the risk of fire or electrical shock, do not expose the product to rain or moisture. The product shall not be exposed to any dripping or splashing. Objects filled with liquids, such as vases, should not be placed on the product. ...
- Page 6 ADVISORY FCC Compliance and Advisory Statement: This device complies with Part 15 of the FCC Rules. Operation is subject to the following two conditions: 1) this device may not cause harmful interference, and 2) this device must accept any interference received, including interference that may cause undesired operation NOTE: This equipment has been tested and found to comply with the limits for a Class B digital device, pursuant to Part 15 of the FCC Rules.
-
Page 7: Quickstart Guide
On the back of the radio turn the main power switch to “ON”. The display should turn on within approximately 4 seconds and flash a series of messages. The messages that are briefly displayed will be ‘Grace Digital Radio’, ‘Starting…’ then ‘Scanning’. NOTE: If your radio does not automatically start scanning when plugged into power the 1 time, please press the ‘Power / Vol’... -
Page 8: Contents
the word ‘END’ is in the center of your display. The word ‘END’ is located in front of the beginning of the alphabet. Choose ‘END’ by pressing the large dial inward. The radio will display ‘connecting to ….’, followed by a series of messages. When the radio has successfully connected the main menu will be displayed. -
Page 9: Radio Connections, Controls & Remote Control Functions
Radio connections, controls & remote control functions FRONT PANEL Power / Vol – Push to power unit on / off and turn to change volume Push / Sel – Turn to move through menu and push to select ... - Page 10 BACK PANEL Master power switch - turns unit on / off AC Power Jack – to connect to AC power adapter USB Port – play music from USB flash drive or use as LAN connection (Ethernet Adapter required for LAN connection. Refer to APPENDIX for details) ...
-
Page 11: Remote Control
REMOTE CONTROL Standby / ON BACK Press to return to Menu Quick-key to Main Menu Pandora “Thumbs Down” selection Pandora “Skip Song” selection Pandora “Thumbs Up” selection Mute Volume Up & Volume Down Preset 1 to 10 … Alarm / Timer Play / Pause Stop Next /... -
Page 12: Displays Icons
Display icons Icons are displayed on the bottom row of the LCD display. The meanings of these icons are explained below: ‘Internet Radio’ mode and is playing a live stream Mute indicator Sleep timer Alarm-set indicator ‘Media Player’ mode. Media controls are active ‘Internet Radio’... -
Page 13: Steps To Connect Your Radio To Your Wireless Network
Power / Vol button on the front of the radio. Once powered on, the display on the front of the radio will light up and show: Grace Digital Radio After a few seconds, the screen will change to show :... -
Page 14: Step 3 - Connect To The Wireless Network
Scanning IIIIIIIIIIIIIIIIIII IF the radio does not find a wireless network router, the display will show: No networks Found If this happens after subsequent attempts you should setup your wireless access point working - see the instructions supplied with your wireless network. When NOSTALGIC RADIO finds your wireless network, the display will show ESS-ID for the access point on the screen - this name is the name ascribed to the access point by the person who set up the network - for example:... - Page 15 then: Network OK IF the screen displays either WEP or WPA, a password is required: Enter WEP key Enter WPA key Then the network is using one of the encryption systems: Wired Equivalent Privacy (WEP) or WiFi Protected Access (WPA or WPA2). You therefore need to enter the correct WEP or WPA password on your NOSTALGIC RADIO to communicate with your network.
-
Page 16: Choosing A Radio Station To Listen To
Once the password is entered correctly, your NOSTALGIC RADIO will now be able to connect to the network. Your radio will connect to the selected network without having to re-enter a password. Your password will be saved in your Grace radio even if a power outage occurs. NOTE: IF you would like to give your radio a static IP address then please see the ‘Network config’... -
Page 17: Choosing A Pandora Radio Station
Choosing a Pandora radio station (Personal Radio) This section allows for the new Grace Digital Personal radio services. The current service is Pandora. Prior to this feature working you must first register your radio on the Grace radio web site www.grace.reciva.com... -
Page 18: Changing The Volume
Requesting a station that is currently unavailable If you want to listen to a particular radio station which is currently not available online, you can visit the Grace Digital Audio web site at www.grace.reciva.com and enter in a request to add the station to the... -
Page 19: Stations Which Allow You To Choose What You Listen To
Please note that some radio stations do not pass the audio stream quality test so we are not able to add every request. Typically we can add a station within 10 business days if the station provides us a quality stream. -
Page 20: Setting The Clock
Setting the clock 1. Press the ‘Select’ button. (Note: if you make a mistake at any point, press the BACK button to go back to the previous screen.) 2. Turn the knob until the display shows <Settings> Media Player Alarm Clock <... -
Page 21: Setting The Alarm
7. Turn the knob until the correct time zone is seen on the display. Push the ‘Select’ button to set your time zone. Then turn the Menu knob until the hour setting is correct, and then press the ‘Select’ button. Set Time 1:30 PM 8. - Page 22 Set Time < Set Alarm > 5. Press the ‘Select’ button. Disable all 1 OFF 2 OFF 3 OFF 4 OFF 5 OFF 6. Turn the knob to choose between <Disable all> which turns off all alarms or any of the 5 alarms. Press the select button to set the alarm that you want to activate.
-
Page 23: Setting The Sleep Timer
Alarm Set: 07:45 10. Turn knob to choose how often you want the Alarm to alarm 11. Turn knob to use either the buzzer or the current radio station that is playing to turn on. The display shows <Alarm Set> with the time of the alarm shown beneath for 3 seconds and then returns to the radio station display. -
Page 24: Configuring 'My Stuff
Configuring “My Profile 1. Once logged into you Grace Digital Audio account, you can edit your account’s details from your ‘My Profile’ section. 2. Click on the ‘My Profile’ link to view your account’s current information. This information will include various details such as your address, user name, password etc. -
Page 25: Configuring 'My Stations
Configuring ‘My Podcast’ 1. It is possible to add audio podcasts (RSS feeds) to your Grace Digital Audio account that can be accessed on your Internet radio. To add a podcast, simply login to your account and then click on the ‘My Podcasts’... -
Page 26: Configuring 'My Pandora
To cause the radio to download a new stations’ list, please remove and reconnect the power to your radio. Configuring “My Pandora’ 1. In order to use the Pandora feature on the Grace Digital Internet radio you must 1st have an active Pandora account. You can create a Pandora account at www.pandora.com www.grace.reciva.com... -
Page 27: Accessing Pandora Feedback Menu
< My Pandora > 6. Select ‘Stations’ < Stations > Search Accessing Pandora Feedback Menu 1. While listening to one of your Pandora radio stations choose the ‘Reply button on the internet radio or remote control. The ‘Reply’ button will allow you to perform the similar choices as you do with your regular Pandora on line account. -
Page 28: Settings Menu
<Upgrade Firmware> Use this option to download new firmware for the radio from the Grace Digital Audio portal on the Internet. If there is new firmware available, then the radio will prompt you if you want to download it or not. -
Page 29: Register
<Register> This will display a key that can be used to register the radio on the Grace Digital Audio Customer portal: www.grace.reciva.com <Clock Setup>... -
Page 30: Wi-Fi Strength
Go to the radio’s main menu and select ‘settings’ then select ‘UPnP’ then ‘device name’. By default the name is ‘Grace Digital’ but you can change it to ‘Bedroom’, ‘Den’, ‘kitchen’ ... Now you have a true multi-room audio system... -
Page 31: Troubleshooting
Troubleshooting Please read the User’s Guide carefully to ensure proper use of your system and to enjoy your NOSTALGIC RADIO’s basic and advanced features. Please keep this User’s Guide for future reference. If you experience any trouble with your wireless internet radio NOSTALGIC RADIO, then you may find it useful to visit the help section on our webpage: http://www.gracesupport.com/ If you have trouble connecting NOSTALGIC RADIO to your wireless network, these steps may help to... -
Page 32: Specifications
This warranty does not imply any acceptance by Grace Digital, retailers or its agents for consequential loss or damage and specifically excludes fair wear and tear, accident, misuse of unauthorized modification. -
Page 33: Customer Service And Support
Warranty (continued) Your NOSTALGIC RADIO (GDI-IRN1941) is supported by a limited manufacturer’s warranty for product defects in material or workmanship that may be evident under normal use for 1 year from date of purchase from an authorized franchisee or dealer. ... -
Page 34: Using The Usb Connection As A Usb-Ethernet Connection
USB port. The radio will be able to access a USB thumb drive when the USB-Ethernet adaptor is removed and when a thumb drive is connected to the USB socket. ©2011 Grace Digital Inc. San Diego, CA...
Need help?
Do you have a question about the VICTORIA GDI-IRN1941 and is the answer not in the manual?
Questions and answers