Table of Contents
Advertisement
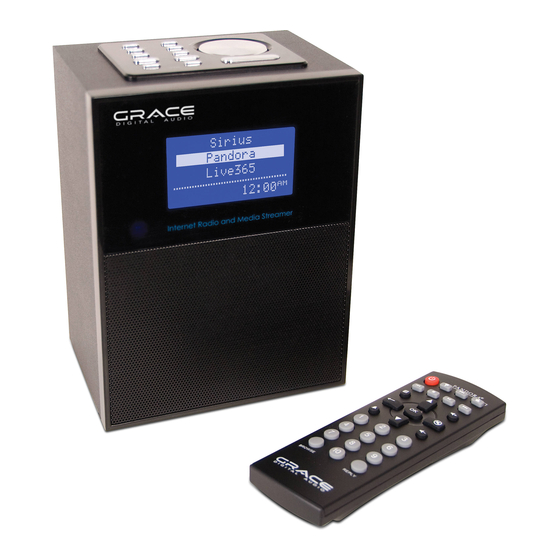
Quick Links
- 1 What You Need before You Can Use Your Internet Radio
- 2 Quickstart Guide
- 3 Steps to Connect Your Radio to Your Wireless Network
- 4 Step 2 - Scan for a Wireless Network Connection
- 5 Step 3 - Connect to the Wireless Network
- 6 Choosing a Radio Station to Listen to
- 7 Troubleshooting
- Download this manual
Advertisement
Table of Contents

Related Manuals for Grace Digital ALLEGRO GDI-IRD4000


Summary of Contents for Grace Digital ALLEGRO GDI-IRD4000
- Page 1 ALLEGRO Wireless Internet Radio by Grace Digital User’s Guide Model No. GDI-IRD4000 _________________________________________________________________...
-
Page 2: Table Of Contents
Setting the alarm .......................... 21 Setting the sleep timer ......................... 23 Configuring ‘My Stuff’........................23 Registering an account on Grace Digital Audio’s website ............23 Configuring ‘My Profile’ ........................ 24 Configuring ‘My Stations’ ......................24 Configuring ‘My Streams’ ......................24 Configuring ‘My Podcasts’... - Page 3 Arranging (Queuing up) tracks for playback later ................. 30 Arranging (Queuing up) albums for playback later ............... 31 Controlling playback ........................31 Browsing the list of tracks currently (queued up) for playback ............. 31 Removing tracks from the list (queue) ..................32 Playing tracks in random order ....................
-
Page 4: Important Safety Instructions And Warnings
Important Safety Instructions and Warnings Please read before installation If this Internet radio has been moved from a cold place to a warm place, DO NOT plug it in for 2-3 hours (e.g. from a cold car boot to a warm room). There is a possibility that moisture may have condensed in the Internet radio, this can cause damage to your Internet radio. - Page 5 WARNING: • To reduce the risk of fire or electrical shock, do not expose the product to rain or moisture. • The product shall not be exposed to any dripping or splashing. Objects filled with liquids, such as vases, should not be placed on the product. •...
- Page 6 ADVISORY This Product is intended for North American markets. The GRACE Wireless Internet Radio GDI- IRD4000 is in compliance with the essential requirements and other relevant provisions of Directive 1999/5/EC ADVISORY FCC Compliance and Advisory Statement: This device complies with Part 15 of the FCC Rules. Operation is subject to the following two conditions: 1) this device may not cause harmful interference, and 2) this device must accept any interference received, including interference that may cause undesired operation...
-
Page 7: Quickstart Guide
The display should turn on within approximately 4 seconds and flash a series of messages. The messages that are briefly displayed will be ‘Grace Digital Radio’, ‘Starting…’ then ‘Scanning’. NOTE: If your radio does not automatically start scanning when plugged into power the 1 time, please press the power button to turn your radio on and to view the main Internet radio menu. - Page 8 the large dial until the word ‘END’ is in the center of your display. The word ‘END’ is located in front of the beginning of the alphabet. Choose ‘END’ by pressing the large dial inward. The radio will display ‘connecting to ….’, followed by a series of messages. When the radio has successfully connected the main menu will be displayed.
-
Page 9: Contents
Contents Allegro GDI-IRD4000 Power Adapter Remote Control User’s Guide not included. Optional: 6 x Rechargeable AA NiMH batteries Refer to page 11 for further battery details Radio Connections... -
Page 10: Radio And Remote Control Functions And Controls
Radio and remote control functions and controls Standby / ON UP / DOWN to Move or Change press to Select BACK push to return to Menu Quick-key to Main Menu Pandora “Thumbs Down” selection Pandora Skip Song selection Pandora “Thumbs Up” selection Mute - VOL+ Volume - / +... -
Page 11: Displays Icons
HINTS: * Press the BACK Button to go back to previous menu/screen. * Use the SCROLL Knob or the UP/DOWN buttons to select and push the Knob (OK) or press the OK button to decide/execute. Display icons Icons are displayed on the bottom row of the LCD display. The meaning of these icons are as explained below: ‘Internet Radio’... -
Page 12: Steps To Connect Your Radio To Your Wireless Network
Steps to Connect Your Radio to Your Wireless Network Getting Started Step 1 - Power up the radio (Power Adapter, NiMH & LED Indicator) You can power your radio by connecting to the AC Power on the back of your ALLEGRO or using 6 x AA 6 x AA NiMH (rechargeable) batteries. -
Page 13: Step 2 - Scan For A Wireless Network Connection
Once powered on, the display on the front of the radio will light up and show: Grace Digital Radio After a few seconds, the screen will change to show : Initializing Network After a few seconds, the screen will change to show:... -
Page 14: Step 3 - Connect To The Wireless Network
When ALLEGRO finds your wireless network, the display will show ESS-ID for the access point on the screen - this name is the name ascribed to the access point by the person who set up the network - for example: <... -
Page 15: Choosing A Radio Station To Listen To
Only the person who set up the network in the first place knows this password; if that person is not you then you need to find out the password. You can do this by checking with the Customer Service of your internet provider or the manufacturer of your wireless router. - Page 16 If you are an active Sirius subscriber with a package that includes the ability to listen to Sirius internet radio on a non computer based product you will be able to listen to those stations on the Grace Digital radio. You can either enter your Sirius user name and password onto the Grace Digital website or through this portion of the radio’s menu.
-
Page 17: Choosing A Pandora Radio Station
Choosing a Pandora radio station (Personal Radio) This section allows for the new Grace Digital Personal radio services. The current service is Pandora. Prior to this feature working you must first register your radio on the Grace web site. Please see registering your radio. -
Page 18: Playing A Preset Radio Station
Requesting a station that is currently unavailable If you want to listen to a particular radio station which is currently not available online, you can visit the Grace Digital Audio web site at www.grace.reciva.comand enter in a request to add the station to the list. -
Page 19: Setting The Clock
If you choose <On Demand> more screens are displayed and you can choose what you want to listen. What is displayed will depend on the station you have chosen - the following steps are only a guide. 2. When you choose <On Demand>, the display shows the names of the programs. Turn the knob to choose the program you want, then press the ‘Select’... - Page 20 5. Turn the knob until the display says <Set Time/Date> < Set Time/Date > Set Alarm 6. Press the ‘Select’ button. Pacific Central Eastern 7. Turn the knob until the correct time zone is seen on the display. Push the ‘Select’ button to set your time zone.
-
Page 21: Setting The Alarm
Setting the alarm 1. Press the ‘Select’ button. NOTE: IF you make a mistake at any point, press the BACK button to go back to the previous screen 2. Turn the knob until the display shows <Alarm Clock> Stations < Alarm Clock >... - Page 22 < 1 Off 12:00 AM > 7. If you choose “Yes” then the display enables you to set the time for the alarm. Set Alarm 15:06 8. After selecting < 1 Off 12:00 AM> you can choose the time to set the Alarm. Set Alarm 12:00 AM 9.
-
Page 23: Setting The Sleep Timer
NOTE: when your Alarm turns on, the radio’s back light display will turn on and show a menu asking if you want to turn on the radio or not. If within 60 seconds after the display turns on your radio does not connect to your Wi-Fi network and the radio station starts playing, the buzzer will announce instead. -
Page 24: Configuring 'My Profile
‘manage my radios’: This is the area to delete your radio from your account or to add additional radios. Configuring “My Profile 1. Once logged into you Grace Digital Audio account, you can edit your account’s details from your ‘My Profile’ section. -
Page 25: Configuring 'My Podcasts
Configuring “My Pandora’ 1. In order to use the Pandora feature on the Grace Digital Internet radio you must 1st have an active Pandora account. You can create a Pandora account at www.pandora.com or www.grace.reciva.com. -
Page 26: Accessing Pandora Feedback Menu
5. You can then listen to your Pandora music section via the following menu choices. Select ‘Personal Radio’ Internet Radio < Personal Radio > 6. Select ‘My Pandora’ < My Pandora > 6. Select ‘Stations’ < Stations > Search Accessing Pandora Feedback Menu 1. -
Page 27: Media Player Quickstart Guide
Media Player Quickstart Guide The Media Player allows you to play unprotected audio files (AAC, AIFF, MP3, RM, WAV, WMA) and play lists (M3U) stored on a networked PC or Apple. It has been verified to work with Windows 2000 and Windows XP, and Apple OSX. - Page 28 5. Right click on the directory just created and select ‘Share…’. Ensure that the directory is listed as being shared, if not, click on the ‘Share’ button. 6. Right click on the directory just created and select ‘Properties’. From the ‘Properties’ window, click the ‘Sharing’...
-
Page 29: Locate The Shared Audio Files Using The Radio
5. The radio should now be able to access the MAC from its ‘Media Player > Windows Shares’ menu after entering in the MAC account’s short name and password on the radio. Locate the shared audio files using the radio 1. -
Page 30: Listening To A Complete Shared Album
3. Turn the knob until the required artist is displayed. 4. Press the SELECT button. 5. Turn the knob until the required album name is displayed. 6. Press the SELECT button. ‘[Add to Queue]’ will be displayed. 7. Turn the knob until the required track is displayed. 8. -
Page 31: Arranging (Queuing Up) Albums For Playback Later
Arranging (Queuing Up) albums for playback later 1. Highlight the required album. 2. Press the SELECT button. 3. Turn the knob until ‘[Add To Queue]’ is displayed. 4. Press the SELECT button. ‘Tracks Added to Queue’ will be displayed. Controlling playback 1. -
Page 32: Removing Tracks From The List (Queue)
Removing tracks from the list (queue) 1. Press the BROWSE button. The currently playing track name will be displayed. 2. Turn the knob to select the track you want to remove from the queue. 3. Press and hold the STOP button for 2 seconds and the radio will display: ‘Delete Track?’ 4. -
Page 33: Set Up A Windows Pc To Allow The Radio To Access Your Audio Files Via A Upnp Server
2. Navigate to top-level menu item ‘Media Player’ using the SELECT and BACK buttons. 3. Press the SELECT button. 4. Turn the knob until ‘Playback Mode’ is displayed. 5. Press the SELECT button. 6. Turn the knob until ‘Repeat’ is displayed. 7. - Page 34 c. Press SELECT and the radio will scan for all available UPnP servers. Note, this may take a few seconds for the radio to complete its scan and before the scan has completed, the radio will display ‘[Empty]’. The radio will continue to display ‘[Empty]’ if no UPnP servers are found. d.
-
Page 35: Locating And Playing Media Files Using The Radio And Upnp
Allowing your Allegro to connect: Locating and playing media files using the radio and UPnP 1. Once the UPnP server is configured to share media files with the Internet radio, you can play the files by doing the following on the radio. 2. -
Page 36: Browsing The List Of Tracks Currently Arranged (Queued Up) For Playback
7. Turn the knob to highlight the media files that you wish to play and press SELECT. 8. The radio will display ‘[Add to Queue]’, press SELECT and the radio will add the tracks to its queue and begin playing them automatically. Browsing the list of tracks currently arranged (queued up) for playback 1. -
Page 37: Controlling Playback
Controlling playback 1. Use the STOP button to stop playback. 2. Use the PLAY/PAUSE button to either pause a currently playing track or to restart a currently paused track or to restart a stopped track. 3. Use the SKIP TO PREVIOUS TRACK button to start playback of the previous track in the queue. 4. -
Page 38: Playing Tracks In The Queue Repeatedly
7. Press the ‘Select’ button. 8. Turn the knob to select YES/NO to confirm that shuffle mode should be enabled. Playing tracks in the list (queue) repeatedly 1. Select the individual tracks as described previously. 2. Navigate to top-level menu item ‘Media Player’ using the ‘Select’ and ‘Back’ buttons. 3. -
Page 39: Network Config
<Register> This will display a key that can be used to register the radio on the Grace Digital Audio Customer portal: www.grace.reciva.com <Clock Setup>... -
Page 40: Backlight
<Backlight> Selecting this option will alter the Internet radio’s backlight brightness. 1. After selecting the ‘Backlight’ menu item, the radio will display its list of three menu modes: ‘Inactive’, ‘Active’ and ‘Standby’. These three states are explained below: • The radio gets into its ‘inactive’ state when there is no button pressed for 30 seconds. •... -
Page 41: Troubleshooting
Troubleshooting Please read the User’s Guide carefully to ensure proper use of your system and to enjoy your Allegro’s basic and advanced features. Please keep this User’s Guide for future reference. If you experience any trouble with your wireless internet radio ALLEGRO, then you may find it useful to visit the help section on our webpage: http://grace.reciva.com/ , or http://www.reciva.com If you have trouble connecting ALLEGRO to your wireless network, these steps may help to resolve the problem:... -
Page 42: Specifications
Specifications • 802.11b/g WiFi • Class-D digital amplifier • 89dB S/N ratio • Audio output: 8 Watts, 8ohm speaker • Frequency response: 120Hz – 15KHz ± 3dB • 128 x 64 dots display • 29-Key remote control • 100 - 240V, 12V 1.2A switching power adapter •... - Page 43 This warranty does not imply any acceptance by Grace Digital, retailers or its agents for consequential loss or damage and specifically excludes fair wear and tear, accident, misuse of unauthorized modification.
-
Page 44: Customer Service And Support
Customer Service and Support • For questions regarding your product please visit us at: www.gracedigitalaudio.com or contact us at: http://www.gracesupport.com/ Monday - Thursday 9:00 AM to 4:00 PM (PST) Friday 9:00 AM to 12:00 PM (PST) __________________________ APPENDIX Step 1: Set Up Media Sharing In Windows Media Player 11 After you download and install Windows Media Player 11 for Windows XP and connect your radio to your network, you need to set up media sharing so that you can share music with your radio. - Page 45 2. In the Media Sharing dialog box, select the Share my media check box. 3. In the list that appears below the Share my media to: check box, click your Radio*, click Allow. The selected device will now show a green tick and then click OK. •...
- Page 46 4. The display may show “Access Denied (801)” 5. Your device will now appear in the list. If you want to confirm this is your radio, right click the device and select Properties your radio’s MAC address will be shown.
-
Page 47: Step 2: Play Music On The Internet Radio
Step 2: Play Music on the Internet Radio After installing and configuring your radio and Windows Media Player 11, you are now ready to play music wirelessly. The following steps describe how to play music using the Radio. 1. Use the control, to select “UPnP Servers” from the “Media Player” menu. 2. - Page 48 ©2010 Grace Digital Inc. San Diego, CA...
Need help?
Do you have a question about the ALLEGRO GDI-IRD4000 and is the answer not in the manual?
Questions and answers