
Related Manuals for Grace Digital Encore GDI-IRC7500


Summary of Contents for Grace Digital Encore GDI-IRC7500
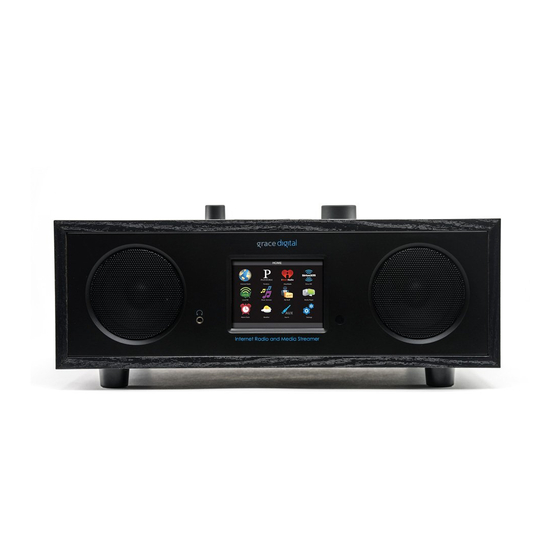
- Page 1 Encore By Grace Digital User’s Guide Model No.: GDI-IRC7500 ____________________________________________________________...
-
Page 2: Table Of Contents
User’s Guide Table of Contents IMPORTANT Safety Instructions and Warnings ................4 QUICKSTART Guide......................... 7 What you need before you can use your Internet radio..............7 Contents (In the box) ........................11 Radio connections, controls & remote control functions ............. 12 Displays icons .......................... - Page 3 SiriusXM ............................40 Dar.FM, Live365 VIP ......................... 40 Settings Menu ........................... 41 WiFi and Network Setup ....................... 41 Backlight Settings ......................... 41 Clock Set up..........................42 Get Registration Key........................42 Equalization ..........................42 My Home City ..........................42 Name Your Radio ......................... 42 Properties .............................
-
Page 4: Important Safety Instructions And Warnings
Important Safety Instructions and Warnings Please read before installation If this Internet radio has been moved from a cold place, (e.g. a cold car trunk) to a warm place, then there is a possibility that moisture may condense inside the product. In these conditions DO NOT PLUG IN. - Page 5 WARNING: To reduce the risk of fire or electrical shock, do not expose the product to rain or moisture. The product should not be exposed to any dripping or splashing liquid. Objects filled with liquids, such as vases, should not be placed on the product. ...
- Page 6 Directive 1999/5/EC ADVISORY FCC Compliance and Advisory Statement: This device complies with Part 15 of the FCC Rules. Operation is subject to the following two conditions: 1) this device may not cause harmful interference, and 2) this device must accept any interference received, including interference that may cause undesired operation NOTE: This equipment has been tested and found to comply with the limits for a Class B digital device, pursuant to Part 15 of the FCC Rules.
-
Page 7: Quickstart Guide
On the front of the radio press the power switch to turn the radio “ON” (If the clock is on the display the radio is in standby mode). The main screen will display and within approximately 4 seconds will flash a series of messages. The messages that are briefly displayed will be ‘Grace Digital Audio’, ‘Starting…’ then ‘Scanning’. - Page 8 On the top of the next screen please select ‘Network Configuration’ by pressing the Menu knob. (To go back to previous menus at any time press the ‘Back’ button on the radio). From the next screen please select ‘Scan for networks’ by pressing the Menu knob inwards. Step 2: The radio is now scanning for available Wi-Fi (wireless) network(s) in your area.
- Page 9 Scroll the Menu knob to the left or right until the name of your network (ESSID) is highlighted. After you highlight your network, press the Menu knob dial inwards to select your network. Note: If your radio does not display the name of your wireless network please make sure you are within range of your wireless network.
- Page 10 Note: If you make a mistake at any time, press the ‘Back’ button to erase the letter(s) or number(s) then select the correct entry. Once you have selected ‘Enter’ the radio will display ‘connecting to ….’, followed by a series of messages.
-
Page 11: Contents (In The Box)
You can only register your radio and create an account If you radio is successfully connected to your Wi-Fi network and internet connection. In the box Mondo Internet Radio (GDI-IRC7500) AC Power Adapter (UL approved) Remote Control (featuring Pandora) 3.5 mm to RCA Cable... -
Page 12: Radio Connections, Controls & Remote Control Functions
Radio connections & remote control functions TOP PANEL TOP of the radio Volume / Mute – turn to control volume, push in to mute / un-mute the volume Snooze / sleep timer – When the radio is turned on: press to set the sleep timer or press and hold to enter the alarm menu. -
Page 13: Back Panel
BACK PANEL AC Power Jack – to connect to the included AC power adapter USB Port – play music from USB flash drive or use as Ethernet LAN connection (Ethernet Adapter required for LAN connection. Refer to APPENDIX for details) ... -
Page 14: Remote Control
REMOTE CONTROL Standby / ON BACK Press to return to Menu Quick-key to Main Menu Pandora “Thumbs Down” selection Pandora “Skip Song” selection Pandora “Thumbs Up” selection Mute Volume Up & Volume Down Preset 1 to 10 … Alarm / Timer Play / Pause Stop Next / Previous... -
Page 15: Displays Icons
Display icons Small icons displayed at the very top of the display are: Media Player; Shuffle Media Player; Repeat Shift key pressed; allows you to access presets 6 to 10 One or more alarms have been set. Wi-Fi network strength: This shows the relative strength of your Wi-Fi signal. 1 is a weak signal and 4 is a very strong signal. -
Page 16: Steps To Connect Your Radio To Your Wireless Network
To power your radio connect the AC Power on the back of your Grace Digital Mondo Radio to a wall power outlet. The radio can be switched between ‘on’ and standby with the power button on the radio. -
Page 17: Step 2 - Connect To The Wireless Network
Step 2 - Connect to the wireless network Select the ESSID for your wireless network from the list of networks and press the Menu knob. If your network is not configured to require a password (encryption code), the screen should display Then if either a WPA or a WEP password is required you should briefly see the following screen. - Page 18 After approximately 3 seconds, a screen keyboard will be displayed for entering your password To enter the password, use the Menu knob to select each letter/number/symbol of the password in turn, pressing the Menu knob after each letter is highlighted. Note;...
-
Page 19: Choosing A Radio Station To Listen To
Choosing a radio station to listen to Premium Music Services Please contact the Premium Music Service provider to ensure you have an active account (user name and password) to use on Internet radios. For SiriusXM subscribers you can enter your SiriusXM user name and password directly on the radio directly for all other Free and Pay Premium music services go grace.reciva.com to register your radio and to enter in your premium service user name and... - Page 20 Genre Selecting ‘Genre’ will present a list of genres. Highlight and select the genre of your choice by turning and pressing the Menu knob. You will be presented with a screen showing ‘All Stations’ or ‘By Location’. [All Stations] Selecting ‘[All Stations]’ allows you to choose from the list of stations from that genre. [By Location] Selecting ‘[By Location]’...
-
Page 21: Playing A Pandora Radio Station
Playing a Pandora radio station Before you can use this feature you must first register your radio on the Grace Radio web site grace.reciva.com . Please see ‘registering your radio’. After registration is complete you can enter in your Pandora user name (typically an email address) and password in the “see extra features” of the website. -
Page 22: Storing A Radio Station In A Preset
Storing a radio station in a preset Preset on Radio When a station is playing, press and hold a preset button until the message below is displayed (approximately 2 seconds). If you want to set presets 6-10 press the ‘Shift’ button briefly (the shift light in the upper portion of the display will light up) then press and hold the preset button (approximately 2 seconds). -
Page 23: Requesting A Station That Is Currently Unavailable
Requesting a station that is currently unlisted If you want to listen to a particular radio station which is not listed in the Reciva stations database, you can visit the Grace Digital Audio web site at grace.reciva.com/addstation and enter in a request to add the station to the list. -
Page 24: Stations Which Allow You To Choose What You Listen To
Stations which allow you to choose what you listen to Some radio stations can provide a number of options associated with their station; for example, some stations enable you to listen to programs that have already been broadcast. When you select a radio station that has this ability, the station does not start playing immediately, but instead the display shows: An example of a choice of different ‘Live’... -
Page 25: Setting The Clock
Setting the clock Use the ‘Home’ button to return to the Home screen. (Note: If you make a mistake at any point, press the ‘Back’ button to go back to the previous screen.) From the Home screen select the ‘Settings’ icon. Select ‘Clock Setup’... - Page 26 Then turn the Menu knob until the hour is correct and then press the Menu knob to set that hour and move on to the minutes field. Repeat that process for the time and date fields. Clock Format The Clock format menu allows to change from the 12 hour clock with AM and PM to the 24 hour clock. DST (Daylight Savings Time) This menu allows you to set your preference for daylight savings.
-
Page 27: Setting The Alarm
Setting the alarm There are two ways to access the alarm menu: Press and hold the snooze bar for a short period and the ‘Set Alarms’ menu will appear. Alternatively you can access it via the home screen by selecting the Alarm icon in the bottom right hand corner of the display. - Page 28 Select ‘Set Alarms’ to see the alarms menu. You will now see ‘Disable All’ followed by five further items ‘1 Off…’, ‘2 Off…’ ETC. Selecting ‘Disable All’ will disable all the alarms. Select any other field to set up to seven alarms. Here is an example of how to set an alarm on your Grace Mondo;...
- Page 29 Press the Menu knob to select this alarm. You will then be presented with the following screen. Select ‘Modify Alarm’ and you will be presented with a series of screens that allow you to set the time, which day, an ascending buzzer or a station from your presets. The first screen you will see will look like this.
- Page 30 Next, turn the Menu knob until the minute setting is correct and then press the Menu knob to enter those details. You will then be presented with the list of alarm types below. Please note that if you scroll down on this screen you will find an additional option for selecting weekends only.
- Page 31 Finally you are invited to set the volume for the alarm. Please use the Menu knob to set the volume and then press the Menu knob to confirm. The ‘Alarm Set’ message will be displayed briefly before you are returned to the list of alarms, showing the alarms you have set.
-
Page 32: Adjusting The Snooze Time
To disable the alarm during its activation simply press the power button. Alternatively you can snooze the alarm by pressing the large snooze bar on top of the radio. To disable all the alarms completely select ‘Disable All’ from the Alarms menu. Adjusting the Snooze time From the main Alarms menu accessed via the home screen it is possible to adjust the length of... - Page 33 Now select the Snooze Duration from the Alarm Menu. By turning the menu knob you can adjust the length of the snooze in blocks of five minutes. Finally, simply press the Menu knob to confirm your selection.
-
Page 34: Setting The Sleep Timer
Setting the sleep timer To set the sleep timer, simply press the large snooze / sleep timer button on top of the radio during normal operation. You will then be able to scroll the Menu knob from between 30 seconds and 99 hours. When the desired time has been selected, press the Menu knob to confirm. - Page 35 This picture is just an example of a registration key. Your key will be different and delivered to your radio personally when you select ‘Register’. The key you receive is unique to you and is only valid for 12 hours. Troubleshooting If you radio does not provide a registration code (key) then your radio is not currently connected to your Wi-Fi network.
-
Page 36: Step 2 - Register On The Grace Website
Step 2 – Register on the Grace website Open the website, grace.reciva.com from your computer’s web browser. Enter in the registration code (key) that you obtained from your radio onto the web site and choose ‘submit’ on the web site. Note The web site will show the ‘serial number’... -
Page 37: Step 3 - Reboot
Pandora and Sirius accounts from the radio, and much more. Configuring ‘My Profile’ Once logged into your Grace Digital Audio account, you can edit your account’s details from your ‘My Profile’ section. On a computer please navigate to grace.reciva.com... -
Page 38: Configuring 'My Streams
My Streams and My Podcasts If you want to listen to a station or podcast that is not in the Reciva stations list, and you know the streaming url for the station, then you can add it to your own personal list of stations. This is entirely personal to you. -
Page 39: Using Pandora
Pandora on the Grace Digital Mondo Radio. Important Note Grace Digital is not affiliated in any way with Pandora nor do we guarantee any of Pandora’s services or streams. Please see Pandora’s web site for information on how to update and activate your Pandora services. -
Page 40: Accessing The Pandora Feedback Menu
Accessing Pandora Feedback Menu While listening to one of your Pandora radio stations choose the ‘Mode’ button on the internet radio or ‘Extra Features’ on the remote control to access the following familiar Pandora controls via your Radio.; Track Details ... -
Page 41: Settings Menu
Settings Menu You are able to adjust various settings on your Grace Mondo Radio. These can be found by selecting the ‘Settings’ icon from the Home page of the radio. Please Note If you make a mistake at any point, press the ‘Back’ button to go back to the previous screen. -
Page 42: Clock Set Up
Change the time format of the radio, and set the local time zone. Get Registration Key This will display a key that can be used to register the radio on the Grace Digital Audio Customer portal: grace.reciva.com. See the ‘Registering your radio’ section of this user manual for more details. -
Page 43: Reset To Factory Defaults
Network Firmware Upgrade Use this option to download new firmware for the radio from the Grace Digital Audio portal on the Internet. If there is new firmware available, then the radio will prompt you If you want to download it or not. -
Page 44: Media Player
Media Player Your Grace Mondo can also play music stored on your PC, or a USB memory stick. Select Media Player from the Home Screen using the Menu knob. UPnP Servers You can play content from your laptop, PC or other UPnP enabled storage device using the ‘UPnP servers’... - Page 45 Your PC laptop or other storage device has audio content stored on it. It is running some type of UPnP media server software such as Windows Media player or TVersity (there are many free and premium servers available to choose from on the web). Windows Vista Check that your media server is set to enable sharing.
- Page 46 Windows 7 In Windows 7, please select ‘Control Panel’ and then ‘Network and Sharing Center’. On the top left hand side of the screen you should see three options listed – select the last one called ‘Change advanced sharing settings’. Under ‘Home or Work (Current Profile)’...
- Page 47 presented select ‘Choose media streaming options’ at the middle of that sub section. If you are presented with a screen like the one above showing a button captioned ‘Turn on media streaming’ please select it. This will enable media streaming from your PC or laptop to the radio using the UPnP industry protocol.
-
Page 48: Usb Media
You should now be presented with a list of UPnP enabled devices on the network, and at least one of them should be a Grace Digital radio. Please ensure that the drop down beside it is set to allowed, then press OK and then exit the menu. -
Page 49: Playback Mode
App. Go to the radio’s main menu and select ‘setting’ then select ‘UPnP’ then ‘device name’. By default the name is ‘Grace Digital’ but you can change the name as you wish for instance to ‘bedroom’, ‘den’, ‘kitchen’… Now you have a true multi-... -
Page 50: Troubleshooting
Troubleshooting Please read the User’s Guide carefully to ensure proper use of your system and to enjoy your MONDO RADIO’s basic and advanced features. Please keep this User’s Guide for future reference. If you experience any trouble with your wireless internet radio MONDO RADIO, then you may find it useful to visit the help section on our webpage: www.gracesupport.com/ If you have trouble connecting your Grace Mondo Radio to your wireless network, these steps may help... -
Page 51: Specifications
This warranty does not imply any acceptance by Grace Digital, retailers or its agents for consequential loss or damage and specifically excludes fair wear and tear, accident, misuse of unauthorized modification. -
Page 52: Customer Service And Support
In the event of a product defect during the warranty period, return of the product and your sales receipt as proof of purchase date for your GDI-IRC7500 unit is required and shall, at the discretions of the manufacturer, result in: (a) correction of the defect by repair without charge for parts and labor;... -
Page 53: Appendix
USB port with the use of the Grace Digital USB-Ethernet adaptor (separate USB-Ethernet adaptor purchase required) . Once you have a Grace Digital USB-Ethernet adapter, remove the power from the radio then insert into the USB port, plug the radio back into the power. After the radio boots up please go to the main menu and select ‘settings’...
Need help?
Do you have a question about the Encore GDI-IRC7500 and is the answer not in the manual?
Questions and answers