Table of Contents
Advertisement
Available languages
Available languages
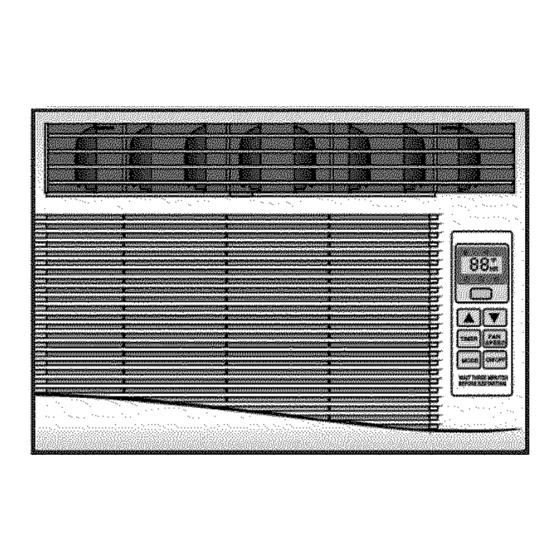
ROOMAIR CONDITIONER
Useand CareManual
L_
Remote Control
AW-05CR1
FM
AW-06CR1
FM
AW-08CR1
FM
Mechanical
Control
AW-05CM1
FD
AW-06CM1
FD
AW-08CM1
FD
7 7 7 7 7
Thank you for purchasing
an WINTAIR ®room air conditioner.
Please read this "Use and Care Manual" carefully
before installing
and using this appliance.
Keep this manual for future reference.
bl c_aso!_sc_s_o
con'par
,_ a_,_a;onc
co/_a_oWINTAIR ®
a_,_ lan_:_ to_
de Jsoy
h/far_te[_m_;_rto"ar_tescjeh;,staary
Jt
arestel'wod.lc;to
Co_seTveesterran
a p ra co[;suta
oei_e
futuro.
For Service Call 1 877 465 3566
Pars obtener servicio t(7cnlco, Ilarse a! I 877 465 3566
Advertisement
Table of Contents

Subscribe to Our Youtube Channel
Related Manuals for WINTAIR AW-06CR1FM


Summary of Contents for WINTAIR AW-06CR1FM
- Page 1 Control AW-05CM1 AW-06CM1 AW-08CM1 7 7 7 7 7 Thank you for purchasing an WINTAIR ®room air conditioner. Please read this "Use and Care Manual" carefully before installing and using this appliance. Keep this manual for future reference. bl c_aso!_sc_s_o con'par ,_ a_,_a;onc...
-
Page 2: Table Of Contents
iiiiiiiiiiiiii Page Air Conditioner Safety ......... Introduction and Parts Identification ......Electrical Specifications ......... Tips Before Installation ......... Installation Instructions ........8-10 Operating Instructions ........11-14 Care and Maintenance ......... Troubleshooting Guide ......... Warranty ........... Page Introducci6n ..........Identificaci6n de las Piezas ........ -
Page 3: Air Conditioner Safety
What You Need to Know About Safety instructions Warning and important Safety instructions appearing in this manual are not meant to cover all possible conditions and situations that may occur. Common sense, caution, and care must be exercised when operating or cleaning tools and equipment. Always contact your dealer, distributor, service agent, or manufacturer about problems or conditions you do not understand. - Page 4 • The portable air conditioner should be connected Power Supply Cord to a 115 V, 60 Hz, 15- or 20-amp fused 3-prong grounded outlet. NOTE: Your unit's device may differ from the one shown. The use of a time-delay fuse or time-delay circuit breaker is recommended.
-
Page 5: Introduction And Parts Identification
Thank you for choosing this room air conditioner to cool your home. This USE AND CARE MANUAL provides information necessary for the proper care and maintenance of your new room air conditioner. If properly maintained, your air conditioner will give you many years of trouble free operation. To avoid instaflation difficulties,... - Page 6 PART MDENTMFMCATMON D,- Remote contro_ modem Exterior Air Inlet Interior Air Outlet Horizontal Air Vane Vertical Air Vane Air Filter Cabinet Front Panel Rear Grill Interior Air (in the rear of Inlet Grille the unit) Exterior Air Inlet Remote Controller Fresh Air Lever Control Panel Power Cord...
-
Page 7: Electrical Specifications
1. All wiring must comply with local and national electrical codes and must be installed by a licensed electrician. Once you have any If the air conditioner has a serial plate rating questions regarding the following instructions, of 1 15 volts and up to and including 7.5 amps contact a licensed electrician. -
Page 8: Tips Before Installation
Your RoomAir Conditioner unit is designed to Your RoomAir Conditioner was designed be highly efficient and save energy. Follow these for easy installation in a single or double-hung recommendations for greater efficiency. window. NOTE: This unit is NOT designed for vertical (slider type) windows. -
Page 9: Installation Instructions
F.Your u nit w asdesigned t oevaporate condensation under n ormal conditions. However, under e xtreme Because thecompressor is located o nthe humidity conditions, excess c ondensation may cause controls s ide oftheunit ( right s ide), t hisside the base pantooverflow t otheoutside. willbeheavier andmore awkward tomanipulate. - Page 10 WINDOW INSTALLATION STEP 1. If your air conditioner cabinet 18" wide, it will fit window openings 21" to 32" in wide. Minimum opening height is 14" from bottom of sash to sill (Fig. 1). Fig. 1 2. Insert the guide panels into the guides of the air conditioner.
- Page 11 Inner Sill Outer Sill 5. Install the L brackets on the outer sill with the Center Line short side of the bracket against the back of the inner sill. Install one L bracket 7.5" to each side of center line. See Fig. 5. Short Side 6.
-
Page 12: Operating Instructions
_Mechanicai control model MODE The mode knob controls fan speeds and cooling speeds. To set desired cooling temperature, simply rotate the mode knob dial to the appropriate setting. See Fig. 9. Thermostat knol_ Mode knob THERMOSTAT The thermostat automatically controls the cooling cycle (compressor) of the air conditioner to maintain... - Page 13 >- CONTROL PANEL You can easily operate this air conditioner by pressing relevant Control Panel button on the control panel as well as the remote control, ON/OFF BUTTON The air conditioner will be started when it is energized or will be stopped when it is in operation, if you press this button.
- Page 14 : REMOTE CONTROL Power BUTTON The appliance will be started when it is energized or will be stopped when it is in operation, if you press this button. Power Timer MODE BUTTON Used to select the operation mode. + -- BUTTONS Mode Powe'TSave r Used to set room temperature in COOLING...
- Page 15 : REMOTE CONTROL How to insert the Batteries Remove the battery cover according to the arrow direction. Insert new batteries making sure that the (+) and (-) of battery are matched correctly. Reattach the cover by sliding it back into position. Note: Use 2 LR06 AAA (1.5 volt) batteries.
-
Page 16: Care And Maintenance
When servicing t heairconditioner, besureto [e,Z_eJul[e]_J turnthemode switch tothe"OFF" p osition a nd disconnect thepower c ordfromtheelectrical outlet. DO NOT forget to install the air filter. If the air conditioner is left to operate without the air filter, dust is not removed from the room and may cause your air conditioner to fail. -
Page 17: Troubleshooting Guide
Frequently, a problem is minor and a service call may not be necessary, use this troubleshooting guide for a possible solution. POSSIBLE CAUSE SUGGESTED SOLUTION PROBLEM Air conditioner will No power to the unit. Check connection of power cord to not operate power source. -
Page 18: Warranty
II REMOTECONTROLAW-05CR1FM m AW-08CR1FM 5 YEAR FULL WARRANTY This product is warranted for five years from the date of original purchase. Any part which fails in materials or workmanship will be replaced within the warranty period. This warranty covers in-home service. A copy of your proof-of-purchase, with date of purchase, and product name included, is required to arrange this service repair. -
Page 19: Introducci6N
Gracias per elegir este aire acondicionade para enfriar su hegar. Este MANUAL DE USO Y MANTENIMIENTO proporciona la informaciOn necesaria para cuidar y mantener en forma adecuada su nuevo aire acondicionado. Funcionard sin problemas durante muchos aries si le brinda el mantenimiento apropiado. - Page 20 Identificaci6n de las Piezas }b Modelo de Remoto controlador Aleta de Aire Aleta de Aire Vertical Entrada Rejilla de Entrada Horizontal Aire Exterior de Aire Interior Filtro de Aire (en el interior) Gabinete Panel Frontal Rejilla de Ventilaci6n Reji!!a Atras de Aire Interior Control Entrada de...
-
Page 21: Especificaciones Ei6Ctricas
1. Todos los cables deben cumplir con los c6digos el6ctricos locales y nacionales y los debe instalar un electricista licenciado. Si tiene preguntas Si el r6tulo del aire acondicionado indica 1 15 voltios y hasta 7.5 amperios, la unidad relacionadas con las siguientes instrucciones, puede... -
Page 22: Consejos Antes Dela Instalaci6N
Su unidad de AireAcondicionado para Habitaciones El AireAcondicionado para Habitaciones se ha se ha disen_ado para Iograr un alto rendimiento y dise_ado de modo tal que resulte Ricil su instalaci6n ahorrar energia electrica. Siga las siguientes en ventanas armadas sencillas o dobles. -
Page 23: Instrucciones De Instalaci6N
I_ _ _Z_II_ _ _IIV_l F. La unidad estd dise_ada para evaporar la condensaci6n bajo condiciones normales. No obstante, bajo condiciones de extrema humedad, es probable que la condensaci6n Debido a que el compresor se encuentra del lado excesiva haga que la bandeja base se desborde hacia el de los controles (a la derecha de la unidad),... - Page 24 _Pasos para la instalaci6n en ventanas 1. Si el aire acondicionado tiene un gabinete de 18" de ancho, podr6 colocarse en aberturas de ventanas de 21"a 32" de ancho. La altura minima de abertura es de 14" desde la parte inferior del marco hasta el umbral (Fig.
- Page 25 Jmbral Extemo Tornillo de 3/4 " Umbral Interne Lf nea Central 5. Instale los soportes en L en el umbral externo, de modo que la parte m_s corta del soporte apoye contra Tornillo de 3/4" la parte posterior del umbral interno. Instale un soporte Lado Corto en L a 7.5"...
-
Page 26: Instrucciones De Operaci6N
MODE (Modo) La perilla de modo controla las velocidades ventilador y de enfriamiento. Para fijar una temperatura de enfriamiento, simplemente haga rotar la perilla y col6quela en el nivel deseado. Vea la Fig. 9. Control de THERMOSTAT (Termostato) Control El termostato controla autom_ticamente el ciclo de Termostato... - Page 27 Panel de Control Este aire acondicionado se puede operar f6cilmente los botones del panel de control as_como tambi_n el control remoto. Bot6n (Encendido/Apagado) si presiona este bot6m encender_el aireacondicionado. Cuando el aire acondieionado esta de calefacci6n, se per imprentar este bot6n 3 minutos despues, Bot6n Mode (Modo) Cada vez que se presiona el bot6n MODE.
- Page 28 : Control remoto Bot6n Power (Encendido/Apagado) El aparato se encenderd si est6 apagado o apagar6 cuando este en operaci6n, si oprime este bot6n. Bot6n Mode (Modo) Utilice este bot6n para seleccionar el modo de operaci6n. Power Timer Bot6n Mode Power Saver Botones de ajuste de temperatura...
- Page 29 Control remoto • Colocai6n de las pilas Retire la tapa de las en el sentido de la flecha. Introduzca las pilas nuevas,con cuidado de que coincidan los polos(+)y(-). Vuelva a instalar la tapa,desliz_ndola otra vez a su posici6n. Nota: • Utilice pilas 2 LR06 AAA (1.5V) .No uti_ce pilas recargables.Sustituya las pilas por...
-
Page 30: Cuidado Y Mantenimiento
Cuando repare el aire acondicionado, aseg_rese colocar la perilla de modo en OFF y luego desconectar el cable de alimentaci6n del tomacorriente electrico. NO o[vide instalar el filtro de aire. Si el a[re acondicionado funciona sin el flltro de aire, 1. -
Page 31: Guia Para La Soluci6N De Problemas
Generalmente losproblemas s onsencillos yes probable q uenoseanecesario I lamar a unt6cnico. Estagufapuedeayudarlo aresolverlos. PROBLEMA CAUSAPOSlBLE SOLUCI6N SUGERIDA Elaireacondicionado Launidadnorecibe Verifique si el cable dealimentaci6n e nofunciona suministro electrico. staconectado a ltomacorriente. Verifique el fusibleo el cortacircuito. Fijeel FANCONTROL ( control d el ventilador) e n unaposiciOn quenosea OFF. -
Page 32: Garantia
II C0NTROLA REMOT0 AW-05CR1FM m AW-08CR1FM GARANTJA COMPLETA DE 5 AltOS Este producto se garantiza por 5 aSos a partir de la fecha de la compra orignaL Cualquier parte que falle en materiales o la ejecuci6n ser& substituida dentro del periodo de la garanteia. Esta garantia incluye servicio a domicilio. - Page 33 WIN'[ @2006 WlNT . Kelon Air Conditioner Co., Ltd., and Kelon USA. Eric.At] rights reserved, Kelon Air Conditioner Co., Ltd. Kelon USA, inc. No.12 Qiaodong Road 8000 Virginia Manor Rd., Suite 170 Ronggui, Shunde, Guangdong China 528303 Bettsville, MD 20705 Pttnied i_ Ch_a Version...
Need help?
Do you have a question about the AW-06CR1FM and is the answer not in the manual?
Questions and answers