FujiFilm X100S Owner's Manual
Hide thumbs
Also See for X100S:
- Manual (144 pages) ,
- Ower's manual (14 pages) ,
- New features manual (24 pages)
Table of Contents
Advertisement
Quick Links
DIGITAL CAMERA
X100S
Owner's Manual
Thank you for your purchase of this product. This
manual describes how to use your FUJIFILM X100S
digital camera and install the supplied software. Be
sure that you have read and understood its contents
before using the camera.
For information on related products, visit our website at
http://www.fujifilm.com/products/digital_cameras/index.html
For more information on the X100S, visit
http://fujifilm-x.com/x100s/
EN
BL02401-100
Before You Begin
First Steps
Basic Photography
and Playback
Basic Movie Recording
and Playback
The Q (Quick Menu) Button
More on Photography
and Playback
Menus
Connections
Technical Notes
Troubleshooting
Appendix
Advertisement
Chapters
Table of Contents

Related Manuals for FujiFilm X100S


Summary of Contents for FujiFilm X100S
-
Page 1: Digital Camera
Basic Movie Recording Thank you for your purchase of this product. This and Playback manual describes how to use your FUJIFILM X100S digital camera and install the supplied software. Be The Q (Quick Menu) Button sure that you have read and understood its contents before using the camera. -
Page 2: Important Safety Instructions
For Your Safety For Your Safety IMPORTANT SAFETY INSTRUCTIONS • Read Instructions: All the safety and operating instructions This video product should not be placed in a built-in instal- mast and supporting structure, grounding of the lead-in wire should be read before the appliance is operated. lation such as a bookcase or rack unless proper ventilation to an antenna discharge unit, size of grounding conductors, •... -
Page 3: Safety Notes
fi re socket Do not heat, change or take apart the battery. Do not or electric shock. Contact your FUJIFILM dealer. drop or subject the battery to impacts. Do not store Do not allow water or foreign objects to enter the the battery with metallic products. - Page 4 fi re or electric shock. Contact your Do not attempt to recharge a fully charged battery. The bat- FUJIFILM dealer to request internal cleaning every Do not use this camera in locations aff ected by oil tery does not however need to be fully discharged before two years.
- Page 5 This section applies to all camera models. Use only • Dispose of used batteries promptly. thoroughly before inserting new batteries. FUJIFILM AC power adapters designated for use with this • Do not drop or subject to strong physical shocks. camera. Other adapters could damage the camera.
- Page 6 Trademark Information Trademark Information infringe copyright laws without the consent of the owner. xD-Picture Card and E are trademarks of FUJIFILM Note that some restrictions apply to the photographing of Corporation. The typefaces included herein are solely devel- stage performances, entertainments, and exhibits, even oped by DynaComware Taiwan Inc.
-
Page 7: Notices
For Your Safety For Customers in Canada For Customers in Canada NOTICES CAUTION: This Class B digital apparatus complies with Canadian ICES-003. To prevent fi re or shock hazard, do not expose the unit to rain or moisture. Disposal of Electrical and Electronic Equipment in Private Households Disposal of Electrical and Electronic Equipment in Private Households Please read the “Safety Notes”... -
Page 8: About This Manual
About This Manual About This Manual Before using the camera, read this manual and the warnings in “For Your Safety” (P ii). For information on specifi c topics, consult the sources below. Table of Contents Table of Contents ...................... P P x x Troubleshooting Troubleshooting .......... -
Page 9: Caring For The Camera
Use a blower to remove dust from the lens and monitor, then gently wipe with a soft, dry cloth. Any remaining stains can be removed by wiping gently with a piece of FUJIFILM lens-cleaning paper to which a small amount of lens-cleaning fl uid has been applied. Care should be taken to avoid scratch-... -
Page 10: Table Of Contents
Table of Contents Table of Contents For Your Safety ..................ii Choosing a Display ................. 18 IMPORTANT SAFETY INSTRUCTIONS .........ii Focusing the Viewfi nder ............. 19 Safety Notes ..................iii Adjusting Display Brightness ............ 19 NOTICES ....................vii Bright Ambient Lighting ............. 19 About This Manual ................viii Using the Hybrid Viewfi nder ............. - Page 11 Table of Contents The Q (Quick Menu) Button The Q (Quick Menu) Button Film Simulation ................55 Bracketing ................... 56 Using the Q (Quick Menu) Button ..........34 Multiple Exposures ................. 57 More on Photography and Playback More on Photography and Playback Continuous Shooting (Burst Mode) ........
- Page 12 Table of Contents v AE/AF-LOCK BUTTON ............78 Menus Menus G CORRECTED AF FRAME ............78 Using the Menus: Shooting Mode ........... 72 I FLASH ..................79 Shooting Menu Options (Photographs) ....... 72 B RED EYE REMOVAL............... 79 B SELF-TIMER ................72 n SAVE ORG IMAGE ..............
- Page 13 Table of Contents The Setup Menu ................87 Connections Connections Using the Setup Menu ..............87 Viewing Pictures on a Computer ..........93 Setup Menu Options ..............88 Windows: Installing MyFinePix Studio ........93 F DATE/TIME ................88 Macintosh: Installing RAW FILE CONVERTER....... 95 N TIME DIFFERENCE ..............
- Page 14 Table of Contents Technical Notes Technical Notes Troubleshooting Troubleshooting Optional Accessories..............105 Problems and Solutions .............111 Accessories from FUJIFILM ............105 Warning Messages and Displays ..........115 Attaching Adapter Rings ............107 Appendix Appendix Attaching Lens Hoods ..............107 Glossary .....................118 Attaching Protector Filters ............107 Memory Card Capacity ...............119...
-
Page 15: Before You Begin Symbols And Conventions
Before You Begin Before You Begin Symbols and Conventions Symbols and Conventions The following symbols are used in this manual: Q This information should be read before use to ensure correct operation. R Additional information that may be helpful when using the camera. P Other pages in this manual on which related information may be found. -
Page 16: Parts Of The Camera
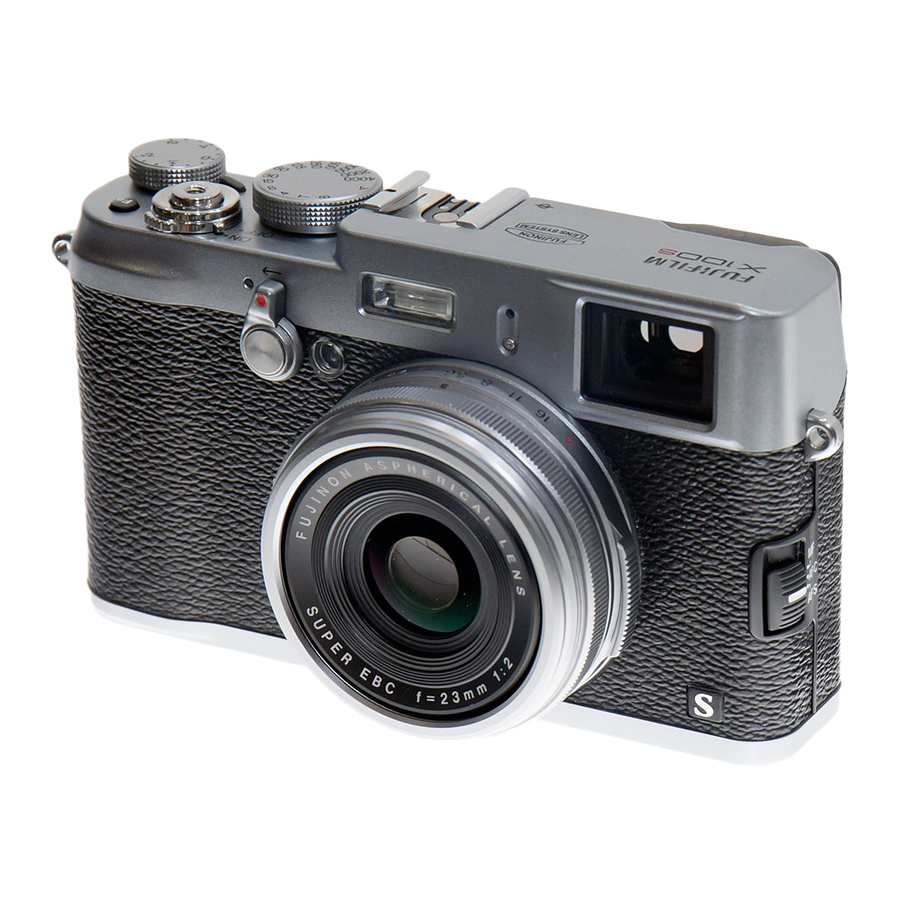
Parts of the Camera Parts of the Camera For more information, refer to the page listed to the right of each item. Shutter button ..........111 Front ring ............107 Connector cover ......71, 97, 99, 104 Exposure compensation dial ......51 AF-assist illuminator ........ - Page 17 Parts of the Camera Diopter adjustment control ......19 VIEW MODE button ........18 Command dial ........... 4 a (playback) button ........25 AFL/AEL (focus lock/exposure) button Q (quick menu) button ........34 AE (autoexposure) button ....... 52 .............46, 49, 78 DISP (display)/BACK button ......
-
Page 18: The Command Dial
Parts of the Camera The Command Dial The Command Dial Rotate the command dial or press it up ( q ), right ( w ), down ( e ), or left ( r ) to highlight items and press MENU/OK ( t ) to select. The command dial also serves as the following buttons: (delete) button ( 28)/AF (autofocus) button (... -
Page 19: The Command Control
Parts of the Camera The Command Control The Command Control Silent Mode Silent Mode Pressing the command control left or right per- In situations in which camera sounds or lights may forms the same function as rotating the com- be unwelcome, press the DISP/BACK button until the o icon is displayed (about a second), or select ON mand dial. -
Page 20: Camera Displays
Parts of the Camera Camera Displays Camera Displays The following types of indicator may be displayed during shooting and playback. In the description that follows, all available indicators are shown for illustrative purposes; the indicators actually displayed vary with camera settings. ■... -
Page 21: Shooting: Electronic Viewfi Nder
Parts of the Camera ■ Shooting: Electronic Viewfi nder Flash mode ............. 29 Silent mode indicator ........5, 88 Macro (close-up) mode ........31 Distance indicator ........... 46 Self-timer indicator ......... 53 Battery level ............ 16 Continuous mode ..........58 Sensitivity ............44 White balance .......... -
Page 22: Shooting: Lcd Monitor
Parts of the Camera ■ Shooting: LCD Monitor Flash mode ............. 46 White balance ..........42 Macro (close-up) mode ........31 Battery level ............ 16 000100 Metering ............52 Temperature warning........117 Continuous mode ..........58 Sensitivity ............44 Silent mode indicator ........5, 88 Aperture.........36, 38, 39, 71 ND (Neutral Density) fi lter indicator .... -
Page 23: First Steps Attaching The Strap
First Steps First Steps Attaching the Strap Attaching the Strap Attach the strap clips to the camera and then attach the strap. Open a strap clip. Pass the clip through the eyelet. Use the clip attaching tool to open a strap clip, Rotate the clip fully through making sure that the tool and clip are in the the eyelet until it clicks... - Page 24 Attaching the Strap Insert the strap. Fasten the strap. Insert the strap through a protective cover Fasten the strap as shown. Repeat Steps 5–6 and strap clip. for the second eyelet. Q To avoid dropping the camera, be sure the strap is correctly secured.
-
Page 25: Charging The Battery
Charging the Battery Charging the Battery The battery is not charged at shipment. Charge the battery before use. Place the battery in the charger. Plug the charger in. Insert the battery in the orientation indicated Plug the charger into a power outlet. The by the labels. -
Page 26: Inserting The Battery And A Memory Card
Inserting the Battery and a Memory Card Inserting the Battery and a Memory Card Although the camera can store pictures in internal memory, optional SD, SDHC, and SDXC memory cards (sold separately) can be used to store additional pictures. After charging the battery, insert the battery and memory card as described below. - Page 27 Inserting the Battery and a Memory Card Q Be sure card is in the correct orientation; do not Insert the memory card. insert at an angle or use force. If the memory Holding the memory card is not correctly inserted or no memory card card in the orientation is inserted, a will appear in the display and in- shown at right, slide...
- Page 28 Inserting the Battery and a Memory Card Q Q Batteries Batteries Removing the Battery and Memory Card Removing the Battery and Memory Card • Remove dirt from the battery terminals with a clean, Before removing the battery or memory card, turn dry cloth.
-
Page 29: Compatible Memory Cards
Inserting the Battery and a Memory Card ■ Compatible Memory Cards FUJIFILM and SanDisk SD, SDHC, and SDXC memory cards have been approved for use in the cam- era. A complete list of approved memory cards is available at http://www.fujifilm.com/support/digital_ cameras/compatibility/. -
Page 30: Turning The Camera On And Off
Turning the Camera on and Off Turning the Camera on and Off Rotate the ON/OFF switch to ON to turn the camera on. Select OFF to turn the camera off . R Press the button to start playback. Press the shutter button halfway to return to shooting mode. -
Page 31: Basic Setup
Basic Setup Basic Setup A language-selection dialog is displayed the fi rst time the camera is turned on. Set up the camera as described below (you can reset the clock or change languages at any time using the F DATE/ TIME or L a options in the setup menu;... -
Page 32: Choosing A Display
Choosing a Display Choosing a Display The camera is equipped with a hybrid optical/electronic viewfi nder (OVF/EVF) and an LCD monitor (LCD). Press VIEW MODE to choose a dis- play. OVF/EVF OVF/EVF Automatic display selection Viewfi nder only LCD monitor only using eye sensor Automatic Display Selection Automatic Display Selection... -
Page 33: Focusing The Viewfi Nder
Choosing a Display Focusing the Viewfi nder Focusing the Viewfi nder Adjusting Display Brightness Adjusting Display Brightness The camera is equipped with diopter adjustment The brightness of the viewfi nder and LCD monitor in the range –2 to +1 m –1 to accommodate indi- can be adjusted using the A SCREEN SET-UP >... -
Page 34: Using The Hybrid Viewfi Nder
Choosing a Display Using the Hybrid Viewfi nder Using the Hybrid Viewfi nder Choosing a Display Choosing a Display Use the viewfi nder selector to Choose a display according to the task. choose between optical and Display Display Description Description electronic viewfi nders. -
Page 35: The Disp/Back Button
The DISP/BACK DISP/BACK Button Button The DISP/BACK button controls the display of indicators in the viewfi nder and LCD monitor. ■ Optical Viewfi nder: Shooting ■ LCD Monitor: Shooting Detailed display Standard display 000100 2000 F5.6 2000 F5.6 2000 0.1 0.5 5.0 10 Standard display Custom display... -
Page 36: Viewfi Nder/Lcd Monitor: Playback
The DISP/BACK Buttion ■ Viewfi nder/LCD Monitor: Playback Indicators displayed Indicators hidden Favorites Photo information 100-0001 100-0001 100-0001 100-0001 3:2 F 3:2 F ISO 200 1/1000 F4.5 : OFF 12 / 31 / 2050 10 : 00 AM 10 : 00 AM 12 / 31 / 2050 10 : 00 AM 1 / 1000 F4.5... -
Page 37: Basic Photography And Playback
Basic Photography and Playback Basic Photography and Playback Taking Photographs Taking Photographs This section describes how to take pictures using program AE (mode P). For information on S, A, and M modes, see page 36. Select program AE. Select single AF. Set shutter speed and aperture to A (shutter Rotate the focus mode selector to AF-S (P 46). - Page 38 Taking Photographs Focus. Frame the picture with your subject in the center of the display and press the shutter button halfway to focus. R If the subject is poorly lit, the AF-assist illuminator may light ( 78). If the camera is able to focus, it will beep twice and focus area will glow green. Focus and exposure will lock while the shutter button is pressed halfway.
-
Page 39: Viewing Pictures
Viewing Pictures Viewing Pictures Viewing Pictures Full Frame Viewing Pictures Full Frame Pictures can be viewed in the viewfi nder or LCD monitor. When taking important pictures, take a test shot and check the results. To view pictures full frame, press a. 100-0001 100-0001 1 / 1000 F4.5... -
Page 40: Viewing Photo Information
Viewing Pictures Viewing Photo Information Viewing Photo Information Playback Zoom Playback Zoom Photo information can be viewed by press- Press k to zoom in on the current picture, n to ing the command control right. zoom out. When the picture is zoomed in, the command dial can be used to view areas of the 100-0001 D-RANGE... -
Page 41: Multi-Frame Playback
Viewing Pictures Multi-Frame Playback Multi-Frame Playback To change the number of images displayed, press n when a picture is displayed full frame. Press n to view more images. 100-0001 100-0001 Press k to view fewer images. Use the command dial to highlight images and press MENU/OK to view the highlighted image full frame. In the nine- and hundred-frame displays, press the command dial up or down to view more pictures. -
Page 42: Deleting Pictures
Deleting Pictures Deleting Pictures To delete individual pictures, multiple selected pictures, or all pictures, ERASE press the command dial up (b), and choose from the options below. Note FRAME SELECTED FRAMES ALL FRAMES that deleted pictures can not be recovered. Copy important pictures to a computer or other storage device before proceeding. -
Page 43: Using The Flash
Using the Flash Using the Flash Use the built-in fl ash for additional lighting when shooting at night or indoors under low light. To choose a fl ash mode, press the command dial right (N) to display the following options, then rotate the dial or press it left or right to highlight an option and press MENU/OK to select. - Page 44 Optional Flash Units Optional Flash Units The camera can also be used with optional FUJIFILM shoe-mounted fl ash units. Do not use third-party fl ash units that apply over high voltages to the camera hot shoe. Aperture, Sensitivity, and Flash Range Aperture, Sensitivity, and Flash Range Flash range varies with sensitivity and aperture.
-
Page 45: Macro Mode (Close-Ups)
Macro Mode (Close-ups) Macro Mode (Close-ups) To focus at distances as close as 10 cm/4 in., press the command dial left (F) and select F. If the optical viewfi nder is on, the camera will automatically switch to the electronic viewfi nder (because of parallax, the camera will not focus at distances of less than 80 cm/2.6 ft. -
Page 46: Basic Movie Recording And Playback Recording High-Defi Nition (Hd) Movies
Basic Movie Recording and Playback Basic Movie Recording and Playback Recording High-Defi nition (HD) Movies Recording High-Defi nition (HD) Movies The camera can be used to record short high-defi nition movies. Sound is recorded in stereo via the built-in microphone; during recording, do not cover the microphone or use the viewfi nder selector, which is located next to the microphone. -
Page 47: Viewing Movies
Viewing Movies Viewing Movies During playback, movies are displayed as shown at right. The following operations Movie icon can be performed while a movie is displayed: 100-0006 100-0006 Operation Operation Description Description Press the command dial down to start playback. Press again to pause. While playback Start/pause playback Start/pause playback is paused, you can press the command dial left or right to rewind or advance one... -
Page 48: The Q (Quick Menu) Button Using The Q (Quick Menu) Button
The Q (Quick Menu) Button The Q (Quick Menu) Button Using the Q (Quick Menu) Button Using the Q (Quick Menu) Button Press Q for quick access to the following items. For more information on the options available, see the pages listed below. - Page 49 The Q (Quick Menu) Button Movie Mode Movie Mode In movie mode, the quick menu contains the following items: FILM SIMULATION W MOVIE MODE .......... 80 D WHITE BALANCE ........42 P FILM SIMULATION........55 J EVF/LCD BRIGHTNESS......90...
-
Page 50: More On Photography And Playback
More on Photography and Playback More on Photography and Playback Choosing an Exposure Mode Choosing an Exposure Mode The camera off ers a choice of program AE (P), shutter-priority AE (S), aperture-priority AE (A), and manual exposure (M) modes. Program AE (P) Program AE (P) To allow the camera to adjust both shutter speed and aperture for optimal exposure, rotate the aperture ring and shutter speed... -
Page 51: Shutter-Priority Ae (S)
Choosing an Exposure Mode Shutter-Priority AE (S) Shutter-Priority AE (S) To adjust shutter speed manually while letting the camera select aperture for optimal exposure, rotate the aperture ring to A and use the shutter speed dial. S will appear in the display. Q If the correct exposure can not be achieved at the selected shutter speed, aperture will be displayed in red when the shutter button is pressed halfway. -
Page 52: Aperture-Priority Ae (A)
Choosing an Exposure Mode Aperture-Priority AE (A) Aperture-Priority AE (A) To adjust aperture manually while letting the camera select shut- ter speed for optimal exposure, rotate the shutter speed dial to A and adjust aperture. A will appear in the display. Q If the correct exposure can not be achieved at the selected aper- ture, the shutter speed will be displayed in red when the shutter but- ton is pressed halfway. -
Page 53: Manual Exposure (M)
Choosing an Exposure Mode Manual Exposure (M) Manual Exposure (M) Exposure can be altered from the value suggested by the camera by rotating both the shutter speed dial and aperture ring to set- tings other than A. M will appear in the display. R The command dial and command control can be used to adjust shutter speed and aperture by ±2 3 EV from the selected value in steps... -
Page 54: Shutter Speed And Aperture
Choosing an Exposure Mode Shutter Speed and Aperture Shutter Speed and Aperture Because the camera uses a lens-internal shutter, fast shutter speeds may not be available at large apertures. If the selected combination of shutter speed and aperture is unavailable, shutter speed or aperture will be displayed in red and the desired exposure may not be achieved. -
Page 55: Long Time-Exposures (T/B)
Long Time-Exposures (T/B) Long Time-Exposures (T/B) Select a shutter speed of T (time) or B (bulb) for long time-exposures. R Use of a tripod is recommended to prevent the camera from moving during the exposure. R To reduce “noise” (mottling) in long time-exposures, select ON for K LONG EXPOSURE NR in the shooting menu (P 74). -
Page 56: White Balance
White Balance White Balance Press the command dial down (WB) to display the following options, then rotate the dial or press it left or right to highlight an option that matches the light source and press MENU/OK. The dialog shown at bottom right will be displayed; use the com- mand dial to fi ne-tune white balance or press DISP/BACK to exit without fi ne-tuning WHITE BALANCE AUTO... - Page 57 White Balance : Custom White Balance : Custom White Balance Choose to adjust white balance for unusual lighting conditions. White balance measurement options will be displayed; frame a white object so that it fi lls the display and press the shutter button all the way down to measure white balance (to select the most recent custom value and exit without measuring white balance, press DISP/BACK, or press MENU/OK to select the most recent value and display the fi ne-tuning dialog).
-
Page 58: Sensitivity
Sensitivity Sensitivity “Sensitivity” refers to the camera’s sensitivity to light. Choose from values between 200 and 6400, or select L (100), H (12800), or H (25600) for special situations. Higher values can be used to reduce blur when lighting is poor, while lower values allow slower shutter speeds or wider apertures in bright light;... -
Page 59: Auto
Sensitivity ■ AUTO The following options are available when AUTO is selected: Option Option Default Default DEFAULT SENSITIVITY DEFAULT SENSITIVITY MAX. SENSITIVITY MAX. SENSITIVITY MIN. SHUTTER SPEED MIN. SHUTTER SPEED 60 60 The camera automatically chooses a sensitivity between the default and maximum values. Sensitiv- ity is only raised above the default value if the shutter speed required for optimal exposure would be slower than the value selected for MIN. -
Page 60: Focus Mode
Focus Mode Focus Mode Use the focus mode selector to choose how the camera focuses. • AF-S (single AF): Focus locks while the shutter button is pressed halfway. Choose for stationary subjects. • AF-C (continuous AF): Focus is continually adjusted to refl ect changes in the distance to the subject even when the shutter button is not pressed halfway (note that this increases the drain on the battery). -
Page 61: Mf Assist
Focus Mode ■ MF Assist The c MF ASSIST option in the setup menu can be used to check focus when pictures are framed in the LCD monitor or electronic viewfi nder. R The c MF ASSIST menu can be displayed by pressing and holding the center of the command control. The following options are available: •... -
Page 62: Focus Frame Selection
Focus Mode Focus Frame Selection Focus Frame Selection When t AREA is selected for F F AF MODE in the shooting menu and AF-S is selected for focus mode, the electronic view- fi nder and LCD monitor off er a choice of 49 focus points and the optical viewfi nder a choice of 25, allowing photographs to be Focus point composed with the main subject positioned almost anywhere in... -
Page 63: Focus/Exposure Lock
Focus/Exposure Lock Focus/Exposure Lock To compose photographs with off -center subjects: Focus: Position the subject in the focus frame and press the shutter button half- way to lock focus and exposure. Focus and exposure will remain locked while the shutter button is pressed halfway (AF/AE lock). 2000 F5.6 R Depending on the option selected for... - Page 64 Focus/Exposure Lock Autofocus Autofocus Although the camera boasts a high-precision autofocus system, it may be unable to focus on the subjects listed below. • Very shiny subjects such as mirrors or car bodies. • Fast-moving subjects. • Subjects photographed through a window or other refl ective object. •...
-
Page 65: Exposure Compensation
Exposure Compensation Exposure Compensation Rotate the exposure compensation dial to adjust exposure when photographing very bright, very dark, or high-contrast subjects. The eff ect is visible in the LCD monitor and electronic viewfi nder; when using the optical viewfi nder, use the exposure indicator to check exposure. Exposure compensation indicator Exposure Value (EV) Exposure Value (EV) -
Page 66: Metering
Metering Metering To choose how the camera meters exposure, press the AE button to display metering options. Use the command dial to highlight an option and press AE to select. Mode Mode Description Description The camera instantly determines exposure based on an analysis of PHOTOMETRY composition, color, and brightness distribution. -
Page 67: Using The Self-Timer
Using the Self-Timer Using the Self-Timer Use the timer for self-portraits or to prevent blur caused by camera shake. Press MENU/OK in shooting mode to display the shooting menu. Press SHOOTING MENU SELF-TIMER the command dial up or down to highlight SELF-TIMER and IMAGE SIZE 3 : 2... - Page 68 Using the Self-Timer Press the shutter button the rest of the way down to start the timer. The display in the monitor shows the number of seconds remaining until the shutter is released. To stop the timer before the picture is taken, press DISP/BACK.
-
Page 69: Film Simulation
Film Simulation Film Simulation Simulate the eff ects of diff erent kinds of fi lm, including black-and-white (with or without color fi lters). Press MENU/OK in shooting mode to display the shooting menu. Press SHOOTING MENU SELF-TIMER the command dial up or down to highlight FILM SIMULATION IMAGE SIZE 3 : 2... -
Page 70: Bracketing
Bracketing Bracketing Automatically vary settings over a series of pictures. Press the DRIVE button to display drive options and rotate the dial or press it up or down to highlight one of the following: ±1 ± ± AE BKT Option Option Description Description... -
Page 71: Multiple Exposures
Multiple Exposures Multiple Exposures Create a photograph that combines two exposures. Press MENU/OK. You will be prompt- ed to take the second shot. R To return to Step 2 and retake the fi rst shot, press the command dial left. To save the fi rst shot and Press the DRIVE button to display drive options. -
Page 72: Continuous Shooting (Burst Mode)
Continuous Shooting (Burst Mode) Continuous Shooting (Burst Mode) Capture motion in a series of pictures. Press the DRIVE button to display drive op- Press the shutter button the rest tions. Press the command dial up or down to of the way down to start shoot- highlight I (CONTINUOUS), and the options ing. -
Page 73: Viewing Pictures Taken In A Single Burst
Continuous Shooting (Burst Mode) Viewing Pictures Taken in a Single Burst Viewing Pictures Taken in a Single Burst When a picture taken in continuous shooting mode is dis- Position in burst/total number of pictures in burst played full-frame, the fi rst picture in the current burst can be viewed by pressing the command dial down (burst mode playback). -
Page 74: Panoramas
Panoramas Panoramas Follow an on-screen guide to create a panorama. Press the DRIVE button to display drive op- Pan the camera in the direction shown by the tions. Press the command dial up or down to arrow. Shooting ends automatically when the highlight r (MOTION PANORAMA) and press camera is panned to the end of the guides MENU/OK. - Page 75 Panoramas Q Panoramas are created from multiple frames; expo- For Best Results For Best Results sure for the entire panorama is determined by the For best results, prop your elbows against your sides fi rst frame. The camera may in some cases record an and move the camera slowly in a small circle at a greater or lesser angle than selected or be unable to steady speed, keeping the camera horizontal and...
-
Page 76: Viewing Panoramas
Panoramas Viewing Panoramas Viewing Panoramas In full-frame playback, panoramas can be played back us- ing the command dial. Press the command dial down to start playback and press again to pause. While playback is PLAY paused, you can scroll the panorama manually be pressing STOP PAUSE the command dial left or right. -
Page 77: Recording Pictures In Raw Format
Recording Pictures in RAW Format Recording Pictures in RAW Format To toggle RAW image quality on or off for a single shot, assign RAW to the Fn button (P 69). If a JPEG option is currently selected for im- age quality, pressing the Fn button temporarily selects the equivalent JPEG+RAW option. -
Page 78: Creating Jpeg Copies Of Raw Pictures
Recording Pictures in RAW Format Creating JPEG Copies of RAW Pictures Creating JPEG Copies of RAW Pictures RAW pictures store information on camera settings separately from the data captured by the camera image sensor. Using the j RAW CONVERSION option in the playback menu, you can create JPEG copies of RAW pictures using diff erent options for the settings listed below. -
Page 79: The Nd Filter
The ND Filter The ND Filter The camera is equipped with a Neutral Density (ND) fi lter that reduces exposure by the equivalent of 3 EV. This allows slower shutter speeds or wider apertures to be used with brightly lit subjects, making it possible to blur motion or soften background details without risk of overexposure. -
Page 80: Image Search
Image Search Image Search Follow the steps below to search for pictures. Press MENU/OK during playback to display the playback menu. Press the command dial up or down to highlight b IMAGE SEARCH and press MENU/OK. Highlight an option and press MENU/OK. Option Option Description... -
Page 81: Photobook Assist
PhotoBook Assist PhotoBook Assist Create books from your favorite photos. Creating a PhotoBook Creating a PhotoBook Select NEW BOOK for m PHOTOBOOK AS- Highlight COMPLETE PHOTOBOOK and press MENU/OK (to select all photos or all pho- SIST in the playback menu (P 85) and choose from the following options: tos matching the specifi ed search conditions •... -
Page 82: Viewing Photobooks
PhotoBook Assist Viewing Photobooks Viewing Photobooks Editing and Deleting Photobooks Editing and Deleting Photobooks Highlight a book in the photobook assist menu Display the photobook and press MENU/OK. The and press MENU/OK to display the book, then press following options will be displayed; select the the command dial left or right to scroll through desired option and follow the on-screen instruc- the pictures. -
Page 83: The Fn Button
The Fn Button The Fn Button The role played by the Fn button can be selected using the F Fn BUTTON option in the shooting menu (P 74). The options available include multiple exposure (P 57), depth-of-fi eld preview (P 38), sensitivity (P 44), the self-timer (P 53), image size (P 72), image quality (P 73), dynamic range (P 73), fi lm simulation (P 55), ND fi lter (P 65), AF mode (P 77), custom settings (P 70), movie recording (P 32), advanced fi lter... -
Page 84: Saving Settings
Saving Settings Saving Settings Save up to 7 sets of custom camera settings for commonly-encountered situations. Saved settings can be recalled using the u SELECT CUSTOM SETTING option in the shooting menu. Press MENU/OK in shooting mode to display the shooting menu. Press SHOOTING MENU SELECT CUSTOM SETTING the command dial up or down to highlight K EDIT/SAVE CUSTOM... -
Page 85: Advanced Movie Recording
Advanced Movie Recording Advanced Movie Recording Depth of Field Depth of Field Aperture can be set manually for movie recording by selecting an aperture other than A for aperture-priority AE. Adjust aperture before recording be- gins. Choose low f-numbers to soften background details. The eff ect can be heightened by increasing the distance between your subject and the back- ground. -
Page 86: Using The Menus: Shooting Mode
Menus Menus Using the Menus: Shooting Mode Using the Menus: Shooting Mode The shooting menu is used to adjust settings for a wide range of shooting condi- SHOOTING MENU SELF-TIMER tions. To display the shooting menu, press MENU/OK in shooting mode. Highlight IMAGE SIZE 3 : 2 IMAGE QUALITY... -
Page 87: T Image Quality
Using the Menus: Shooting Mode T IMAGE QUALITY IMAGE QUALITY ( ( default: default: FINE) FINE) Choose a fi le format and compression ratio. Select FINE or NORMAL to record JPEG images, RAW to record RAW images, or FINE+RAW or NORMAL+RAW to record both JPEG and RAW images. FINE and FINE+RAW use lower JPEG compression ratios for higher-quality JPEG images, while NORMAL and NORMAL+RAW use higher JPEG compression ratios to increase the num- ber of images that can be stored. -
Page 88: Color
Using the Menus: Shooting Mode f COLOR COLOR ( ( default: default: MID) MID) Adjust color density. q SHARPNESS ( ( default: default: STANDARD) STANDARD) SHARPNESS Sharpen or soften outlines. r HIGHLIGHT TONE HIGHLIGHT TONE ( ( default: default: STANDARD) STANDARD) Adjust the appearance of highlights. -
Page 89: Disp. Custom Setting
Using the Menus: Shooting Mode v DISP. CUSTOM SETTING DISP. CUSTOM SETTING Choose the items displayed in the viewfi nder and LCD monitor (P 21). The following items can be displayed: framing grid (you can also select the grid type as described on page 76), virtual horizon, focus distance (auto or manual), histogram, exposure (shut- ter speed, aperture, and sensitivity), exposure compensation/exposure indicator, metering, fl ash mode, white balance, fi lm simu- lation, dynamic range, number of exposures remaining, image size and quality, and battery level. -
Page 90: Framing Guidline
Using the Menus: Shooting Mode c FRAMING GUIDLINE default: F F GRID 9) FRAMING GUIDLINE ( ( default: GRID 9) Choose the type of framing grid available in shooting mode. F GRID 9 GRID 9 G GRID 24 GRID 24 H HD FRAMING HD FRAMING For “rule of thirds”... -
Page 91: Advanced Filter
Using the Menus: Shooting Mode d ADVANCED FILTER ADVANCED FILTER ( ( default: default: OFF) OFF) Take photos with fi lter eff ects. Choose from the following fi lters. Filter Filter Description Description G TOY CAMERA TOY CAMERA Choose for a retro toy camera eff ect. H MINIATURE MINIATURE The tops and bottoms of pictures are blurred for a diorama eff ect. -
Page 92: C Af Illuminator
Using the Menus: Shooting Mode C AF ILLUMINATOR ( ( default: default: ON) AF ILLUMINATOR If ON is selected, the AF-assist illuminator will light to assist autofocus. R The AF-assist illuminator turns off automatically in silent mode. Q The camera may be unable to focus using the AF-assist illuminator in some cases. If the camera is unable to focus in macro mode, try increasing the distance to the subject. -
Page 93: I Flash
Using the Menus: Shooting Mode I FLASH FLASH ( ( default: default: ±0) ±0) Adjust fl ash brightness. Choose from values between +2 3 EV and –2 3 EV. Note that the desired results may not be achieved depending on shooting conditions and the distance to the subject. B RED EYE REMOVAL RED EYE REMOVAL ( ( default:... -
Page 94: Shooting Menu Options (Movie Mode)
Using the Menus: Shooting Mode Shooting Menu Options (Movie Mode) Shooting Menu Options (Movie Mode) The following options are available in movie mode (P 32). W MOVIE MODE MOVIE MODE ( ( default: default: i i 1920×1080 (30fps)) 1920×1080 (30fps)) Select a frame rate for movie recording. -
Page 95: Using The Menus: Playback Mode
Using the Menus: Playback Mode Using the Menus: Playback Mode To display the playback menu, press MENU/OK in playback mode. Highlight items PLAYBACK MENU RAW CONVERSION and press the command dial right to view options, then highlight an option and ERASE CROP RESIZE... -
Page 96: Resize
Using the Menus: Playback Mode e RESIZE RESIZE Create a cropped copy of the current picture. Display the desired picture. Select e RESIZE in the playback menu. Highlight a size and press MENU/OK to display a confi rmation dialog. Press MENU/OK again to save the resized copy to a separate fi le. R The sizes available vary with the size of the original image. -
Page 97: C Image Rotate
Using the Menus: Playback Mode C IMAGE ROTATE IMAGE ROTATE Rotate pictures. Display the desired picture. Select C IMAGE ROTATE in the playback menu. Press the command dial down to rotate the picture 90° clockwise, up to rotate it 90° counterclockwise. Press MENU/OK. -
Page 98: B Red Eye Removal
Using the Menus: Playback Mode B RED EYE REMOVAL RED EYE REMOVAL Remove red-eye from portraits. The camera will analyze the image; if red-eye is detected, the image will be processed to create a copy with reduced red-eye. Display the desired picture. Select B RED EYE REMOVAL in the playback menu. -
Page 99: Photobook Assist
Using the Menus: Playback Mode m PHOTOBOOK ASSIST PHOTOBOOK ASSIST Create books from your favorite photos (P 67). j MARK FOR UPLOAD TO MARK FOR UPLOAD TO Select pictures for upload to YouTube, Facebook or MyFinePix.com using MyFinePix Studio (Windows only). Highlight an option and press MENU/OK. -
Page 100: K Print Order (Dpof)
Using the Menus: Playback Mode K PRINT ORDER (DPOF) PRINT ORDER (DPOF) Select pictures for printing on DPOF- and PictBridge-compatible devices (P 101). J DISP ASPECT DISP ASPECT Choose how High Defi nition (HD) devices display pictures with an aspect ratio of 3 : 2 16 : 9 (this option is available only when an HDMI cable is connected). -
Page 101: The Setup Menu
The Setup Menu The Setup Menu Using the Setup Menu Using the Setup Menu Display the setup menu. 1.1 Press MENU/OK to display the menu for the current mode. 1.2 Press the command dial left to highlight the tab for the current menu. 1.3 Press the command dial down to highlight Z. -
Page 102: Setup Menu Options
The Setup Menu Setup Menu Options Setup Menu Options F DATE/TIME DATE/TIME Set the camera clock (P 17). N TIME DIFFERENCE default: h h ) ) TIME DIFFERENCE ( ( default: Switch the camera clock instantly from your home time zone to the local time at your destination when traveling. To specify the diff erence between local time and your home time zone: Highlight g LOCAL and press MENU/OK. -
Page 103: Bframe No
The Setup Menu B FRAME NO. FRAME NO. ( ( default: default: CONTINUOUS) CONTINUOUS) New pictures are stored in image fi les named using a four-digit fi le number assigned by adding one to the Frame number last fi le number used. The fi le number is displayed during playback as shown at right. B FRAME NO. con- 100-0001 trols whether fi le numbering is reset to 0001 when a new memory card is inserted or the current memory card is formatted. -
Page 104: Sound Set-Up
The Setup Menu b SOUND SET-UP SOUND SET-UP Adjust sound settings. Option Option Description Description Adjust the volume of the sounds produced when camera controls are operated. Choose e OFF (mute) OPERATION VOL. OPERATION VOL. to disable control sounds. Adjust the volume of the sounds produced when the shutter is released. Choose e OFF (mute) to dis- SHUTTER VOLUME SHUTTER VOLUME able the shutter sound. -
Page 105: Z Power Management
The Setup Menu Z POWER MANAGEMENT POWER MANAGEMENT Adjust power management settings. Option Option Description Description Choose the length of time before the camera turns off automatically when no operations are performed. AUTO POWER OFF AUTO POWER OFF Shorter times reduce the drain on the battery; if OFF is selected, the camera must be turned off manually. Note that in some situations the camera turns off automatically even when OFF is selected. -
Page 106: Eye-Fi Transfer
The Setup Menu b Eye-Fi TRANSFER ( ( default: default: ON) Eye-Fi TRANSFER The camera can be used with third-party Eye-Fi cards; for more information see the manual provided with the card or contact the manufacturer. Option Option Description Description ON ON Pictures taken with the camera are uploaded to a pre-selected destination. -
Page 107: Connections
Connections Connections Viewing Pictures on a Computer Viewing Pictures on a Computer The supplied software can be used to copy pictures to a computer, where they can be stored, viewed, organized, and printed. Before proceeding, install the software as described below. Do connect the camera to the computer until installation is complete. - Page 108 Viewing Pictures on a Computer Exit any applications that may be running and insert the installer CD in a CD-ROM drive. Windows 8/Windows 7/Windows Vista Windows 8/Windows 7/Windows Vista If an AutoPlay dialog is displayed, click SETUP.EXE. A “User Account Control” dialog will then be displayed; click Yes (Windows 8/Windows 7) or Allow (Windows Vista).
-
Page 109: Macintosh: Installing Raw File Converter
RAW FILE CONVERTER is used to view RAW images on your computer. Confi rm that the computer meets the following system requirements: Intel (Core 2 Duo or better) Pre-installed copies of Mac OS X version 10.6–10.8 (visit http://www.fujifilm.com/support/digital_cameras/ OS OS compatibility/ for more information). -
Page 110: Importing Pictures Or Movies To Mac (Macintosh)
Viewing Pictures on a Computer Importing Pictures or Movies to Mac (Macintosh) Importing Pictures or Movies to Mac (Macintosh) Use a standard application in Mac OS such as Image Capture to import pictures or movies to Mac. -
Page 111: Connecting The Camera
Viewing Pictures on a Computer Connecting the Camera Connecting the Camera If the pictures you wish to copy are stored on a memory card, insert the card into the camera ( 12). R Windows users may require the Windows CD when starting the software for the fi rst time. Q Loss of power during transfer could result in loss of data or damage to internal memory or the memory card. - Page 112 Viewing Pictures on a Computer Q If a memory card containing a large number of images is inserted, there may be a delay before the software starts and you may be unable to import or save images. Use a memory card reader to transfer pictures. Q Make sure that the computer does not display a message stating that copying is in progress and that the indicator lamp is out before turning the camera off or disconnecting the USB cable (if the number of im- ages copied is very large, the indicator lamp may remain lit after the message has cleared from the computer...
-
Page 113: Printing Pictures Via Usb
Printing Pictures via USB Printing Pictures via USB If the printer supports PictBridge, the camera can be connected directly to the printer and pictures can be printed without fi rst being copied to a computer. Note that depending on the printer, not all the functions described below may be supported. -
Page 114: Printing The Dpof Print Order
Printing Pictures via USB Printing the DPOF Print Order Printing the DPOF Print Order Printing the Date of Recording Printing the Date of Recording To print the print order created with K PRINT To print the date of recording on pictures, press ORDER (DPOF) in the playback menu (P 86): DISP/BACK in the PictBridge display and select PRINT WITH DATE... -
Page 115: Creating A Dpof Print Order
Printing Pictures via USB Creating a DPOF Print Order Creating a DPOF Print Order During Printing During Printing The K PRINT ORDER (DPOF) option in the play- The message shown at right is PRINTING back menu can be used to create a digital “print displayed during printing. -
Page 116: With Date S/ Without Date
Printing Pictures via USB ■ WITH DATE s/ WITHOUT DATE Press the command dial up or down To modify the DPOF print order, select K PRINT to choose the number of copies (up ORDER (DPOF) in the playback menu and press to 99). -
Page 117: Reset All
Printing Pictures via USB ■ RESET ALL The total number of prints is dis- played in the monitor. Press MENU/ To cancel the current print RESET DPOF OK? OK to exit. order, select RESET ALL for K PRINT ORDER (DPOF). The The pictures in the current confi rmation shown at right print order are indicated by a... -
Page 118: Viewing Pictures On Tv
Viewing Pictures on TV Viewing Pictures on TV To show pictures to a group, connect the camera to a TV using an HDMI cable (available separately from third-party suppliers; note that the TV can only be used for playback, not shooting). Turn the camera off . -
Page 119: Technical Notes Optional Accessories
The camera supports a wide range of accessories from FUJIFILM and other manufacturers. Accessories from FUJIFILM Accessories from FUJIFILM The following optional accessories are available from FUJIFILM. For the latest information on the accesso- ries available in your region, check with your local FUJIFILM representative or visit http://www.fujifilm.com/ products/digital_cameras/index.html. - Page 120 Optional Accessories Leather cases Leather cases LC-X100S: This leather case, exclusively for use with the X100S/X100, combines practicality with the luxury of leather and comes with a shoulder strap made of the same material. Pictures can be taken and batteries and memory cards inserted or removed with the camera still in its case.
-
Page 121: Attaching Adapter Rings
Optional Accessories Attaching Adapter Rings Attaching Adapter Rings Attaching Lens Hoods Attaching Lens Hoods Remove the front ring. Attach the adapter ring Attach the adapter ring before attaching the lens before attaching the lens hood. hood. R R Align the indentations and Align the indentations and rotate as shown. -
Page 122: The Wcl-X100 Wide Conversion Lens
Optional Accessories The WCL-X100 Wide Conversion Lens The WCL-X100 Wide Conversion Lens ■ Attaching the WCL-X100 A Y WIDE CONVERSION LENS option has been added to the shooting menu for use with the op- Remove the front ring. tional WCL-X100 wide conversion lens. Select ON when using the WCL-X100. -
Page 123: Connecting The Camera To Other Devices
† Printer † ■ ■ Audio/Visual Audio/Visual ■ ■ Computer Related Computer Related HDMI cable † HDTV † USB cable (supplied) Computer † * Available separately from FUJIFILM. † Available separately from third-party suppliers. -
Page 124: Caring For The Camera
Caring for the Camera Caring for the Camera To ensure continued enjoyment of the product, observe the following precautions. ■ Water and Sand Storage and Use Storage and Use If the camera will not be used for an extended pe- Exposure to water and sand can also damage the riod, remove the battery and memory card. -
Page 125: Troubleshooting
: The battery has reached the end of its charging life. Purchase a new charge. charge. battery. If the battery still fails to charge, contact your FUJIFILM dealer. battery. If the battery still fails to charge, contact your FUJIFILM dealer. ■ ■ Menus and Displays... - Page 126 Problems and Solutions ■ ■ Shooting Shooting Problem Problem Solution Solution P 12, 28). • Memory is full: Insert a new memory card or delete pictures ( (P 12, 28). P 92). • Memory is not formatted: Format the memory card or internal memory ( (P 92).
- Page 127 Problems and Solutions Problem Problem Solution Solution Some fl ash modes are not Some fl ash modes are not The camera is in silent mode. Turn silent mode off ( The camera is in silent mode. Turn silent mode off (P P 5).
- Page 128 12). The camera does not func- The camera does not func- P 12, 14). If the problem persists, contact your FUJIFILM dealer. Remove and reinsert the battery ( Remove and reinsert the battery (P 12, 14). If the problem persists, contact your FUJIFILM dealer.
-
Page 129: Warning Messages And Displays
TURN OFF THE CAMERA Camera malfunction. Turn the camera off and then on again. If the message persists, contact a FUJIFILM dealer. Camera malfunction. Turn the camera off and then on again. If the message persists, contact a FUJIFILM dealer. - Page 130 : Use a compatible card (P P 15). 15). • • Camera malfunction Camera malfunction: Contact a FUJIFILM dealer. : Contact a FUJIFILM dealer. b b MEMORY FULL MEMORY FULL The memory card or internal memory is full and pictures can not be recorded or copied. Delete pictures ( The memory card or internal memory is full and pictures can not be recorded or copied.
- Page 131 Warning Messages and Display Warning Warning Description Description • • A search has returned more than 30,000 results A search has returned more than 30,000 results: Choose a search that returns fewer results. : Choose a search that returns fewer results. TOO MANY FRAMES TOO MANY FRAMES •...
-
Page 132: Appendix
Appendix Appendix Glossary Glossary Exif Print: A standard for storing information with pictures for optimal color reproduction during printing. HDMI (High-Defi nition Multimedia Interface): An interface standard for the transmission of images and sound that adds audio input to the DVI interface used to connect computers to displays. JPEG (Joint Photographic Experts Group): A compressed fi le format for color images. -
Page 133: Memory Card Capacity
Memory Card Capacity Memory Card Capacity The following table shows the recording time or number of pictures available at diff erent image sizes. All fi gures are approximate; fi le size varies with the scene recorded, producing wide variations in the number of fi les that can be stored. -
Page 134: Specifi Cations
Specifi cations Specifi cations System Model Model FUJIFILM X100S FUJIFILM X100S digital camera digital camera Eff ective pixels Eff ective pixels 16.3 million 16.3 million Image sensor Image sensor 23.6 × 15.6 mm (APS-C), X-Trans CMOS II sensor with square pixels and primary color fi lter 23.6 ×... - Page 135 Specifi cations System Shutter speed Shutter speed • • P P mode mode: : sec. to sec. to sec. sec. • • Time Time: 30 sec. to : 30 sec. to ...
- Page 136 Specifi cations Input/output terminals HDMI output HDMI output HDMI mini connector HDMI mini connector Digital input/output Digital input/output USB 2.0 High-Speed USB 2.0 High-Speed Power supply/other Power supply Power supply NP-95 rechargeable battery NP-95 rechargeable battery Battery life Battery life (approximate (approximate Battery type Battery type...
- Page 137 Specifi cations NP-95 rechargeable battery Nominal voltage Nominal voltage DC 3.6 V DC 3.6 V Nominal capacity Nominal capacity 1,800 mAh 1,800 mAh Operating temperature Operating temperature 0 °C to +40 °C/+32 °F to +104 °F 0 °C to +40 °C/+32 °F to +104 °F Dimensions Dimensions (W ×...
- Page 138 • Specifi cations subject to change without notice; for the latest information, visit http://www.fujifilm.com/products/ digital_cameras/index.html. FUJIFILM shall not be held liable for damages resulting from errors in this manual. • Although the viewfi nder and LCD monitor are manufactured using advanced high-precision technology, small bright points and anomalous colors may appear, particularly in the vicinity of text.
-
Page 139: Restrictions On Camera Settings
Restrictions on Camera Settings Restrictions on Camera Settings The options available in each shooting mode are listed below. Option Option M M n Option Option M M n ✔ ✔ ✔ ✔ ✔ ✔ ✔ ✔ ✔ ✔ ✔ ✔ ✔... -
Page 140: Oimage Size
Restrictions on Camera Settings M M n M M n Option Option Option Option t ND FILTER ✔ ✔ ✔ ✔ ✔ ✔ ✔ ✔ ✔ ✔ ND FILTER ✔ ✔ ✔ ✔ ✔ ✔ ✔ ✔ ✔ ✔ ✔ ✔ O IMAGE SIZE ✔... - Page 141 Restrictions on Camera Settings M M n M M n Option Option Option Option FRAMING FRAMING c FRAMING GUIDLINE ✔ ✔ ✔ ✔ ✔ ✔ ✔ ✔ ✔ ✔ ✔ ✔ FRAMING GUIDLINE ✔ ✔ ✔ ✔ ✔ ✔ ✔ ✔ ✔ ✔ ✔...
- Page 142 Restrictions on Camera Settings 1 1 Fixed at Fixed at OFF OFF. . M M n Option Option Fixed at o o (multi). 2 2 Fixed at (multi). I FLASH FLASH ✔ ✔ ✔ ✔ ✔ ✔ ✔ ✔ ✔ ✔ 3 3 Continuous AF is used when Continuous AF is used when AF-S AF-S is selected for focus mode.
- Page 143 Memo Memo...
- Page 144 7-3, AKASAKA 9-CHOME, MINATO-KU, TOKYO 107-0052, JAPAN http://www.fujifilm.com/products/digital_cameras/index.html...