Table of Contents
Advertisement
Quick Links
OWNER'S
MANUAL
MODEL
NO.
FTll50
IMPORTANT
Read and follow all
Safety Precautions
and Instructions
before operating this
equipment.
Rev. 04-147
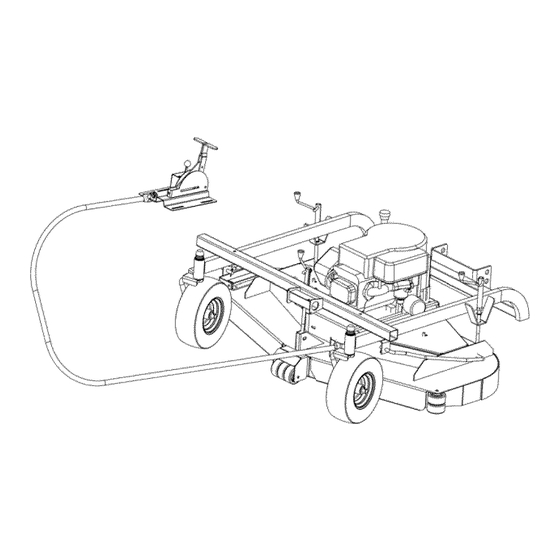
50" UNIVERSAL
MOUNT
TRAILMOWER
®
For Vehicle Mounting
Options See
Details On Page- 16
Assembly
Operation
Service
and Adjustment
Repair
Parts
1602 CORPORATE
DRIVE,
P.O. BOX 67, WARRENSB[
RG, MISSO[
RI 64093
PHONE
660-747-8183
FAX 660-747-8650
Manufacturing
quality lawn care equipment
since 1945
3lade
In The
USA
ONFTll50
Advertisement
Table of Contents

Summary of Contents for Swisher FT1150
- Page 1 OWNER'S MANUAL MODEL FTll50 50" UNIVERSAL MOUNT TRAILMOWER ® For Vehicle Mounting Options See Details On Page- 16 IMPORTANT Read and follow all Safety Precautions and Instructions Assembly before operating this equipment. Operation Service and Adjustment Rev. 04-147 Repair Parts 1602 CORPORATE DRIVE, P.O.
- Page 2 SAFETY PRECAUTIONS This Safety Alert Symbol indicates important messages in this manual. When you see this symbol, carefully read the message that follows and be alert to the possibility of personal injury. Read this manual completely. This machine can amputate hands, feet, and throw objects.
- Page 3 • Mower blades are sharp and can cut. Wrap the blades or wear gloves, and use extra caution when servicing them. ? Did You Know Swisher Mower & Machine Co. was started in 1945.
-
Page 4: Maintenance
MOWER MAINTENANCE GENERAL RECOMMENDATIONS The warranty on this trailmower does not cover items that have been subjected to operator abuse or negligence. To receive full value from the warranty, operator must maintain unit as instructed in this manual. Some adjustlnents will need to be made periodically to maintain your unit properly. -
Page 5: Warranty
This warranty does not apply to any product of Swisher Mower Co., Inc., that has been subject to alteration, misuse, abuse, improper assembly or installation, shipping damage, or to normal wear of the product. - Page 6 OPERATING YOUR MOWER The operation of any mower can produce foreign objects to be thrown into the eyes, resulting in severe eye damage. Always wear certified safety glasses or wide-vision safety goggles over spectacles before starting any cutting machine and while operating such a machine.
-
Page 7: Starting The Engine
STARTING THE ENGINE • See engine manufacturer's instructions for the type and amount ofoil and fuel used. Engine must be level to accurately check and fill oil. Do not overfill. • Park vehicle and mower on a level surface, set the vehicle parking brake, and disengage blades. - Page 8 STOP MOWING • Bring vehicle to a full stop. • Disengage clutch lever by moving lever to center position. • Turn key switch to "OFF" position. TRANSPORTING MOWER • Never transport unit with engine running. • If transporting unattached from tow vehicle, remove spark plug wire and place it where contact with the spark plug cannot be made.
- Page 9 SAFETY AND OPERATIONAL DECALS Replace decal ilrnnediately if damaged. Order by part number lioln Swisher Mower and Machine Co. Inc. 3ortant Decal F_Y|_G DE[[R_S OD45 - Warning Decal Decal located On grass chute [not shown] OD33 - Speed Decal OD 10--BLADE...
- Page 10 ..HEIGHT ADJI _BE ES225 ? Did You Know In 1956 Swisher Mower & Machine Co. introduced the first zero turning radius riding mower. The design of this 3-wheeled mower included safety features ahead of its time. In January 2000,...
-
Page 11: Deck Assembly
FIGURE 2 Detail (Page 14) See Detail ,(Page 13) Not Pictured T2SM Spring See Detail (Page 13) DECK ASSEMBLY r_G_RE 2 ...... - Page 12 Console Assembly Figure7 9 ----_ NB-274 NBq ....................g?)gq gSam _ui ... 8-32 NB201 ....................g:_x _ _ii Truss ........BELT CONFIGURATION 3752 Figure 5 T 239 (112" Belt) (39" Belt) WHBP50 (Complete Wiring Harness)
- Page 13 BLADE DRIVER SET-UP Figure Outer Blade Center Blade Driver Driver Configuration Configuration Item Description Part Center Shaft 9076 Blade Bearing '% % Bearing Housing 9057TK Pulley Spacer 6104RS Blade Mount Plate 9008 17 1/2" Blade 5059 Blade Pulley- 5.5" 6114 Blade Pulley- 5"...
-
Page 14: Base Assembly
See Detail MOTOR BASE ASSEMBLY Figttre3 3/8-16 X5 1/2 GR5 ZP NB-575 1/4-20 HXNUT NB-139 1/4-20 X 1 NB-t02 5/16-t8 X2 1/2 HCC GR5 ZP NB-253 ENGINE SET-UP FIGURE 4 ..............................Part# ..3/8-24 X 1 Engine Bolt Locktite NB-452N .... -
Page 15: Operation
SUGGESTED GUIDE FOR SIGHTING SLOPES FOR SAFE OPERATION ONLY RIDE UP AND DOWN HILL_ NOT ACROSS N_LL 1. Fold th}s page along dotted l_ne _nd_csted above. 2. HoW page before so that _ta _eft edge he ve_caHy pa_a[_e_ to a t_ee t_unk o_ othe_ updght structure. - Page 16 FIGURE Attachment Options Quick Switcli" Mount Detail-1 • Attaching unit to operate in the front mount position PART# 2646 (Quick Switch "_* M ount kit sold separately) Detail-1,3 ItemNo, Description Part# Mount Pin 5153_ 3/4 ID Washer NB195 Detail-3 PART# 9146...
- Page 17 Swisher ATV Quick Switch TM Swisher Log Splitters System Swisher products pioneered tag along type residential mowers in the 1980's with its 40" Traihnower. ® Today, Swisher offers a full line of products which include log splitters, and a wide range of ATV accessories.
- Page 18 All mower parts listed herein may be ordered directly from MANUAL Swisher Mower & Machine Co., Inc. or your nearest Swisher dealer. All engine parts may be ordered from the nearest dealer of the engine supplied with your mower.


Need help?
Do you have a question about the FT1150 and is the answer not in the manual?
Questions and answers