Table of Contents
Advertisement
Quick Links
Advertisement
Table of Contents

Related Manuals for Samsung HCN5529W


Summary of Contents for Samsung HCN5529W
- Page 2 Warning ! Important Safety Instructions CAUTION CAUTION: TO REDUCE THE RISK OF ELECTRIC SHOCK, DO NOT REMOVE COVER (OR BACK). NO USER SERVICEABLE PARTS INSIDE. REFER SERVICING TO QUALIFIED SERVICE PERSONNEL. This symbol indicates high voltage is present inside. It is dangerous to make any kind of contact with any inside part of...
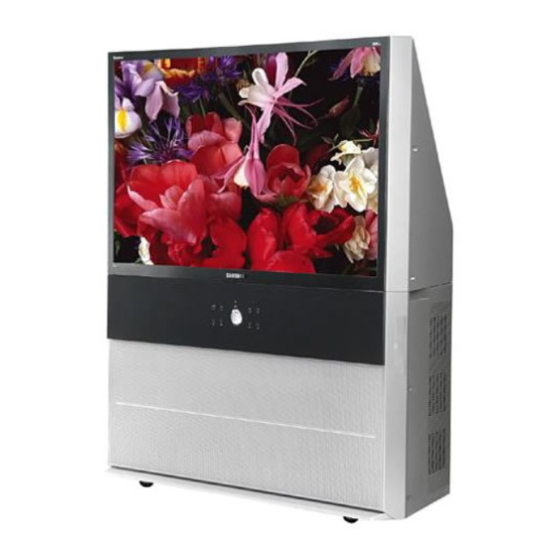
- Page 3 Choosing Samsung Thank you fbr choosing Samsung! Your new Samsung Prqjection TV represents the latest in television technology We designed it with easy-to-llse on-screen menlls and closed captioning capabilities, making it one of the best products in its class. We are proud to offer you a product that will provide convenient, dependable service and e*_joyment fbr years to come.
- Page 4 • Protect thepower c ord. P ower supply cords s hould berouted sothatthey won't b ewalked o n orpinched b yotqjects placed o noragainst them. Pay particular attention t ocords a tplugs, con- venience receptacles, and thepointwhere t hey exitfl'om theunit. •...
- Page 5 Important Warranty Information Regarding Television Format Viewing Standard screen format televisions (4:3, the aspect ratio of the screen width to height) are [_i'imai'ily designed to view standard format fllll-motion video. The images displayed them shollld t_rimai'ily be in the standard 4:3 ratio format and constantly moving.
- Page 6 A Guide Digital What is Digital Television? Digital television (DTV) is a new way of transmitting high qtlality video and alldio to DTV_ (HDTV) yoln" TV set. Using bir_adcasters can transmit high definition images, Do lby digital sln'rol md alldio, and new services sllch as mltlticasting (transmitting more than one program...
- Page 7 View Digital Television There are three ways to watch The first is to use an integrated digital TV; one with a blJilt-in digital television timer. second is to connect an external DTV set-top receiver to a DTVlready television or monitor. This type of TV or monitor...
- Page 8 Q&A 1. Is the antenna I use for existing TV reception good enough for DTV? Over-the-air (OTA) digital TV broadcasting uses the same channels as analog TV and works well with many existing TV antennas. However, DTV broadcast channel assign- merits are different than analog channels.
-
Page 9: Table Of Contents
CONTENTS Chapter 1: Your ....Lift of Features .......... Accessories ..........Fal_]i l'ari_:_]yTUl);s_IfB:vitthlY_)111" T7 "" :::::::::::::::::::::::::: Side Pand Jacks ........Remote Control ........Chapter 2: Installation ....VHF and UHF Connecting Antennas ......Antennas with 300-ohm Flat Twin Leads ....Antennas with 75-ohm Round Leads... - Page 10 CONTENTS Using A*Jtomatic So*md Settings ...... Chapter 3: Operation (Cont.} .... Setting the Clock ......... Option 1: Setting the Clock Manually ....Option 2: Setting the Clock Automatically ....Viewing an External Signal Source ......Setting the Signal Source ......Assigning Names to External input mode ....
-
Page 11: Chapter 1: Your New Tv
Your NEw TV List Features Your Samsung TV was designed with the latest technology This TV is a high-perfbrmance unit that inchldes the following special featllres: • Easy-to-llse remote control • Easy-to-use system oil-screen lrlei]ll • Automatic timer to turn the TV on and off •... - Page 12 Your NEw TV Familiarizing Yourself with Your Front Panel Buttons The buttons on the front panel control your TV_ basic fbatures, including the on-screen menu. To use the more advanced features, you must use the remote control. HCN529W HCN5529W MUTE VOL-, Press to increase or decrease the volume.
-
Page 13: Side Pand Jacks
Your Side Panel Jacks You can use the side panel.jacks to connect an A/V component that is used only occasionally, such as a camcorder or video game. (For information on connecting 17 - 25.) equipment, see pages PERFECT FOCUS Press to adjust for the optimum picture set in the Factory. VIDEO INPUT jack... - Page 14 Your NEw TV Rear Panel Jacks Use the rear panel jacks to connect an A/V component that will be connected continu- ously, such as a VCR or a DVD player. Because there are two sets of input.jacks, you can connect two different A!V components (i.e., a VCR and a DVD, 2 VCRs, etc.)
-
Page 15: Remote Control
See page fbr details. Power Mode Turnsthe TVon andoff. Selects a target device to be con- trolled bythe Samsung remote O ANTENNA control(i.e., TV,STB, VCR,Cable Press to select the ANT A or box or DVD). ANT B. PRE-CH Fay. - Page 16 Press the Play/Pausebutton to play back prerecorded tapes or pause the tape. Press to fast forward the tape in your VCR. Usedduring set up of this Samsung remote control, so that it will work compatibly with other devices (VCR,cable box, DVD.)
-
Page 17: Chapter 2: Installation
INSTALLATION Connecting Antennas If yollr antenna has a set of leads that look like this, see "Antennas with 300-ohm Flat Twin Leads," below. If yo_r antenna has one lead that looks like this, see "Antennas with 75-ohm Round Leads," on page If you have two antennas, see "Separate... -
Page 18: Antennas With 75-Ohm Round Leads
INSTALLATION Antennas with 75-ohm Round Leads Separate Antennas If yon have two separate antennas for yonr TV (one VHF and one UHF), yon mnst combine the two antenna signals before connecting the antennas to the TV This procednre reqnires a an optional combinei_adaptor (available... -
Page 19: All Channels
INSTALLATION Cable with a Cable that Descrambles Channels Eind the cable that is connected to the ANTENNA 0UTtermina! : on your cable box, This termina! might be abeled !' ANT OUI'I WHF OUT'!I OrSimply, "0UTI_i Connecting to a Cable that Descrambles Some Channels... - Page 20 INSTALLATION terminal on the A/B CableBox Switch switch. Connect another cable between the other OUT terminal on the splitter Incoming Cable and the A: IN termina[on Splitter RF (A/S) the RF(A!B) switch. Cable Box Switch ConnEct the !ast coaxial cable between the OUT terminal on the RF(AIB) Incoming switch...
- Page 21 INSTALLATION Connecting a VCR These instrllctions asslnne that have ah'eady connected yolu" TV to an antenna or a cable TV system (according to the instructions on pages 17 - 20). Skip step 1 if you have not yet connected to an antenna OI"...
-
Page 22: Connecting A Camcorder
INSTALLATION Connecting a Second to Record from Your TV can send out signals of its picture and sound to be recorded by a second VCR. To do this, connect your second VCR as follows: TV RearPanel a set of audio cables between Connect the AUDIO OUT acks on the TV and the AUDIO IN acks on the VCR. - Page 23 INSTALLATION Connecting a DVD Player or DTV Set-top (480i, 480p, 720p, 1080i) The rear panel jacks on your TV make it easy to connect player to your Connecting to V, PB,P_ TV Rear Panel Connect a set of audio cables between the DVD audio injacks on the TV and ........
- Page 24 INSTALLATION Connecting a DTV Set-Top Connecting to DVI (Digital Visual Interface) By inplltting a high-bandwidth Digital Content Protection high-definition pictl u'e sol u'ce to the DVI INPUT jack on the TV_ high-definition pictures can be displayed on the screen in their digital form. (This DVI INPUTjack is ft)r use in the flmue when D-VHS Nigh-bandwidth...
- Page 25 Be certain to remove the black cover from the optical output before inserting the Cable. If your system has both coaxiat and optica! digital audio !nputs, SAMSUNG recommends you use the optical digital ou!put on the TV. Do not connect both optical and coaxial...
-
Page 26: Installing Batleries In The Remote Control
INSTALLATION Installing Batteries in the Remote Control il ¸ :: Slide the back Cover all the way out to open the battery c0mpattment of the [em0te control. L_// Make sure to match the "+" and 2¸¸¸¸ (;: "-" ends of the batteries with Install two AAA size diagram... -
Page 27: Chapter 3: Operation
OPERATION Turning You can a!so use the P©WER button on the front panel Plug & Play Feature When the TV is initially powered On, basic customer settings proceed al]tomatically and sl]bsecp ]ently: Setting the langl]age, Antenna inpl]t check, Channel Memorize and Time Setting. - Page 28 OPERATION _91 To return to the previous step, move to "Return" ]-he TV will begin pressing the button and then memonzmg all of the press tile ENTER button. avatlable channels. After all the ava able To return to the next step, are storeu, the cnannels move to "Next"...
- Page 29 Perfbct Focus, then perform Perfect Foc:ls once again. • If you can't make adjustments after Perfect Focus, then make manual a@llstments. If you still can't make a@llstments, contact a Samsung authorized Service Center. • The Data to be controlled with Manual ac!juset won't be cared while the Perfect Focus are working.
- Page 30 OPERATION Adjusting Manual Convergence If" the coloi" at)peai's spread out or "smeared" on the screen, the convergence t)robably needs alignment. sure to use the remote control for the convergence adjustments. First steps: J Picture Mode : Dynamic Press the MENU button. See_;t :_ctll/;...
- Page 31 OPERATION AdJust Convergence A cresshair pattern will @pea[ O n the screen. After moving the cursor to the Jr]- -It- position you want to adjust using theA, 4, I% Y buttons onthe remote control' adjust Red Jr]- Jr]- roll - Jr]- Convergenc e by p[essmg the V0L / •...
-
Page 32: Viewing The Menus
OPERATION Viewing Menus On-Screen Displays Viewing Menus W_ththe Dower on, press the MENU button The"lnput menu appears on the screen. Its left side has six icons: Input, Picture. Sound Channel. Setup and Guide Press me • or • button to move tc items in the menu ime icons blink when nlghlighteoL... - Page 33 OPERATION Selecting a Menu Language Press the MENU button, Press the • button to select" Setup", then press the ENTERbutton, Press the • bur[on To select" Menu Language" then Dress the ENTER button Press the • button to select" Eng sh', then press the ENTERhuE[on, Press the EXIT button to exit...
-
Page 34: Memorizing The Channels
OPERATION Memorizing Channels Your TV can memorize store all of the available channels %r both "ofLair" (antenna) cable channels. After the available channels are memorized, rise the (;HA and CHV bnttons to scan throngh the channels. This eliminates the need for memo- to change channels... - Page 35 OPERATION ANT A : Air Select the antenna connection ANT A: Cable Press the • button to ANT A : Air, ANT B : Cable select antenna connection, then press tho ENTER ANT A : Cable, ANT B : Air Cable None button...
- Page 36 OPERATION Changing Channels Using Channel Buttons Pressthe CHA or CHV buttonto changechannes. When you press or CHv, tile TV changes channels in sequence. You will see all the chan- nels that the TV has memorized. (Tile TV must have memorized at least three channels.) You will not see channels...
-
Page 37: To View Your Favorite Channels
OPERATION Selecting Your Favorite Channels You can store of yollr favorite channels for each available int> it sollrc'e (sllc'h as CATV). Then, when you press the Fa>CH button on the remote control, the TV displays only the favorite channels you previously stored, allowing you to quickly and easily find frequently watched... - Page 38 OPERATION Adding Erasing Channels To add channels that were not memorized (or to delete unwanted channels fl'om memory): Use the number buttons tOdirect!y Select the Channel that wi!l be added or erased. Press the T button to select" Channel" ; then pEessthe ENTERbutten: 5e[e/;t A¢_teb _a : Ai...
-
Page 39: Customizing The Picture
OPERATION Picture Control You can use the on-screen menus to chan_e the contrast, brightness, tint, co]or, sharpness accordinf4 to personal preference. (Alternatively. can use one of the "automatic" settings. See next [)age.) Customizing Picture Press the MENU button. Press the • button to select Picture"... -
Page 40: Using Automatic Picmt> Settings
OPERATION Using Automatic Picture Settings Yt)I u" TV has three al ltomatic pictl u'e settings ("Dynamic ", "Standard", "Movie" "(;11store") that preset at the factory. You can activate either Dynamic, Standard oi" Movie by pressing RMode (or by making a selection fl'om the menu). -
Page 41: Selecting The Color Tone
OPERATION Selecting Color Tone I Picture Mode :Dynamic Press the MENU button. Cf toY_ #iotu Select I _tu e Siz Press the V buEon [c #N_e : Or/ select" Picture", then A/_u',t C n _er!}e_ce press the ENTER button PittU _ Mode : [ _!b_l//ic D'ess the •... -
Page 42: Sound Comml
OPERATION Sound Control AdJusting Volume Pressthe VOL+ or VOL÷ buttonsto increaseor decreasethe _olume. Using Mute At any time, you can tempoi'ai'ily cut off the sound using the Mute button. press the MUTE button aid the sound cuts off. Theword MUTE w appear in the Iower4eft corner of the screen. -
Page 43: Using A*Jtomatic So*Md Settings
OPERATION Press the b Or _ button to highlight a particular item to be change d. Press the A or V button to increase or decrease the Press the EXiT button to exit. Using Automatic Sound Settings Your TV has %ur automatic sound settings ("Standard",... -
Page 44: Setting The Clock
OPERATION Setting Clock Setting the clock is necessary to llse the vaI'iolls timer f_atlu'es of the T'V_ Also, OIT:leI" you can check the time while watching the TV_ (Just press Display) Option 1: Setting Clock Manually Press the MENU button. Press the •... -
Page 45: Option 2: Setting The Clock Automatically
OPERATION Option 2: Setting Clock Automatically The Clock can be set automatically if you are receiving a digital signal. Press the MENU button. Press me • button to select" SetuD". then Dress the ENTER buttor 02/10/2003/03:43 Press the ENTERbutton Time Setup Mode _ M;_ _al then press the •... -
Page 46: Viewing An External Signal Source
OPERATION Viewing External Signal Source Use the remote control to switch between viewing signals from connected ecp fipment, DVD, such as VCRs, Set-Top box and the TV source (broadcast or cable). Setting Signal Source Press the MENU button, Press the ENTER buEon [o select"... - Page 47 OPERATION Press the ME I Videol "q_ : ..Vde_ : ... Press the ENTER button to V _,: ... S fi4 ol ; ..S fk/_o2 : ..v More Press the ENTERbutton Press [ne • or • butto- to select external device : VCR 3VD, D-VHS,Cable STB 4D STB.
-
Page 48: Chapter 4: Special Features
SPECIAL FEATURES [Analoq---I Fine Tuning Analog Channels The Fine _lning function lets you manually ad.just the TV_ tuner if" you have difficulty tuning analog channels. Press the MENU Duuon. Press the • button [o select" Channel", then press the ENTER button Press the •... -
Page 49: Checking The Digital-Signal Strength
SPECIAL FEATURES Checking Digital-Signal Strength Unlike analog channels, which can vary in reception quality fl'om "snowy" to clear, digital (HDTV) channels have either perfect reception qllality or you will not receive them at all. So, unlike analog channels, cannot fine tune a digital channel. -
Page 50: Changing The Screen Size
SPECIAL FEATURES Changing Screen Size Quick way to change the Screen size: Simply press the "ASPECT" button on the remote control. Press the MENU button. Press the • button to select" Picture" then press the ENTERbutton. Press the • button 1o select"... -
Page 51: Dnie (Digital Natllral Image Engine)
SPECIAL FEATURES DNle (Digital Natural Image engine) Samsung' s New Technok)gy brings you more detailed images with contrast, white enhancement noise reduction. Quick way to select DNIe Simply press the "DNIe" button the remote control: Press the MENU button Press the V button to select"... -
Page 52: Viewing Pictllre-In-Pictllre
SPECIAL FEATURES Viewing Picture-in-Picture You can use the PIP feature to simultaneously watch two video sources. When PIP Note: is selected in the Zoom mode, the Mode is automatically converted to the Normal mode. Activating Picture-in-Picture -_1 Quick way to access the PIP menu: Simply press the "PIP"... -
Page 53: A/V) Pip
SPECIAL FEATURES Selecting a Signal Source (External A/V) You can use PIP to view a signal from an external source, such as a VCR. Press the MENU button. Press the Y button to select '! Picture" i then press the ENTERbutton. /i_:tu v Mode : Custo//_ Press the V button to... - Page 54 SPECIAL FEATURES Swapping Contents of the PIP Image Main Image Press the MENU button, I Picture Mode :Custom Press the T button to e ;t :% /e ge select !' Picture" i then press the ENTERbutto n. P_t_ Press the Y button to select"...
-
Page 55: Changing The Size Of The Pip Window
SPEOIAL FEATURES Changing Size of the PIP Window Press the MENU button. I Picture Mode :Dynamic / iStUr/} Mode : [: y_al//}_ Press the Y button to C_store P/:t //! select _PIP", then pres s Colo /_/lle :Co<l 1 the ENTERbutton. Se_e_ Picture Size D_k! ;... -
Page 56: Changing The Position Of The Pip
SPECIAL FEATURES Changing Position Press the • button to Select '_Position": then pres sthe ENTERbutt0 n. Press the A or • button to position the PIP screen where you want, then press the ENTERbutton. Press the EXIT button to exit. -
Page 57: Changing The Pip Channel
SPECIAL FEATURES Changing PIP Channel Quick way to access PIP CH: Simply press the (PIP) "CH AV" Press the MENU button. button on the remote control. Press the Y button to select '! Picture"; then press the ENTERbutton. /i/tu eMode : Custo/}_ Press the V button to C I_,tomP ct _//! -
Page 58: Extra Solmd Settings (Auto Volume. Bbe)
SPECIAL FEATURES Extra sound settings (Auto Volume, BBE) Auto Volume Each broadcasting station has its own signal conditions, which can make it necessary to at!just the volume every time the channel is changed. "Auto volume" lets you automatically at!just the volume of the desired channel by lowering... -
Page 59: Bbe
SPECIAL FEATURES BBE is a built-in efiect that adds clarity, punch and dynamics to the sollnd. Quick way to select BBE: Simply press the "BBE" button the remote control: Press the MENU button. Press the• button t o Select '_Sound!', then press the ENTER button. -
Page 60: (Mts)
SPECIAL FEATURES Choosing a Multi-Channel Sound (MTS) Soundtrack When a Digital Signal is received The digital-TV transmission system is capable of simllltaneolJs transmission many alldio tracks (for example, simllltaneolls translations of the program into foreign langllages). The availability of these additional "multitracks"... -
Page 61: When An Analog .)Ignal Is Received
SPECIAL FEATURES [Analo.q-I When an Analog Signal is received Depending on the particular program being broadcast, you can listen to Mono, Stereo or a Quick way to access the MTS menu: Just press the "MTS" button Press the MENU button: on the reinote control. -
Page 62: Setting The On/Off Timer
SPECIAL FEATURES Setting On/Off Timer Press the MENU button. Time /'4el 1_/9 :/ng_ish Press the • button to c_, i _n Select" Setup!', then press rv'_,r_u mr I__,r,cy _:1 _or_r_ the ENTERbutton. _: i_,_ _ll_ : off 02/10/2003/03:43 Press the ENTERbutton, then press the •... - Page 63 SPECIAL FEATURES Set on timer to select Antenna ! Air), then press the ENTERbuttonl Set on timer Press the • or • button to adjust" Channel", then press the ENTERbutton. Set on timer Press the • or • button to adjust !iVolume", then press the ENTERBUtton.
-
Page 64: Setting The Sleep_Timer
SPECIAL FEATURES Press the • or V button to adjust" Hour": PreSSthe ENIER button to move to the next step. Set other items using the same method as Liste d on When finished setting the timer, press the EX!T button to exit. Setting Sleep Timer... -
Page 65: Rating Control Mere
SPECIAL FEATURES Rating Control Menu Access to channels and programs is controlled by a password (i.e., a 4-digit secret code that is defined by the user).The on-screen menu will instruct you to assign a password (and you can change it later, if necessary). Change Your Password... -
Page 66: How To Set Up Kestrictionsusing The "Tvparental Guidelines
SPECIAL FEATURES Restrictions Using "'TV Parental Guidelines'" Parental restrictions can be set up using either of two methods: The TV guidelines the MPAA ratit'_g. [ Time Press the MENu button, Press the • button to select" getup", then press the ENTER buttor Press the •... -
Page 67: How To Set Up Restrictions Using The Movie Ratings
SPECIAL FEATURES Restrictions using Movie Ratings: PG-13, NC-17, (MPAA) The Movie rating system uses the Motion Picture Association of America system, its main application is f_)I"movies. When the Rating Controls is on, the TV will automatically block any programs that coded with objectionable... -
Page 68: Important Notes Abollt Parental Locks
SPECIAL ]FEATURES Important Notes About Parental Locks Explanation of the MPAA and TV (FCC) Rating Systems: TV (FCC) Age-Based Ratings TV-G TV-MA Genera[aumence. It contains little or no Mature audiences only. This program may violence, no strong language, ano tt[ueor no contain mature themes, profane language... -
Page 69: Viewing Closed Caption
SPECIAL FEATURES Viewing Closed Captions Setting Up Digital Captions (On-Screen Text Messages) The Digital Captions function operates on digital channels. Quick way to access captions menu: Siinply press tile "Calotion" Time Press the MENU button. button on tile remote control: Men_ Dmgua!}e : D_glish S_t R_t r/_] Io_t_o :_... - Page 70 SPECIAL FEATURES Press the • • button to selec[ me option/Service Size, Style, Foreground or Background) you wanr Service : This option consists of Service I - Service& The nefault is Service 1. Either rne reading level or the language may change depennmg on me ser_ ce option.
-
Page 71: Setting Up Analog Caption (On-Screen Text Messages)
SPECIAL FEATURES Viewing Closed Caption [Analoq--I Setting Up Analog Caption (On-Screen Text Messages) The Analog Caption function operates in either analog RF channel mode or external signal mode. (Det_ending on the broadcasting signal, the Analog Caption function operate on digital channels.) -',11 Quick way to access captions inenu:... -
Page 72: Menu Transh Mency Level
SPECIAL FEATURES Menu Translucency Level Adjusts the transparency of" the menu screen. Press the MENU button. Press the Y button to select" Setup!'; then press the ENTERbutton. ii2 ¸ : ¸¸ : : Press the Y button to Level", then p[ess the ENTERbutton. -
Page 73: Setting The F1U_Ction Hel T)
SPECIAL FEATURES Setting Function Help Displays help on the menu functions. I Time Press the MENU button. e_F_ Laz/gua()e : Ew#li_>h _t I#at r/_! Contro _i Press the y button to Captioll select _Setupi', then press R_l_tioI_ Hel_ _;i_ : OfT ENTER button. -
Page 74: Electronic Program Ollide
SPECIAL FEATURES Electronic Program Guide Your TV has an "Electronic Program Guide" to help you navigate through the possible viewing options. The EPG supplies information, such as t?i'ogi'am lists, start and end times of all available channels. EPG. In addition, detailed information about the t?i'ogi'am is often available... -
Page 75: Using The Electronic Program Guide
SPECIAL FEATURES Using Electronic Program Guide Press the MENU button. Press the Y button to select" Guide'!; then press ENTERbutton. 6o tq _v_ I/i _u_e Press the Y button to _}ot R w@lder lil select" Default Guide" [ Default Guide :Mini Guide ] then press th e ENTER button. -
Page 76: Viewing Information About A Single Channel
SPECIAL FEATURES Viewing Information about a Single Channel Press the MENU button. Press the • button to select" Guide" lhen press the ENTER buttor [ Go to Mini Guide Press the • button to select" Go to Mini Guide" men press the ENTER DUEOR, ENTER button: Presstile ENTER button to watch... -
Page 77: Viewing Information About Channels
SPECIAL FEATURES Viewing Information about Channels Displays the program time and content for all channels. This function is available only when the program is digital. Press the MENU button PresstheYbuttonto select" Guide".then press the ENTERbutton. Press the • button to Go to Full Guide select"Go to Full Guide' then press rne ENTER... -
Page 78: Reminder List
SPECIAL FEATURES Reminder List Reminded Viewing List [lave made a scheduled viewing list of programs you would like to see, the channel will be automatically switched to the scheduled program at the sched- uled time even if you are watching another program. -
Page 79: To View The Reminder List
SPECIAL FEATURES To view Reminder List First, select the channel you want to add to your ist, Press the ENTER button, Press the • button to select" Guide'. then Dress the ENTER put[on. Press the • button 1o [ Go to Reminder List select"... -
Page 80: Cllstomizing Yolu"Remote Control
SPECIAL FEATURES Customizing Your Remote Control Your TV comes equipped with a "universal" remote control. In addition controlling the TV] the universal remote can also operate most VCRs, DVDs and cable boxes (even if yolu" VCR, Cable box or DVD are made by mamlfactlu'ers other than Samsllng). -
Page 81: Settingup Yourremotecontrolto Operateyourcablebox
Press the "MODE" button to switch the relnote control to the "Cable" n-lode. On your Samsung remote control, press SET. Make sure you enter 3 digits of the code, even if the first digit is a Enter 3 digits of the cable box code listed bel0w i:0rYourbrand of "0."... - Page 82 Fisher, Radio Shack/Realistic, Sears,'foshiba Radio Shack/Realistic,Sylvania Emerson Bell & Howell, Fisher, JC Penney "li,knika Sbintom CL,Kenwood, Marantz, NEC, Quartz, Radio Shack/Realistic, Akai, Samsung Magnavox, Pbilco, Svlvania Sanvo, Sears, '[hndy Akai, Emerson Emerson Fisher Hitachi, JC Penney, Pentax, Pioneer, Shintom, Sony...
-
Page 83: Chapter 5: Troubleshooting
TROUBLESHOOTING If the TV seems to have a problem, first try this list of possible t)i'oblems and solutions. If none of these tro*lbleshooting tips apply, then call yo*lt" nearest service center. Identifying Problems Problem Possible Solution Poor pictlu'e. Try another channel. -
Page 84: Appendix
APPENDIX Cleaning Maintaining Your With pIoper care, your TV unit will give you many years of service. Please fi)llow these guidelines to get the maximum t_ei'fbi'mance fl'om your TV Placement • Do not place the TV near extremely hot, coM, humid or dusty places. - Page 85 £L£CTRON_CS SERVICE DI'_'ISION 400 Vallev Road. Suite 201 Mount Arlington, NJ 07856 TEL : 1-800-SAMSUNG (1-800-726-7864) VV_VW'. S arflsun gu s a. c o nl BP68-00137A-00...