Table of Contents
Advertisement
Quick Links
Advertisement
Table of Contents

Subscribe to Our Youtube Channel
Related Manuals for RCA CC6163


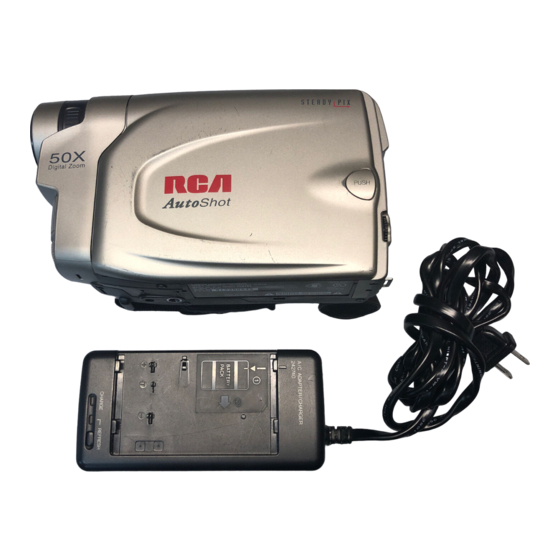
Summary of Contents for RCA CC6163
- Page 2 Important Safety Information Be sure to read all the safety information before you begin to use this product. camcorder or AC adapter/charger to rain or moisture. I WARNING: To reduce the risk of fire or shock hazaxd, do not expose This symbol indicates "dangerous...
-
Page 3: Table Of Contents
Wewant t omake sure youenjoy yournewcamcorder. If youhave any questions, call: Camcorder E xchange Warranty... 800-283-6503 (pages 77-78) Customer Service ........800-336-1900 (page 76) Accessories ..........800-338-0376 (pages 63-68) Assistance ........Recording ........Time-Remaining Display ....First-Time Operation ....Select a Tape Length ....Power Your Camcorder ..... - Page 4 Recording (Cont.) Optional Accessories ....White Balance ....... 38 Using the Optional AC088 Tripod .......... Auto White Balance ....38 Order Form for Camcorder Model Manual White Balance ....38 CC6163 ........Exposure Control ......40 Auto Exposure ......40 Trouble Checks ......
-
Page 5: Assistance
This section describes the steps necessary to set up your camcorder to record. Refer to the other sections for detailed operation and feature options. Assistance The toll-free numbers axe available to help you with any problem you may encounter. Camcorder Exchange Warranty ....800-283-6503 Customer Service ........ - Page 6 Attach the adapter/charger. ToAC100-240, 50/60 Hz Adapter/ Jack • Connect the other end of the DC Since the battery must be charged before it can be used the first time, cable to the DC in jack on the camcorder as shown above. attach the adapter/charger to the camcorder.
- Page 7 5. Insert a tape. Push here to EJECT Switch close cassette compartment. • Insert the cassette with the tape • Slide the EJECT switch. wheel facing up and the tape The cassette holder opens window facing out. automatically. • Press the button on the cassette •...
- Page 8 Set POWER (CAMERA MAN/CAMERA A UTO/OFF/VCR) switch to CAMERA A UTO. Switch and Indicator In the AutoShot 'rM mode, the • The power indicator lights and the camcorder enters record-pause. focus, exposure, and white _pAUSE _ appears in the balance are automatically viewfinder when the camcorder...
- Page 9 9. Select a tape length. MENU/DISPLAY Button Switch and Indicator Menu PUSH Dial (Rotate or Push In) 1. Set the POWER switch to CAMERA MAN. TAPE LENGTH 2. Press the MENU/DISPLAY button to display the menu in the viewfinder. EXIT TELE MACRO "Ok=l _ TAPE...
- Page 10 LENS COVER Control TALLY Light • • Button STOP Button licator PLAY/PA )WER Switch _umb Trigger • Press PLAY/PAUSE to play back 10. Start and stop recording. the tape. • Place the POWER switch in • Press STOP when you axe finished CAMERA AUTO.
- Page 11 14. Review camcorder operating controls. FADES Button P. (Program) AE Button SEARCH R and F Buttons (Also REW 4"q and FF I_, Buttons) STOP Button Menu PUSH Dial EJECT Switch Shoulder Strap Shoulder Strap Attachment Ring Attachment Ring SP/SLP Button MENU/DISPLAY Button Also COUNTER...
- Page 12 14. Review camcorder's operating controls (Continued) 5 SEC. REC Button Zoom Lever Button RELEASE Lever POWER Switch Service Port and Indicator (Located Under Cover) This connector is for use by qualified service personnel only. LENS Tally COVER Light Control Attach Adapter/ Charger's DC Cord (DC In Jack Located...
- Page 13 14. Review camcorder's operating controls (Continued) Eyepiece Focus Control Viewfinder Push here t_ close cassette door. Cassette Compartment Clock Cell Battery Compartment Threaded Tripod Mount Hole...
-
Page 14: Power Your Camcorder
Adapter/Charger The adapter/chaxger attaches to the camcorder and lets you power your camcorder directly from standard household power. The adapter/charger operates on 100-240 volts, 50/60 Hz, so it can be used virtually anywhere in the world to power the camcorder or recharge the battery. -
Page 15: Rechargeable Battery
Rechargeable Battery The battery must be charged as described on the next page before it can be used the first time. Initial charging takes approximately 70 minutes. When fully charged, battery supplies approximately 60-70 minutes of operating time - depending on how much you use zoom and pause. -
Page 16: Charge The Battery
Use the Battery to Power Your Camcorder (Continued) Hold Battery Flush ,Reference and Slide Marks To AC Wall Outlet 100- 240 Volts, 50/60 Hz. (Charge) REFRESH Adapter/Charger Indicator Button Charge the Battery If the DC cable is attached to the DC OUT 6. -
Page 17: Battery Level Indicator
Use the Battery to Power Your Camcorder (Continued) 4. After the battery is charged, the CHG Battery Care and Storage (charge) indicator stops flashing • Recharging takes approximately 70 lights. minutes for the battery depending on 5. Remove the battery from the adapter/ the battery's condition. -
Page 18: Optional Car Cord Adapter
Optional Car Cord Adapter The optional DCC08 car cord shown on page 63 allows you to power your camcorder from the cigarette lighter socket of a car, truck, or RV. It converts 12-volt to a 6-volt output. Note: Consult the installation and operating instructions enclosed with the DCC08 for complete operating instructions. -
Page 19: Date And Time Display
Install the Clock Lithium Cell The clock cell indicator _5 flashes for a few seconds in the viewfinder when you turn on the camcorder if the cell is not installed or needs replacing. /Insert Object Here Clock Cell to Remove Cell Holder Clock Cell (+ Side Facing Out) -
Page 20: Set The Date And Time
Set the Date and Time You must set the correct date and time before you can display and record it on your tapes. The clock cell must be installed as shown on the previous page before you can set the date. Menu (Rotate or Press In) Switch... - Page 21 Set the Date and Time (Continued) 4. Press the menu PUSH dial in to Press the menu PUSH dial in. When display the DATE/TIME menu. the hour stops flashing and the minutes start flashing, rotate the menu DATE/TIME PUSH dial to set the minutes. 2000 10.
-
Page 22: Record Auto Date, Date, Time, And Title Displays
Record AUTO DATE, Date, Time, and Title Displays You must install the clock cell and set the date and time (as shown on the previous pages) before the you can select and record the correct date and time. Menu PUSH Dial (Rotate or Press In) CAMERA MAN Select AUTO DATE, Date, Time, or Date and Time to Record on Your Tape... - Page 23 Record AUTO DATE, Date, Time, and Title Displays (Continued) Rotate the menu PUSH dial to • TIME: The time is displayed highlight the date/time display you recorded. want to record • DATE/TIME Display: • AUTO DATE: The date is auto- date and time are displayed matically recorded...
-
Page 24: Videocassettes
Make sure you select good quality tapes for your camcorder. Use of poor quality tapes or tapes that have been damaged or mishandled can contaminate the video heads, resulting in a snowy picture or no picture at all during playback. Because there is no control over the type of tape purchased... -
Page 25: Insert And Remove Cassettes
Insert and Remove Cassettes Tape Window Push here to SP/SLP Button close cassette Switch EJECT compartment. 1. Slide the EJECT switch. The cassette Before inserting a cassette, turn the tape wheel on the side of the cassette in the holder opens automatically. direction shown to remove any slack in 2. -
Page 26: Recording
Time-Remaining Display The approximate time remaining on the tape in the camcorder for the tape speed you select is displayed. You must set the correct tape length in the TAPE LENGTH feature of the menu before the camcorder can correctly calculate time remaining. - Page 27 Time-Remaining Display (Continued) --MIN (Calculating) -- Tape Length --MIN Indicator 29MIN Tape Speed 3MIN TAPE Indicator 2MIN (Flashing) Time-Remaining Display in Viewfinder ]NIN (Flashing) ONIN (Flashing) Rotate the menu PUSH dial to D. ZOOM highlight the type of tape you are TELE MACRO .,OFt using.
-
Page 28: Recording Tips
Recording Tips • Try to make sure indoor scenes axe camcorder to add variety to your well-lit. This improves picture quality recordings. and color reproduction. Be aware of video and audio back- Do not move the camcorder rapidly grounds. Background details barely from side-to-side while recording. -
Page 29: Use The Viewfinder To See What You Record
Use the Viewfinder to See What You Record The camcorder's viewfinder is a miniature monitor that displays the picture seen by the camcorder when recording. Eyepiece Focus Control -- 7 Viewfinder Adjust Viewfinder for Convenient Viewing For convenient viewing, rotate the viewfinder up or down. Eyepiece Focus Control The eyepiece focus control lets you set... -
Page 30: Viewfinder Displays
Viewfinder Displays Several displays appear in the viewfinder to aid in the operation of the camcorder. You can press and hold the MENU/DISPLAY button for more than one second to remove or display the battery level indicator, tape- length indicator, and tape-remaining display. - Page 31 Viewfinder Displays (Continued) balance selected in the MWB menu ° ._KSPORTS appears here. This indicator appears when you select • _O_ appears when you select • _K SPORTS to record fast-moving ]_:FINE to record outdoors on a action, such as sporting events.
- Page 32 Viewfinder Displays (Continued) 5MIN =,-EFFECT M 0:00:00 I-_] FADER LENS COVER TAPE END • _] FADER appears for black fade. Dew Warning ([]) • MOSAIC appears for mosaic fade. The dew indicator appears when exces- sive moisture (condensation) has entered •...
- Page 33 Viewfinder Displays (Continued) Tape Length (T30) • ,_, and ,,_, flash while you adjust manual focus and i_ and i_ flash The tape length (T20, T30, or T40) when you cannot adjust the focus selected in the TAPE LENGTH menu farther appears here.
-
Page 34: Autoshot
SEARCH 44 Button SEARCH F Button MENU/ Thumb DISPLAY Trigger Button POWER SP/SLP Switch Button Tally Light Microphone AutoShot Mode The POWER switch lets you select • The camcorder automatically automatic or manual control of several controls focus, exposure, and white features. -
Page 35: Five-Second Record Feature
Five-Second Record Feature Camera Edit Feature The five-second record feature allows you The camera edit feature allows you to to record for five seconds providing short position the tape when the camcorder is scene transitions. in record-pause. Set POWER switch to CAMERA AUTO or CAMERA MAN. -
Page 36: Zooming
Zooming You can zoom in and out for close ups or wide-angle shots just by moving the zoom lever on the camcorder. The camcorder automatically focuses when you zoom at most distances. Digital zooming allows you to zoom up to 50 times. To record a close-up of a small subject closer than three feet. -
Page 37: Tele Macro Zooming
Zooming (Continued) • Select ON to turn digital zooming 3. Press the menu PUSH dial in to display the D. ZOOM menu. • Select OFF to turn digital zooming D. ZOOM off. 5. Press the menu PUSH dial twice to turn digital zooming on or off and remove... -
Page 38: Focusing
Focusing The camcorder adjusts focus automatically under normal conditions. You might need to focus manually under certain conditions. Menu PUSH Dial (Rotate or Press In) POWER Switch CAMERA Auto Focus During auto focus the camcorder focuses patterns, or two subjects at different on the object located in the center area of distances overlapping. -
Page 39: Manual Focus
Focusing (Continued) Manual Focus 6. Adjust the focus for a subject nearer or farther away. You might need to focus manually under certain conditions. • Rotate the menu PUSH dial up to focus on a subject farther away. 1. Set the POWER switch to CAMERA flashes while you axe MAN. -
Page 40: White Balance
White Balance Making colors look natural is what white balance is all about. This is achieved adjusting the way the camcorder "sees" and records the light source in the scene you record. Your camcorder is equipped with automatic white balance. You might want to adjust white balance manually under certain conditions,... - Page 41 White Balance (Con_nue_ M.W.B. EXPOSURE AUTO M. W.B. AUTO :e::FINE 16 X 9 o:,_, :CLOUD TITLE DATE/TIME DISP. 'RETURN EXIT Rotate the menu PUSH dial to Note: Connecting your camcorder to a color TV monitor may be helpful highlight M. W. B. and press the dial when making white balance adjust- in to display the M.W.B.
-
Page 42: Exposure Control
Exposure Control The camcorder controls the iris for you when the POWER switch is set to CAMERA AUTO. The camcorder adjusts brightness automatically under normal conditions. might need to adjust brightness manually when the background is too bright or too dark in comparison with the subject. -
Page 43: Steady Pix Feature
Exposure Control Steady Pix Feature (Continued) The Steady Pix feature corrects slight EXPOSURE shaking of images during some recording AUTO modes. • While zooming in on a distant subject. • When recording an approaching small subject. EXIT • When recording while walking riding in a vehicle. -
Page 44: Fade Or Wipe In Or Out
Fade or Wipe In or Out You can add a professional touch to your recordings when you fade or wipe in and out of scenes. The picture gradually appears or disappears. The speed of the fade or wipe is controlled by the camcorder. FADES Button To Fade or Wipe In or Out... - Page 45 Fade or Wipe In or Out (Continued) Fade or Wipe In Fade or Wipe Out 1. Press the thumb trigger to pause 1. During recording, repeatedly press FADES to select a fade. recording. Note: The last fade used appears the first 2.
-
Page 46: Program) Ae Button
P. (Program) AE Button The P. (Program) AE button lets you select one of several different effects. Press the button to select the effect you want. The name and indicator for the effect appears briefly and then the indicator remains. P. -
Page 47: 16X9 Mode
16X9 Mode The camcorder has a wide recording mode that lets you make recordings compatible with the 16X9 format. When 16X9 is activated, the camcorder records black bars at the top and bottom of the picture to produce the wide- screen effect. -
Page 48: Preset Titles
Preset Titles The title feature lets you choose one of eight preset titles. You can also choose the language for your titles. Menu PUSH Dial (Rotate or Press In) 'POWER Switch CAMERA MENU/DISPLAY Button Select a Language for the Title You can select English, French, menu PUSH dial in to display the... -
Page 49: Record A Preset Title
Preset Titles (Continued) Record a Preset Title Rotate the menu PUSH dial down to 1. Set the POWER switch to CAMERA highlight the title you want to record, MAN. and press the dial twice to select the 2. Press the menu PUSH dial in to title and remove the menus. -
Page 50: Self-Timer Recording
Self-Timer Recording You can set the self-timer to delay recording so you can be in the scene when recording begins. Menu PUSH Dial (Rotate or Press In) POWER Switch CAMERA MENU/DISPLAY Button To Set the Self Timer 1. Set the POWER switch to CAMERA MAN. - Page 51 Self-Timer Recording (Continued) 3. Rotate the menu PUSH dial down to highlight INT. TIME and press the dial in to display the INT. TIME menu. INT. TIME __._ 15S 30 S 1 MIN 5 MIN 7. Press the thumb trigger to start recording.
-
Page 52: Animation Recording
Animation Recording You can produce an illusion of movement for an otherwise stationary scene or object by shooting a series of pictures of slightly different poses (such as cartooning). Menu PUSH Dial (Rotate or Press In) Switch CAMERA MENU/DISPLAY Button To Record Using Animation 1. - Page 53 Animation Recording (Continued) 4. Rotate the menu PUSH dial down to highlight REC TIME and press the dial in to display the REC TIME menu. /all 5S D. ZOOM TELE MACRO TAPE LENGTH TIME 8. Press the thumb trigger to start INT.
-
Page 54: Time-Lapse Recording
Time-Lapse Recording You can make automatic recordings at preset time intervals. The recording shows subtle changes (such as shifts in cloud formations or plant growth) when it remains focused on an object. Menu PUSH Dial (Rotate or Press In) 'POWER Switch CAMERA MENU/DISPLAY... - Page 55 Time-Lapse Recording (Continued) 8. Press the menu PUSH dial twice to • Select 15S to delay the recording exit the menus. for 15 seconds. and the amount of recording time • Select 30S to delay the recording for 30 seconds. _@ and the amount of interval time between...
-
Page 56: Tally Light (Turn On Or Off)
Tally Light (Turn On or Off) You can turn the tally light on or off using the menu. Tally Light Menu PUSH Dial (Rotate or Press In) POWER Switch CAMERA To Turn the Tally Light On or Off 1. Set the POWER switch to CAMERA TALLY LAMP MAN. -
Page 57: Demo Mode
Demo Mode You can turn on the DEMO mode in the MENU to have a demonstration of some of the camcorder's features. Menu PUSH Dial (Rotate or Press In) POWER Switch CAMERA To Turn the Demo Mode On 1. Set the POWER switch to CAMERA DEMO MAN. -
Page 58: Attach The Shoulder Strap
Attach the Shoulder Strap The camcorder's shoulder strap is designed to let you carry the camcorder from your shoulder and - when you are ready to shoot - bring the camcorder to shooting position in one quick movement. To Attach the Shoulder Strap Thread the end of the strap back 1. -
Page 59: Playback
Use the Viewfinder for Playback You can see tapes using the viewfinder. There is no sound during viewfinder playback. Eyepiece Focus Control Viewfinder (Rewind) 44 Button FF (Fast Forward) I_;, Button STOP Button PLAY/PAUSE Button EJECT Switch POWER Switch in VCR Play Tape Back... -
Page 60: Playback Features
Playback Features Viewfinder P.AE and FADES Buttons (Also Tracking REW (Rewind) • • Button FF (Fast Forward) l_, Button STOP Button PLAY/PAUSE Button EJECT Switch COUNTER RIM POWER Switch in VCR Position the Tape Set POWER switch to VCR and forward) ,I, button for more than two seconds. -
Page 61: Time Counter
Playback Features (Continued) Time Counter Tracking During playback, streaks may appear in The time-counter display shows the the playback picture. Press in both actual time elapsed when playing back a tracking buttons (P.AE and FADES segment of tape. The memory-stop buttons) to activate manual tracking. -
Page 62: Playback On Tv (Or Vcr) With Audio/Video Inputs
Playback on TV (or VCR) with Audio/Video Inputs To connect your camcorder to a TV monitor (or VCR) with audio/video inputs, use the included audio/video cable. If your TV is already connected to a VCR, attach the camcorder to the VCR and watch what the camcorder is recording playing on the TV. - Page 63 Playback on TV (or VCR) with Audio/Video Inputs (Continued) Playback Operation and How to Copy Tapes on the VCR 1. A. Camcorder connected directly to • During playback, use the playback TV: Turn on the TV and tune it to features on pages 58-59.
-
Page 64: Traveling Tips
Traveling Tips Make sure you have any plug adapters Write down your camcorder's serial that you might need before taking your number and keep it separate from the camcorder to other countries. Consult camcorder when traveling. If your your dealer for advice. camcorder is lost or stolen, you will be able to identify... -
Page 65: Optional Accessories
We invite you to take a look at some great ideas for sparking creativity and adding to the fun of using your compact VHS camcorder. The following pages have a selection of accessories to help make your memorable moments look and sound even better. These accessories axe designed to make the process of recording and watching your videos more enjoyable. - Page 66 FB1260 Rechargeable Battery CPS91 AC Battery Charger The CPS91 battery charger plugs directly into an AC outlet and charges the FB 1260 This rechargeable, 1-hour, nickel- and BB99L camcorder batteries. cadmium battery is designed specifically Because the CPS91 operates on 100-240 for long life.
-
Page 67: Using Theoptional Ac088 Tripod
Using theOptional AC088 Tripod Mounting the camcorder on a tripod, such as AC088, keeps the camcorder steady and produces excellent video results. This tripod's fluid-effect head provides smooth camera pan and tilt. The quick-release mount makes it easy to attach or remove the camcorder. - Page 68 To order accessories, contact your local Dealer. If a dealer is not nearby, you can also follow the directions below to order by telephone or direct-by-mail. United States and Canada Orders To place your order by phone, have your Visa, MasterCaxd, or Discover card ready and call the toll-free number listed below.
-
Page 69: Order Form For Camcorder Model Cc6163
Order Form for Camcorder Model CC6163 Total Part No. Price Qty. Description AC088 $ 49.95 Super Lightweight Tripod Soft Camcorder Case AC201A $ 34.95 ACS091 $ 12.95 Shoulder Strap AH25 2.95 Y-Adapter BB99L $ 77.60 Rechargeable Battery (Extended) CPS91 $ 59.95 AC Battery Charger DCC08 $ 89.95... - Page 70 Charge your order on your VISA,MasterCard, or Discover Card by falling in below YOUR CREDIT CARD IMPORTANT: Copy complete accotmt numberfrom your VISA card IIII 17-q-q-qT-7-1--qT-7-1--q E xp_a_ondato:7-l-q 7-l-q IMPORTANT: Copy complete account numberfrom your MasterCard I I I I II I I I II I I I II I I I I Copy Number above your name on MasterCard I I I I I Expiration date: _ [---]'--q...
-
Page 71: Trouble Checks
Troubles sometimes arecaused bysimple " faults" t hat y oucan easily correct without the help ofaservice t echnician byfirstchecking afewbasic r emedies. Before youcallortake yourcamcorder toanAuthorized RCA Camcorder Service Center, lookbelow forthe type oftrouble y ouareexperiencing. Then perform the simple c hecks and adjustments listed forthattrouble. - Page 72 Time-counter memory might be on. Whenever an "M" Tape stops during rewind or fast appears with the time-counter display, the camcorder forward stops rewinding (or fast forwarding) when counter reads M 0:00:00. Press REW I'I or FF ,, again to continue rewinding or fast forwarding, or press COUNTER RIM to turn off the memory-stop feature.
- Page 73 Error number (EO1, and then connect power source again. If error E02, etc.) appears viewfinder number does not disappear from viewfinder, consult your Authorized RCA Camcorder Service Center. Streaks in picture Adjust tracking with P.AE and FADES buttons. during playback page 59.
- Page 74 Bright, c rystal- • Sunlight isdirectly e ntering thelens. shaped spots i n viewfinder Rechargeable If battery has not been used for some time, completely battery r uns down drain the battery's power and recharge sooner than Battery run times are measured when the camcorder expected recording...
-
Page 75: Specifications
General Camera Section Power requirement: 6VDC Image sensor: 1/4" CCD imager Lens: F1.6, f=3.9 to 62.4mm Power consumption: 5.5 watts Weight: 1.6 lbs. (720g) 16:1 power zoom lens 50:1 digital zoom Filter diameter: 40.5 mm Dimensions - Including Viewfinder: 3-9/16" (W) x 4-11/16"... -
Page 76: Care And Maintenance
Clean the Camcorder To clean the camcorder's exterior, remove any power source connected to the camcorder and gently wipe it with a clean soft cloth. Clean the Camcorder's Lens To clean the camcorder's lens, blow it with a blower brush and gently wipe the lens with cleaning tissue and commercially prepared cleaning solution designed for use on camera lens. -
Page 77: Proper Care And Storage
Authorized RCA Camcorder Service Center. • Do not aim your camcorder at the sun or other bright objects. • Do not use an adapter/charger •... - Page 78 Thomson provides a toll-free telephone You can reach Thomson at the number to help you with any problems following number: may encounter with your camcorder. Many 800-283-6503 can be diagnosed over the phone, and if necessary, repair or replacement will be (Toll free inside U.S.A.) arranged.
-
Page 79: Limited Warranty
What your warranty covers: to our phone representative. This is for security purposes. If we receive your unit, • Any defect in materials or workmanship. excluding all accessories, within 14 days For how long after your purchase: from the date you were provided the RA number, only items not covered... - Page 80 To have your Camcorder repaired by an that vary from state to state. Authorized RCA Camcorder Service Center: If you purchased your camcorder outside the United States: •...
-
Page 81: Customer Assistance And Service
camcorder 16X9 recording 45 cassette 23 Fade and wipe indicators 5SEC. REC button Cassette 30, 42 10, 31, 33 care and storage 23 Fade/wipe feature 42, 43 inserting and removing 23 Fast forward indicator 29 Accessories tape wheel 23 FFbutton 8, 58 included warning 28... - Page 82 white balance 39 Record indicator 8 Pause, stop-action Record time indicators zoom level 29, 34 Play indicator Information to user 83 PLAY/PAUSE button Recording 8, 57, 58, 61 Inserting and removing time-lapse 52, 53 cassettes 23 Playback Recording, first 8 Interval time indicators first 8 Recording indicator...
-
Page 83: Information To User
Stop-action pause 5 8 Time counter Time-counter display Videocassettes TALLY LAMP menu 3 3 Time-lapse indicator 31, 53 Viewfinder 6, 11, 27 Tally l ight Time-lapse recording 52, 53 adjust for viewing Time-remaining display 8, 10,32,33,49,54 cautions 24, 25, 31 Tally light f eature 3 3,54 displays Tips... - Page 84 _ THOMSON CONSUMER ELECTRONICS 10330 N Meridian Street Indianapolis, 46290 @2000 Thomson Consumer Electronics, Inc. Trademark(s) @ Registered Marca(s) Registrada(s) Printed in Japan TOCOM 15555960 Part No. LYT0519-001A (VP)
Need help?
Do you have a question about the CC6163 and is the answer not in the manual?
Questions and answers