Table of Contents
Advertisement
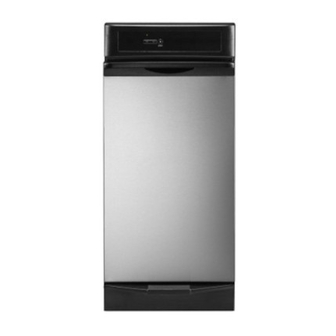
Kitchen_kid
®
COMPACTOR
For questions about features, operation/performance,
parts accessories or service, call: 1-800-422-1230
In Canada, call for assistance 1-800-461-5681,
for installation
and service, call: 1-800-807-6777
or visit our website at...
www.kitchenaid.com
or www.kitchenaid.com/canada
Table of Contents ...........................................................................................................
2
9871780A
Advertisement
Table of Contents

Related Manuals for KitchenAid KUCC151JSS0


Summary of Contents for KitchenAid KUCC151JSS0
- Page 1 Kitchen_kid ® COMPACTOR For questions about features, operation/performance, parts accessories or service, call: 1-800-422-1230 In Canada, call for assistance 1-800-461-5681, for installation and service, call: 1-800-807-6777 or visit our website at... www.kitchenaid.com or www.kitchenaid.com/canada Table of Contents ......................9871780A...
-
Page 2: Table Of Contents
TABLE OF CONTENTS COMPACTOR SAFETY ............. INSTALLATION INSTRUCTIONS ..........Unpacking ..................Location Requirements ..............Electrical Requirements ............... Freestanding and Undercounter Installation ....... 5 Changing the Decorative Panel ........... COMPACTOR USE ................. How Your Compactor Works ............Loading ..................Star_ing Your Compactor ............Using Solid (Locked) Cycle ............ -
Page 3: Compactor Safety
COMPACTOR SAFETY Your safety and the safety of others are very important. We have provided many important safety messages in this manual and on your appliance. Always read and obey all safety messages. This is the safety alert symbol. This symbol alerts you to potential hazards that can kill or hurt you and others. All safety messages will follow the safety alert symbol and either the word "DANGER"... -
Page 4: Installation Instructions
INSTALLATION INSTRUCTIONS Installer: Leave Use and Care Guide with the homeowner. Homeowner: Keep Use & Care Guide for future reference and for local electrical inspectoCs use, if required. Place the other two corner posts on the floor to the side of the compactor. - Page 5 Cutout dimensions (7.6 cm)_ Electrical Shock Hazard 34_h" min. (87 cm) Plug into a grounded 3 prong outlet. Do not remove ground prong. 18" min. 145.7 cm) Do not use an adapter. Failure to follow these instructions can result in 24"...
- Page 6 IMPORTANT: Tighten screw. Repeat for other rear wheel. • Do not grasp control panel to move compactor. • Slide compactor onto cardboard or hardboard before moving compactor across floor to prevent damaging floor covering. • Do not allow the rear frame of the compactor to touch the floor covering when lifting or moving compactor.
-
Page 7: Unpacking
Countertop mounting There are three options for changing the decorative panel: • Order an acrylic panel • Create a custom panel for use with a trim kit • Create a custom panel for installation without trim To order an acrylic panel or a trim kit, see the "Assistance Service"... - Page 8 Trimless panel with handle Trimless panel without handle Dimensions Dimensions Use these dimension drawings to create a custom panel for use Use these dimension drawings to create a custom panel for use without a trim kit. The panel should be 1/2in. to 5/8in. (13 mm to without a trim kit.
-
Page 9: Compactor Use
COMPACTOR USE The compacting ram is the part of the compactor which compresses the trash. The compacting ram does not go to the bottom of the drawer. You will not see compacting of trash the first few times you load the compactor. NOTE: The compactor drawer should be more than 1/2full before the compactor... - Page 10 • Load bottles o rcans ontheir s ides inthecenter ofthe drawer. Donotload bottles i nanupright position. The fan-powered Charcoal Air Filter absorbs and minimizes odor. The degree of odor in the compactor depends on the type of trash placed in it. The length of time before the filter needs to be replaced varies with the type of trash compacted.
-
Page 11: Installing A New Bag
Lift out bag. COMPACTOR CARE Your new compactor is designed to give you many years of dependable service. However, there are a few things you are expected to do in order to maintain your compactor properly. This section will tell you how to clean and care for your compactor. -
Page 12: Cleaning
3. Grasp the drawer on the sides and pull it out the rest of the Cleaning Inside the Drawer way. Set the drawer down gently. NOTE: You may want to wear protective gloves as there may be bits of glass in the drawer. 1. -
Page 13: Troubleshooting
TROUBLESHOOTING Try the solutions suggested here first in order to avoid the cost of an unnecessary service call. Trash is not compacting • Is the drawer less than half full? Drawer must be more than half full before trash is compacted. Your compactor won't operate •... -
Page 14: Assistance Or Service
Stainless Panel with Towel Bar Handle: For further assistance Order Part #9871802 (Brushed stainless steel) If you need further assistance, you can write to KitchenAid with any questions or concerns at: KitchenAid Brand Home Appliances Customer Interaction Center 553 Benson Road Benton Harbor, MI 49022-2692 Please include a daytime phone number in your correspondence. -
Page 16: In Canada
KitchenAid will pay for factory specified replacement par_s and repair labor costs to correct defects in materials or workmanship. Service must be provided by a KitchenAid designated service company.
Need help?
Do you have a question about the KUCC151JSS0 and is the answer not in the manual?
Questions and answers