
Related Manuals for Navman iCN 610


Summary of Contents for Navman iCN 610
-
Page 1: User Manual
iCN 600 series Smart 2005 with User Manual iCN 610 iCN 620 iCN 630 iCN 635 iCN 650 English - Europe / Australia / New Zealand... -
Page 3: Table Of Contents
iCN 600 series | User Manual Contents Box Contents ................5 1. Introduction ................7 2. iCN Features ................ 8 3. Positioning the iCN in a Vehicle ........... 10 4. Getting Started..............13 5. Memory Card ..............15 6. GPS Status ................. 16 7. - Page 4 iCN 600 series | User Manual...
-
Page 5: Box Contents
600 series | User Manual Thank you for purchasing this Navman iCN. We hope you enjoy your new GPS transferable navigation system. This User Manual will help you Drive-Away™ with your iCN, straight out of the box. Navman welcomes your feedback. To contact us or visit our website, see Support Information on page 87. - Page 6 iCN 600 series | User Manual...
-
Page 7: Introduction
• Do not use or handle the ICN when it is hot; leave it to cool, out of direct sunlight. Failure to adhere to these instructions may lead to serious personal injury, including death, or property damage. Navman disclaims all liability for use of the iCN that contributes to injuries, death, property damage or violates law. -
Page 8: Icn Features
iCN 600 series | User Manual 2. iCN Features We recommend that you familiarize yourself with the iCN’s basic operations, such as using the 8-way toggle and Volume button. Some buttons have two functions, and specific features vary between iCN models. Front Components Component Description... -
Page 9: Back Components
iCN 600 series | User Manual Back Components Component Description Broadcasts voice commands and warnings; Use Volume button Speaker to adjust Memory card may be inserted into slot with label facing the front of Memory Card Slot* the iCN. Receives signals from GPS satellites when lifted out to the GPS Receiver horizontal position External Antenna... -
Page 10: Positioning The Icn In A Vehicle
iCN 600 series | User Manual 3. Positioning the iCN in a Vehicle The iCN can be mounted in a vehicle two ways: 1. By suction on the windscreen; 2. By suction, adhesive tape and screws drilled directly into the dashboard. Note: This is a permanent solution and will mark your dashboard. - Page 11 iCN 600 series | User Manual Inserting the iCN into the Suction-Mount 3. Open the GPS antenna outwards, so that it has a clear view of the sky. 4. iCN 650 users, United States, Canada and New Zealand users go to step 5, otherwise continue: Gently insert the card in the Memory Card slot with the label facing the front of the iCN.
- Page 12 iCN 600 series | User Manual Adhesive Tape and Screw-Mount* You can use the baseplate, adhesive tape and screws supplied to permanently mount the iCN directly into the vehicle dashboard. Note: This is a permanent solution. Once fixed, the adhesive tape cannot be removed. *iCN 630, 635, 650 only Assembling the iCN Screw-Mount 1.
-
Page 13: Getting Started
iCN 600 series | User Manual 4. Getting Started The Main Menu screen provides access to all of the iCN’s functions, including navigating to a destination. Step One: Turn iCN On 1. Plug the power adapter into the socket on the left of the iCN and the other end into the 12 V vehicle power-socket. -
Page 14: Main Menu Screen
iCN 600 series | User Manual Step Three: Warning Screen 1. Read the warning message. 2. Select Accept, then press OK to confirm that you understand. The first Tutorial screen will display. Step Four: Tutorial Screens 1. Read the Tutorial screen. •... -
Page 15: Memory Card
To navigate in an area outside of the preactivated map, you must first purchase a Map Product Key from your Navman supplier. Install Smart Desktop, then use it to activate your Map Product Key and install the required map. For more information on installing maps, see page 73. -
Page 16: Gps Status
iCN 600 series | User Manual 6. GPS Status Signals are transmitted by Global Positioning System (GPS) satellites orbiting the Earth. You can view your GPS status at any time from the 2D Map, 3D Map*, Next Turn and Next 4 Turns screens. The GPS Strength Indicator will display green when there is a valid fix (2D or 3D), and between one and three bars will display to indicate the strength of the signal;... -
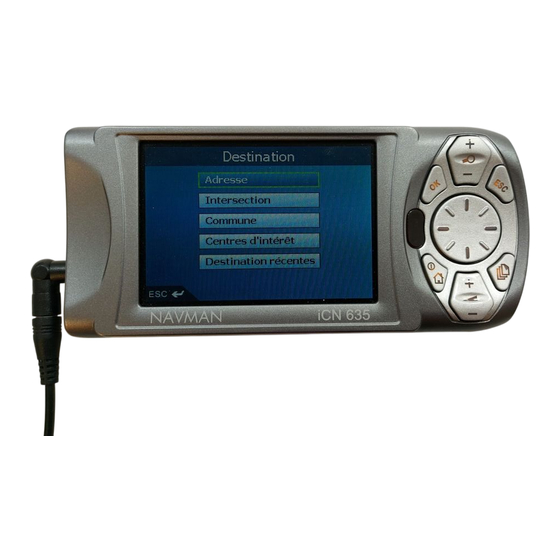
Page 17: Setting Your Destination
iCN 600 series | User Manual 7. Setting Your Destination For your safety, enter destination information before you start a journey. Do not operate the iCN while driving. Select a destination using the Destination, Keyboard and Preview screens, which used together form a destination wizard. -
Page 18: Preview Screen
iCN 600 series | User Manual Figure 3. Number/Symbol Keyboard As you select each character, the first two results will display. Press to see more search results. • Use the 8-way toggle to move around the Keyboard screen. • To select a character or a search result, press OK. •... -
Page 19: Address Search Rules
iCN 600 series | User Manual Address Search Rules The following rules apply when searching for a destination in Europe: Street Names with Dates If a street name contains a date or a number, search by the first number: Example 1: If searching for “Faubourg du 13 Juillet 1920”, search by “13”. Example 2: If searching for “Avenue du 14 Avril 1914”, search by “14”. -
Page 20: By Address - Europe And New Zealand
iCN 600 series | User Manual Setting Your Destination by Address - Case Study One: Europe and New Zealand This case study will show you how to set your destination by selecting your country, then area, then street, then house number. Note: This case study applies to Europe and New Zealand only. - Page 21 iCN 600 series | User Manual Step Three: Find the Area of Destination a. From the Destination screen, select Find area, then press OK. The Keyboard screen will display. b. Use the Keyboard screen to find the area of your destination. For information on using the Keyboard screen, see pages 17-18.
- Page 22 iCN 600 series | User Manual b. Use the Keyboard screen to find the street of your destination. For information on using the Keyboard screen, see pages 17-18. The Destination screen will display. Step Five: Find the House Number of Destination a.
- Page 23 iCN 600 series | User Manual b. Use the Keyboard screen to find the house number of your destination. For information on using the Keyboard screen, see pages 17-18. The Preview screen will display. c. Complete one of the following: •...
-
Page 24: By Address - Australia, Canada And Usa
iCN 600 series | User Manual Setting Your Destination by Address - Case Study Two: Australia, Canada & USA This case study will show you how to set your destination by selecting your country, then state, then town or city, then street, then house number. Note: This case study applies to Australia, Canada and USA only. - Page 25 iCN 600 series | User Manual Step Three: Select the State of Destination If you only have the map of one state installed and selected, that state is selected for your destination by default and cannot be changed. Go to Step Four: Find the Town or City of Destination.
- Page 26 iCN 600 series | User Manual Step Five: Find the Street of Destination a. From the Destination screen, select Find street, then press OK. The Keyboard screen will display. b. Use the Keyboard screen to find the street of your destination. For information on using the Keyboard screen, see pages17-18.
- Page 27 iCN 600 series | User Manual b. Use the Keyboard screen to find the house number of your destination. For information on using the Keyboard screen, see pages 17-18. The Preview screen will display. c. Complete one of the following: •...
-
Page 28: By Poi - Europe And New Zealand
iCN 600 series | User Manual Setting Your Destination by POI - Case Study One: Europe and New Zealand This case study will show you how to set your destination by selecting a Point of Interest (POI). A POI is a named site, feature, landmark or public venue which can be displayed as an icon on the map. - Page 29 iCN 600 series | User Manual Step Three: Select the Type of POI Note: To narrow the search for a type of POI, you can first search by Area. a. From the Destination screen, select Find Point of Interest, then press OK. The Select POI screen will display.
- Page 30 iCN 600 series | User Manual d. Complete one of the following: • To calculate the route and open the 3D Map screen*, select Go, then press OK. The 3D Map screen* will display. • To display the destination on the 2D Map screen, select the preview map, then press OK. The 2D Map screen will display.
-
Page 31: By Poi - Australia, Canada And Usa
iCN 600 series | User Manual Setting Your Destination by POI - Case Study Two: Australia, Canada & USA This case study will show you how to set your destination by selecting a Point of Interest (POI). A POI is a named site, feature, landmark or public venue which can be displayed as an icon on the map. - Page 32 iCN 600 series | User Manual Step Three: Select the State of Destination If you only have the map of one state installed and selected, that state is selected for your destination by default and cannot be changed. Go to Step Four: Select the Type of POI. a.
- Page 33 iCN 600 series | User Manual c. Use the Keyboard screen to find the POI. For information on using the Keyboard screen, see pages 17-18. The Preview screen will display. d. Complete one of the following: • To calculate the route and open the 3D Map screen*, select Go, then press OK. The 3D Map screen* will display.
-
Page 34: Using The 2D Map Screen To Plan A Route
iCN 600 series | User Manual 8. Using the 2D Map screen to Plan a Route You can plan a route directly from the 2D Map screen using the Pop-up menu. 1. From the Main Menu, select Map, then press OK. The 2D Map screen will display. -
Page 35: Multi-Stop Trips
iCN 600 series | User Manual 9. Multi-stop Trips You can use the Multi-stop Trip screen to set multiple destination points for your trip. Your route will be calculated to go via each of these points in the specified order. Destination points can be added via the Multi-stop Trip screen or by selecting Show Details from the pop-up menu on the 2D Map screen, then Add to Trip. - Page 36 iCN 600 series | User Manual c. Select Address or POI, then press OK. The Destination screen will open. Note: You can also add destination points using Favourites, recent destinations and nearest Point of Interest. Step Two: Select the Country of Your Destination Point If you only have the map of one country installed and selected, that country is selected for your destination point by default and cannot be changed.
- Page 37 iCN 600 series | User Manual Step Three: Find the Area of Your Destination Point a. From the Destination screen, select Find area, then press OK. The Keyboard screen will display. b. Use the Keyboard screen to find the area of your destination point. For information on using the Keyboard screen, see pages 17-18.
- Page 38 iCN 600 series | User Manual b. Use the Keyboard screen to find the street of your destination point. For information on using the Keyboard screen, see pages 17-18. The Destination screen will display. Step Five: Find the House Number of Your Destination Point a.
- Page 39 iCN 600 series | User Manual c. Select Add to Trip, then press OK. The Multi-stop Trip screen will display, listing your destination point. d. Complete one of the following: Note: Destination points added, updated or deleted after a multi-stop trip has commenced will not affect the current route.
-
Page 40: Australia, Canada And Usa
iCN 600 series | User Manual Case Study Two: Australia, Canada & USA This case study will show you how to set a multi-stop trip by selecting your country, then area, then street, then house number for each destination point. Note: This case study applies to Australia, Canada and USA only. - Page 41 iCN 600 series | User Manual Step Two: Select the Country of Your Destination Point If you only have the map of one country installed and selected, that country is selected for your destination point by default and cannot be changed. Go to Step Three: Select the State of Your Destination Point.
- Page 42 iCN 600 series | User Manual Step Four: Find the Town or City of Your Destination Point a. From the Destination screen, select Find town/city, then press OK. The Keyboard screen will display. b. Use the Keyboard screen to find the town or city of your destination. For information on using the Keyboard screen, see pages 17-18.
- Page 43 iCN 600 series | User Manual b. Use the Keyboard screen to find the street of your destination point. For information on using the Keyboard screen, see pages 17-18. The Destination screen will display. Step Six: Find the House Number of Your Destination Point a.
- Page 44 iCN 600 series | User Manual c. Select Add to Trip, then press OK. The Multi-stop Trip screen will display, listing your destination point. d. Complete one of the following: Note: Destination points added, updated or deleted after a multi-stop trip has commenced will not affect the current route.
-
Page 45: Skipping A Destination Point
iCN 600 series | User Manual Skipping a Destination Point You can modify a multi-stop trip at any time from the Multi-stop Trip screen, however if you have already commenced a trip, changes will not affect the current route: Main Menu > Multi-stop Trip To skip a destination point during a multi-stop trip, complete the following: 1. -
Page 46: Viewing Your Route
iCN 600 series | User Manual 10. Viewing your Route Once a route has been calculated, you can view it in several ways. Press to cycle through the screens 2D Map Screen The 2D Map screen is always oriented North and shows your current position (if a GPS fix is active) and surrounding street names. - Page 47 iCN 600 series | User Manual 3D Map Screen — iCN 630, 635, 650 only The 3D Map screen displays when a route is calculated, oriented to the travelling direction with an adjustable horizon. To view the 3D Map screen when a route has been calculated, press to cycle through the screens.
-
Page 48: Next Turn Screen
iCN 600 series | User Manual Next Turn Screen The Next Turn screen displays information that you need for the next turn, the direction of the turn and the distance to the turn. A route must have been calculated for this screen to be able to display. Access to this screen is controlled by the Settings - Display screen. -
Page 49: Route Information Screen
iCN 600 series | User Manual Route Information Screen The Route Information screen provides information about your current route and lets you skip a trip destination point or cancel a route. The screen is only available from the Main Menu when you are navigating a route: Main Menu >... -
Page 50: Cancel Route
iCN 600 series | User Manual Summary Select Summary, then press OK to display the Route Summary screen containing your From and To addresses, Estimated Time to arrival and the Distance remaining to your destination. If you are navigating a multiple destination trip, the information displayed will relate to your next destination point. -
Page 51: The 2D Map Screen Pop-Up Menu
iCN 600 series | User Manual 11. The 2D Map Screen Pop-up Menu The Pop-up menu allows you to access navigational functions from the 2D Map screen. To display the Pop-up menu complete the following: 1. From the Main Menu, select Map, then press OK. The 2D Map screen will display. -
Page 52: Avoiding An Area
iCN 600 series | User Manual 12. Avoiding an Area* You can calculate a route that avoids a specified area on the map. Up to ten Avoid Areas can be added. Avoid Areas are displayed as shaded areas. If no alternative route around an Avoid Area exists, you will be routed through an Avoid Area. -
Page 53: Route Demonstrator
iCN 600 series | User Manual 13. Route Demonstrator The Route Demonstrator allows you to: • Preview a route. • Plan and view a route without a GPS fix, such as when you are inside a building. Step One: Activate Route Demonstrator 1. - Page 54 iCN 600 series | User Manual To Disable Route Demonstrator 1. Press to display the Main Menu screen. 2. From the Main Menu screen, select Preferences, then press OK. 3. From the Preferences screen, select Routing, then press OK. The Routing screen will display. 4.
-
Page 55: Favourites & My Home
iCN 600 series | User Manual 14. Favourites & My Home You can save up to 200* destinations as Favourites, one of which can be saved as My Home. My Home can be any designated Favourite, but we recommend that it is your home or other common destination. You can save a Favourite from the Preview screen after searching for an address, or from the Pop-up Menu on the 2D Map screen. -
Page 56: Saving A Favourite From The 2D Map Screen
iCN 600 series | User Manual 4. Complete one of the following: • To save as a favourite, select Save as Favourite, then press OK. The Favourite is saved. The Go To screen will display. • To save as My Home, select Save as My Home, then press OK. The Favourite is saved as My Home. -
Page 57: Editing The Name Of The Favourite
iCN 600 series | User Manual 6. To change the name of the Favourite, select the Name box, then press OK. The Enter text screen will display. • Use the 8-way toggle to move around the Enter text screen. • To select a character, press OK. •... -
Page 58: Deleting A Favourite
iCN 600 series | User Manual 4. Select the Name box, then press OK. The Enter text screen will display. • Use the 8-way toggle to move around the Enter text screen. • To select a character, press OK. • To delete a character, press ESC; hold ESC to delete the line. •... -
Page 59: Navigating To A Favourite
iCN 600 series | User Manual 4. Select Delete, then press OK. A Warning dialogue box will display asking for confirmation to delete the Favourite. 5. Select Yes, then press OK. The Favourite is deleted. The Favourite screen will display. Navigating to a Favourite 1. -
Page 60: Preferences
iCN 600 series | User Manual 15. Preferences You can modify the following preferences to suit your needs. Screen Brightness 1. Press and hold the Zoom/Brightness button to display the Brightness scale. 2. To increase screen brightness, press + . To decrease screen brightness, press -. The Brightness scale comprises ten rectangular boxes in a row. - Page 61 iCN 600 series | User Manual If you want to... Then... change the Preference for motorways move the Preference for motorways slider towards Less often to use roads other than motorways where possible when calculating a route. move the slider towards More often to use motorways where possible when calculating a route.
- Page 62 600 series | User Manual If you want to... Then... enable Track Recording contact Navman Customer Support, (only to be used if required by Navman as we recommend this feature be used Customer Support) only under the supervision of a Navman technician.
- Page 63 iCN 600 series | User Manual Map Preferences — Display Settings 1. From the Main Menu, select Preferences, then press OK. 2. From the Preferences screen, select Maps, then press OK. 3. From the Maps screen, select the Display option. The first of two Display screens will display.
- Page 64 iCN 600 series | User Manual Map Preferences — Internal Memory 1. From the Main Menu, select Preferences, then press OK. 2. From the Preferences screen, select Maps, then press OK. 3. From the Maps screen, select Internal memory. The Maps - Internal memory screen will display. 4.
- Page 65 iCN 600 series | User Manual Map Preferences — Points of Interest (POIs) Points of Interest in a region are grouped into types. This function allows you to select the types you need. For example, you may be only interested in entertainment venues and want to disable other POI types such as schools.
- Page 66 iCN 600 series | User Manual Alerts Preferences — Active POIs The Active POI settings allow you to set warning chimes and visual warnings for custom POIs that will activate within a chosen distance-radius of your location. For example, a warning chime will sound or a visual warning will display when an active POI is within 150 ft, but not necessarily on your route.
- Page 67 iCN 600 series | User Manual Alerts Preferences - Speed and GPS Signals The Safety settings allow you to set safety-related warnings. 1. From the Preferences menu, select Safety Alerts, then press OK. The Safety Alerts screen will display. 2. On the Safety Alerts screen, select Safety, then press OK. The Safety screen will display.
- Page 68 iCN 600 series | User Manual My Data Preferences - My Points of Interest (My POI) Custom Points of Interest (POIs) are installed from the Smart Desktop POI Editor (see pages 77- 79), and listed on the My POIs screen. 1.
- Page 69 iCN 600 series | User Manual GPS Status Signals are transmitted by Global Positioning System (GPS) satellites orbiting the Earth. The Satellite Signal Strengths screen provides a visual representation of the information being received. Latitude and longitude are displayed, along with a north-pointing compass, the heading in degrees and ground speed.
- Page 70 iCN 600 series | User Manual 4. Complete the following: If you want to... Then... change the Position select either the Decimal degrees or the Degrees, format minutes, seconds option. change the local time select the offset from the Coordinated Universal Time (UTC) offset for your location from the Local time offset box using the lefthand and righthand buttons of the 8-way toggle.
-
Page 71: Smart Desktop
Smart Desktop will open. You are now ready to install maps on your iCN. To Open Smart Desktop Once Smart Desktop has been installed, you can access it from the Start menu: Start > Programs > Navman > Smart Desktop 2005 for iCN600 series Selected maps. Map Display screen... -
Page 72: Updating Your Icn
Uninstall: “Smart Desktop 2005 for iCN600 Series”. 17. Updating your iCN Updating your Version of Smart Update your iCN software to the most recent version of Smart by accessing the Navman website through Smart Desktop. To update your iCN, complete the following: 1. -
Page 73: Installing Maps Using Smart Desktop
• Enter your Map Product Key from the back of the CD box when prompted. • Your computer will connect to the Internet to activate your Map Product Key. • You will be prompted to enter or update your contact details, so that Navman can advise you when updates are released. -
Page 74: Continuous Continental Navigation
Install Basemap 1. Open Smart Desktop if it is not already open: Start > Programs > Navman > Smart Desktop 2005 for iCN600 series. 2. On the Map menu, click Basemaps. The Navman Basemap Installer window will open. - Page 75 The Main Menu screen will display. Remove Basemap 1. Open Smart Desktop if it is not already open: Start > Programs > Navman > Smart Desktop 2005 for iCN600 series. 2. On the Map menu, click Basemaps. The Navman Basemap Installer window will open.
-
Page 76: Smart Desktop Advanced Features
iCN 600 series | User Manual 20. Smart Desktop Advanced Features This section details advanced features of Smart Desktop. If you have not installed Smart Desktop, see page 71. To Find a City or Town 1. From the Map menu, click Find City. The Find City window will open. - Page 77 iCN 600 series | User Manual Map Layers To conserve space on your iCN and memory card, you can choose map layers to install. The layers you can choose from are: • Points of Interest (POIs) • Bodies of water and parks •...
- Page 78 iCN 600 series | User Manual 2. Add a POI to the POI File. • On the POI Editor window Edit menu, click New. The POI Details window will open. • Type a description for the POI in the Description box. •...
- Page 79 iCN 600 series | User Manual 3. Modify the POI settings as required: If you want to... Then... activate the POI select the Active check box. Note: If you do not activate the POI, you will be able to configure only the POI Visibility Level and Icon File settings.
- Page 80 iCN 600 series | User Manual Backups You can save backups of all iCN Preferences and Favourites to your computer. To Back up your Preferences, Favourites and My Home 1. On the Smart Desktop File menu, click Backup. The Backup window will display. 2.
-
Page 81: Accessories
iCN 600 series | User Manual 21. Accessories You can purchase almost all items that came with your iCN separately, including additional mounting- kits and in-vehicle power adaptors. The following accessories are also available for your iCN: MCX External Antenna Required for vehicles with heated windscreens or to boost GPS performance in weak signal areas and in areas with poor or limited visibility of the open sky. -
Page 82: Appendix: Street Types
iCN 600 series | User Manual Appendix: Street Types Note: Belgium and Switzerland each list street types and their abbreviations in three languages. Country Street Type Abbreviation Austria BOULEVARD CHAUSSEE PLATZ STRASSE BAAN Belgium (Dutch) BERG DREEF LAAN MARKT PARK PLEIN SQUARE STEENWEG... - Page 83 iCN 600 series | User Manual Country Street Type Abbreviation BOULEVARD Germany CHAUSSEE PLATZ STRASSE AVENUE Ireland BOULEVARD CENTRE CRESCENT PLACE ROAD ROUTE SQUARE STREET YARD Italy CONTRADA C.DA CORSO C.SO FRAZIONE LARGO PIAZZA P.ZA PIAZZALE P.LE STRADA STATALE SUPERSTRADA VIALE Luxembourg ALLÉE...
- Page 84 iCN 600 series | User Manual Country Street Type Abbreviation GATA Norway GATE PLASSEN VEGEN Portugal AVENIDA BAIRRO CALÇADA CAMINHO ESTRADA LARGO LARGUINHO LARG PRAÇA QUARTO QUARTA QUINTA SÃO SANTA SANTO Spain AVENIDA CALLE CALLEJÓN CAMINO CARRETERA GLORIETA PASEO PLAZA RAMBLA RBLA RONDA...
-
Page 85: Support Information
NAVMAN DISCLAIM ALL LIABILITY FOR ANY USE OF THIS PRODUCT IN A WAY THAT MAY CAUSE ACCIDENTS, DAMAGE OR VIOLATE THE LAW. Compliance This device complies with part 15 of the FCC Rules. Operation is subject to the following two conditions: (1) This device may not cause harmful interference, and (2) this device must accept any interference received, including interference that may cause undesired operation. - Page 86 iCN 600 series | User Manual Notes...
- Page 88 MN000330A...
Need help?
Do you have a question about the iCN 610 and is the answer not in the manual?
Questions and answers