Table of Contents
Advertisement
Quick Links
/Modem MS350}
PART NO. 906068 - 05-30-02
Copyright © 2002 Delta Machinery
iiiiiiiiiiiiiiiiiiiiiiiiiiiiiiiiiiiiiiiiiiiiiiiiiiiiiiiiiiiiiiiiiiiiiiiiiiiiiiiiiiiiiiiiiiiiiiiiiiiiiiiiiiiiiiiiiiiiiiiiiiiiiiiiiiiiiiiiiiiiiiiiiiiiiiiiiiiiiiiiiiiiiiiiiiiiiiiiiiiiiiiiiiiiiiiiiiiiiiiiiiiiiiiiiiiiiiiiiiiiiiiiiiiiiiiiiiiiiiiiiiiiiiiiiiiiiiiiiiiiiiiiiiiiiiiiiiiiiiiiiiiiiiiiiiiiiiiiiiiiiiiiiiiiiiiiiiiiiiiiiiiiiiiiiiiiiiiiiiiiiiiiiiiiiiiiiiiiiiiiiiiiiiiiiiiiiiiiiiiiiiiiiiiiiiiiiiiiiiiiiiiiiiiiiiiiiiiiiiiiiiiiiiiiiiiiiiiiiiiiiiiiiiiiiiiiiii
iiiiiiiiiiiiiiiiiiiiiiiiiiiiiiiiiiiiiiiiiiiiiiiiiiiiiiiiiiiiiiiiiiiiiiiiiiiiiiiiiiiiiiiiiiiiiiiiiiiiiiiiiiiiiiiiiiiiiiiiiiiiiiiiiiiiiiiiiiiiiiiiiiiiiiiiiiiiiiiiiiiiiiiiiiiiiiiiiiiiiiiiiiiiiiiiiiiiiiiiiiiiiiiiiiiiiiiiiiiiiiiiiiiiiiiiiiiiiiiiiiiiiiiiiiiiiiiiiiiiiiiiiiiiiiiiiiiiiiiiiiiiiiiiiiiiiiiiiiiiiiiiiiiiiiiiiiiiiiiiiiiiiiiiiiiiiiiiiiiii
__________________________________________________________________________________________________________________________________________________________________________________________________________________________
lllllllllllllllllllllllllllllllllllllllllllllllllllllllllllllllllllllllllllllllllllllllllllllllllllllllllllllllllllllllllllllllllllllllllllllllllllllllllllllllllllllllllllllllllllllllllllllllllllllllllllllllllllllllllllllllllllllllllllllllllllllllllllllllllllllllllllllllllllllllllllllllllllllllllllllllllllllllllllllllllllllllllllllllllllll
Advertisement
Table of Contents

Related Manuals for Delta ShopMaster MS350


Summary of Contents for Delta ShopMaster MS350
- Page 1 /Modem MS350} PART NO. 906068 - 05-30-02 Copyright © 2002 Delta Machinery iiiiiiiiiiiiiiiiiiiiiiiiiiiiiiiiiiiiiiiiiiiiiiiiiiiiiiiiiiiiiiiiiiiiiiiiiiiiiiiiiiiiiiiiiiiiiiiiiiiiiiiiiiiiiiiiiiiiiiiiiiiiiiiiiiiiiiiiiiiiiiiiiiiiiiiiiiiiiiiiiiiiiiiiiiiiiiiiiiiiiiiiiiiiiiiiiiiiiiiiiiiiiiiiiiiiiiiiiiiiiiiiiiiiiiiiiiiiiiiiiiiiiiiiiiiiiiiiiiiiiiiiiiiiiiiiiiiiiiiiiiiiiiiiiiiiiiiiiiiiiiiiiiiiiiiiiiiiiiiiiiiiiiiiiiiiiiiiiiiiiiiiiiiiiiiiiiiiiiiiiiiiiiiiiiiiiiiiiiiiiiiiiiiiiiiiiiiiiiiiiiiiiiiiiiiiiiiiiiiiiiiiiiiiiiiiiiiiiiiiiiiiiiiiiiiiiiii iiiiiiiiiiiiiiiiiiiiiiiiiiiiiiiiiiiiiiiiiiiiiiiiiiiiiiiiiiiiiiiiiiiiiiiiiiiiiiiiiiiiiiiiiiiiiiiiiiiiiiiiiiiiiiiiiiiiiiiiiiiiiiiiiiiiiiiiiiiiiiiiiiiiiiiiiiiiiiiiiiiiiiiiiiiiiiiiiiiiiiiiiiiiiiiiiiiiiiiiiiiiiiiiiiiiiiiiiiiiiiiiiiiiiiiiiiiiiiiiiiiiiiiiiiiiiiiiiiiiiiiiiiiiiiiiiiiiiiiiiiiiiiiiiiiiiiiiiiiiiiiiiiiiiiiiiiiiiiiiiiiiiiiiiiiiiiiiiiiiii ___________________________________________________________________________________________________________________________________________________________________________________________________________________________ llllllllllllllllllllllllllllllllllllllllllllllllllllllllllllllllllllllllllllllllllllllllllllllllllllllllllllllllllllllllllllllllllllllllllllllllllllllllllllllllllllllllllllllllllllllllllllllllllllllllllllllllllllllllllllllllllllllllllllllllllllllllllllllllllllllllllllllllllllllllllllllllllllllllllllllllllllllllllllllllllllllllllllllllllllll...
-
Page 2: General Safety Rules
Your personal safety is your responsibility. This machine was designed for certain applications only. Delta Machinery strongly recommends that this machine be modified and/or used for any application other than that for which it was designed. If you have any questions... -
Page 3: Safety Rules For Miter Saws
ADDITIONAL SAFETY RULES FOR MITER SAWS WARNING: FAILURE TO FOLLOW THESE RULES MAY RESULT IN SERIOUS PERSONAL INJURY. MAKE SURE blade is not contacting workpiece DO NOT OPERATE THIS MACHINE UNTIL it is before switch is turned on. assembled installed according instructions. -
Page 4: Power Connections
POWER CONNECTIONS A separate electrical circuit should be used for your machines. This circuit should not be less than #12 wire and should be protected with a 20 Amp time lag fuse. If an extension cord is used, use only 3-wire extension cords which have 3- prong grounding type plugs and matching receptacle which will accept the machine's plug. -
Page 5: Extension Cords
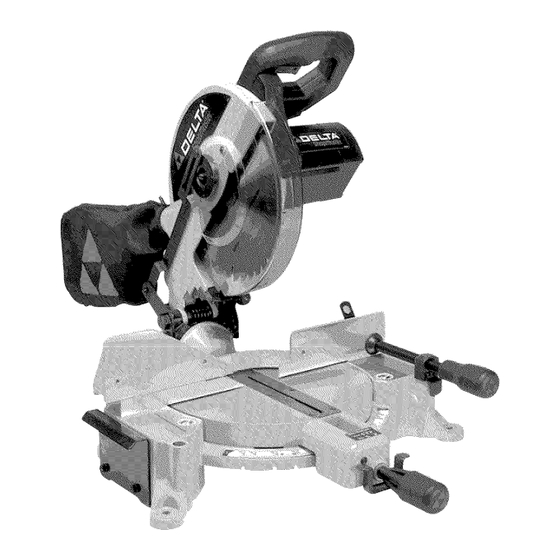
Fig. C NG INSTR Delta Model MS350 is a 10" Compound Power Miter Saw designed to cut wood, plastic, and aluminum. Compound angle and bevel cutting are easy and accurate. It can crosscut up to 5-3/4" x 2-3/8"at the 90 degree position, miter at 45 degrees, both left and right 4-1/8"... - Page 6 CARTON CONTENTS Remove the miter saw and all loose items from the carton. IMPORTANT: CARRYING THE MACHINE THE SWITCH HANDLE WILL CAUSE MISALIGNMENT. ALWAYS LIFT THE MACHINE BY THE BASE OR BY THE CARRYING HANDLE (See Fig. 29C). Fig. 2 illustrates the machine and all loose items after they have been removed from the carton.
-
Page 7: Fastening Machine To Supporting Surface
Fig. 5 Fig. 6 MOVING CUTTINGHEAD TO THE UP POSITION Push down on switch handle (A) Fig. 5 and pull out cuttinghead lock knob (B). Move the cuttinghead (C) to the up position (Fig. 6). ATTACHING DUST BAG Attach dust bag (A)Fig. 7 to the dust spout (B) making sure the wire ring (C) is engaged between the ridges in the spout. -
Page 8: Operating Controls And Adjustments
OPERATING CONTROLS AND ADJUSTMENTS TABLE HAZARD AREA WARNING: The area inside the two red lines (A) Fig. 9 on the table is designated as a hazard zone. Never place your hands inside this area while the tool is being operated. Fig. -
Page 9: Rotating Table For Miter Cutting
ROTATING TABLE FOR MITER CUTTING Your miter saw wiii cut any angle from a straight 90 degree cut to 47 degrees right and left. Loosen iock handle (A) Fig. 13 one or two turns, depress index lever (B), and move the table to the desired angle. -
Page 10: Locking Cuttinghead In The Down Position
LOCKING CUTTINGHEAD IN THE DOWN POSITION When transporting the saw, the cuttinghead should always be locked in the down position. Lower the cuttinghead (A) Fig. 17, and push in cuttinghead lock knob (B) until it engages with hole in cuttinghead. IMPORTANT: CARRYING THE MACHINE BY THE SWlTCH HANDLE WILL CAUSE... -
Page 11: Adjusting Sliding Fence
ADJUSTING SLIDING FENCE The sliding fence (A) Fig. 21 B provides support of extra large workpieces and should be set as close as possible to the saw blade. When miter cutting (blade set 90 degrees to the table and at an angle to the right or left), set the fence all the way toward the blade (Fig. -
Page 12: Adjusting Tension Of Cuttinghead Return Spring
4. If an adjustment is necessary, pushin Hock handHe (D)Fig24,andturncounter-clockwise. Loosen Hockknob (B)Fig.24,andusea 3mmhexwrench toturnscrew(C) unfiH bHade i s 90degrees tothetable.Tighten Hockknob (B). Fig.24 5. Raise cuttinghead. Pushin andturnHock h andHe counter-clockwise to Hoosen. 6. Movethe cuttinghead a H the wayto theHeft beveH p osition andtightenHock h andHe. 7. -
Page 13: Typical Operations And Helpful Hints
TYPICAL OPERATIONS AND HELPFUL HINTS Before cutting, make certain the cuttinghead table are at their correct settings and firmly locked in place. Place the workpiece on the table and hold or clamp it firmly against the fence. Fig. 28 illustrates the supplied work clamp (A). -
Page 14: Side Supports
SIDE SUPPORTS This machine has two side supports to (1) help stabilize the machine, and (2) to help support long or wide workpieces. The supports are located on either side of the table. The machine comes with the supports pushed in (Fig. 29D). To utilize the supports, pull them out to their full length (Fig. -
Page 15: Cutting Aluminum
Fig.30E Fig. 30F BLADE CUTTING ALUMINUM FENCE Aluminum extrusions such as used for making aluminum screens and storm windows can easily be cut with your compound miter saw. When cutting aluminum RIGHT extrusions, or other sections that can be cut with a saw blade and are within the capacity of the machine,... -
Page 16: Cutting Crown Moulding
CUTTING CROWN MOULDING One of the many features of your saw is the ease of cutting crown moulding.The following is an example of cutting both inside and outside corners on 52/38 degree wall angle crown moulding. NOTE: When cutting 45 degree wall angle crown moulding, the following procedure for inside and outside... -
Page 17: Maintenance
MAINTENANCE CHANGING THE BLADE WARNING: USE ONLY CROSS-CUTTING BLADES. WHEN USING CARBIDE TIPPED BLADES, DO NOT USE BLADES WITH DEEP GULLETS AS THEY CAN DEFLECT AND CONTACT THE GUARD. USE ONLY 10" DIAMETER SAW BLADES WHICH ARE RATED FOR 5200 RPM OR HIGHER AND HAVE 5/8" DIAMETER ARBOR HOLES. -
Page 18: Brush Inspection And Replacement
BRUSH INSPECTION AND REPLACEMENT Brush life varies. It depends on the load on the motor. Check the brushes after the first 50 hours of use for a new machine or after a new set of brushes has been installed. After the first check, examine them after about 10 hours of use until such time that replacement necessary. - Page 19 NOTES...
- Page 20 Parts and accessories for Porter-Cable .Delta products should be obtained by contacting any Porter-Cable.Delta Distributor, Authorized Service Center,or Porter-Cable.Delta Factory Service Center. If you do not have access to any of these, call 800-223-7278 and you will be directed to the nearest Porter-Cable.Delta Factory Service Center. Las Estaciones de Servicio Autorizadas estan ubicadas en muchas grandes ciudades.
Need help?
Do you have a question about the ShopMaster MS350 and is the answer not in the manual?
Questions and answers