Table of Contents
Advertisement
FW:FiLm
DIGITAL CAMERA
FINEPIX AX500 Series
Owner's
Manual
Thank
you
for
your
purchase
of this product.
This manual
describes
how
to
use
your
FUJIFILM digital camera and the
supplied
software.
Be sure that
you have read and understood
its contents
and the warnings
in
"ForYour Safet.y"(_
ii) before us-
ing the camera.
For information
on related products,
visit our website
at
http://www.fujifilm.com/procJucts/cJigito/
comeros/index.html
BLO1671-200r_I
Before YouBegin
FirstSteps
Basic Photography andPlayback
Moreon Photography
MoreonPlayback
Movies
Connections
Menus
Technical Notes
Troubleshooting
Appendix
.....
_°
_ ...........
W_ndow_
ExifPdnt _
Pi,tB,idgo
_ ....
Advertisement
Table of Contents

Related Manuals for FujiFilm FINEPIX AX500 Series


Summary of Contents for FujiFilm FINEPIX AX500 Series
- Page 1 Basic Photography andPlayback Moreon Photography Thank your purchase of this product. This manual describes your MoreonPlayback FUJIFILM digital camera and the supplied software. Be sure that Movies you have read and understood its contents and the warnings Connections "ForYour Safet.y"(_ ii) before us- ing the camera.
-
Page 2: Important Safety Instructions
For Your Safety IMPORTANT SAFETY INSTRUCTIONS • Readlnstructions: All the safety and operat Alternate Warnings; This video product Power-Cord Protection: Power supply cords ing instructions should be read before equipped with a three wire grounding type should be routed so that they are not likely appliance is operated. - Page 3 mally fellow the operating instructions. Ad iust only those controls that are covered by Outdoor Antenna Grounding: If an outside Cleaning: Unplug this video product from the the operating instructions as an improper antenna or cable system is connected to the wall outlet before cleaning...
- Page 4 If the I C_g_|_,, ' result if the information is ignored cord is damaged, contact your FUJIFILM dealer The icons shown below are used to indicate the nature of the instruc Donotplacethecameraonanunstablesurface.
- Page 5 i, ii ii!ii !ii!ii!ii! Donot leave this camera in olacessuhiea toextreme& hiah temDer- thecamera such as sealed atures, Do not leave locations batteries can cause the battery to leak fluid, overheat or burst vehicle or in direct sunlight This can cause a fire When carryinq the battery, install it in a diqital camera or keep it KeepoutofthereachofsmaRchlldren.
- Page 6 • Charging the Battery • Cautions: Handling the Battery The Battery and Power Supply Charge the battery in the supplied battery • Donottransport or storewith metal objects Note: Ch'_ used charger. Charging times will increase at am such as necklaces or hairpins your camera...
- Page 7 Use only FUJIFILM AC power adapters desig •If t he camera will not be u sed Br a n e xtend periods of disuse, or if they are repeatedly...
- Page 8 15 European countries and China FUJIFILM Corporation can not accept liability minutes and then seek medical assistance for dalrages or lost profits incurred as a result • If liquid...
-
Page 9: About Thismanual
_About This Manual Before using the camera, read this manual and the warnings in "For Your Safe- ty"(_ ii). For information on specific topics, consult the sources below. "Table of Contents" gives an overview of the entire manual. The ::: p rincipal camera operations are list- ed here. - Page 10 _quently-Used Buttons -I_ When the camera is -I_ To return instantly to shooting mode, off, playback can be press the shutter button halfway. started by pressing button for about a Shoot second. • Deleting Pictures -I_ Press and hold the DISP/ Press the selector up (_) BACK button to disable...
-
Page 11: Table Of Contents
_Table of Contents ForYourSafety ..............More on Photography iMPORTANT SAFETY iNSTRUCTiONS ........ii Shooting Mode..............Safety Notes ..............Choosing a ShootingMode ..........18 About ThisManual ............ShootingModeOptions..........19 Frequently-Used Buttons ..........x PANORAMA ............FocusLock................ Before You Begin ExposureCompensation .......... 26 Symbolsand Conventions . - Page 12 Movies Menus RecordingMovies............Usingthe Menus: Shooting Mode........55 Viewing Movies............... Usingthe ShootingMenu..........55 ShootingMenu Options..........55 Connections SHOOTING MODE ............ ViewingPictureson TV........... 43 ISO ................ Printing Picturesvia USB ..........44 IMAGE SIZE ............Printing the DPOF Print Order ......... 46 IMAGE QUALITY .............
- Page 13 Usingthe Menus: PlaybackMode ........60 The SetupMenu .............. Usingthe Playback Menu..........60 Using the SetupMenu............ 65 Playback MenuOptions..........SetupMenu Options............66 PHOTOBOOK A SSBT ..........60 %TE/T%E ............. TIME DIFFERENCE ........... 66 [] IMAGE SEARCH ............_/LANG ............66 [] ERASE ..............
- Page 14 bbeofCo_e_s Technical Notes Troubleshooting Problems and Solutions ..........OptionalAccessories ............Printing ................ Warning Messages and Displays........83 Computer Related ............Appendix Audio/Visual ..............Tips and Tricks..............Accessories f rom FUJI FILM ..........75 Memory CardCapacity............ Caringfor the Camera ............. AXS50 AX590 .
-
Page 15: Symbolsand Conventions
_ymbols and Conventions The following symbols are used in this manual: (D :This information should be read before use to ensure correct operation. _, :Additional information that may be helpful when using the camera. Other pages in this manual on which related information may be found. -
Page 16: Parts Of The Camera
Parts of the Camera For more information, refer to the page listed to the right of each item ......,'°° Selectorbutton Move cursorup (exposure c ompensation) button (26) (delete)button Move cursorleft Move cursorright (macro)button (27) ,_ (flash)button (28) I Move cursordown 0 (self-timer)button :30) Illustrations... - Page 17 _Shutter button.............. 16 _ (playback)button........... 17 ONIOFF button ............. 11 _ USB multi-connector......... 43, 44, 52 Flash ................28 _Strapeyelet ..............Self-timerlamp ............30 _ Battery-chambercover ........... 6 Lensand lenscover Tripodmount Microphone ..............40 _ Speaker ................. LCD monitor..............Memorycardslot............7 DISP(display)/BACK button ........
-
Page 18: Camera Displays
CameraDispl__ay_ The following types of indicator may be displayed during shooting and play- back. Indicators vary with camera settings. • Shooting d?d? ??--t ? _Focuswarning ............16, 83 Numberof availableframes .......... 90 Sensitivity ..............55 Imagesizellmagequality ........56,57 FINEPIX c olor ..............White balance ............... -
Page 19: Playback
_:_ :_ < 3 ! :¸ _ ¸_ _ _ ¸¸4 _, • Playback Playback modeindicator.......... 17, 32 IntelligentFace Detectionindicator......3 1 Silentmodeindicator..........3, 66 I_ 4:3N Gift image ..............32 Frame number.............. 68 Markfor uploadto ............61 Photobook assist ............37 Favorites . -
Page 20: Inserting The Batteries And A Memory Card
_lnsertinq the Batteries and a Memory Card Insert the batteries and memory card asdescribed below. 1 Open the battery-chamber cover. Be sure the camera is off before opening the battery<ha mber cover. (!} Do not open tile battery<hamber cover when tile camera is on. Failureto observe this precaution could result in damage to image files or memory cards. - Page 21 in_'ting d _e _ tt_'de_ and aMemo_7 Ci_r(i 3 Insert the memory card. Holding the memory card in the ori- entation shown at right, slide it in until it clicks into place at the back of the slot. (!) Besure card is in the correct orientation; do not insert at an angle or use force.
- Page 22 ®_ Removingthe MemoryCard :::Before removing the memory card, turn the camera offand open the battery-cham- ::her c over. ::i T o remove the memory card, press it in and release it slowly. ::i T he card can then be removed by hand. When a memory card is removed, the card could come out of the slot too quickly.
-
Page 23: • Compatible M Emorycards
9 q_e _tt_'_ies and a Memo_7 C_xi • Compatible M emoryCards FUJIFILM and SanDisk SD and SDHC memory cards have been approved for use in the camera. A complete list of approved memory cards is available at h_tp://www.fujifilm.com/support/digit_l_c_mer_s/compo_ibility/. Operation not guaranteed with other cards. - Page 24 • Movie recording may be interru pted with some types of SD/SDHCmemory card. Use a a,Ass@ card or better when shooting HD movies. • Formatting a memory card in the camera creates a folder in which pictures are stored. Do not rename or delete this folder or use a computer or other device to edit, delete, or rename image files.
-
Page 25: Turning The Cameraon And Off
_Turning the Camera on and Off ShootingMode Play.back M ode Pressthe ON/OFF button to turn the To turn the camera on and begin camera on. The lens will extend and playback, press the [] button about a second. the lens cover will open. Pressthe [] button again or press PressON/OFF again to turn the camera... - Page 26 C, **e_o (l:>Forcibly obstructing the lens could cause damage or product malfunction. (l:>Fingerprints and other markson tile lens carl affect pictures. Keep tile lens clean. (l:>The ON/OFF button does not completely end tile supply of power to the camera. AutoPower O ff The camera will turn off automatically if no operations are performed for the length of time selected for I'_tl A UTO POWEROFF (_ 69).
-
Page 27: Basicsetup
Basic Setup A language-selection dialog is displayed the first time the camera is turned on. Set up the camera as described below (you can reset the clock or change languages at any time using the [] DATE/TIME or [] _/LANG, options in the setup menu;for information on displaying the setup menu, see page 65). - Page 28 Pictures in _r_ (Scene Recognition) Mode This section describes how to take pictures in _ (scene recognition) mode. The camera automatically analyzes the composition and adjusts settings ap- propriately. 1 Turn the camera on, Press the ON/OFFbutton to turn the camera on. 8R shooting indicators will be displayed.
- Page 29 2 Frame the picture. Use the zoom buttons to frame the picture in the display. Zoom Zoom Hold the camera steady with both hands and brace your elbows against your sides. Shaking or unsteady hands carl blur your shots. To prevent pictures that are out of focus or too dark (under- exposed), keep your fingers and other ob]ects away from tile lens and flash.
- Page 30 X_kir_{_i_>k:_x_s in _ (Scene i:_lecoclr_ition _,__ 3 Focus. Press the shutter button halfway to focus. _, Tile lens may make a noise when the camera focuses; this is normal. If the cameraisableto focus,it will beep twice. Ifthe cameraisunableto focus,the focus frame will turn red, !AF will be dis- played.
-
Page 31: Viewing Pictures
_Viewing Pictures Pictures can be viewed in the LCD monitor. When taking important photo- graphs, take a test shot and check the results. 1 Press the [] button, The most recent picture will be displayed. 2 View additional pictures, Press the selector right to view pictures in the or- der recorded, left to view pictures in reverse order. -
Page 32: Shooting Mode
_Shootinq Mode Choose a shooting mode according to the scene or type of subject. Choosin.g aShooting M ode 1 PressMENU/OK to display the shooting menu. 2 Highlight [] SHOOTING MODE and pressthe se- lector right to display shooting mode options. 3 Highlight the desired mode and press MENU/0K 4 Press DISP/BACK t o exit to shooting mode. -
Page 33: Shootingmodeoptions
Shooting ModeOptions Scene Description The camera automatically analyzes the composition and selects a scene SCENE RECOGNITION according to shooting conditions and tile type of subject. Choose for crisp, clear snapshots. This mode is recommended in most I_1 AUTO situations. P PROGRAMAE Options for white balance and AF mode will be fully available and expo-... - Page 34 Scene Description Choose for crisp, clear shots that capture tile brightness of scenes domi- _l_ SNOW nated by shining white snow. A_ BEACH Choose for crisp, clear shots that capture the brightness of sunlit beaches. _" PARTY Capture indoor background lighting under Iowqight conditions.
-
Page 35: Panorama
Si_ootin 9 Mode • _ PANORAMA In this mode, you can take up to three pictures and join them together to form a panorama. Use of a tripod is recommended to assist in composing overlap- ping shots. The camera zooms all the way out and zoom remains fixed at the widest angle until shooting is complete. - Page 36 5 Take the last shot as described in Step 4. _, To end shooting and create a panorama after the first or second shot, pressthe multi selector up after completing Step 3 or Step4 and proceed to Step 6. 6 Press MENU/OK to save the picture. (l>...
- Page 37 _booti_'_ Mode i: @_ Fram ng Panoramas Manually Follow tile steps below if the desired results achieved with _AUTO for [] PANORAMA MODE: 1Select_ MANUAL for [] PANORAMA MODE in the shooting menu. 2 Select a frame and take the first shot. 3 Press MENU/OKto display a guide showing an edge of the picture you have just taken.
-
Page 38: _Focus Lock
_Focus Lock To compose photographs with off-center subjects: 1 Focus:Position the subject in the focus frame (E[+]_) and press the shutter button halfway to lock focus and exposure. Focus and exposure will remain locked while the shutter button is pressed halfway (AF/AE loci<). - Page 39 I- 0 C_,_S i,,,OC _< Although the camera boasts a high-precision autofocus system, it may be unable to focus or] the subjects listed below. If the camera is unable to focus, focus or] another subject at tile same distance and use focus lock to recompose the photograph.
-
Page 40: [] Exposurecompensation
Exposure Compensation To adjust exposure compensation when photo- graphing very bright, very dark, or high-contrast sub- jects, press the selector up ([]). Press the selector up or down to choose an exposure compensation value and then press MENWOK Choose positive (+) values to increase exposure °[ Choose negative () values... -
Page 41: Macromode(Close-Ups)
_ Macro Mode (Close-ups) For close-ups, press the selector left (_) and select _. When macro mode is in effect, the camera focus- es on subjects near the center of the frame. Use the zoom buttons to compose pictures (_ 15). -
Page 42: Using The Flash(Intelligent Flash)
the Flash (Intelligent Flash) When the flash is used, the camera's Intelligent Flash system instantly analyzes the scene based on such factors as the brightness of the subject, its position in the frame, and its distance from the camera. Flash output and sensitivity are adjusted to ensure that the main subject is correctly exposed while pre- serving the effects of ambient background... - Page 43 Usi_gtime H_sh(i_tdii_e_t Fibrosis} _, Ifthe flash will fire, [] will be displayed when the shutter button is pressedhalfway. At slow shutter speeds, t"" will appear in the display to warn that pictures may be blurred; use of a tripod is recommended. _, Flashis charging if [] blinks in yellow.
-
Page 44: <0 Using The Self-Timer
<0 Using the Self-Timer To use the self-timer, press the selector down (_) and choose from the following options: Option Description (OFF) Self-timer off. The shutter is released ten seconds after the shutter button is pressed. Use for d_ (lOSE() self-portraits. -
Page 45: [] Intelligent Facedetection
Intelligent Face Detection Intelligent Face Detection sets focus and exposure for human faces anywhere in the frame, preventing the camera from focusing on the background group portraits. Choose for shots that emphasize portrait subjects. To use Intelligent Face Detection, press MENU/OK to display the shooting menu and select ON for FACE DETECTION. -
Page 46: More On Playback Playbackoptions
_yback Options Toview the most recent picture in the LCDmonitor, press the [] button. Press the selector right to view pictures in the order recorded, left to view pictures in reverse order. Keep the selector pressed to scroll rapidly to the desired frame. -
Page 47: Playback Zoom
i>iavi:)a(:i< Optior_s Playback Zoom Press T to zoom in on pictures displayed in single-frame playback; press W to zoom out. When the picture is zoomed in, the selector can be used to view areas of the image not currently visible in the display. Zoom indicotor Novigotion window shows... -
Page 48: Multi-Frameplayback
Pay>a_:kOp_o Multi-FramePlayback Pressing W when a picture is shown full-frame in the LCD monitor displays the current image with previous and following images in the background. Press W to increase the number of images displayed to two, nine, or one hundred, T to view fewer images. -
Page 49: [] Deletingpictures
[] Deletinq Pictures To delete individual pictures, multiple selected pictures, or all pictures, press MENU/OK, select ERASE (_ 60), and choose from the options below. Note that deleted pictures can not be re- covered. Copy important pictures to a computer or other storage device be- fore proceeding. -
Page 50: Image Search
Image Search Searchfor pictures. I Select [] IMAGE SEARCH in the playback menu (_ 60), highlight one of the following search criteria, and press MENU/OK: • BYDATE: Search by date. • BYFACE: Search for faces from the face recognition database. •... -
Page 51: [] Photobook Assist
[] PhotoBook Assist Create books from your favorite photos. Creatin.ga PhotoBook 1 Select NEW BOOK for [] PHOTOBOOK ASSIST in the playback menu 60) and choose from the following options: • SELECT FROM ALL:Choose from all available pictures. • SELECT B YIMAGE SEARCH: Choose from pictures matching selected search conditions 36). -
Page 52: Viewingphotobooks
>_oloBook Assist ViewinqPhotobooks Highlight a book in the photobook assist menu and press MENU/OK to display the book, then press the selector left or right to scroll through the pictures. Editing.andDeleting.Photobooks Display the photobook and press MENU/OKThe following options will be dis- played;... -
Page 53: Viewingpanoramas
_Viewing Panoramas If you press the selector down when a panorama is displayed full frame, the camera will play back the picture from left to right. To pause playback, press the selector down; press the selector down again to resume. To delete the panorama, press the selector up (_) when playback is paused. -
Page 54: Recordingmovies
Recording Movies Shoot short movies with sound. During recording, @ REC and the time remaining will be displayed in the LCD moni- tor and sound will be recorded via the built-in microphone (be careful not to cover the microphone during recording). Press MENU/OKto display the shooting menu and select _._ MOVIE for SHOOTING MODE (_... - Page 55 g boy _,,s Before recording, select a frame size using tile EIMOVIE MODE option in tile shooting men u. Select _ 1280 (1280x 720) for an aspect ratio of 16:9 (High Deft- nition), _ (640x480) to record standard definition movies, or _ (320x240) for longer movies.
-
Page 56: Viewing Movies
_Viewing. Movies During playback, movies are displayed in the LCD monitor as shown at right. The following operations can be per- formed while a movie is displayed: Option Description Start/pause Pressthe selector down to start playback. Press again playback :]ause. End playback/ Pressthe selector up to end playback. -
Page 57: Viewingpictureson Tv
_Viewing Pictures on TV Connect the camera to a TVto show pictures to a group. 1 Turn the camera offand connect an optional A/V cable as shown below. Connect ye//ow p/ug to videoqnjock Insert into Connect white plug to USB multi-connector oudioqn jock (l) When corlrlecting cables, be surethe connectors are fully inserted. -
Page 58: Printing Picturesvia Usb
_Printing Pictures via USB If the printer supports PictBridge, the camera can be connected _j" directly to the printer as shown below and pictures can be printed without first being copied to a computer. Note that depending on PictBfidge the printer, not all the functions described below may be supported. 1 Connect the supplied USBcable asshown and turn the printer on. - Page 59 :> g Pctt_" sv;_tiC' 6 Press MI_NU/OK to start printing. Printing can be interrupted by pressing DISP/BACK, but note that some printers may not respond immediately. If the printer stops before printing is complete, turn the camera off and then on again.
-
Page 60: Printing The Dpof Print Order
Printinq.theDPOF PrintOrder The [] PRINT ORDER (DPOF) option in the playback menu can be used to create a digital "print order"for PictBridge-compatible printers (_ 74) or de- vices that support DPOR I Select playback mode and press MENU/OK to display the playback menu. 2 Highlight PRINT ORDER (DPOF) and press MENU/OK. - Page 61 g :'ct esvatiSB 5 Press the selector up or down to choose the number of copies (up to gg). To remove a picture from the print order, press the selector down until the number of copies is zero. 6 Repeat Steps 4-5 to complete the print order and press MENU/OIlwhen settings are complete.
-
Page 62: Viewing Pictureson A Computer
_Viewing Pictures on a Computer The supplied software can be used to copy pictures to a computer, where they can be stored, viewed, organized, and printed. Before proceeding, install the software as described below. Do NOT connect the camera to the computer until installation is complete. - Page 63 V _ Agi_h_ i::_i_: tL_*_!_ O_h _i!_ C,'OiT_i!L_t_!_ _ 3 Exit any applications that may be running and insert the installer CD in a CD-ROM drive. The installer will start automatically; click Install MyFinePix Studio and follow the on-screen instructions to install MyFinePix Studio.
-
Page 64: Macintosh:installing Finepixviewer
Macintosh: I nstallin.gFinePixViewer 1 Confirm that the computer meets the following system requirements: PowerPC or Intel Pre-installed copies of Mac OS X version 10.3.9 10.6. Mac OS X 10.7 is not supported. (visit http://www.fujifi/m.com/support/digito/comeros/ compotibility/for more information) 256MB or more A minimum of 200MB required for installation... - Page 65 (; Pet _eso a(o_@ 4 Remove the installer CD from the CD-ROM drive. Note that you may be unable to remove the CD if Safari is running; if necessary, quit Safari before removing the CD. Store the installer CD in a dry location out of direct sun- light in case you need to re-install the software.
-
Page 66: Connecting The Camera
V,'w g :'ct_eso :_Cot_pt_ Connectin.g. the Camera 1 If the pictures you wish to copy are stored on a memory card, insert the card into the camera. _, Windows users may require tile Windows CD when starting tile software for the first time. - Page 67 Formore information on using thesupplied s oftware, start t heapplication and select theappropriate option from theHelpmenu. (l_Ifamemory card c orltairling alarge n umber ofimages isinserted, there may bea delay b efore thesoftware starts and you may beunable toimport orsave i mages. Use a memory card reader totransfer pictures.
- Page 68 V _;_ w "{7 i>i_i1_l_!_ o_h _i_(ilxi_hh_t_ ®_ Unnsta ngtheSuppedSoftware ::i O nly uninstall tile supplied software when it is no longer required or before begin- ::i n ing reinstallation. After quitting the software and disconnecting the camera, drag the "FinePixViewer"folder from "Applications"into the Trashand select EmptyTrash in the Finder menu (Macintosh), or open the control panel and use "Programs and ::i F eatures"(Windows 7/Windows Vista)or"Add or Remove Programs"(Windows XP)to...
-
Page 69: Usingthe Menus: Shooting Mode
the Menus: Shootinq Mode Using.the Shooting.Menu To display the shooting menu, press MENU/OKin shooting mode. Highlight items and press the selec- tor right to view options, then highlight an option and press MENU/OK Press DISP/BACK t o exit when set- tings are complete. -
Page 70: [] Image Size
Choose the image size a nd aspect ratio a twhich p ictures are record- I_14:3 ed. L arge pictures can be printed atlarge sizes with no drop i nquality, ,_-_'T' while s mall pictures require less memory, allowing more pictures tobe Size_--Aspect rotio... -
Page 71: Image Quality
g(_e _s:S_oo gMod_: Choose how much image files are compressed. Option Description FINE Low compression. Select for higher image quality. NORMAL High compression. Select this option to store more pictures. Enhance contrast and color saturation or take pictures in black and white. Option Description 1_ STANDARD... -
Page 72: [] White Balance
Using ti_e M en_,_: Si_ooting Mode For natural colors, choose asetting that matches the light source. Option Description AUTO White balance adjusted automatically. -;÷:- For subjects in direct sunlight. _'.',_ For subjects in the shade. Use under"dayJight"fluorescent lights. Use under"warm white"fluorescent lights. -
Page 73: [] Face D Etection
t_s ,gt_e L4e_ s: S_o<t gMod_; Choose whether the camera automatically detects and sets focus and exposure for human por- trait subjects (31). This option controls how the camera selects the focus area. Regardless of the option selected, the camera will focus on the subject in the center of the LCD monitor when macro mode is on. -
Page 74: Usingthe Menus: Playbackmode
the Menus: Playback Mode Usingthe Playback Menu To display the playback menu, press MENU/OK in play- back mode. Highlight items and press the selector right to view options, then highlight an option and press MENU/OK Press DISP/BACK t o exit when settings are complete. - Page 75 Using d_e _ n_,_s_ _iayb_:k Mode Select pictures for u pload toYouTube or Facebook using MyFinePix Studio (Windows only). • Selecting Picturesfor Upload 1 Select YouTube to choose movies for upload toYouTube, FACEBOOK to choose photos and movies for upload to Facebook. 2 Press the selector left or right to display pictures and press MENU/OK to select or deselect.
- Page 76 tis gth_L4e_<_ 'ayi_;_ck_4ode View p ictures inan automated slide show. Choose the type o fshow and press MENU/OKto start. Press DISP/BACK at any time during the show to view on-screen help. The show can be ended at any time by pressing MENU/OK Option Description NORMAL...
- Page 77 (_efSe_ s, y ba_:ki£oSe _RR@_EeT Protect pictures from accidental deletion. 1 Select [] PROTECT in the playback menu. 2 Highlight one of the following options and press MENU/OK: • FRAME:Protect selected pictures. Press the selector left or right to view pictures and press MENU/OK to select or deselect.
-
Page 78: Image Rotate Print O Rder ( Dpof)
_e_'7:e_ _;y: ckfSode Create a small copy of the current picture. 1 Display the desired picture. 2 Select[] RESIZE in the playback menu. 3 Highlighta sizeand pressMENU/OK to displaya confirmationdialog. 4 Press MENU/OKto save the resized copy to a separate file. _, The sizes available vary with the size of the original image. -
Page 79: _The Setup Menu
_The Setup Menu Usingthe Setup. Menu 1 Display the setup menu. 1.1 Press MENU/OK to display the menu for the cur- rent mode. 1.2 Press the selector left to highlight the tab for the current menu. 1.3 Press the selector down to highlight "_ SET. -
Page 80: Setupmenu Options
The Set _ i p _ e r_u SetupMenu Options Setthe camera clock (13). Switch the camera clock instantly from your home time zone to the local time at your destina- tion when traveling. To specify the difference between local time and your home time zone: 1 Highlight -_ LOCAL and press the selector right. -
Page 81: Reset
T_eSet: pM_ctt _ Reset all settings except [] DATEITIME, [] TIME DIFFERENCE,I:_ BACKGROUND COLOR, VIDEO SYSTEM,and [] BATTERYTYPEto default values. 1 Highlight [] RESETand press the selector right to display a confirmation dialog. 2 Highlight OK and press MENU/0K This option will format the memory card. -
Page 82: Frame No
Ti_e t_,etu_a i_emi New pictures are stored inimage files n amed using afour-digit file Fromenumber number assigned by adding one to the last file number used. The file %o.looo;'I number is displayed during playbackas shown at right. FRAME NO. _r"T'_ controls whether file numbering... -
Page 83: Shutter Sound
The _ et_,_p Mem_ Choose the sound made by the shutter. Adjust the volume for movie playback. Control the brightness of the display. _, When a shooting mode option other than P (PROGRAM AQ is selected, display brightness automatically adjusted during shooting regardless of a option... -
Page 84: Blink Detection
The S_!!t_ ip M_!!m_ Choose ON to activate blink detection. If an option other than OFF is selected for [] IMAGE DISP. (67), a warning will be displayed if the camera detects subjects who may have blinked when the picture was taken. -
Page 85: Digital Zoom
T i_ eSet _ ip_e n_ IfON isselected, pressing Tbutton atthe maximum optical zoom position will t rigger digital zoom, further magnifying the image. DIGITAL ZOOM On }'1_ Optico/ zoom Digito/ zoom DIGITALZOOMoff Optico/zoom !_" Digital zoom produces lower quality images than optical zoom. -
Page 86: Background Color
Choose a color scheme. Choose whether to display tool tips. Choose a video mode for connection to a TV. Option Description Select this mode for connection to video devices in North America, the Carib- NTSC bean, parts of Latin America, and some East Asian countries. -
Page 87: Discharge (Ni Mhbatteries Only)
The capacity of rechargeable Ni-MH batteries may be temporarily reduced when new, after long periods of disuse, or if they are repeatedly recharged before being fully discharged. Capacity can be increased by repeatedly discharging the batteries using [] DISCHARGE and recharging them in a battery charger (sold separately). -
Page 88: Optionalaccessories
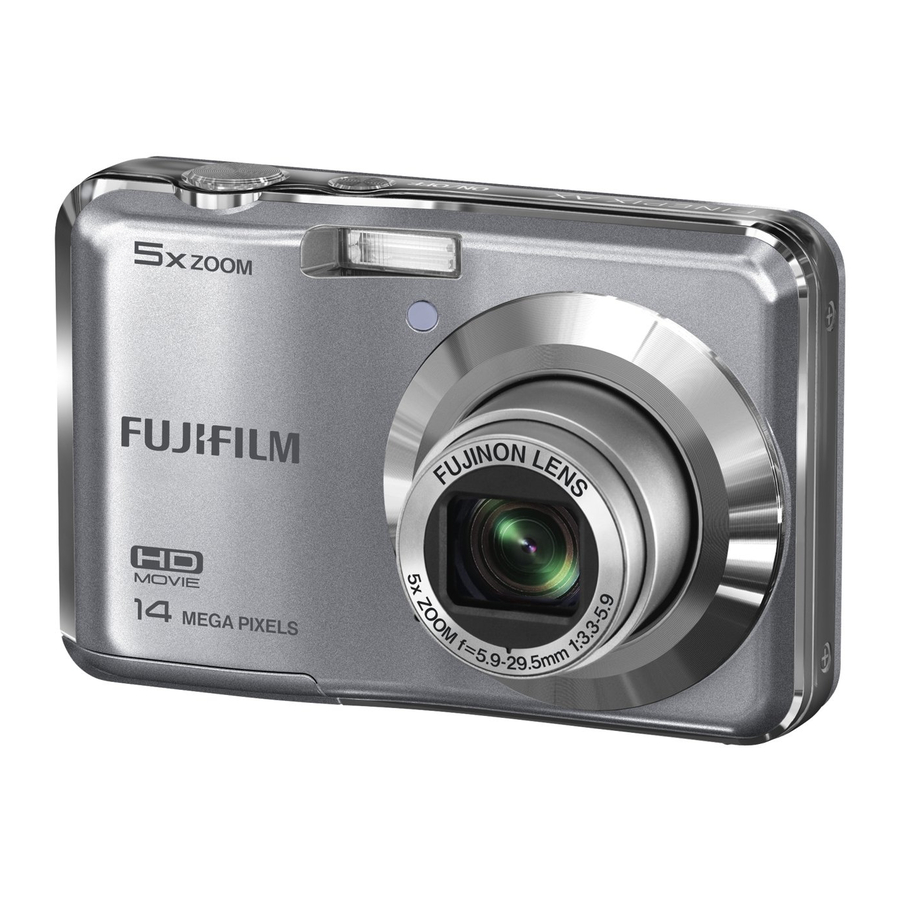
_ptional Accessories The camera supports a wide range of accessories from FUJIFILM and other manufacturers. DIGITAL CAMERA Audio/Visual \ • Printing FINEPIX AX500 Series • A/V cable (optional) (supplied) e USBcable PictBridge-compotible SD/SDH% HDMI cable (soldseparately) HDTV _ HDP-L1... -
Page 89: Accessories Fromfujifilm
Accessories fromFUJIFILM The following optional accessories are available from FUJIFILM. For the lat- est information on the accessories available in your region, check with your local FUJIFILM representative or visit http://www.fujifilm.com/products/digitol_ comeros/index.html. Cab!e AV-C1 : Usefor viewing pictures on TV. -
Page 90: Caringfor The Camera
for the Camera To ensure continued enjoyment of the product, observe the following pre- cautions. Storageand Use If the camera will not be used for an • WaterandSand extended period, remove the batter- Exposure to water and sand can also ies and memory card. -
Page 91: Cleaning
Use a blower to remove dust from the lens and LCD monitor, then gently wipe with a soft, dry cloth. Any remaining stains can be removed by wiping gently with a piece of FUJIFILM lens-cleaning paper to which a small amount of lens- cleaning fluid has been applied. -
Page 92: Troubleshooting Problems And Solutions
_Problems and Solutions Power and Batteries Problem Solution The batteries are exhausted: Insertfreshor fully-charged sparebatteries(6). Thecameradoesnot The batteries are not in the correct orientation: Re-insertthe batteries inthe correct ori- turn on. entation (_ The battery-chamber cover is not latched: Latchthe battery-chamber c over( The batteries are cold:Warmthe batteries by placingthem in a pocketor otherwarm place and re-insert them in the cameraimmediatelybeforetaking a picture. - Page 93 Menus and Displays Problem are Solution M:.:u.r_n:...:.splays_n ]SelectENGLISH for m _/LANG, 13,66), no£in Lngllsn, Shooting Problem Solution Memory is full:Insert a new memorycardor delete pictures( 7, 35), Memory is not formatted: Formatthe memorycard(_ 67), Nopictureis takenwhen There is dirt on the memory cardcontacts:Clean the contacts with a soft, dry cloth, the shutter button is The memory card is damaged:Inserta new memorycard(_ pressed,...
- Page 94 P<Aie_s_ 8 Soi t<: s Problem Solution The subject'sface is obscuredby sunglasses, a hat, long hair, or other objects:Remove the obstructions, The subject'sface occupies only a small area of the frame: Change the compositionsothat Nofaceis detected, the subject'sfaceoccupies a largerareaof the frame (24), The subject'shead is tilted or horizontal: Askthe subjectto hold their headstraight, The camera is tilted: Keepthe cameralevel (_ 15),...
- Page 95 Problem Solution This is normal when slow shutter speeds are selected at high temperaturesand doesnot indicate Pictures aremottled, a malfunction, Verticallines appearin The camerahasbeen usedcontinuouslyat high temperatures, Turn the cameraoff and wait for pictures, it to cooldown, "Smear"inthe form of Vertical purple or white lines may appearafter the camerahasbeen usedcontinuouslyat high vertical purpleor white temperatures or when a very bright object is inthe frame;this phenomenonis commonto all CCD...
- Page 96 Connections/Miscellaneous Problem Solution The camera is not properly connected:Connect t he cameraproperly(43). An A/V cablewas connectedduring movie playback:Connect t he cameraoncemovieplay- backhasended. Nopictureor sound. Input on the television is set to"TV": Set input to"VIDEO". The camera is not set to the correctvideo standard: Matchthe cameraI_ VIDEO SYS- TEM settingto the TV(72).
-
Page 97: Warning Messages And Displays
Camera malfunctionor movingparts of lensobstructed.Turnthe cameraoffand then on again, TURNOFF THECAMERA taking carenot to touchthe lens. If the message persists, c ontacta FUJIFILM dealer. ANDTURN ONAGAIN Thememory card is not formatted or was formatted in a computer or other device: Formatthe memorycardusingthe [] FORMAT option inthe camerasetupmenu (67). - Page 98 The file is corrupt or was not created with the camera:The file cannot beviewed. READ ERROR The memory card contactsrequire cleaning: Cleanthe contacts with a soft, dry cloth. If the message is repeated,format the card(_ 67). If the message persists, r eplacethe card. Camera malfunction: Contacta FUJIFILM dealer.
- Page 99 Warning Description The camerahasrun out of frame numbers (currentframe number is 999-9999). Formatthe FRAME NO.FULL memorycardand selectRENEW for [] FRAME NO.. Takea picture to resetframe num- beringto 100-0001,then selectCONTINUOUS for [] FRAME NO (68). PRESS ANDHOLD THEDISPBUTTON TO An attempt was madeto choosea flash mode or adjustthe volume with the camerain silent mode.
- Page 100 ,..... Warning Description NOCARD INSERT A NEWCARD No memorycardinserted;inserta memorycard, DPOF FILEERROR TheDPOF print orderonthe currentmemorycardcontainsmorethan999 images, CANNOTSETDPOF Thepicture cannot be printed using DPOF, CANNOTSETDPOF Moviescannot be printed using DPOF, A connection erroroccurred while pictureswere being printed or copiedto a computeror other COMMUNICATION ERROR device, Confirmthat the deviceis turned on andthat the USB cable isconnected, PRINTER ERROR...
-
Page 101: Tips And Tricks
and Tricks The following tips and tricks will help you get the most from your camera. Choose tile following settings for improved battery performance: • [] FACE DETECTION (_ 31): OFF • r_AF MODE (_ 59): I_-ICENTER • [] LCD MODE (_ 69): [] POWER SAVE ON •... - Page 102 Tcks When ON is selected for [] FACE DETECTION (_ 31), you carl: • Zoom in on faces when ZOOM (CONTINUOUS)is selected for [] AGE DISP. (_ 67). • Zoomin on facesduring slide shows (_ 62) or by pressing tile selector down during playback.
- Page 103 Tips _i_'_d T _'ic ks • To photograph backlit subjects, select o_ NATURAL & _. for SHOOTING MODE (_ 18) and position your subject in the centerof the frame. motion, • To photograph subjects that are in select I_3 TRACK- ING for rdil AF MODE (_ •...
-
Page 104: Memory Cardcapacity
_Memory Card Capacity The following table shows the recording time or number of pictures available at different image sizes. All figures are approximate; file size varies with the scene recorded, producing wide variations in the number of files that can be stored. - Page 105 • FinePix AXSO0 - AX540 FINE NORMAL NORMAL NORMAL FINE FINE 1090 2180 I_14:3 1110 1220 2440 _3:2 1240 1430 2870 1470 16:9 1060 2060 4120 04:3 1030 2130 1400 2690 5380 016:9 1340 2810 " 04:3 2300 4290 8580 1150 2140 4600...
- Page 106 _pecifications Model Digital Camera FinePix AXSO0 S eries Effectivepixels FinePix AXSSO - AXS90 16million FinePix AXSO0 - AXS40 14million _,_3-in,, s quare-pixelCCD with primary colorfilter Storage media SD/SDHC m emory cards File system Compliantwith Design Rule for Camera File System(DCF), E xif2,3, and Digital Print Order Format (DPOF) Fileformat •...
-
Page 107: Axs50 Ax590
Digital zoom FinePix AXS50- AX590 Approx.72 x (upto 36x whencombined with optical z oom) FinePix AXSO0 - AX540 Approx.6.7 x (upto 33.5x when combined w ith optical z oom) Aperture F3.3/F8.0(wideangle), F 5.9/F14.4(telephoto); usesNeutral Density (ND) f ilter Focusrange Approx.45cm (1.4 ft.)-infin ity (wideangle);80cm (2.6ft.)-infin ity (telephoto) (distance fromfrontof lens) •... -
Page 108: Ax500 Ax540
Image stabilization Digital imagestabilization • AUTOmode:l/4sJJ_:oo s Shutter speed (combined m echanical and • Othermodes: 8s-_4:oos electronic s hutter) Continuous FinePix AX550- AX590 Upto 1.1 fps;max.3 frames FinePix AX500- AX540 Upto 1.1 fps;max.3 frames Focus • Mode:SingleAF, c ontinuousAF • Autofocussystem: Contrast-detect T TLAF •... - Page 109 LCD monitor FinePix AX580- AX590/ AX520 - AX540 30-in, 230k-dot colorLCD monitor; frame coverage approx 96% FinePix AX550- AX560IAX500 - AX510 27-in, 230k-dot colorLCD monitor; frame coverage approx 96% Movies Frame size1,280x 720, 640x 480,320x 240;30fps;monauralsound Languages Arabic,Bulgarian,Simplified Chinese, T raditionalChinese, C zech, D anish,Dutch, English,Farsi, Finnish, French,German,Greek, Hebrew,Hungarian, Indonesian,Italian, Japanese,Kazakh, Korean, Latvian, Lithuanian, Norwegian, Polish, Portuguese,Romanian, Russian,Serbian, Slovak,Spanish, S wedish,Thai, Turkish,Ukrainian,Vietnamese...
- Page 110 Camera dimensions 93.0mm x 602 mm x 27.8mm/3.6 in. x 2.3 in. x 1.0 in., (Wx U× D) excludingprojections(minimum depth22.0ram/0.8in.) Shooting weight FinePix AX580- AXS90/AXS20- AX540 Approx.173g/6.1 oz.,including batteriesand memorycard FinePix AXS50- AX560/AX500 - AX510 Approx,168g/5,9 oz,,including batteriesand memorycard Camera weight FinePix AX580- AX590/AX520 - AX540 Approx 124g/43 oz, excludingbatteries,accessories, and memorycard FinePix AXS50- AXS60/AX500 - AX510...
-
Page 111: Specifications
Speci_icado • Notices • Specifications subject to change without notice. FUJIFILM shall not be held liable for damages resulting from errors in this manual. • Although the LCDmonitor is manufactured using advanced high-precision technol- ogy, small bright points and anomalous colors may appear, particularly in the vicinity of text. - Page 112 FWIFILm FUJIFILM Corporation 7-3, AKASAKA 9-CHOME, MINATO-KU, TOKYO 107-0052, JAPAN http://wvw.fujifilm.oom/produots/digital cameras/index.html Please contact your local distributor for repairs and technical support. (see Worldwide Network list)
Need help?
Do you have a question about the FINEPIX AX500 Series and is the answer not in the manual?
Questions and answers