
Subscribe to Our Youtube Channel
Related Manuals for EverFocus EPTZ3602


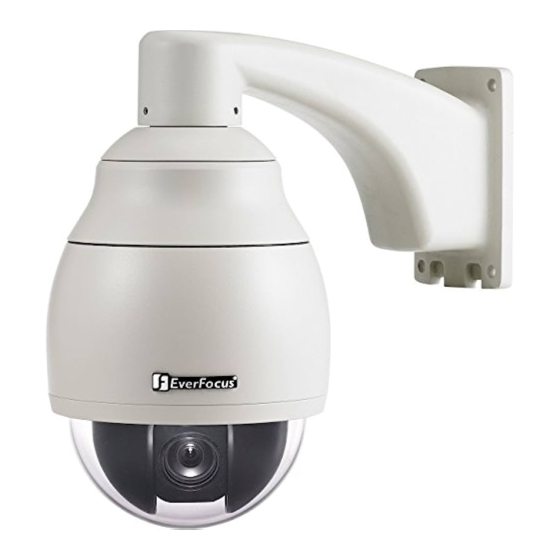
Summary of Contents for EverFocus EPTZ3602
- Page 1 EPTZ3602/3602i Speed Dome 36x, 960H, IP66, ICR, DNR, WDR, Fan & Heater User’s Manual Copyright © EverFocus Electronics Corp, Release Date: August, 2014...
- Page 2 Copyright 1995 - 2014 EverFocus Electronics Corp. All rights reserved. No part of the contents of this manual may be reproduced or transmitted in any form or by any means without written permission of the EverFocus Electronics Corporation. EverFocus 12F, No.79, Sec.
- Page 3 - Connect the equipment into an outlet on a circuit different from that to which the receiver is connected. - Consult the dealer or an experienced radio/TV technician for help. Warning: Changes or modifications made to this equipment, not expressly approved by EverFocus or parties authorized by EverFocus could void the user's authority to operate the equipment.
- Page 4 Precautions 1. Do not install the camera near electric or magnetic fields. Install the camera away from TV/radio transmitters, magnets, electric motors, transformers and audio speakers since the electromagnetic fields generated from these devices may distort the video image or otherwise interfere with camera operation. 2.
-
Page 5: Table Of Contents
Contents Introduction............................. 1 Features ............................2 Installation ............................2 Packing List ..........................2 Optional Accessories ........................ 3 Cable Descriptions ........................4 I/O Terminal Block ........................5 Basic Installation for Outdoor Models ..................6 3.5.1 Installation Requirements .................... 6 3.5.2 Important Note for Installation .................... -
Page 6: Introduction
EPTZ3602/3602i 1. Introduction The EPTZ3602 series is a high-performance speed dome with a built-in 36x 960H optical zoom lens, supporting up to 700 TVL. The series comes in two types: outdoor (EPTZ3602) and indoor (EPTZ3602i). Equipped with a weather-resistant (IP66) housing, the outdoor models meet a wide variety of needs for outdoor surveillance. -
Page 7: Features
Note: Equipment configurations and supplied accessories vary by country. Please consult your local EverFocus office or agents for more information. Please also keep the shipping carton for possible future use. 2. Contact the shipper if any items appear to have been damaged in the shipping process. -
Page 8: Optional Accessories
EPTZ3602/3602i Optional Accessories • EPTZ- PBOX (External power connection box) • Corner mount adapter (Used for fixing a wall-mount bracket to a 90° wall corner, indoors or outdoors.) • Pole mount adapter • Indoor ceiling pendant mount bracket (Used for installing a wall-mount bracket to a (Used for installing a speed dome against pole, indoors or outdoors.) -
Page 9: Cable Descriptions
Note: Different regions may use different ranges for AC voltage. Be sure to check the voltage range in your area before installing. Video Cable A BNC cable is used for connecting an EPTZ3602/EPTZ3602i to a DVR or a monitor. An amplifier may be needed depending on the distance. RS-485 Cable The yellow wire carries RS-485+, and the orange wire carries RS-485-. -
Page 10: I/O Terminal Block
18 are power pin for connecting to 24 VAC power. 13-14 15-16 17-18 1-12 Alarm Video RS485 24VAC EPTZ3602/3602i Base Board Function Function ALM_NO_B (Alarm Output Normal Open B) ALMIN3 (Alarm Input 3) GND (Ground) ALM_COM_B (Alarm Output Common B) ALMIN4 (Alarm Input 4) -
Page 11: Basic Installation For Outdoor Models
EPTZ3602/3602i Basic Installation for Outdoor Models There are two ways to install the outdoor models of EPTZ series Speed Dome: Wall Mount and Ceiling Mount. 3.5.1 Installation Requirements The installation should be handled by a qualified service agent and should be complied with all ... -
Page 12: Important Note For Installation
EPTZ3602/3602i 3.5.2 Important Note for Installation Before installing, replace the 3 desiccant bags inside the top housing. The desiccant bag loses its effectiveness after you open the camera. To keep the camera’s interior dry, it is highly recommended to replace the desiccant bags every time when you open the camera. -
Page 13: Initial Setup
EPTZ3602/3602i 3.5.3 Initial Setup To allow the control device, such as a keyboard, to recognize and then control multiple cameras, you need to set up the ID address for the cameras using the DIP switch on the Camera Main Body. - Page 14 EPTZ3602/3602i Switch Address Switch Switch Switch Address Address Address Switch Switch Switch Switch Address Address Address Address Switch Switch Switch Switch Switch Address Address Address Address Address...
- Page 15 EPTZ3602/3602i Switch Address Switch Switch Switch Address Address Address Switch Switch Switch Switch Address Address Address Address Switch Switch Switch Switch Switch Address Address Address Address Address...
- Page 16 EPTZ3602/3602i Protocol The first, second and the third switches on the left are used to set the communication protocol. Please refer to the sticker on the camera main body for setting up the protocol. The supported protocols are listed on the sticker. The default protocol is EVF.
-
Page 17: Wall-Mount Installation
EPTZ3602/3602i 3.5.4 Wall-Mount Installation 1. Drill 4 screw-depth holes for mounting the bracket base plate and then drill a through-wall hole for inserting the camera cables. You can optionally drill a second through-wall hole to separate cable feeding (see Step 3). - Page 18 EPTZ3602/3602i 4. Connect the RS-485, video and power cables through the top hole of the base board. If necessary, connect the alarm cable as well using the bottom hole. 5. Screw the bracket base to the wall using the 4 screws.
- Page 19 EPTZ3602/3602i 7. Put on the supplied gloves before pushing upward the main body into the top housing. Draw out the provided rope from the housing and hook it on the rope attachment hook of the main body. 8. Make sure the red triangle on the inside of the top housing lines up with the red triangle on the outside of the main body.
-
Page 20: Ceiling Mount Installation
EPTZ3602/3602i 9. Screw the housing cover to the top housing slowly by twisting it clockwise. Note: When you turn on the power, the camera will enter self-inspection mode and run a self-testing program. Once this is complete, you will be able to operate it via any IP network. - Page 21 EPTZ3602/3602i 3. Slightly turn the surface ring and remove it from the indoor recessed mount bracket. 4. Place and then screw the camera’s top housing on the top disk of the indoor recessed mount bracket by using the 3 short screws.
- Page 22 EPTZ3602/3602i 6. Screw the 3 rotation clips of the indoor recessed mount bracket on the ceiling using a screwdriver. 7. Put on the supplied gloves before pushing upward the main body into the top housing. Draw out the provided rope from the housing and hook it on the rope attachment hook of the main body.
- Page 23 EPTZ3602/3602i 9. Screw the housing cover to the top housing slowly by twisting it clockwise. 10. Slide the surface ring to the fillister and slightly turn it until it is firmly fixed. Note: When you turn on the power, the camera will enter self-inspection mode and run a...
-
Page 24: Ekb500 Connection
EPTZ3602/3602i 3.5.6 EKB500 Connection You can use EKB500 Keyboard to control the EPTZ cameras including the OSD menu setup or PTZ control. Follow the steps below to connect the EKB500 Keyboard to the EPTZ camera. EKB500 RJ-45 Cable Blue White... - Page 25 EPTZ3602/3602i After complete the above connection, you can start operating the EPTZ camera with EKB500 Keyboard: IRIS Focus Zoom Zoom OUT Zoom IN LEFT RIGHT DOWN Move the Joystick up/down/left/right to shift the camera view in that direction. Twist the top of the Joystick to zoom in/out.
-
Page 26: Configuration In The Osd Menu
EPTZ3602/3602i 4. Configuration in the OSD Menu You can use the keyboard to configure camera settings in the OSD menu. Note: The controls described in this chapter are based on using the EKB500 Keybaord. For EKB500 connection and operation, please refer to 3.5.5 EKB500 Connection. - Page 27 EPTZ3602/3602i EXPOSURE In Exposure menu, there is a sub-menu. Press Enter key or turn joystick Left / Right to enter Exposure sub-menu. EXPOSURE <┘ EL. SHUTTER AUTO FOCUS MODE AUTO EXIT DIGITAL ZOOM WHITE BALANCE AUTO BACKLIGHT DAY/NIGHT AUTO COLOR NEGATIVE DIG.
- Page 28 EPTZ3602/3602i BACKLIGHT This is the function of Back Light Compensation. When the background of subject is too bright, or when the subject is too dark due to shooting in AE mode, back light compensation will make the subject appear clearer.
-
Page 29: Positions
EPTZ3602/3602i Positions In main menu, turn joystick Up or Down to select POSITION option. Press Enter key or turn joystick Left / Right to enter POSITION sub-menu. VIDEO SETTINGS SET POSITIONS <┘ POSITIONS EXIT OSD/AREAS AUTO MODES ALARM PRIVATE ZONES... - Page 30 EPTZ3602/3602i • POSITION: Select from SET and CLEAR. SET: Select SET and press Enter key of keyboard, you will be entered to a sub-menu. Turn the joystick to your desired position. Once the position is confirmed, press IRIS+ key of keyboard to save setting and return to previous menu.
-
Page 31: Osd/Areas
EPTZ3602/3602i OSD/Areas In main menu, turn joystick Up or Down to select OSD/AREAS. Turn joystick Left or Right to enter OSD/AREAS sub-menu. VIDEO SETTINGS POSITIONS CAM. TITLE EPTZ3602_ _ OSD/AREAS AREAS <┘ AUTO MODES DIRECTIONS <┘ ALARM DISPLAY <┘ PRIVATE ZONES... - Page 32 EPTZ3602/3602i ZONE ZONE1 TITLE RANGE 1. ---------------------------- -------- <┘ <┘ 2. ---------------------------- -------- <┘ <┘ 3. ---------------------------- -------- <┘ <┘ 4. ---------------------------- -------- <┘ <┘ 5. ---------------------------- -------- <┘ <┘ 6. ---------------------------- -------- <┘ <┘ 7. ---------------------------- -------- <┘ <┘...
- Page 33 EPTZ3602/3602i Press Enter key of keyboard or turn joystick Left/Right to enter Set North position menu. Move the joystick to North position. Press IRIS+ key of keyboard to save and return. DIRECTIONS NORTH SET NORTH <┘ DEFAULT NORTH [PUSH ENT] RETURN Go to “DEFAULT NORTH”...
- Page 34 EPTZ3602/3602i • ZONES YES: Show zones. NO: Do not show zones. • PRESET TITLE YES: Show preset title. NO: Do not show preset title. • ZOOM YES: Show zoom multiple when zoom in or zoom out. NO: Do not show zoom multiple.
-
Page 35: Auto Modes
EPTZ3602/3602i Auto Modes In main menu, turn joystick Up/Down to select AUTO MODES. Turn joystick Left/Right to enter AUTO MODES sub-menu. AUTOPAN VIDEO SETTINGS <┘ POSITIONS PRESET TOURS <┘ OSD/AREAS PATTERN <┘ AUTO MODES AUTO RESUME ALARM RESUME TO POS.1(H) - Page 36 EPTZ3602/3602i • SET LEFT POS. Press Enter key or turn the joystick Left/Right to enter SET LEFT POS. menu. Turn the joystick to the position where you wish to set Left position. Press IRIS+ key of keyboard to save setting and return to previous menu.
- Page 37 6. RETURN: Turn joystick Left/Right to return to previous menu. PATTERN Press Enter key of keyboard to enter PATTERN sub-menu. Note that the Pattern function can only be set up using EverFocus’ EKB500 keyboard. You can then operate the Pattern function through the DVR or EKB500 Keyboard. PATTERN SETUP AUTOPAN <┘...
- Page 38 EPTZ3602/3602i 1. Turn the joystick Up or Down to select pattern number. 2. Turn the joystick Left or Right to select action mode, either PLAY, SET or CLEAR. 3. Select SET and press Enter key of keyboard. PATTERN SETUP PATTERN 1 RECORD MODE...
- Page 39 EPTZ3602/3602i AUTO RESUME Return to previous mode, if no action for a period. Turn the joystick Left/Right to set AUTO RESUME. Auto Resume is selectable from OFF, After 30 sec, After 1 min, after 5 min, After 10 min, After 30 min and After 60 min. After this period of time, speed dome will resume to the mode you set in “RESUME TO”.
-
Page 40: Alarm
EPTZ3602/3602i Alarm In main menu, turn joystick Up or Down to select ALARM. Turn joystick Left or Right to enter ALARM sub-menu. ALARM INPUTS VIDEO SETTINGS <┘ POSITIONS ALARM OUTPUTS <┘ OSD/AREAS MOTION DETECT <┘ AUTO MODES EXIT ALARM PRIVATE ZONES... - Page 41 EPTZ3602/3602i REACTION: The action will be taken when alarm is triggered. OFF: No reaction will be taken when alarm is triggered. POSITION: When the alarm is triggered, speed dome will go to the preset position. Turn the joystick Left or Right to select on Position and press Enter key to select position number. Turn joystick Left/Right to make selection.
- Page 42 EPTZ3602/3602i 1. OUTPUT NUM: Select Output number from 1~2. 2. INPUT1: Select YES to enable Alarm input 1 for the alarm output selected. Select NO to disable Alarm input 1. 3. INPUT2: Select YES to enable Alarm input 2 for the alarm output selected. Select NO to disable Alarm input 2.
- Page 43 EPTZ3602/3602i 2. Press Enter key to enter Motion Detection Setting. Use the joystick to select motion area. Turn the joystick Up or Down to select directions, LEFT, RIGHT, UPPER or LOWER. Turn the joystick Left or Right to adjust the value of motion area. For Left & Right directions, it is selectable from 0 to 12. For Upper &...
-
Page 44: Private Zones (Optional)
EPTZ3602/3602i Private Zones (Optional) In main menu, turn joystick Up/Down to select PRIVATE ZONES masking. Turn joystick Left/Right to enter PRIVATE ZONE sub-menu. PRIVATE ZONE 1 <┘ VIDEO SETTINGS PRIVATE ZONE 1 POSITIONS PRIVATE ZONE 1 OSD/AREAS PRIVATE ZONE 1... -
Page 45: System
EPTZ3602/3602i System In main menu, turn joystick Up/Down to select SYSTEM. Turn joystick Left/Right to enter SYSTEM sub-menu. VIDEO SETTINGS AUTO INIT POSITIONS LANGUAGE ENGLISH OSD/AREAS PASSWORD <┘ AUTO MODES LOAD DEFAULT [PUSH ENT] ALARM RESTART [PUSH ENT] PRIVATE ZONES... -
Page 46: Info
EPTZ3602/3602i Info In main menu, turn joystick Up or Down to select INFO. Turn joystick Left or Right to enter INFO sub-menu. EPTZ series VERSION: V2.2.15 PROTOCOL: AUTO BAUDRATE: 9600 RS-485-ID: CAMERA: PRESET-CNT: 0000000000 X-CONT: 0000000001 Y-CONT: 0000000004 IRIS+: RETURN 1. -
Page 47: Specifications
EPTZ3602/3602i 5. Specifications Product Model EPTZ3602 (outdoor) EPTZ3602i (indoor) Pickup Device 1/4" Sony 960H Super HAD CCD II Video Format NTSC/PAL Scanning System 1020 x 508 (NTSC); 1020 x 596 (PAL) Horizontal Resolution 700 TVL Min. Illumination Normal: 0.1 Lux/F1.6; Night Mode: 0.05 Lux/F1.6 (ICR ON) - Page 48 24 VAC Power Consumption 30W Max. Weather-Resistant IP66-rated (only for EPTZ3602) -40°C~50°C ≤ 95% / -40°F~122°F ≤ 95%(EPTZ3602) Operating Temperature -10°C~50°C ≤ 85% / 14°F~122°F ≤ 85%(EPTZ3602i) 180 x 280mm/7.1" x 11" (EPTZ3602) Dimensions (W x H) 159 x 230mm/6.3" x 9.1" (EPTZ3602i) Weight 3.0kg / 6.62lbs...
-
Page 49: Appendix
EPTZ3602/3602i Appendix A. Setting-up and Operating EPTZ Camera Function Using EKB500 Manual Control Mode • Manual control: Shift Joystick Up/Down/Left/Right, and turn it Clockwise/Counterclockwise to control speed dome. Use the control keys which are Zoom, Focus and IRIS function keys on the keyboard to Zoom In/Out, focus N (near)/F (Far), or IRIS +/-. - Page 50 EPTZ3602/3602i You can directly go to the following specific preset positions: 33 => Rotation of 180 degree 34 => Go to Home position (if Home Position is set by EVF Keyboard) 90 => Run tour (one-way) 91 => Run Pattern 94 =>...
- Page 51 Press Stop to stop recording tour. To view this pattern tour, simply press Tour, and input tour number 0. Alarm Link to a Position/Tour EPTZ3602/EPTZ3602i have 4 alarm inputs that can be set to link to a position or a tour when an alarm is triggered. •...
- Page 52 EverFocus USA - California: EverFocus USA - New York: 1801 Highland Avenue, Unit A, Duarte, CA 91010, 415 Oser Avenue, Unit S, Hauppauge, NY 11788, TEL: +1 626 844 8888 TEL: +1 631 436 5070 FAX: +1 626 844 8838 FAX: +1 631 436 5027 www.everfocus.com...
Need help?
Do you have a question about the EPTZ3602 and is the answer not in the manual?
Questions and answers