Advertisement
Quick Links
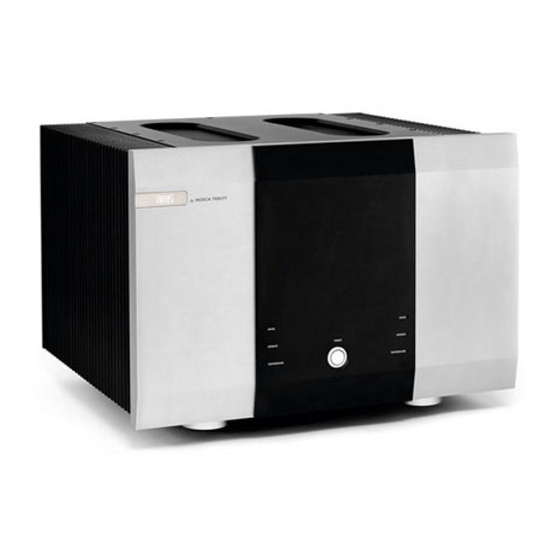
The AMS50 uses the latest in low distortion circuitry in a bridged configuration which delivers 50 watts of pure class A power.
The AMS50 is designed with pure undistorted experience in mind. Overall the listening experience is greatly improved because of
The AMS50 accepts both XLR balanced and RCA line level inputs. When driven from a balanced pre-amplifier the sound
quality is greatly improved because the balanced cable cancels out noise and interference artefacts, giving up to 12dB increase in
The Primo Pre-amplifier is an ideal partner as it features a fully valve signal path and true balanced operation throughout
Alternatively, the AMS50 can be used as a conventional power amplifier driven by a high quality preamp.
The AMS50 is a perfect answer to pure musicality in a single beautifully engineered package. Used properly and carefully, it
Dust regularly with a soft duster or soft brush, but be careful when using cleaning or polishing agents - they may harm the surface
If there are further questions about any Musical Fidelity component, please consult the dealer from whom it was purchased, who is
AMS50
ANTONY MICHAELSON SIGNATURE
50W Pure Class A Dual Mono Power Amplifier
Thank you for purchasing the Musical Fidelity AMS50.
dramatically lower distortion and increased dynamic range.
should give many years of outstanding musical reproduction.
there to help and give advice.
dynamic range.
finish.
Advertisement

Summary of Contents for Musical Fidelity AMS50
- Page 1 Dust regularly with a soft duster or soft brush, but be careful when using cleaning or polishing agents - they may harm the surface finish. If there are further questions about any Musical Fidelity component, please consult the dealer from whom it was purchased, who is there to help and give advice.
-
Page 2: Table Of Contents
AMS50 CONTENTS PAGE Section Mains plug (U.K. only) Safety information Modification warning Installation precautions General advice User information EU disposal information Item disposal information Introduction Installation Installation Audio connection Cleaning Illustrations - front and rear panels Connections Operation and features Amplifier operation Basic Amplifier fault finding Amplifier problems? -
Page 3: Safety Information
If connecting to a BS1363 plug, a 13 amp fuse must be used. WARNING: ANY MODIFICATIONS TO THIS PRODUCT NOT EXPRESSLY APPROVED BY MUSICAL FIDELITY WHO IS THE PARTY RESPONSIBLE FOR STANDARDS COMPLIANCE COULD VOID THE USER'S AUTHORITY TO OPERATE THIS EQUIPMENT. -
Page 4: General Advice
Do not remove any covers or try to gain access to the inside. There are no internal adjustments or fuses you can replace yourself. Refer all service work to an authorised Musical Fidelity agent. Note: Unauthorised opening of the equipment will invalidate any warranty claim. -
Page 5: Item Disposal Information
AMS50 ITEM DISPOSAL INFORMATION DISPOSAL AFVAL The crossed out wheeled bin label that appears on the Het label op de achterzijde van dit apparaat, een back panel of the product indicates that the product must not be afvalbak op wielen met een kruis doorgehaald, geeft aan dat dit disposed of as normal household waste. -
Page 6: Installation
AMS50 INSTALLATION SETTING UP OUTPUTS: Position the AMS50 on a stable, horizontal surface Connect loudspeakers to the terminals near the base of where there is no risk of it being knocked. the back panel marked as OUTPUTs. Make sure (+) Make sure ALL units involved are switched off and lead from amplifier speaker output goes to (+) lead on unplugged from mains supply before making or... -
Page 7: Connections
AMS50 AMPLIFIER CONNECTIONS FRONT PANEL 1. LEFT CHANNEL Mains LED 5. RIGHT CHANNEL Temperature LED 2. LEFT CHANNEL Operate LED 6. RIGHT CHANNEL Operate LED 3. LEFT CHANNEL Temperature LED 7. RIGHT CHANNEL Mains LED 4. POWER Switch BACK PANEL 8. -
Page 8: Amplifier Operation
AMS50 AMPLIFIER OPERATION POWER ON Once all connections are made, switch on the unit, using the ON/OFF rocker switch on the back panel. On the front panel of the AMS50 the front MAINS LEDs glow to indicate mains is present. To switch the unit on use front panel button, press once and the operate LEDs will light (and mains LEDs extinguish), indicating the unit is ready for use. -
Page 9: Amplifier Specifications
If none of these actions affect a cure, please contact your dealer, or an authorised Musical Fidelity service agent. Remember; never open the case of the AMS50 yourself, as this will invalidate the guarantee. - Page 10 AMS50 AMPLIFIER SPECIFICATIONS Issue 1 Page 10 of 12...
- Page 11 18¼ inches deep (front to back) including terminals Standard accessories: IEC type mains lead (10-Amp type), Musical Fidelity reserves the right to make improvements which may result in specification or feature changes without notice. Issue 1 Page 11 of 12...
- Page 12 AMS50 MANUAL REVISION RELEASE DATE CHANGES Issue 1 May 2009-05-28 issue Issue 1 Page 12 of 12...


Need help?
Do you have a question about the AMS50 and is the answer not in the manual?
Questions and answers