Table of Contents
Advertisement
FOR CAR USE ONLY/NUR FÜR AUTOMOBIL GEBRAUCH/POUR APPLICATION AUTOMOBILE UNIQUEMENT/
PARA USO EN AUTOMÓVILES/SOLO PER L'UTILIZZO IN AUTOMOBILE/ENDAST FÖR BILBRUK
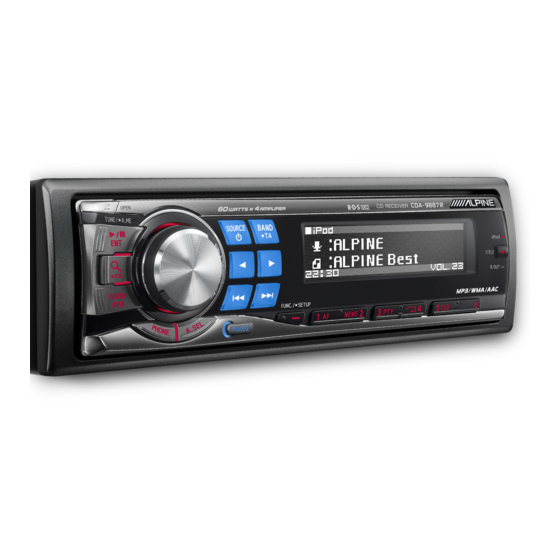
RDS MP3/WMA/AAC CD Receiver
ALPINE ELECTRONICS MARKETING, INC.
1-1-8 Nishi Gotanda,
Shinagawa-ku,
Tokyo 141-0031, Japan
Phone 03-5496-8231
ALPINE ELECTRONICS OF AMERICA, INC.
19145 Gramercy Place, Torrance,
California 90501, U.S.A.
Phone 1-800-ALPINE-1 (1-800-257-4631)
ALPINE ELECTRONICS OF CANADA, INC.
777 Supertest Road, Toronto,
Ontario M3J 2M9, Canada
Phone 1-800-ALPINE-1 (1-800-257-4631)
YAMAGATA (Wuxi) Co., Ltd.
Block 28-25, Changjiang Nanlu, WND, jiangsu, China
CDA-9887R
• OWNER'S MANUAL
Please read before using this equipment.
• BEDIENUNGSANLEITUNG
Lesen Sie diese Bedienungsanleitung bitte vor
Gebrauch des Gerätes.
• MODE D'EMPLOI
Veuillez lire avant d'utiliser cet appareil.
• MANUAL DE OPERACIÓN
Léalo antes de utilizar este equipo.
• ISTRUZIONI PER L 'USO
Si prega di leggere prima di utilizzare il
attrezzatura.
• ANVÄNDARHANDLEDNING
Innan du använder utrustningen bör du läsa igenom
denna användarhandledning.
ALPINE ELECTRONICS OF AUSTRALIA PTY. LTD.
161-165 Princes Highway, Hallam
Victoria 3803, Australia
Phone 03-8787-1200
ALPINE ELECTRONICS GmbH
Frankfurter Ring 117, 80807 München, Germany
Phone 089-32 42 640
ALPINE ELECTRONICS OF U.K. LTD.
Alpine House
Fletchamstead Highway, Coventry CV4 9TW, U.K.
Phone 0870-33 33 763
ALPINE ELECTRONICS FRANCE S.A.R.L.
(RCS PONTOISE B 338 101 280)
98, Rue de la Belle Etoile, Z.I. Paris Nord Il,
B.P. 50016, 95945 Roissy Charles de Gaulle
Cedex, France
Phone 01-48638989
R
ALPINE ITALIA S.p.A.
Viale C. Colombo 8, 20090 Trezzano
Sul Naviglio (MI), Italy
Phone 02-484781
ALPINE ELECTRONICS DE ESPAÑA, S.A.
Portal de Gamarra 36, Pabellón, 32
01013 Vitoria (Alava)-APDO 133, Spain
Phone 945-283588
ALPINE ELECTRONICS (BENELUX) GmbH
Leuvensesteenweg 510-B6,
1930 Zaventem, Belgium
Phone 02-725-13 15
Designed by ALPINE Japan
Printed in China (Y)
68-08564Z21-A
EN
DE
FR
ES
IT
SE
Advertisement
Table of Contents

Related Manuals for Alpine CDA-9887R


Summary of Contents for Alpine CDA-9887R
- Page 1 • ANVÄNDARHANDLEDNING Innan du använder utrustningen bör du läsa igenom denna användarhandledning. ALPINE ELECTRONICS MARKETING, INC. ALPINE ELECTRONICS OF AUSTRALIA PTY. LTD. ALPINE ITALIA S.p.A. 1-1-8 Nishi Gotanda, 161-165 Princes Highway, Hallam Viale C. Colombo 8, 20090 Trezzano Shinagawa-ku,...
- Page 2 Alpine introduces IMPRINT — the world’s first technology that thoroughly eliminates in-car acoustic problems that normally degrade sound quality. VISION VS. REALITY INTRODUCING IMPRINT All good music starts as an artist’s vision. After countless hours of...
-
Page 3: Table Of Contents
ENGLISH Contents CD/MP3/WMA/AAC Playback ............12 Repeat Play ............. 13 Operating Instructions M.I.X. (Random Play) ........13 Searching from CD Text ......... 13 WARNING File/Folder Name Search (concerning MP3/WMA/AAC) ....14 WARNING ..........3 Quick Search ........... 14 CAUTION ..........3 About MP3/WMA/AAC ......... - Page 4 ® SETUP iPod (Optional) Playback ............29 Bluetooth Setting Searching for a desired Song ......29 Setting the Bluetooth IN Connection ....25 Quick Search ...........30 General Setting Direct Search Function ........30 Birthday Opening Message Setting Select Playlist/Artist/Album/Podcast/Genre/ (Birthday Set) ..........25 Composer .............30 Setting the Clock Display (Clock Mode) ..
-
Page 5: Operating Instructions
HALT USE IMMEDIATELY IF A PROBLEM APPEARS. or death. Failure to do so may cause personal injury or damage to the product. Return it to your authorized Alpine dealer or the nearest Alpine Service Centre for repairing. DO NOT OPERATE ANY FUNCTION THAT TAKES YOUR ATTENTION AWAY FROM SAFELY DRIVING YOUR VEHICLE. - Page 6 We Centre Hole Centre Hole recommend not using these accessories on discs played in Alpine New Disc CD players. Outside Bumps...
- Page 7 On handling Compact Discs (CD/CD-R/CD-RW) • Windows Media and the Windows logo are trademarks, or registered trademarks of Microsoft Corporation in the United • Do not touch the surface. States and/or other countries. • Do not expose the disc to direct sunlight. •...
-
Page 8: Getting Started
Detaching Getting Started Turn off the unit power. Press (OPEN) to open the front panel. Rotary encoder (OPEN) SOURCE To close the front panel, press the left side until it locks as shown in the figure below. ENT AUDIO/RTN FUNC./SETUP Accessory List •... -
Page 9: Initial System Start-Up
Initial System Start-Up Be sure to press the RESET switch when using the unit for the first time, after changing the car battery, etc. Turn off the unit power. Press (OPEN) to open the front panel, and then remove it. Press RESET with a ballpoint pen or similar pointed object. -
Page 10: Radio
Presetting Stations Automatically Radio Press BAND/TA repeatedly until the desired radio Rotary encoder band is displayed. BAND/TA SOURCE TUNE/A.ME Press and hold TUNE/A.ME for at least 2 seconds. The frequency on the display continues to change while the automatic memory is in progress. The tuner will automatically seek and store 6 strong stations in the selected band. -
Page 11: Rds
Recalling Preset RDS Stations Press FUNC./SETUP to activate the function mode. FUNC./SETUP Rotary encoder BAND/TA Press 1 AF to activate the RDS mode. Press FUNC./SETUP to activate the preset mode. Make sure that the function mode returns to preset mode, and then press the preset button in which your desired RDS station is preset. -
Page 12: Pi Seek Setting
PI SEEK Setting Setting the Time to automatically Adjust When you set to ON, the time is automatically adjusted by RDS data. Press and hold FUNC./SETUP for at least 2 seconds to activate the SETUP mode. Press and hold FUNC./SETUP for at least 2 seconds to activate the SETUP mode. -
Page 13: Pty (Programme Type) Tuning
When traffic information stations cannot be received: PTY (Programme Type) Tuning In the tuner mode: When the TP signal can no longer be received for over 1 minute, the “TA” indicator blinks. Press FUNC./SETUP to activate the function mode. In the CD mode: When the TP signal can no longer be received, the traffic Press 3 PTY to activate the PTY mode, while the information station of another frequency will be selected... -
Page 14: Displaying Radio Text
Displaying Radio Text CD/MP3/WMA/AAC Text messages from a radio station can be displayed. Rotary encoder Press TITLE while receiving FM in the radio mode to SOURCE select the Radio Text display. (OPEN) The display will change every time the button is pressed. If there is PS (Programme Service Name) PS (Programme Service Name)* (Blank) -
Page 15: Repeat Play
• Do not remove a CD during its eject cycle. Do not load more than • If a CD changer or an MP3 compatible CD changer is connected: one disc at a time. A malfunction may result from doing either. After pressing FUNC./SETUP to select the function mode (RPT/ •... -
Page 16: File/Folder Name Search (Concerning Mp3/Wma/Aac)
File/Folder Name Search About MP3/WMA/AAC (concerning MP3/WMA/AAC) CAUTION Folder and file names may be searched and displayed during playback. Except for private use, duplicating audio data (including MP3/ WMA/AAC data) or distributing, transferring, or copying it, Press /ESC to activate Search selection mode whether for free or for a fee, without permission of the copyright during MP3/WMA/AAC playback. - Page 17 ID3 tags/WMA tags Order of files This device supports ID3 tag v1 and v2, and WMA tag. Files are played back in the order that the writing software writes If tag data is in an MP3/WMA/AAC file, this device can display them to the disc.
-
Page 18: Sound Setting
MultEQ, developed by Audyssey Labs, automatically corrects the audio for the listening environment. The system is optimized for selected positions in the vehicle. To accomplish this, MultEQ must take measurements of the vehicles response characteristics. For details on the set up procedure, consult your authorized Alpine dealer. -
Page 19: Adjusting And Storing The Parametric Equalizer Curve
Turn the Rotary encoder to select the desired Turn the Rotary encoder to select PROTECT equalizer characteristic, and then press /ENT. YES/NO, and then press /ENT to store the adjusted contents. Parametric EQ Graphic EQ (Initial setting) PROTECT YES PROTECT NO (Initial setting) PEQ: 5-band Parametric EQ (Initial setting) GEQ: 7-band Graphic EQ... -
Page 20: Recalling The Stored Equalizer Curve
(how fast the filter rolls off the highs or lows). Adjustments should be made according to the reproduction characteristics of the speakers. Depending on the speakers, a passive network may not be necessary. If you are unsure about this point, please consult your authorized Alpine dealer. -
Page 21: Adjusting And Storing The Crossover Settings
Adjusting to a frequency range holding the desired button for at least 2 seconds. outside that recommended may cause damage to the speakers. For the recommended crossover frequencies of Alpine speakers, refer Turn the Rotary encoder to select PROTECT to the respective Owner’s Manual. -
Page 22: Recalling The Stored Crossover Settings
Turn the Rotary encoder to adjust the output level. Example 1. Listening Position: Front Left Seat Adjustable output level: -12 to 0 dB. Adjust the time correction level of the front left speaker Repeat steps 3 to 6 to make adjustment to the other to a high value and the rear right to zero or a low value. -
Page 23: Setting The Time Correction Unit
Time Difference Table Setting the Time Correction Unit Delay Distance Distance Delay Distance Distance Number (cm) (inch) Number (cm) (inch) You can change the unit, (cm or inch) of time correction. 173.4 68.3 176.8 69.7 Press and hold FUNC./SETUP for at least 2 180.2 71.0 seconds to setup the Selection mode. -
Page 24: Recalling The Stored Time Correction Settings
Repeat steps 3 and 4 to set another speaker. Setting the MX Mode When the setting has been completed, select any one of the preset buttons (1 through 6), press MX (Media Xpander) makes vocals or instruments sound distinct and hold the desired preset buttons for at least 2 regardless of the music source. -
Page 25: Other Functions
The display in CD mode: Other Functions TEXT (TRACK NAME) * TRACK NO./ELAPSED TIME TEXT (DISC NAME) * TEXT (TRACK NAME) * TEXT (TRACK NAME)* CALENDAR/CLOCK TITLE (Blank) TEXT (TRACK NAME) * TRACK NO./ELAPSED TIME (Blank) Displaying the Text The display in MP3/WMA/AAC mode: FOLDER NAME* FILE NAME Text information, such as the disc name and the track name, will be... -
Page 26: Displaying Time
About the indication display SETUP When displaying Text, the following indicators are lit according to the mode. MP3/WMA/AAC You can flexibly customize the unit to suit your own preferences and Indicator/Mode CD Mode iPod Mode Mode usage. From the SETUP menu, Audio Setting, Display Setting, etc., can Folder Name be modified. -
Page 27: Bluetooth Setting
Setting the External Digital Input (Digital AUX) your preference. Digital AUX ON / Digital AUX OFF (Initial setting) When an ALPINE Ai-NET compatible digital audio processor Turning the Clock Display ON/OFF (Clock) (PXA-H701) and a DVD player (DVE-5207) not compatible with Clock ON (Initial Setting) / Clock OFF Ai-NET are connected, set Digital AUX to ON to enjoy 5.1-channel... -
Page 28: Connecting To An External Amplifier
To use the steering remote control, perform the following button operations after setting to ON and pressing /ENT. For details, consult your nearest Alpine dealer. Select the assigned function by turning the Rotary encoder. (e.g. Select SOURCE) -
Page 29: Audio Setting
Setting the Response Slope for the High Range Speaker (TW Setup) Audio Setting TW Setup Maker’s (Initial setting) / TW Setup User’s Depending on the response characteristics of the speaker, care should be AUDIO is selected on the setup main menu in step 2. taken when setting the response slope of the high range speaker to Subwoofer On and Off FLAT in 2.2ch (3WAY) mode (see “Adjusting and Storing the Crossover... -
Page 30: Scroll Type Setting
Scroll Type Setting Tuner Setting Scroll Type TYPE 1 / Scroll Type TYPE 2 (Initial setting) Choose from two scrolling methods. TUNER is selected on the setup main menu in step 2. Select the type you prefer. Adjusting Source Signal Levels (FM Level) TYPE 1: The characters scroll from right to left, a single FM Level High (Initial setting) / FM Level Low... -
Page 31: Ipod ® (Optional)
An iPod can be connected to this unit by using the proprietary Playlist Song — — ALPINE FULL SPEED™ Connection Cable (KCE-422i) (sold Artist* Album* Song — separately). When this unit is connected by using the cable, the controls Album* Song —... -
Page 32: Quick Search
Turn the Rotary encoder to select a song and Direct Search Function press /ENT. The selected song is played back. The unit’s direct search function can be used to search for an album, • After pressing and holding /ENT for at least 2 seconds while song, etc., more efficiently. -
Page 33: Random Play Shuffle (M.i.x.)
Random Play Shuffle (M.I.X.) Repeat Play The Shuffle function of the iPod is displayed as M.I.X. on this unit. Only Repeat One is available for the iPod. Shuffle Albums: Repeat One: The songs on each album are played back in proper order. Upon A single song is repeatedly played back. -
Page 34: Changer (Optional)
See “Multi-Changer Selection (Optional) ” on page 32 for selecting the CD Changers. Alpine’s Ai-NET system will support up to 6 CD Changers. When • The controls on this unit for CD Changer operation are operative operating two or more changers, the KCA-400C (Multi-Changer only when a CD Changer is connected. -
Page 35: Remote Control
Power Button Remote Control Press this button to turn the power on/off. Band Button Radio mode: BAND Button Press this button and the band will change. Changer mode: To switch the changer. UP Button Radio mode: SEEK (UP) button CD/iPod mode: Press this button to advance to the beginning of the next track. -
Page 36: Battery Replacement
Point the remote control transmitter at the remote control sensor. Remote control sensor Connectable to Remote Control Interface Box This unit may be controlled from the vehicle’s audio controls. An optional Alpine Remote Control Interface Box must be used. For details, contact your Alpine dealer. -
Page 37: Information
Otherwise, make sure the rest of your system is properly CD playback sound skips due to vibration. connected or consult your authorized Alpine dealer. • Improper mounting of the unit. - Securely re-mount the unit. -
Page 38: Indication For Ipod Mode
- Remove the disc by following these steps: the CD Changer. Press the button again for at least 2 seconds. If the disc still does not eject, consult your Alpine dealer. • No magazine is loaded into the CD Changer. - Insert a magazine. • Mechanism error. -
Page 39: Specifications
CHASSIS SIZE Specifications Width 178 mm (7") Height 50 mm (2") FM TUNER SECTION Depth 160 mm (6-1/4") Tuning Range 87.5-108.0 MHz NOSEPIECE SIZE Mono Usable Sensitivity 0.7 µV Alternate Channel Selectivity 80 dB Width 170 mm (6-3/4") Signal-to-Noise Ratio 65 dB Height 46 mm (1-13/16") -
Page 40: Installation And Connections
Failure to do so may result in damage to the unit and/or VEHICLE OPERATION, SUCH AS THE STEERING WHEEL OR the vehicle. When in doubt, consult your Alpine dealer. SHIFT LEVER. • The CDA-9887R uses female RCA-type jacks for connection to other units (e.g. -
Page 41: Installation
Metal Mounting Strap Installation Screw Caution Bolt Stud Do not block the unit’s fan or heat sink, thus preventing air circulation. If blocked, heat will accumulate inside the unit and may cause a fire. Hex Nut (M5) Air ventilation hole This unit When your vehicle has the Bracket, mount the long hex bolt onto the rear panel of the CDA-9887R and... -
Page 42: Connections
Connections (Black) ADAPTIVE STEERING REMOTE G . GND To adaptive steering remote control interface box (Brown/Yellow) ADAPTIVE STEERING REMOTE CONTROL IN1 To adaptive steering remote control interface box (Brown/Orange) ADAPTIVE STEERING REMOTE CONTROL IN2 To adaptive steering remote control interface box (Blue) To iPod (Black) - Page 43 Outputs Vehicle Display Interface control signals. Connect RED is right and WHITE is left. this to the optional Vehicle Display Interface box. Subwoofer Output RCA Connectors For details about connections, consult your nearest Alpine RED is right and WHITE is left. dealer. System Switch...
- Page 44 • Connect the ground lead securely to a bare metal spot (remove any paint, dirt or grease if necessary) of the car chassis. • If you add an optional noise suppressor, connect it as far away from the unit as possible. Your Alpine dealer carries various noise suppressors, contact them for further information.
- Page 48 Produktinformations-Karte ist freiwillig. et en l’envoyant à Alpine, vous acceptez voluntario. Si Vd. nos la remite, será it to Alpine, your data will be tabulated Sollten Sie diese Karte vervollständigen, que ces informations soient utilisées par utilizada de modo confidencial para el into reference data for future Alpine so werden die Daten für zukünftige...
- Page 49 Alpine, i Vostri dati saranno raccolti in un file di riferimento per lo sviluppo dei nuovi prodotti Alpine. In aggiunta Voi potrete ricevere in futuro informazioni riguardanti i nuovi prodotti o la richiesta di una Vostra opinione circa i prodotti o i servizi forniti da Alpine.
- Page 50 S/NO. LABEL...
Need help?
Do you have a question about the CDA-9887R and is the answer not in the manual?
Questions and answers