Advertisement
Quick Links
Download this manual
See also:
User Manual
a small Phillips screwdriver.
TROUBLESHOOTING
2. Insert the batteries, matching the polarity (+ and -)
PROBLEM
SYMPTOM
as shown in the battery compartment.
Remote
Cannot locate
sensor
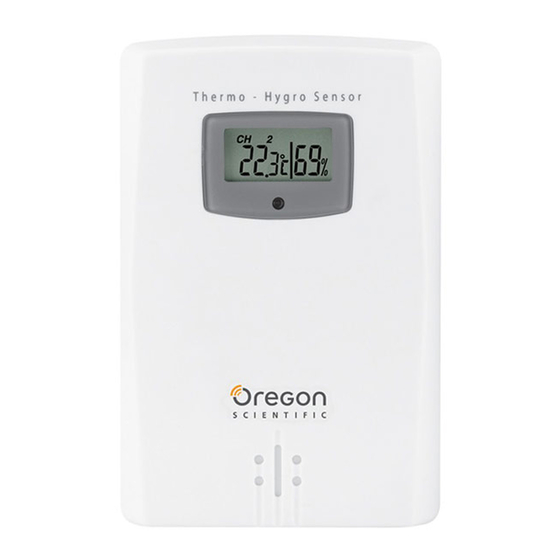
Remote Thermo-Hygrometer Sensor
remote sensor
Model: THGR122NX
Cannot change
channel
USER MANUAL
EN
Data does not
OVERVIEW
match main unit
FRONT VIEW
SPECIFICATIONS
SWITCH
OPTION
Channel
Channel 1-3. If you are using more
REMOTE SENSOR DIMENSIONS
than one sensor, select a different
L x W x H
92 x 60 x 20 mm
1
channel for each sensor.
(3.6 x 2.4 x 0.79 inches)
2
3. Set the channel. The switch is located in the battery
Weight
63 grams (2.22 ounces)
compartment.
without battery
4. Place the sensor near the main unit. Press RESET
on the sensor. Then, press the appropriate main unit
TEMPERATURE
button (as specified in the main unit manual) to initiate
signal sending between the sensor and the main
Unit
unit. The reception icon on the main unit will blink for
Outdoor range
approximately 3 minutes while it is searching for the
Resolution
sensor.
1. LCD display
5. Close the remote sensor battery compartment.
2. LED status indicator
6. Secure the sensor in the desired location using the wall
REMOTE SENSOR (THGR122NX)
BACK VIEW
mount or table stand.
RF frequency
Range
For best results:
Transmission
•
Insert the batteries and select the channel before you
mount the sensor.
Channel No.
•
Place the sensor out of direct sunlight and moisture.
•
Do not place the sensor more than 30 metres (98 feet)
POWER
from the main (indoor) unit.
Sensor batteries
•
Position the sensor so that it faces the main (indoor)
unit, minimizing obstructions such as doors, walls, and
furniture.
NOTE
It is recommended that you use alkaline batteries
•
Place the sensor in a location with a clear view to the
with this product for longer performance.
sky, away from metallic or electronic objects.
•
Position the sensor close to the main unit during cold
winter months as below-freezing temperatures may
ABOUT OREGON SCIENTIFIC
affect battery performance and signal transmission.
1. Wall mount hole
Visit our website (www.oregonscientific.com) to learn more
2. RESET hole
about Oregon Scientific products. If you're in the US and
3. CHANNEL number (1-3)
You may need to experiment with various locations to get
would like to contact our Customer Care department directly,
please visit: www2.oregonscientific.com/service/support
the best results.
4. Battery compartment
OR
(Battery compartment cover not shown)
SAFETY AND CARE
Call 1-800-853-8883.
Clean the product with a slightly damp cloth and
alcohol-free, mild detergent. Avoid dropping the product
GETTING STARTED
For international inquiries, please visit:
or placing it in a high-traffic location.
BATTERIES
www2.oregonscientific.com/about/international
Remote unit
2 x UM-4 (AAA) 1.5V batteries
EU-DECLARATION OF CONFORMITY
WARNINGS
Hereby, Oregon Scientific, declares that this Remote
This product is designed to give you years of service
Insert batteries before first use, matching the polarity
Thermo-Hygrometer Sensor (model: THGR122NX) is in
if handled properly. Oregon Scientific will not be
compliance with the essential requirements and other
(+ and -) as shown in the battery compartment. For best
responsible for any deviations in the usage of the
relevant provisions of Directive 1999/5/EC. A copy of the
results, install batteries in the remote sensor before the
device from those specified in the user instructions or
signed and dated Declaration of Conformity is available on
any unapproved alterations or repairs of the product.
main unit. Press RESET after each battery change.
request via our Oregon Scientific Customer Service.
Observe the following guidelines:
NOTE
Do not use rechargeable batteries.
•
Never immerse the product in water. This can cause
shows when batteries are low.
electrical shock and damage the product.
•
Do not subject the product to extreme force, shock, or
NOTE
It is recommended that you use alkaline batteries
COUNTRIES RTTE APPROVED COMPLIED
fluctuations in temperature or humidity.
All EU countries, Switzerland CH
with this product for longer performance.
•
Do not tamper with the internal components.
•
Do not mix new and old batteries or batteries of
TABLE STAND OR WALL MOUNT
different types.
To use the remote sensor stand or wall mount:
•
Do not use rechargeable batteries with this product.
FCC STATEMENT
•
Remove the batteries if storing this product for a long
This device complies with Part 15 of the FCC Rules.
period of time.
Operation is subject to the following two conditions: (1) This
device may not cause harmful interference, and (2) This
•
Do not scratch the LCD display.
device must accept any interference received, including
interference that may cause undesired operation.
NOTE
The technical specification of this product and
contents of this user guide are subject to change without
WARNING
Changes or modifications not expressly
notice. Images not drawn to scale.
approved by the party responsible for compliance could void
the user's authority to operate the equipment.
NOTE
This equipment has been tested and found to comply
with the limits for a Class B digital device, pursuant to Part
REMOTE SENSOR (THGR122NX)
15 of the FCC Rules. These limits are designed to provide
reasonable protection against harmful interference in a
SETUP SENSOR
residential installation.
1. Open the remote sensor battery compartment with
THGR122NX EU MANUAL R3.indd 1
This equipment generates, uses and can radiate radio
Sensore Remoto
frequency energy and, if not installed and used in accordance
Modello: THGR122NX
with the instructions, may cause harmful interference to
REMEDY
radio communications. However, there is no guarantee
Check batteries
that interference will not occur in a particular installation. If
MANUALE PER L'UTENTE
this equipment does cause harmful interference to radio or
Check location
television reception, which can be determined by turning the
IT
Check sensors.
equipment off and on, the user is encouraged to try to correct
Only one sensor
the interference by one or more of the following measures:
PANORAMICA
is working
•
Reorient or relocate the receiving antenna.
Initiate a
VISTA ANTERIORE
•
Increase the separation between the equipment and
manual sensor
receiver.
search
•
Connect the equipment into an outlet on a circuit different
from that to which the receiver is connected.
•
Consult the dealer or an experienced radio / TV technician for
1
help.
2
DECLARATION OF CONFORMITY
The following information is not to be used as contact for
support or sales. Please call our customer service number
(listed on our website at www.oregonscientific.com, or on the
warranty card for this product) for all inquiries instead.
We
Name:
Oregon Scientific, Inc.
°C
1. Display LCD
Address:
19861 SW 95
Ave.,Tualatin,
th
-20°C to 60°C
2.
Indicatore LED
Oregon 97062 USA
0.1°C
Telephone No.:
1-800-853-8883
VISTA POSTERIORE
Per un migliore risultato:
declare that the product
433 MHz
Product No.:
THGR122NX
30 metres (98 feet)
Product Name:
Remote Thermo-Hygrometer Sensor
with no obstructions
Manufacturer:
IDT Technology Limited
Every 40 seconds
Address:
Block C, 9/F, Kaiser Estate,
1 - 3
Phase 1,41 Man Yue St.,
Hung
Hom, Kowloon,
Hong Kong
2 x UM-4 (AAA) 1.5V
is in conformity with Part 15 of the FCC Rules. Operation is
subject to the following two conditions: 1) This device may
not cause harmful interference. 2) This device must accept
any interference received, including interference that may
1. Foro per il fissaggio a muro
cause undesired operation.
2. RESET
3.
Numero di canale CHANNEL (1-3)
4. Vano batterie
(Il coperchio del vano batterie non è mostrato)
SICUREZZA E MANUTENZIONE
Pulire il prodotto usando un panno leggermente inumidito e
OPERAZIONI PRELIMINARI
un detergente delicato senza alcool. Evitare di versare liquidi
nell'unità o di collocare l'apparecchio in punti di maggior
BATTERIE
passaggio.
Alimentazione
2 batterie tipo UM-4 (AAA) da 1,5V
Inserire le batterie prima di utilizzare l'unità per la prima
AVVERTENZE
volta, accordando le polarità (+ e -) come mostrato nel vano
batterie. Per un migliore risultato, si consiglia di installare le
Il presente prodotto è progettato per offrire molti anni di
batterie nel sensore remoto, dopo averle inserite nell'unità
funzionamento soddisfacente a condizione che venga
principale. Premere RESET dopo ogni sostituzione delle
batterie.
maneggiato con cura. Oregon Scientific declina ogni
responsabilità per danni derivanti da un utilizzo
NOTA
Non utilizzare batterie ricaricabili.
dell'apparecchio diverso da quello specificato nel presente
indica che le batterie sono scariche.
manuale d'uso, o da qualsiasi alterazione o riparazione non
NOTA
Per una maggiore durata, si consiglia di utilizzare
autorizzata del prodotto. Attenersi alle seguenti istruzioni:
batterie alcaline.
SUPPORTO DA TAVOLO O FISSAGGIO A MURO
Uso del supporto da tavolo o fissaggio a muro del sensore
and Norway
N
remoto:
NOTA
presente manuale d'uso sono soggetti a modifiche senza
preavviso. Le immagini non sono riprodotte in scala.
SENSORE REMOTO (THGR122NX)
IMPOSTAZIONE DEL SENSORE
RISOLUZIONE DEI PROBLEMI
1. Aprire il vano batterie del sensore remoto usando un
piccolo cacciavite.
2. Inserire le batterie nel vano batterie, accordando le
polarità (+ e -) come mostrato.
Sonde Thermo-Hygromètre Sans Fil
POSSIBILI
PROBLEMA
SINTOMO
SOLUZIONI
Modèle : THGR122NX MANUEL
Non è possibile
Verificare le batterie
localizzare il
D'UTILISATION
sensore remoto
Controllare la posizione
FR
Controllare i sensori.
Non è possibile
VUE D'ENSEMBLE
Solo un sensore è in
Sensore
cambiare canale
funzione
Remoto
FACE AVANT
I dati visualizzati
sul sensore non
Avviare una ricerca
INTERRUTTORE
OPZIONE
corrispondono a
manuale dei segnali
quelli dell'unità
dai sensori
Channel
Canali 1-3. Se si utilizza più di un
principale
1
sensore, selezionare un canale
2
diverso per ciascun sensore.
SPECIFICHE
3. Impostare il canale. L'interruttore si trova nel vano
DIMENSIONI DEL SENSORE REMOTO
batterie.
B x A x P
2 x 60 x 20 mm
4. Collocare
il
sensore
vicino
all'unità
principale.
(3,6 x 2,4 x 0,79 pollici)
trasmissione del segnale. Premere RESET sul sensore.
Peso
63 grammi (2,22 once)
Quindi premere per iniziare la trasmissione di segnali tra
senza batteria
il sensore e Potrebbe essere necessario cambiare più
volte la l'unità principale. L'icona di ricezione sull'unità
TEMPERATURA
posizione per ottenere i migliori risultati. principale
lampeggerà per circa tre minuti durante la ricerca del
Unità di misura
°C
1. Affichage LCD
sensore.
Gamma Temperatura
da -20 °C a 60 °C
2. Voyant lumineux indicateur d'état
5. Chiudere il vano batterie del sensore remoto.
esterna
FACE ARRIÈRE
6. Collocare il sensore nel luogo desiderato usando il
Risoluzione
0,1 °C
supporto da tavolo o fissandolo al muro.
SENSORE REMOTO (THGR122NX)
Frequenza RF
433 MHz
•
Inserire le batterie e selezionare il canale prima di
montare il sensore.
Gamma
30 metri (98 piedi)
•
Collocare il sensore lontano dalla luce diretta del sole e
senza ostacoli
dall'umidità.
Trasmissione
Ogni 40 secondi
•
Non collocare il sensore a più di 30 metri (98 piedi)
Numero di canale
1 - 3
dall'unità principale (interno).
ALIMENTAZIONE
•
Collocare il sensore in modo che sia rivolto verso l'unità
principale (interno), riducendo al minimo gli ostacoli
Batterie del sensore
2, tipo UM-4 (AAA) da
come porte, muri e mobili.
1,5V
•
Collocare il sensore in un luogo in cui abbia una buona
NOTA
Per una maggiore durata, si consiglia di utilizzare
visibilità verso il cielo, lontano da oggetti metallici o
batterie alcaline.
elettronici.
1. Fixation murale
•
Collocare il sensore più vicino all'unità principale
durante i mesi invernali, poiché temperature rigide sotto
INFORMAZIONI AGLI UTENTI DEI PRODOTTI DI
2. RESET [RÉINITIALISATION]
lo zero possono influire negativamente sulla durata
TIPO "DOMESTICO"
3.
Numéro de CANAL (1 à 3)
della batteria e sulla trasmissione del segnale.
INFORMAZIONE AGLI UTENTI
4. Compartiment des piles
Potrebbe essere necessario cambiare più volte la
(La trappe du compartiment des piles n'est pas
posizione per ottenere i migliori risultati.
représentée)
MISE EN MARCHE
ai sensi dell'art. 13 del Decreto Legislativo 25 luglio 2005,
PILES
n. 151"Attuazione delle Direttive 2002/95/CE, 2002/96/CE
e 2003/108/CE, relative alla riduzione dell'uso di sostanze
Sonde
x 2 piles UM-4 (AAA) 1,5 V
pericolose nelle apparecchiature elettriche ed elettroniche,
Insérer les piles avant la première utilisation, en respectant
nonché allo smaltimento dei rifiuti"
la polarité (+ et -) indiquée dans le compartiment des piles.
Il simbolo del cassonetto barrato riportato sull'apparecchiatura
Pour un résultat optimal, installer les piles de la sonde avant
o sulla sua confezione indica che il prodotto alla fine della
d'installer celles de l'appareil principal. Appuyer sur RESET
propria vita utile deve essere raccolto separatamente dagli
après avoir remplacé les piles.
altri rifiuti.
REMARQUE
Ne pas utiliser de pile rechargeable.
L'utente dovrà, pertanto, conferire l'apparecchiatura giunta
a fine vita agli idonei centri di raccolta differenziata dei
rifiuti elettronici ed elettrotecnici, oppure riconsegnarla
apparaît lorsque les piles sont faibles.
al rivenditore al momento dell'acquisto di una nuova
apparecchiatura di tipo equivalente, in ragione di uno a uno.
L'adeguata raccolta differenziata per l'avvio successivo
REMARQUE
Il est recommandé d'utiliser des piles alcalines
dell'apparecchiatura dismessa al riciclaggio, al trattamento
avec ce produit pour des performances optimales.
e allo smaltimento ambientalmente compatibile contribuisce
•
Non immergere mai il prodotto nell'acqua. Ciò
ad evitare possibili effetti negativi sull'ambiente e sulla
potrebbecausare scosse elettriche e danneggiare il
salute e favorisce il reimpiego e/o riciclo dei materiali di cui è
prodotto.
INSTALLATION SUR PIED OU MONTAGE MURAL
composta l'apparecchiatura.
•
Non sottoporre il prodotto a forza eccessiva, urto, o
Lo smaltimento abusivo del prodotto da parte dell'utente
Utilisation de la fixation murale ou du pied ou de la sonde :
variazioni eccessive di temperatura o umidità.
comporta l'applicazione delle sanzioni amministrative
previste dalla normativa vigente
•
Non manomettere i componenti interni.
•
Non mischiare batterie vecchie e nuove o batterie di
INFORMAZIONI SU OREGON SCIENTIFIC
tipo diverso.
Per avere maggiori informazioni sui nuovi prodotti Oregon
•
Non
utilizzare
batterie
ricaricabili
con
questo
Scientific visita il nostro sito internet www.oregonscientific.
apparecchio.
it, dove potrai trovare tutte le informazioni di cui hai bisogno.
Per ricerche di tipo internazionale puoi visitare invece il sito
•
Rimuovere le batterie se si prevede di non utilizzare
www2.oregonscientific.com/about/international.asp.
l'apparecchio per un lungo periodo di tempo.
•
Non graffiare il display LCD.
DICHIARAZIONE DI CONFORMITA' UE
Le specifiche di questo prodotto e il contenuto del
Con la presente Oregon Scientific dichiara che questo
prodotto (Modello: THGR122NX) è conforme ai requisiti
SONDE SANS FIL (THGR122NX)
essenziali ed alle altre disposizioni pertinenti stabilite
dalla direttiva 1999/5/CE. Una copia firmata e datata della
MISE EN SERVICE DE LA SONDE
Dichiarazione di Conformità è disponibile, su richiesta,
1. Ouvrir le compartiment des piles à l'aide d'un petit
tramite il servizio clienti della Oregon Scientific.
tournevis cruciforme.
2. Insérer les piles, en respectant la polarité (+ et -)
indiquée dans le compartiment des piles.
PAESI CONFORMI ALLA DIRETTIVA R&TTE
Tutti I Paesi Ue, Svizzera CH
E Norvegia
N
Funksendeeinheit
RÉSOLUTION DES PROBLÈMES
Modell:THGR122NX
PROBLÈME
SYMPTÔME
SOLUTION
Vérifier les piles
BEDIENUNGSANLEITUNG
Impossible de
détecter la sonde
DE
Vérifier l'emplacement
ÜBERSICHT
Vérifier les sondes.
Impossible de
Une seule sonde peut
VORDERANSICHT
modifier le canal
fonctionner en même
Sonde
temps
SÉLECTEUR
OPTION
Les données ne
Canal
Canal 1 à 3. Sélectionner un
correspondent
Lancer une recherche
1
canal différent pour chaque sonde
pas sur l'appareil
manuelle de la sonde
utilisée (dans le cas où plusieurs
2
principal
sondes sont utilisées).
3. Régler le canal. Le sélecteur se trouve dans le l'appareil
SPÉCIFICATIONS
principal pendant les mois les plus froids compartiment
des piles.
DIMENSIONS DE LA SONDE
4. Placer la sonde le plus proche possible de l'appareil
L x l x H
92 x 60 x 20 mm
principal. Appuyer sur RESET sur la sonde. Puis,
(3,6 x 2,4 x 0,79 pouces)
appuyer sur le bouton approprié sur l'appareil principal
(cf. manuel d'utilisation de l'appareil principal) pour
Poids
63 grammes (2,22 onces)
initialiser le signal transmis entre la sonde et l'appareil
sans pile
principal. L'icône de réception affichée sur l'appareil
1. LCD-Anzeige
principal clignote pendant environ 3 minutes pour
2. LED-Statusanzeige
indiquer qu'il recherche la sonde.
TEMPÉRATURE
5. Refermer le compartiment des piles.
Unité
°C
RÜCKANSICHT
6. Installer la sonde à l'endroit souhaité, en utilisant le
produitsPlage de mesure
-20 °C à 60 °C
support sur pied ou la fixation murale.
extérieure
Résolution
0,1 °C
Pour un résultat optimal :
•
Insérer les piles et sélectionner le canal avant d'installer
SONDE (THGR122NX)
la sonde.
Fréquences RF
433 MHz
•
La sonde ne doit pas être exposée à l'humidité et ne
doit pas être installée en plein soleil.
Distance de transmission
30 mètres (98 pieds) sans
obstacle
•
Ne pas placer la sonde à une distance de plus 30
mètres (98 pieds) de l'appareil principal (à l'intérieur).
Fréquence de transmission
Toutes les 40 secondes
•
Positionner la sonde de telle sorte qu'elle soit orientée
N ° de Canal
1 à 3
en direction de l'appareil principal (à l'intérieur), en
évitant au maximum les obstacles tels que les portes,
les murs et les meubles.
ALIMENTATION
•
Choisir un emplacement à ciel ouvert pour la sonde, à
Piles
2 x UM-4 (AAA) 1,5 V
l'écart de tout objet métallique ou électronique.
1. Öse für die Wandaufhängung
•
Placer la sonde le plus proche possible de l'appareil
2. RESET
principal pendant les mois les plus froids de l'hiver car
REMARQUE
Il est recommandé d'utiliser des piles alcalines
3. CHANNEL (Kanalnr. 1-3)
le gel peut affecter les performances des piles et la
avec ce produit pour des performances optimales.
transmission du signal.
4. Batteriefach
Si besoin, essayer plusieurs emplacements jusqu'à
(Ohne Batteriefachdeckel abgebildet)
À PROPOS D'OREGON SCIENTIFIC
obtenir le meilleur résultat.
Pour plus d'informations sur les produits Oregon Scientific
France, rendez-vous sur notre site:
VORBEREITUNG ZUM EINSATZ
SÉCURITÉ ET ENTRETIEN
www.oregonscientific.fr.
BATTERIEN
Nettoyer ce produit avec un chiffon légèrement humide et un
Si vous êtes aux Etats-Unis, vous pouvez contacter notre
Funksendeinheit
2 x UM-4 (AA) 1,5 V Batterien
produit nettoyant doux et sans alcool. Ne pas faire tomber le
support consommateur directement sur le site:
produit et ne pas le placer là où pourrait être heurté.
Legen Sie die Batterien vor der ersten Benutzung ein und
www2.oregonscientific.com/service/support.asp
beachten Sie dabei die im Batteriefach abgebildeten (+ und
OU
-)-Polaritäten. Installieren Sie für optimale Ergebnisse die
AVERTISSEMENTS
Batterien zuerst in der Funksendeeinheit und dann in der
par téléphone au: 1-800-853-8883
Empfangseinheit. Drücken Sie nach jedem Batteriewechsel
Ce produit est conçu pour offrir des années de service
auf RESET.
Pour des renseignements internationaux, rendez vous sur le
s'il est manipulé correctement. Oregon Scientific décline
toute responsabilité en cas d'utilisation de cet appareil non
site: www2.oregonscientific.com/about/international.asp.
conforme aux instructions d'utilisation spécifiées dans ce
HINWEIS
Verwenden Sie keine wiederaufladbaren Akkus.
manuel et en cas de modification ou de réparation non
autorisée. Respecter les recommandations suivantes :
EUROPE - DECLARATION DE CONFORMITE
zeigt an, wenn die Batterien schwach sind.
•
Ne pas immerger l'appareil dans l'eau. Ceci peut
Par la présente Oregon Scientific déclare que l'appareil
Sonde Thermo-Hygromètre Sans Fil (Modèle:THGR122NX)
provoquer un choc électrique et endommager le
est conforme aux exigences essentielles et aux autres
produit.
HINWEIS
Um eine längere Lebensdauer zu erzielen, wird
dispositions pertinentes de la directive 1999/5/CE. Une
für dieses Gerät die Verwendung von Alkaline-Batterien
•
Ne pas soumettre le produit à des forces extrêmes ou à
copie signée et datée de la déclaration de conformité est
des variations de température et d'humidité.
empfohlen.
disponible sur demande auprès de notre Service Client.
•
Ne pas manipuler les composants internes.
•
Ne pas mélanger des piles neuves avec des piles
TISCHSTÄNDER ODER WANDAUFHÄNGUNG
usagées ou des piles de différents types.
Benutzung des Tischständers oder der Wandaufhängung
•
Ne pas utiliser de pile rechargeable avec ce produit.
der Funksendeeinheit
•
Retirer les piles si le produit est rangé pour une longue
durée.
PAYS CONCERNÉS RTT&E
•
Ne pas rayer l'affichage LCD.
Tous les pays Européens, la Suisse CH
et la Norvège
N
REMARQUE
Les spécifications techniques de ce produit et
le contenu de ce manuel sont susceptibles de modifications
sans avis préalable. Les représentations ne sont pas à la
taille réelle.
FUNKSENDEEINHEIT (THGR122NX)
EINRICHTEN DER FUNKSENDEEINHEIT
1. Öffnen Sie das Batteriefach der Funksendeeinheit mit
einem kleinen Kreuzschlitzschraubendreher.
2. Legen Sie die Batterien ein und beachten Sie dabei die
geändert werden. Die Bilder sind nicht maßstabsgerecht
im Batteriefach abgebildeten (+ und -)-Polaritäten.
gezeichnet.
FEHLERSUCHE UND ABHILFE
PROBLEM
SYMPTOM
ABHILFE
Batterien prüfen
Kann die
Funksendeeinheit
Standort prüfen
nicht lokalisieren
Funksendeeinheiten
Kann den Kanal
überprüfen Nur eine
SCHALTER
AUSWAHL
Funksende-
nicht ändern
Funksendeeinheit
einheit
arbeitet
Channel
Kanal
1-3.
Wenn
Sie
mehr
als
eine
Funksendeeinheit
einsetzen, wählen Sie für jede
Unpassende
Eine manuelle
Funksendeeinheit einen anderen
Daten für die
Funksendeeinheiten-
Kanal aus.
Empfangseinheit
suche einleiten
3. Kanal einstellen. Der Schalter befindet sich im
Batteriefach.
TECHNISCHE DATEN
4. Stellen
Sie
den
Sensor
in
der
Nähe
der
Empfangseinheit auf. Drücken Sie RESET an dem
FUNKSENDEEINHEITS-ABMESSUNGEN
Sensor.
Drücken
Sie
dann
die
entsprechende
L x B x T
92 x 60 x 20 mm
Taste an der Empfangseinheit (vgl. Sie dazu die
Bedienungsanleitung der Empfangseinheit), um das
(3,6 x 2,4 x 0,79 Zoll)
Aussenden des Signals zwischen dem Sensor und der
Poids
63 g (2,22Unzen)
Empfangseinheit einzuleiten. Das Empfangssymbol auf
ohne Batterie
der Empfangseinheit blinkt für etwa 3 Minuten, während
es nach einem Sensor sucht
5. Schließen Sie das Batteriefach der Funksendeeinheit.
TEMPERATUR
6. Befestigen
Sie
die
Funksendeeinheit
an
der
Einheit
°C
gewünschten Stelle mit der Wandbefestigung oder
Außenbereich
-20 °C bis 60 °C
verwenden Sie den Tischständer.
Abstufung
0,1 °C
Für optimale Ergebnisse:
•
Legen Sie die Batterien ein und wählen Sie den Kanal
FUNKSENDEEINHEIT (THGR122NX)
aus, bevor Sie die Funksendeeinheit montieren.
Funkfrequenz
433 MHz
•
Platzieren Sie die Funksendeeinheit entfernt von
Bereich
30 Meter (98 Fuß)
direkter Sonnenbestrahlung und Feuchtigkeit.
ohne Hindernisse
•
Platzieren Sie die Funksendeeinheit nicht weiter als
Datenübertragung
Alle 40 Sekunden
30 Meter (98 Fuß) von der Empfangseinheit im Haus
Kanal-Nr.
1 - 3
entfernt.
•
Positionieren Sie die Funksendeeinheit so, dass sie
auf die Empfangseinheit im Haus ausgerichtet ist, und
STROMVERSORGUNG
vermeiden Sie wenn möglich Hindernisse wie Türen,
Funksendeeinheits-Batterien
2 x UM-4 (AAA) 1,5 V
Wände und Möbel.
•
Platzieren Sie die Funksendeeinheit entfernt von
metallischen und elektronischen Objekten an einen
HINWEIS
Um eine längere Lebensdauer zu erzielen, wird
Standort mit freier Sicht auf den Himmel.
für dieses Gerät die Verwendung von Alkaline-Batterien
•
Positionieren Sie die Funksendeeinheit während der
empfohlen.
kalten Wintermonate in die Nähe der Empfangseinheit,
da
Temperaturen
unter
der
Frostgrenze
die
ÜBER OREGON SCIENTIFIC
Batterieleistung und dadurch die Signalübertragung
beeinträchtigen können.
Besuchen Sie unsere Website www.oregonscientific.
de und erfahren Sie mehr über unsere Oregon Scientific-
Möglicherweise müssen Sie verschiedene Standorte testen,
Produkte. Auf der Website finden Sie auch Informationen,
um optimale Ergebnisse zu erzielen.
wie Sie im Bedarfsfall unseren Kundendienst erreichen und
Daten herunterladen können. Für internationale Anfragen
besuchen Sie bitte unsere Website: www2.oregonscientific.
SICHERHEIT UND PFLEGE
com/about/international.
Reinigen Sie das Gerät mit einem leicht angefeuchteten
Tuch und einem alkoholfreien milden Reinigungsmittel.
EU-KONFORMITÄTSERKLÄRUNG
Vermeiden Sie das Herabfallen des Gerätes oder die
Platzierung an einem stark frequentierten Standort.
Hiermit erklärt Oregon Scientific, dass Funksendeeinheit
(Modell: THGR122NX) mit den grundlegenden Anforderungen
und anderen relevanten Vorschriften der Richtlinie 1999/5/
WARNUNGEN
EG übereinstimmt. Eine Kopie der unterschriebenen und mit
Datum versehenen Konformitätserklärung erhalten Sie auf
Dieses Gerät ist für viele Betriebsjahre vorgesehen, sofern
Anfrage über unseren Oregon Scientific Kundendienst.
es richtig gehandhabt wird. Oregon Scientific übernimmt
keine Verantwortung für beliebige Abweichungen von der in
der Bedienungsanleitung spezifizierten Verwendung oder für
irgendwelche ungenehmigte Änderungen oder Reparaturen
des Geräts. Beachten Sie folgende Hinweise:
KONFORM IN FOLGENDEN LÄNDERN
•
Tauchen Sie das Gerät niemals in Wasser. Dies kann
Alle Länder der EU, Schweiz CH
einen elektrischen Schock und Beschädigungen des
Gerätes verursachen.
und Norwegen
N
•
Setzen Sie die Empfangseinheit keiner extremen
Gewalt,
keinen
Stößen
und
keinen
hohen
Temperaturänderungen aus.
•
Machen Sie sich nicht an den internen Komponenten
zu schaffen.
•
Mischen Sie keine neuen und alten Batterien oder
Batterien unterschiedlichen Typs.
•
Verwenden Sie in diesem Gerät keine wiederaufladbaren
Akkus.
•
Entfernen Sie die Batterien, wenn Sie das Produkt über
einen längeren Zeitraum lagern.
•
Verkratzen Sie nicht die LCD-Anzeige.
HINWEIS
Die technischen Daten dieses Gerätes und der
Inhalt dieser Bedienungsanleitung können ohne Mitteilung
1/29/08 9:12:56 AM
Advertisement

Subscribe to Our Youtube Channel
Related Manuals for Oregon Scientific THGR122NX


Summary of Contents for Oregon Scientific THGR122NX
- Page 1 Oregon Scientific declina ogni auf RESET. if handled properly. Oregon Scientific will not be a fine vita agli idonei centri di raccolta differenziata dei Pour des renseignements internationaux, rendez vous sur le compliance with the essential requirements and other s’il est manipulé...
- Page 2 álcool. Evite deixar o produto cair e não o deixe zachte, alcoholvrije detergens. Voorkom dat het product kan VARNINGSMEDDELANDEN hänvändelse till OREGON SCIENTIFIC servicecenter. mais sobre os produtos Oregon Scientific. vallen en plaats het niet waar voortdurend veel passage is.
Need help?
Do you have a question about the THGR122NX and is the answer not in the manual?
Questions and answers