Table of Contents
Advertisement
Quick Links
Download this manual
See also:
User Manual
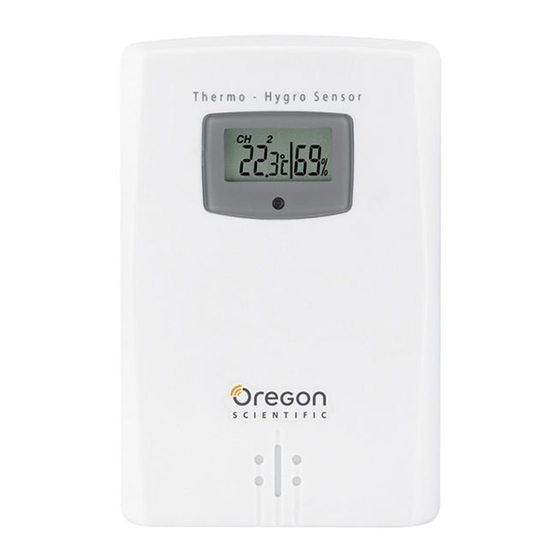
Remote Thermo-Hygrometer Sensor
Model: THGR122NX
USER MANUAL
EN
INTRODUCTION
Thank you for selecting the Oregon Scientifi c™ Remote
Thermo-Hygrometer Sensor (THGR122NX). This product
is compatible various wireless weather station products,
such as the BAR628HG and BAR629HG.
Keep this manual handy as you use your new product.
It contains practical step-by-step instructions, as well as
technical specifi cations and warnings you should know.
PRODUCT OVERVIEW
REMOTE SENSOR (THGR122NX)
1
2
1. LCD display
2. LED status indicator
1
2
3
4
1. Wall mount hole
2. RESET hole
3. CHANNEL number (1-3)
4. Battery compartment
(Battery compartment cover not shown)
GETTING STARTED
BATTERIES
Remote unit
2 x UM-4 (AAA) 1.5V batteries
Insert batteries before fi rst use, matching the polarity
(+ and -) as shown in the battery compartment. For best
results, install batteries in the remote sensor before the
main unit. Press RESET after each battery change.
NOTE Do not use rechargeable batteries.
shows when batteries are low.
NOTE It is recommended that you use alkaline batteries
with this product for longer performance.
TABLE STAND OR WALL MOUNT
To use the remote sensor stand or wall mount:
REMOTE SENSOR (THGR122NX)
SETUP SENSOR
1. Open the remote sensor battery compartment with a
small Phillips screwdriver.
2. Insert the batteries, matching the polarity (+ and -) as
shown in the battery compartment.
SWITCH
SWITCH
OPTION
OPTION
Channel
Channel
Channel 1-3. If you are using more
Channel 1-3. If you are using more
than one sensor, select a different
than one sensor, select a different
channel for each sensor.
channel for each sensor.
3. Set the channel. The switch is located in the battery
compartment.
4. Place the sensor near the main unit. Press RESET
on the sensor. Then, press the appropriate main unit
button (as specifi ed in the main unit manual) to initiate
signal sending between the sensor and the main
unit. The reception icon on the main unit will blink for
approximately 3 minutes while it is searching for the
sensor.
5. Close the remote sensor battery compartment.
6. Secure the sensor in the desired location using the
wall mount or table stand.
For best results:
•
Insert the batteries and select the channel before you
mount the sensor.
•
Place the sensor out of direct sunlight and moisture.
•
Do not place the sensor more than 30 metres (98 feet)
from the main (indoor) unit.
•
Position the sensor so that it faces the main (indoor)
unit, minimizing obstructions such as doors, walls, and
furniture.
•
Place the sensor in a location with a clear view to the
sky, away from metallic or electronic objects.
•
Position the sensor close to the main unit during cold
winter months as below-freezing temperatures may
affect battery performance and signal transmission.
You may need to experiment with various locations to get
the best results.
SAFETY AND CARE
Clean the product with a slightly damp cloth and alcohol-
free, mild detergent. Avoid dropping the product or placing
it in a high-traffi c location.
WARNINGS
This product is designed to give you years of service if
handled properly. Oregon Scientifi c will not be responsible
for any deviations in the usage of the device from those
specifi ed in the user instructions or any unapproved
alterations or repairs of the product. Observe the following
guidelines:
•
Never immerse the product in water. This can cause
electrical shock and damage the product.
•
Do not subject the product to extreme force, shock, or
fl uctuations in temperature or humidity.
•
Do not tamper with the internal components.
•
Do not mix new and old batteries or batteries of
different types.
•
Do not use rechargeable batteries with this product.
•
Remove the batteries if storing this product for a long
period of time.
•
Do not scratch the LCD display.
NOTE The technical specifi cation of this product and
contents of this user guide are subject to change without
notice. Images not drawn to scale.
TROUBLESHOOTING
PROBLEM
PROBLEM
PROBLEM
SYMPTOM
SYMPTOM
SYMPTOM
REMEDY
REMEDY
REMEDY
Remote
Remote
Remote
Cannot locate
Cannot locate
Cannot locate
Check batteries
Check batteries
Check batteries
sensor
sensor
sensor
remote sensor
remote sensor
remote sensor
Check location
Check location
Check location
Cannot change
Cannot change
Cannot change
Check sensors. Only
Check sensors. Only
Check sensors. Only
channel
channel
channel
one sensor is
one sensor is
one sensor is
working
working
working
Data does not
Data does not
Data does not
Initiate a manual
Initiate a manual
Initiate a manual
match main unit
match main unit
match main unit
sensor search
sensor search
sensor search
SPECIFICATIONS
REMOTE SENSOR DIMENSIONS
L x W x H
92 x 60 x 20 mm
(3.6 x 2.4 x 0.79 inches)
Weight
63 grams (2.22 ounces)
without battery
TEMPERATURE
Unit
˚F
Outdoor range
-20˚C to 60˚C (-4˚F to 140˚F)
Resolution
0.1˚C (0.2˚F)
REMOTE SENSOR (THGR122NX)
RF frequency
433 MHz
Range
30 metres (98 feet) with
no obstructions
Transmission
Every 40 seconds
Channel No.
1 - 3
POWER
Sensor batteries
2 x UM-4 (AAA) 1.5V
NOTE It is recommended that you use alkaline batteries
with this product for longer performance.
ABOUT OREGON SCIENTIFIC
Visit our website (www.oregonscientifi c.com) to learn more
about Oregon Scientifi c products such as digital cameras;
MP3 players; children's electronic learning products and
games; projection clocks; health and fi tness gear; weather
stations; and digital and conference phones. The website
also includes contact information for our customer care
department in case you need to reach us, as well as
frequently asked questions and customer downloads.
We hope you will fi nd all the information you need on
our website, however if you'd like to contact the Oregon
Scientifi c Customer Care department directly, please visit:
www2.oregonscientifi c.com/service/support
OR
Call 949-608-2848 in the US.
For international enquiries, please visit:
http://www2.oregonscientific.com/about/international/
default.asp
EC-DECLARATION OF CONFORMITY
Hereby, Oregon Scientifi c, declares that this Remote
Thermo-Hygrometer Sensor is in compliance with the
essential requirements and other relevant provisions of
Directive 1999/5/EC.
A copy of the signed and dated Declaration of Conformity
is available on request via our Oregon Scientifi c Customer
Service.
COUNTRIES RTTE APPROVAL COMPLIED
All EC countries, Switzerland CH
All EC countries, Switzerland CH
and Norway
and Norway
N
N
Sonde Thermo-Hygromètre Sans Fil
Modèle : THGR122NX
MANUEL D'UTILISATION
FR
INTRODUCTION
Nous vous remercions d'avoir choisi la Sonde Thermo-
Hygromètre Sans Fil (THGR122NX) d'Oregon Scientifi c.
Ce produit est compatible avec de nombreuses stations
météo telles que les modèles BAR628HG et BAR629HG.
Garder ce manuel à portée de main lors de l'utilisation de
ce nouveau produit. Il contient des informations importantes
concernant la sécurité et l'entretien. Il illustre étape par étape
les instructions afi n d'utiliser au mieux ce produit.
VUE D'ENSEMBLE DU PRODUIT
SONDE SANS FIL (THGR122NX)
1
2
1. Affi chage LCD
2. Voyant lumineux indicateur d'état
1
2
3
4
1. Fixation murale
2. RESET [RÉINITIALISATION]
3. Numéro de CANAL (1 à 3)
4. Compartiment des piles
(La trappe du compartiment des piles n'est pas
représentée)
MISE EN MARCHE
PILES
Sonde
x 2 piles UM-4 (AAA) 1,5 V
Insérer les piles avant la première utilisation, en respectant
la polarité (+ et -) indiquée dans le compartiment des piles.
Pour un résultat optimal, installer les piles de la sonde
avant d'installer celles de l'appareil principal. Appuyer sur
RESET après avoir remplacé les piles.
REMARQUE Ne pas utiliser de pile rechargeable.
apparaît lorsque les piles sont faibles.
REMARQUE Il est recommandé d'utiliser des piles alcalines
avec ce produit pour des performances optimales.
INSTALLATION SUR PIED OU MONTAGE MURAL
Utilisation de la fi xation murale ou du pied ou de la sonde :
SONDE SANS FIL (THGR122NX)
MISE EN SERVICE DE LA SONDE
1. Ouvrir le compartiment des piles à l'aide d'un petit
tournevis cruciforme.
2. Insérer les piles, en respectant la polarité (+ et -)
indiquée dans le compartiment des piles.
indiquée dans le compartiment des piles.
indiquée dans le compartiment des piles.
indiquée dans le compartiment des piles.
indiquée dans le compartiment des piles.
indiquée dans le compartiment des piles.
indiquée dans le compartiment des piles.
indiquée dans le compartiment des piles.
indiquée dans le compartiment des piles.
SÉLECTEUR
SÉLECTEUR
OPTION
OPTION
Canal
Canal
Canal 1 à 3. Sélectionner un canal différent
Canal 1 à 3. Sélectionner un canal différent
pour chaque sonde utilisée (dans le cas où
pour chaque sonde utilisée (dans le cas où
plusieurs sondes sont utilisées).
plusieurs sondes sont utilisées).
3. Régler le canal. Le sélecteur se trouve dans le
compartiment des piles.
4. Placer la sonde le plus proche possible de l'appareil
principal. Appuyer sur RESET sur la sonde. Puis,
appuyer sur le bouton approprié sur l'appareil principal
(cf. manuel d'utilisation de l'appareil principal) pour
initialiser le signal transmis entre la sonde et l'appareil
principal. L'icône de réception affi chée sur l'appareil
principal clignote pendant environ 3 minutes pour
indiquer qu'il recherche la sonde.
5. Refermer le compartiment des piles.
6. Installer la sonde à l'endroit souhaité, en utilisant le
support sur pied ou la fi xation murale.
Pour un résultat optimal:
•
Insérer les piles et sélectionner le canal avant
d'installer la sonde.
•
La sonde ne doit pas être exposée à l'humidité et ne
doit pas être installée en plein soleil.
•
Ne pas placer la sonde à une distance de plus 30
mètres (98 pieds) de l'appareil principal (à l'intérieur).
•
Positionner la sonde de telle sorte qu'elle soit orientée
en direction de l'appareil principal (à l'intérieur), en
évitant au maximum les obstacles tels que les portes,
les murs et les meubles.
•
Choisir un emplacement à ciel ouvert pour la sonde, à
l'écart de tout objet métallique ou électronique.
•
Placer la sonde le plus proche possible de l'appareil
principal pendant les mois les plus froids de l'hiver car
le gel peut affecter les performances des piles et la
transmission du signal.
Si besoin, essayer plusieurs emplacements jusqu'à obtenir
le meilleur résultat.
SÉCURITÉ ET ENTRETIEN
Nettoyer ce produit avec un chiffon légèrement humide et un
produit nettoyant doux et sans alcool. Ne pas faire tomber le
produit et ne pas le placer là où pourrait être heurté.
AVERTISSEMENTS
Ce produit est conçu pour offrir des années de service
s'il est manipulé correctement. Oregon Scientifi c décline
toute responsabilité en cas d'utilisation de cet appareil non
conforme aux instructions d'utilisation spécifi ées dans ce
manuel et en cas de modifi cation ou de réparation non
autorisée. Respecter les recommandations suivantes :
•
Ne pas immerger l'appareil dans l'eau. Ceci peut provoquer
un choc électrique et endommager le produit.
•
Ne pas soumettre le produit à des forces extrêmes ou
à des variations de température et d'humidité.
•
Ne pas manipuler les composants internes.
•
Ne pas mélanger des piles neuves avec des piles
usagées ou des piles de différents types.
Advertisement
Table of Contents

Subscribe to Our Youtube Channel
Related Manuals for Oregon Scientific THGR122NX


Summary of Contents for Oregon Scientific THGR122NX
- Page 1 Cannot change Cannot change Cannot change Check sensors. Only Check sensors. Only Check sensors. Only Thermo-Hygrometer Sensor (THGR122NX). This product Hygromètre Sans Fil (THGR122NX) d’Oregon Scientifi c. channel channel channel one sensor is one sensor is one sensor is SONDE SANS FIL (THGR122NX)
- Page 2 Remoto de Oregon Scientific™ Este producto es Sonde Sonde Sonde Sonde Sonde Impossible de Impossible de Impossible de Impossible de Impossible de Vérifi...
- Page 3 Oregon Scientific declina ogni Pour des renseignements internationaux, rendez vous sur le auf RESET. if handled properly. Oregon Scientific will not be a fine vita agli idonei centri di raccolta differenziata dei compliance with the essential requirements and other s’il est manipulé...
- Page 4 (+ e -) conforme mostradas no CE – DECLARAÇÃO DE CONFORMIDADE Sensor (Model: THGR122NX) voldoet aan de essentiële do aparelho divergentes do especificado nas instruções de batterijen inzetten, daarbij lettend op de aanduiding van gevolgen van afwijkend gebruik van de instructies die in de För bästa resultat, installera batterierna i fjärrenheten före...
Need help?
Do you have a question about the THGR122NX and is the answer not in the manual?
Questions and answers