Table of Contents
Advertisement
Advertisement
Table of Contents

Related Manuals for Electrolux CEW30EF6GBE


Summary of Contents for Electrolux CEW30EF6GBE
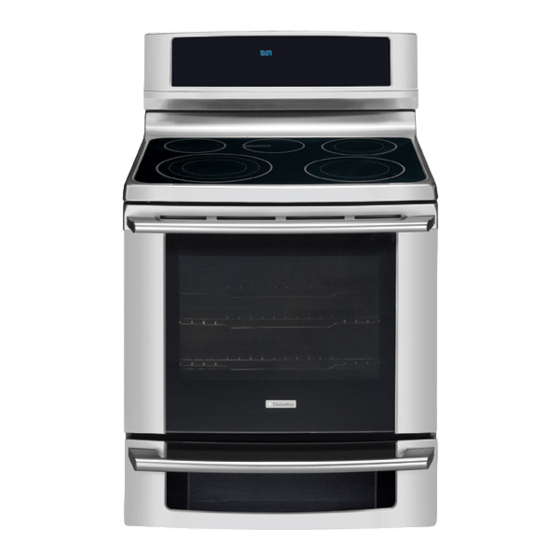
- Page 1 Use & Care Guide 30" Free-Standin 9 Wave-Touch TM Electric Range...
-
Page 2: Table Of Contents
Cleaning recommendations ......54-55 Cooktop maintenance ......... Cooktop cleaning .......... 56-57 Oven door removal ........58-59 Changing oven lights ........60-61 Solutions to Common Problems ......62-64 Warranty #P2007 Electrolux Home Products, Inc. All rights reserved. Printed in the USA... -
Page 3: Safety
Safety important safety instructions Recognize safety symbols, words and labels Safety items throughout this manual are labeled with a WARNING or CAUTION based on the risk type as described below: This symbol alerts you to situations that may cause serious body harm, death or property damage. - Page 4 before turning it on, and turn the zone off before surface zones and oven heating elements may removing the pan. be hot even though they are dark in color. Areas • Use proper pan size--This appliance is near surface zones may become hot enough to equipped with one or more surface units of cause burns.
- Page 5 Safety important safety instructions • Do not cover the broiler insert with aluminum • Glazed cooking utensils--Only certain types of glass, glass/ceramic, ceramic, earthenware, or foil. Exposed fat and grease could ignite. other glazed utensils are suitable for cook top °...
- Page 6 1. Luxury-Lighting 10. Rapid preheat -pg 20- interior oven lights -pg 11- 11. Convection convert -pg 27- 2. Control lock -pg 11- 3. Standard cooking 12. Cleaning -pg 52-53- • Bake-pg21- • Broil -pg 24- • Perfect-Convect 3TM convection bake -pg 26- •...
-
Page 7: Features
Features WaveoTouch TMoven control display & keys 13. Perfect-Pair oven key pads • Sure-2-fit Upperoven • Lower oven 14. User preferences -pg 46-51- Timer 1 lmin 11hr59min The following options are available under User Preferences: Clock 12 hr i:00hr 11hr59min •... - Page 8 Cooktop controls - pg 15-18- 19, Left rear 6 in, single radiant element (1200W) 20, Warmer zone 6 in, element (100W) 21, Right rear 5/7 in, expandable radiant element (750/1800W) 22, Left front 6/9/12 in, expandable radiant element (1000/2000/2700W) 23, Right front 6/9 in, high wattage expandable radiant element (1200/3000W)
- Page 9 Features e features Your electric range features include: 1. Wave-Touch TMactivated glass control panel. 2. Wave-Touch TMelectronic oven & surface controls & timers. 3. Sure-2-fW Mcobalt blue self-cleaning upper oven interior. 4. Self-clean oven door latch. 5. Automatic interior oven door light switch. 6.
-
Page 10: Gettingstarted
Getting Started Setting clock at power up You will be prompted to enter the time of day in the The two timers provided with the oven control serve as extra reminders in the kitchen. When a event of a power failure or when you first provide electric power to your appliance. - Page 11 Getting Started Control lock Changing settings Software controls the upper and lower ovens so The control lock will lock the oven controls, cook that both may be set to operate at the same time top controls and the upper oven door. Control lock with unique settings.
-
Page 12: Settingsforbestresults
iiii!_iii@i:i!_:ili{(!i!:!:ii!,_i_iii@:(_!iii@i@iii,!i_£i Setting for Best Results Upper oven racks Typesofovenracks Bakinglayercakeswithlor2ovenracks Your appliance is equipped with 2 styles of interior For best results when baking cakes using 2 oven oven racks; 1 offsetoven rackand 2fully racks, placecookwareon rack positions2 &5 (- extendableLuxury-GlideT"ovenracks, refertoFig. - Page 13 Setting for Best Results Upper oven racks extendable glide rack Removing and replacing the offset rack (not illustrated) • To remove pull the oven rack straight forward until it reaches the stop position. Lifi up front of lower rack oven rack slightly and slide out.
-
Page 14: Surfacecooking
i_!_;_!_i!;!;_i_i_i_i_!_!_i;_!_!i!;_i_;_;_@_!_!i_:_i_i_i_i Surface Cooking Cookwsre Using propercookware Cookwarematerialtypes Thesizeandtypeofcookware used will influence Thecookwarematerialdetermineshowevenlyand thesettingneededforbestcookingresults, quicklyheatistransferredfromthesurfaceelement Cookwareshouldhaveflatbottomsthatmakegood tothepan bottom, Themostpopularmaterials contactwiththeentire surfaceheatingelement, available are: Checkforflatnessbyrotatingaruleracrossthe • Aluminum-Excelentheatconductor. Some bottomofthecookware, typesoffoodwillcauseittodarken(Anodized aluminumcookwareresistsstaining& pitting). If aluminum pansslideacrosstheceramic ..... cooktop, theymayleave metal markswhichwill resemble scratches. Remove these marks •... -
Page 15: Settingsurfacecontrols
Setting Surface Controls How the cooktop works About ceramic glass cooktop The ceramic cooktop has radiant surface elements @oed located below the surface of the glass. The design reed of the ceramic cooktop outlines the area of the surface element underneath. Make sure the diameter of the pan matches the diameter of the element outline on the cooktop. - Page 16 Fig. 5 Fig. 3 Fig. 4 Element size indicators Some cooktop zone positions offer 2 or 3 different element sizes. At these locations, you may choose to use the single inner heating ring only oryou may add 1 or 2 more heating rings with each press of the BURNER SIZE key.
- Page 17 Setting Surface Controls Setting the WaveoTouch TM Setting cooktop elements • If needed, wake the control panel. • Touch the ON OFF key for the desired heating zone. • If the heating zone has more than one burner ring size available, press and continue to press the BURNER SIZE key for the desired heating zone to change the ring size.
- Page 18 Setting Surface Controls About the warming zone For best results Use the warming zone (Fig. 6) to keep hot cooked foods warm such as; vegetables, gravies, • Always start with hot cooked food. casseroles, soups, stews, breads, pastries and • When warming pastries or breads the cover oven-safe dinner plates.
- Page 19 Display Abbreviations List of displayed abbreviations See the chart below for common abbreviations that you may see while using your appliance. Self clean Defrost Ell _ End of Cycle FIO* Faultcode error Hi setting Hotoven Lo setting Sa b bath mode Demo mode Sabbath mode failure Check food...
- Page 20 !_!;!!_i_i_i_:_!iii_i_!i_i_i_i_ii_ii_!iii!!iiiii!i;:i_!ii!i_!_i!i_i_i!i_i_i!_#!i_!_!_#i#_!:i;ii# Setting Oven Controls About rapid preheat Use the rapid preheat option on single rack baking to quickly bring the upper oven to baking temperature. The rapid preheat option may be set with the _ollowing cooking features: , Bake To add or change any cook settings after this Conv bake feature has started: •...
- Page 21 Setting Oven Controls About baking in upper oven If your recipe requires a different baking Use the bake feature to cook most food items that temperature than the auto-suggested (default) require normal cooking temperatures. temperature (example below shows upper oven Bake may be set with the following options: temperature set for 425°F/218°C) : •...
-
Page 22: Bake
!i!_!!iiiiili:ii:ii@!i!ii@i!i!:!iii!:!!@i!!_@@ii}iil Setting Oven Controls Using cook time in upper oven Adding a cook time when baking is beneficial when See example below to set the upper oven for bake, a recipe requiresa specific temperatureand period startingimmediatelywith preheatingtotheauto- oftimetocook. Followingtherecipecooktime suggest(default) settingof350 F (176 C) andthen helpsinsurethe... -
Page 23: Convectionbake
Setting Oven Controls Using cook time with end time in upper oven See example below to set the upper oven with Adding a cook time along with a specific end time preheating for bake at 375°F (176°C) for 50 minutes gives the same benefits as the cook time option in and to automatically shut-off at 5:30: addition to controlling exactly when the cooking... - Page 24 Setting Oven Controls Broiling in upper oven Setting broil Use the broil feature to cook meats that require See example below to set broil for the upper oven directexposuretoradiantheatforoptimum startingimmeadiatelywiththeauto-suggest(de- browningresults. Thiscookingfeatureisonly fault) setting: available intheupperoven. Usetheconvbroilfeaturetocookthickercutsof meats that requ re d rect exposure to rad ant heat Press and theconvectlon fan foroptlmum...
- Page 25 Setting Oven Controls Setting broil Insert The broil pan insert (if equipped) contains slots that allows grease from the meat to drain into the broil pan. Place prepared meat on broil pan insert and then place onto broiler pan as shown -Fig. 3-. Recommended broiling times...
- Page 26 Press START/enter Convbakemaybesetwiththefollowing options: • Convconvert Once START is pressed the oven will begin • Cook time or cook time with end time heating. The oven display shows PRE-HEATING • Probe during this time. • Rapid preheat After the oven reaches set temperature, PRE- HEATING will turn off and a beep will indicate the Benefits of convection...
-
Page 27: Usingconvectionconvert
Setting Oven Controls Using convection convert Setting convection convert The conv convert option allows you to convert any See the example below to set conv bake, starting normal baking recipe using the convection bake immediately with the auto-suggest (default) setting feature. -
Page 28: Probe
Setting Oven Controls About convection roast Setting convection roast How convection roast works See example below to set convection roast to start immediately with the auto-suggest (default) setting: Convection roast is part of the Perfect-Convect 3TM system. Convection roast combines a cook cycle with the convection fan and element to rapidly roast meats and poultry. - Page 29 Setting Oven Controls Roasting recommendations Roasting rack instructions When preparing meats for convection roasting, you Roasting rack may use the broiler pan, insert and the roasting rack supplied with your appliance. The broiler pan will catch grease spills and the insert will help prevent grease splatters.
- Page 30 i@;!zii!;i,li:iiiii:iiiiiiiil ¸fill ¸ilili!i@iiii:!iii:!@i@i!!i!! Setting Oven Controls About the probe function Checkingtheinternal temperature ofyourfood is themost effective way ofinsudngthat your food Has been properly cooked, When cooMng meat poultry you can use such as roasts, h ams or probetocheck theintemal temperature withoutany guesswork.
- Page 31 Setting Oven Controls Setting the probe See the example below to set the probe target By the default, your oven will adjust to the keep temperature to180°F/82°C when using the warm setting once the probe has reached the set convection roast feature with oven set temperature temperature.
-
Page 32: Convection Broil
Setting Oven Controls About convection broiling Setting convection broil Convection broiling is part of the Perfect-ConvecPTM See example below to set conv broil for the upper system. Use the cony broil feature to cook thicker oven to start immediately with the auto-suggest cuts of meats that require direct exposure to (default) setting. -
Page 33: Keepwarm
Setting Oven Controls Setting keep warm About keep warm Use the keep warm feature to keep hot foods See example below to set keep warm for the upper warm. Keep warm may be set with the following oven to start immediately with the auto-suggest options: (default) setting. -
Page 34: Slow Cook
Setting Oven Controls About slow cook Settingslow cook Theslowcookfeaturemay beusedtocookfoods Seetheexample belowtoseta slowcookon moreslowlyatloweroventemperatures. cookingresultswillbelikethatofaSIowCookeror :::::: Crock-Pot. Thisfeatureisidealforroasting beef, pork & pou try Sow cook ng meats may resu t n Press • the exteriorofmeats becoming dark but not burnt; this is normal. -
Page 35: Perfect Turkey
Setting Oven Controls About Perfect Turkey TM Setting Perfect Turkey TM Heated air circulates around the turkey from all See the example below to use perfect turkey at the sides, sealing in juices and flavors. Poultry cooked default setting of 325°F and the probe at the default with this feature are crispy brown on the outside setting of 180°F (82°C). -
Page 36: Defrost
iii!@_!zii:!@iii@_!i!:iiiii!!!!@iiii_i{ii!ii!!!i!@ Setting Oven Controls About defrost Setting dehydrate Use the defrost feature to thaw small portions of See the example below toset dehydrate at the food at room temperature. Defrost may be set in the default temperature of 120 F. upper oven only. - Page 37 Setting Oven Controls Setting bread proof About bread proof See example below to set bread proof for 85°F/ The bread proof feature maintains a warm 30°C. environment useful for rising yeast-leavened products. Bread proof may be set in the upper oven only.
- Page 38 iii!@;!_i!i!i_iiii@@i!!iii!i;:@:_ii@_i!iiii!iiii_!il Setting Oven Controls Aboutmyfavorite RecaHingafavorite ¥oumaystoreupto ofyourmostfrequentIyused heat settings and cooking times, three for each oven. These keyswill lightinthe displaywhen they Step PreSs areavailableforsettingorrecalling. Eachkeywillallowyoutostoreacookingfeature, PressUPPEROVEN UP,ER ovensettemperatureandacooktimeforeitherthe upperovenorloweroven. 2.ChooseMYFAVORITE q) Savingmyfavoriteinstructions 3. PressSTART/enter All the favorite keys will display after selecting the upperorloweroven.
-
Page 39: Bread Proof
Setting Oven Controls Perfect Program multi stage Stage 2 Multi stage will allow you to program up to 3 stages 8. Press BROIL of cooking. Each stage may be programmed with a cooking feature, set temperature and a cook time. Multi stage is ideal when you want to add a keep 9. - Page 40 iiii_!i!!i_!_i_!i_i:!i!i!;i!i!;i_ii_!_i_!!!_!i_i_!_!_:!_i_#:_ii_i_i_z:i_!!!_;_#!!!!i!!ii!_;_z_i!_:_ Setting Oven Controls Setting multi stage Seetheexampletoprogramamulti stagefeature Stage3 _ foracasserole. Forstage 1, bakeat350 Fforl Forstage2, tobrown, broilforat500 Ffor4 13. PressKEEPWARM minutes. For stage 3, keep warm for 15 minutes, 14. Enter170F Step PreSs uPp,. 15 PFessSTART /b,, I. PressUPPEROVEN OVEN PressMULT STAGE...
- Page 41 Setting Oven Controls Sabbath mode It is recommended that any oven temperature This appliance provides special settings for use modification made within an active Sabbath mode when observing the Jewish Sabbath/Holidays. This mode will turn off all audible tones or visual be followed with 2 presses of the START key.
-
Page 42: Setting Sabbath Mode
iiii_!i!!i_i!i!!!_i!i_!_!i:;!_i:;!i_iii_i!i;:_!i!_!;!_!_i_:_i_:_;_;:i_!i!_i;!!_!_i_:!!_!_!_i!i_i!i!i_!i_i_i!_;_!_!;_ Setting Oven Controls Setting Sabbath mode Canceling Sabbath mode Th_×_mpl_b_low_how_tti.gth_ov_.to Th_×_mpl_b_low_how_howtooa.o_lth_ observetheSabbath(andJewish holidays), Sabbathmode. Step PFess 1. FirstsettheBAKEfeatureyouneedduringthe PressandhodboththeLO Sabbath foreither UPPER or LOWER oven. and HI keys together for 3 " Alsomakeanycooktopsettingsyoumaywish seconds_a beeDw sound) & tohaveavailable, andrelease: "... - Page 43 Setting Lower Oven Controls Perfect Pair lower oven The lower oven provides two basic modes, cooking and warming. The lower oven is ideal for cooking foods such as pizza, casseroles, baked potatoes and frozen convenience foods. Use the keep warm feature to keep hot cooked foods at serving tern perature.
-
Page 44: Setting Lower Oven Controls
_5_i_!_i_i_i_!_!_i!_i_i_!_i_!i_!_i_:`_!i_i_i!:_:_!_!_;_i_i_!_!_!_ Setting Lower Oven Controls Baking in the lower oven About keep warm in the lower Usethe bakefeaturetocookfood itemswith OVen normalcookingtemperatures....Use the keep warm feature to keep cooked foods BaKe may De se[wlm me [oHowmg op[Ions: warm • Cookt me •... - Page 45 Setting Lower Oven Controls Setting keep warm [n the lower oven See example below to set keep warm for the lower Temperature selection oven to start at 190°F / 88°C. See the recommended settings chart below for keep warm. If a particular food is not listed, use the default temperature of 170°F.
-
Page 46: Setting Your Preferences
Setting Your Preferences Setting clock display (CLO) user preferences The clock display mode allows you to turn the clock display on or off. The _ key controls options for preferences. The See the example below to change the clock display will show a digital abbreviation and a value display to OFF. -
Page 47: Setting Your Preferences
Setting Your Preferences Changing between F° or C ° Setting 12 or 24 hour mode The clock display mode allows you to choose between 12 and 24 hour mode. The factory pre-set clock display mode is 12 hour. Your control has the ability to display and set Fahrenheit or Celsius temperatures. -
Page 48: Setting 12Hr Energy Saving Mode (Es)
Setting Your Preferences Setting 12hr energy saving Setting audio mode (AUD} mode (ES) The audio mode allows you choose between 6 levels of audio volume for the oven control• You The oven control has a factory preset built-in 12 may turn the audio off and later return to operating hour energy saving feature that will shut off the with all the normal audible sounds and alerts. -
Page 49: Adjusting Oven Temperature (Upc)
Setting Your Preferences Adjusting oven temperature Adjusting lower oven temperature (UPO) User programmable offset (UPO} Your appliance has been factory calibrated and The temperature may be increased +35°F (+19°C) or decreased -35°F (- 19°C) from normal. tested to ensure an accurate baking temperature. For the first few uses, follow your recipe times and See the example below to increase the temperature recommendations... -
Page 50: Factory Default Reset (Rst)
_i_:_!_!_i_!_i_!_;!_!_!_i_!_!_ii_:_!;_!i_!i_!_!_!i_ Setting Your Preferences Factory default reset (RST) Youmaychoosetorestoreyourfactorysettings. Thiswilleraseallsettingsorfavoritesthatyou havesaved. Seetheexamplebelowresetyourcontrol. 1. Pressandcontinuetopress USER PREF until you reach the _'.J factorydefaultresetmode. -F_g. 7- 2. Usethe +hior -Iototoggleto theyesoptiontoreset -Fig. 1-. hi°rio 3. PressCANCEL/offifyou ..decide notto reset, ..'--'- i,-b _ii _!!:i _ Oi!::::i:i ¸_II:I... - Page 51 i!i! UPO lower oven i::IP_t[I pre-sets Li-J2.! * Audio mode provides 6 possible settings.
-
Page 52: Self-Clean
DONOTforcetheovendooropen.The automatic d oorlockingsystem canbe damaged. • Remove thebroilerpan,insert, a llutensils and anyaluminumfoil.These items cannot withstand high cleaning temperatures. • All oven racks MUST be removed. If they are left in while attempting to set a self-clean cycle, the display will show REMOVE RACKS -Fig. 2. The oven control will not start a self-clean cycle without first removing all the oven racks. -
Page 53: Self-Clean
Self-Clean Settin 9 se+f°c+ean Setting de+ayed se+f+c+ean The clean feature provides 3 different choices for You may wish to set your appliance to perform a self-cleaning the upper oven• Set the clean for lite self-clean cycle sometime later (up to 12 hours (2 hrs), reed (3 hrs) or heavy soils (4 hrs). - Page 54 ci ii0c,eao,o0 • S CHeanin9 Recommendation Aluminum (trim pieces) & vinyl Use hot, soapy water and a cloth. Dry with a clean cloth. Painted and plastic control knobs For general cleaning, use hot, soapy water and a Body parts, cloth. For more difficult soils and built-up grease Pa"...
-
Page 55: Care & Cleaning
Care and Cleaning Oven racks Oven racks must be removed. Clean by using a mild, abrasive cleaner following manufacturer's instructions. Rinse with clean water and dry. Use soap & water to thoroughly clean the top, Oven door sides and front of the oven door. Rinse well. You may use a glass cleaner on the outside glass of the oven door. -
Page 56: Cooktop Maintenance
1_ii!i_!_!7_!i_ii_i_i_i!_i!ii!i!iiii_!iiii_!iiii!_i_!_i_!i_;_!ii_i_iii_i_!!!_!_:_i!_i!_i_!_i_!!ii_!:i!ii_i_!!!i!!:!!_!_!!!_!i:! Care and Cleaning Cooktop maintenance Cooktop cleaning maintaining your ceramic glass cooktop. Pr orto us ng yourcooktop for the f rst t me app y ean _g_n supped w th some of the cooktop c ean ng cream your new apphance. Buff w_th a non-abrasive cloth orno-scratchdeaningpad. -
Page 57: Cooktop Cleaning
Care and Cleaning Cooktop cleaning Plastic or foods with a high sugar content: Special caution for aluminum use on the These types of soils need be removed immediately cooktop if spilled or melted onto the ceramic cooktop Aluminum Foil - Use of aluminum foil on a hot surface. - Page 58 Care and Cleaning The oven door with Luxury° Hold hinges Fig. 1 Fully open the oven door -Fig, 1-, Unlock both oven door hinge locks by pulling them up and away from the oven frame until they stop (unlocked position) -Figs, 2-. If needed use a small flat-bladed screwdriver to assist with loosening the door hinge locks.
- Page 59 iiiii#:i!i!ii!_i:i:i:#i:i!#i Care and Cleaning The oven door with Luxury- Hold _ hinges To . o.,oce ,.e U.-O.o.e°.oo. I. Firmly grasp theoven dooralong both sides just below the door handle. When positioning the door hinge arms with the door hinge slots in the oven frame, you may wish to use your knee to stabilize the door before attempting to insert the door hinge arms in the hinge slots -Fig.
-
Page 60: Changing Oven Lights
!i:i_i!!i_ii_i_i_i_i!i!_!_:_!_i_i_ii_!i_i_i_i_ii!i!_!_i_!i!!_ii!_i!_ii_i!_i_ii!_!i!i_ii!i!_i!i!_i:ii_i!:_i!i!:!_!ii:!_ii:!_!i Care and Cleaning Special door care instructions Changing upper oven lights ..........................Do notcosethe_ oven doorunt a the nteror _::: oven racks are Tully insertea and retracted to thebackoftheoven. Theupperovenlightbulbsarelocatedattherear • Do not hit the -lass with _ots _ans or an of the oven cav ty and both are covered w th a otherobject. - Page 61 Care and Cleaning Changing lower oven light Removing lower oven and replacing light Before drawer removal, be sure to turn OFF the lower oven and let the drawer area cool completely. Pull the drawer away from the oven. Using a phillips-head screwdriver remove the two drawer screws from the insides of the front...
- Page 62 !i_i;ii_i_ii_ii_i_i_i_!_i_!i!i_i:i:;_i!i!ii!i_i!i_ii_iii_!:i_!_!!iii_!_!_!;!_!_i!i!!i!:!_!!_!i_!_!;_i!_!;_!_!_i!;_;!i_ii1i_ " " g " pense. The list includes c_mm_n_ccurrencesthataren_ttheresult_fdefectivew_rkmanship_rmaterialsinthisapp_iance_ :::: PrObM÷m Solution Applianceisnotlevel Besurefloorislevel, strong &stableenoughto ° adequatelysupportrange. Iffloorissaggingorsloping, contactacarpenterto , correctthesituation. Poorinstallation. Placeoven rackin centerofoven. Placea levelontheoven rack. Adjustlevelinglegsat , baseofapplianceuntiltheoven rackislevel. Kitchencabinetalignmentmaymakerangeappearnot level. Be surecabinetsare square & have sufficient roomforapplianceclearance.
- Page 63 • Meatnotproperly prepared. Remove e xcess fatfrom meat.Cutremaining f attyedges to prevent curling, b ut do notcutintolean. • Insert o nbroilerpanwrong sideup&grease not draining. A lways place gridonthebroilerpanwithribs up &slotsdowntoallowgrease to dripintopan(some models). • Grease hasbuiltuponovensurfaces. Regular cleaning is necessary w henbroiling frequently. Oldgrease or foodspatters causeexcessive s moking.
- Page 64 !i_ii!_i_ii_i_i_i_i_!_!!i_i_ii_i_ii!!i!;!_!_i_i!i_!_i_!_!_i_!_!_i_!_!_!i!i_:_i_i!_!_i_!i!i_!i!i_!i!i_!i!i_!i_i_!!i!_!i!_!!ii_:!_:_!i_i ii t,ons,o Com il P,ob'em Scratches or abrasions ° Coarse partides such as salt or sand between cooktop cooktopsurface and utensils can cause scratches. Be sure cooktop surface and bottoms of utensils are clean before usa ge. S maII sc ratc he s d o no t affe ct co o kin g a nd will .
- Page 65 N o t e $...
- Page 66 Notes i_i!_!_i!i_ii_!i!_!_i!i_ii_!i!_!_i!i_ii_!i!_!_i!i_ii_!i!_!_i!i_ii_!i!_!_i!i_ii_!i!_!_i!i_ii_!i!_!_i!i_ii_!i!_!_i!i_ii_!i!_!_i!i_ii_!i!_!
-
Page 67: Warranty
Major Appliances North America, a division of Electrolux Home Products, Inc. In Canada, your appliance is war- ranted by Electrolux Canada Corp. Electrolux authorizes no person to change or add to any obligations under this warranty. Obligations for service and parts under this warranty...
Need help?
Do you have a question about the CEW30EF6GBE and is the answer not in the manual?
Questions and answers