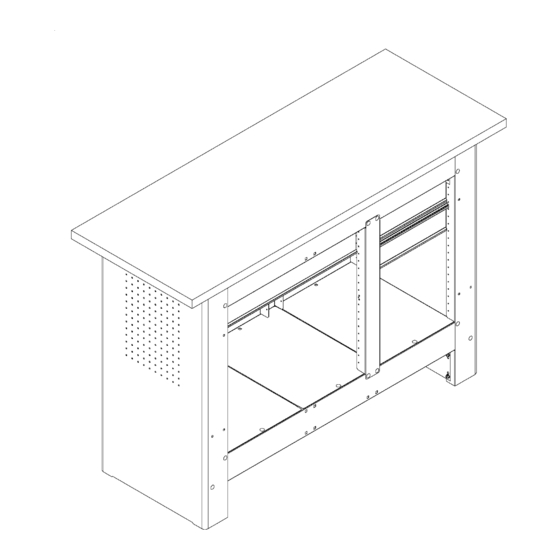
Craftsman WORKBENCH Operator's Manual
Hide thumbs
Also See for WORKBENCH:
- Operator's manual (12 pages) ,
- Operator's manual (8 pages) ,
- Operator's manual (12 pages)
Summary of Contents for Craftsman WORKBENCH
- Page 1 OPERATOR'S MANUAL CRRFTSMRN ° WORKBENCH CAUTION: Read and follow all Safety Rules and Operating Instructions before first use of this product. Sears, Roebuck and Co., Hoffman Estates, IL 60179, USA. F1483...
-
Page 2: Safety Warnings
SAFETY WARNINGS AND CAUTIONS: Use appropriate safety equipment when using power and hand tools. Failure to do so may cause personal injury or product damage. Use adequate manpower when assembling and moving this unit. Failure to do so may cause personal injury or product damage. - Page 3 G(6) C(4) D(3) E(2) A(2) B(2) H(3)
- Page 4 STEP 2 STEP1 AA (10) AA (16) EE (10) BB (8) FF (10) EE (16) Note: It may be easier to turn unit upside down for steps 2 and 3. FF (16) • Attach D(3). Attach B to A with BB. D (3) Assemble A(2) and C(4).
- Page 5 STEP 4 STEP3 AA (8) BB (12) EE (8) CC (12) FF (8) GG (12) Attach E(2). Separate slide parts. Release: Raise or lower Attach (2) Gd to each H. Wrench tighten to 40-50 in/Ibs (finger tighten Release -H (3) approximately 1/2 wrench turn).
- Page 6 STEP 5 STEP 4 Continued Attach Gu(6) to unit. I#[O]llll_l If Backwall with Metal Pegboard is purchased with this Workbench, see Backwall instructions assembly before continuing to assemble Gu (6) Workbench. Do NOT assemble top before returning to these instructions. Position J as desired.
- Page 7 STEP 5 - Continued STEP 6 Insert the drawer slides (Gd) into the workbench slides DD (6) (Gu) and push all of the way to the back. Pull the drawer open until it stops to ensure proper assembly. • Reposition J on unit.
- Page 8 REMOVING AND INSTALLING DRAWERS: Empty the drawer. Fully extend the drawer. Release Lever style- Lift or lower (depending on the slide) the release lever on both sides and pull drawer out to remove. Tab style- Depress the release tabs on both sides and pull drawer out to remove.
- Page 9 MANUAL DE USUARIO CRRFTSMRN ° BANCO DE TRABAJO ATENClON: Lea y siga todas las Normas de Seguridad y las Instrucciones de Funcionamiento antes de utilizar por primera vez este producto. Sears, Roebuck and Co., Hoffman Estates, lL 60179, USA. F1483...
- Page 10 ADVERTENCIAS Y PRECAUCIONES DE SEGURIDAD: Utilice un equipo de seguridad apropiado cuando use herramientas electricas y manuales. De Io contrario podria ocasionarse lesiones personales o dafiar el producto. Utilice el personal adecuado para el montaje y el traslado de esta unidad. De Io contrario podria ocasionarse...
- Page 11 G(6) C(4) D(3) E(2) A(2) B(2) H(3)
- Page 12 PASO 2 PASO 1 AA (10) AA (16) EE (10) BB (8) FF (10) EE (16) Nota: Puede resultar mas facil poner la unidad boca abajo para los pasos 2 y 3. FF (16) • Coloque D(3). Coloque Ben A usando BE}.
- Page 13 PASO 3 PASO 4 AA (8) BB (12) © EE (8) CC (12) © FF (8) GG (12) Coloque E(2) Separe las piezas de las guias. Liberacibn: Sube o baje Coloque (2) Gden cada H. Apriete con la Ilave inglesa a 40-50 pulgadas/libra (apriete...
- Page 14 PASO 5 PASO 4 - Continuacibn Coloque Gu(6) en unidad. Si adquiere el Panel Posterior con tablero de metal junto con este banco de trabajo, vea las instrucciones de montaje del panel posterior antes de continuar montando el banco de trabajo. Gu(6) monte la parte superior...
- Page 15 PASO 5 - Continuacion PASO 6 Inserte las guias del cajon (Gd) en las guias del banco DD(6) trabajo y empuje hasta el fondo. Saque totalmente el cajon hasta que haga tope para asegurarse de que esta adecuadamente instalado. • Vuelva a colocar J en la unidad.
- Page 16 QUITAR E INSTALAR CA JONES: Vacie el cajon. Saque el cajon por completo. Dispositivode liberacibn Estilo palanca - Suba o baje (dependiendo de la guia) la palanca de liberacion de ambos lados (esto permite que las guias se salten los topes). Tire para sacar.


Need help?
Do you have a question about the WORKBENCH and is the answer not in the manual?
Questions and answers