Table of Contents
Advertisement
Quick Links
Advertisement
Table of Contents

Subscribe to Our Youtube Channel
Related Manuals for Essick ECR 3301


Summary of Contents for Essick ECR 3301
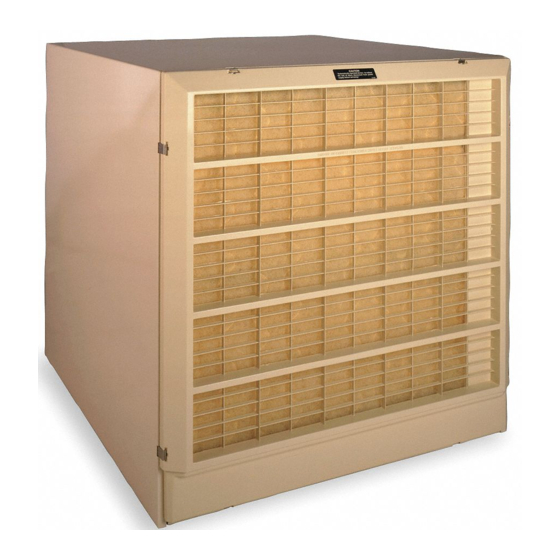
- Page 1 OWNERS MANUAL MODEL NO. ECR 3301 ECR 4000 ECR 4500 ECR 5200 ECR 6600 ECR 7200 CAUTION: Read All Instructions Carefully Before Starting The Installation. ESSICK AIR PRODUCTS ESSICK CONVERTIBLE DOWN/FRONT OUTLET EVAPORATIVE AIR COOLER LITTLE ROCK, ARKANSAS 72209 50209-3...
-
Page 2: Table Of Contents
ESSICK service center and we will repair or replace, at our option, at no charge to you with return freight paid by ESSICK. It is agreed that such repair or replacement is the exclusive remedy available from ESSICK AIR PRODUCTS and that ESSICK IS NOT RESPONSIBLE FOR DAMAGES OF ANY KIND, INCLUDING INCIDENTAL AND CONSEQUENTIAL DAMAGE. -
Page 3: Installation
• ECR-7 Wall Switch (7 position). Use ECR-5 (5 posi- tion) with existing pump type cooler wiring • Roof Stand Kit (if cooler is roof mounted) Cooler ECR 3301 - use ECK-30 kit Cooler ECR 4000 - use ECK-40 kit Cooler ECR 4500 - use ECK-40 kit... -
Page 4: Locating Your Cooler
INSTALLATION LOCATING YOUR COOLER This new design Essick cooler may be installed as a bot- tom or side air outlet cooler. The cooler must be securely fastened to a frame or pad mount. A roof kit is available from Essick. A duct must be attached to the cooler outlet. -
Page 5: Converting To Side Outlet
INSTALLATION CONVERTING COOLER TO SIDE AIR OUTLET (Fig. 4) 1. Remove both louvers and set them where they will not fall. See pg. 11. 2. Remove four louver clips on side opposite motor. 3. Remove a reservoir by pushing the water crossover tube from the grommet and lifting out the reservoir. -
Page 6: Mounting Cooler
INSTALLATION LIFTING COOLER CAUTION: DO NOT LIFT ON THE LOUVERS. REMOVE THE LOUVERS BEFORE LIFTING. DO NOT LIFT ON THE CENTER OF THE CABINET FLANGES. MOUNTING COOLER 1. Prepare duct to fit model used. See outlet size speci- fications on page 3. 2. -
Page 7: Electrical Connections
INSTALLATION ELECTRICAL CONNECTIONS The wiring must comply with local codes. If you are not familiar with the codes or wiring practices, get professional help. Use only an Essick ECR-5 or ECR-7 wall mounted switch. This new cooler does not require prewetting the pads before starting cooling and does not have a pump. -
Page 8: Final Assembly And Adjustment
INSTALLATION FINAL ASSEMBLY AND ADJUSTMENT PUT FLOAT VALVE IN COOLER Put the float valve through the spout hole and cabinet hole. Tighten the ring nut. Be sure the float moves straight up and down. TURN THE FLOAT UNTIL A NARROW SIDE IS UP. Snap the Splash Guard Cover into the Water Spout as shown. -
Page 9: Motor Pulley Adjustment
INSTALLATION MOTOR PULLEY ADJUSTMENT NOTE: ALL DUCT CONNECTED COOLERS MUST BE ADJUSTED. Long or small air ducts have excessive air resistance which decreases air output and motor amperage. You may compensate for this by adjusting the motor pulley. Use a clamp type ampmeter to check the motor amperage. -
Page 10: Cooling Your Home
You must have window, door, or vent openings to let air out when the cooler runs. The total opening areas you need are shown below: MODEL TOTAL OPENING AREA ECR 3301 5 Square feet minimum ECR 4000 8 Square feet minimum ECR 4500 9 Square feet minimum... -
Page 11: Spring, Summer And Fall Care
CARE OF YOUR COOLER CAUTION: ALWAYS SHUT OFF THE ELECTRIC POWER TO THE COOLER AT THE FUSEBOX BEFORE WORKING ON THE COOLER. WHEN YOUR HANDS ARE INSIDE THE COOLER YOU RISK INJURY IF THE COOLER IS ACCIDENTALLY TURNED ON INSIDE THE HOUSE. SPRING CARE: Clean your cooler. -
Page 12: Taking Off Pad
CARE OF YOUR COOLER TAKING OFF PAD (Fig. 18) 1. Lift up the small roller ends to unsnap the two cen- ter rollers. Pull out the two small rollers. 2. Pull out and turn the top roller bearing arm to line up the slot. -
Page 13: Putting On Pad
3. Push the motor to tighten the belt, until it moves about 1/2 inch with finger force. 4. Tighten the three motor mount bolts. REPLACEMENT PADS MODEL NUMBER ECR 3301 ECR 4000 ECR 4500 ECR 5200 ECR 6600 PAD NUMBER... -
Page 14: Repair Parts
REPAIR PARTS ESSICK CONVERTIBLE DOWN/FRONT OUTLET EVAPORATIVE AIR COOLER MODEL NOS. ECR 3301, ECR 4000, ECR 4500, ECR 5200, ECR 6600, ECR 7200... - Page 15 ESSICK CONVERTIBLE DOWN/FRONT OUTLET EVAPORATIVE AIR COOLER MODEL NOS. ECR 3301, ECR 4000, ECR 4500, ECR 5200, ECR 6600, ECR 7200 NOTICE: Order by PART NUMBER, not by Key Number. Refer to the back cover of this manual for parts ordering information.
-
Page 16: How To Order Repair Parts
MODEL NO. ECR 3301 ECR 4000 ECR 4500 ECR 5200 ECR 6600 ECR 7200 HOW TO ORDER REPAIR PARTS ESSICK AIR PRODUCTS 5800 MURRY • LITTLE ROCK, ARKANSAS 72209 ESSICK CONVERTIBLE DOWN/FRONT OUTLET EVAPORATIVE AIR COOLER The model number of your cooler will be found on a label fastened to the housing.
Need help?
Do you have a question about the ECR 3301 and is the answer not in the manual?
Questions and answers