Nikon COOLPIX L110 User Manual
Hide thumbs
Also See for COOLPIX L110:
- Manuel d'utilisation (156 pages) ,
- User manual (156 pages) ,
- Manual del usuario (156 pages)
Table of Contents
Advertisement
Quick Links
Advertisement
Table of Contents

Related Manuals for Nikon COOLPIX L110


Summary of Contents for Nikon COOLPIX L110
- Page 1 Nikon DIGITAL CAMERA COOLPI, User's Manual...
- Page 2 High-Definition Mukimedia interface are trademarks or registered trademarks of HDMI Licensing LLC • All other trade names mentioned in this manual or the other documentation provided with your Nikon product are trademarks or registered trademarks of their respective holders. AVC Patent...
- Page 3 More o nPlayback...
-
Page 4: Warnings
To prevent damage to your Nikon product or injury to yourself or to others, read the following safety precautions in their entirety before using this equipment. Keep these safety instructions where all those who use the product will read them. - Page 5 Failure to observe of four batteries). this precaution could result in • The EN-MH2 rechargeable batteries electric: shock. are for use with Nikon digital cameras • Do notdamage, modify, forciblytug only, and are compatible with bend tile power cable, place it under COOLPIX L110.
- Page 6 When connecting cables to the input Should the monitor break, (:are should and outputjacks, use only the cables provided or sold by Nikon for the be taken to avoid injury caused purpose, to maintain compliance with broken glass and to prevent liquid prod uct regulations.
- Page 7 Use the interface cables sold or communications. However, there is no provided by Nikon for your equipment. guarantee that interference will not Using other interface cables may occur in a particular installation. If this exceed the limits of Class B Part 15 of equipment does cause harmful the FCCrules.
- Page 8 Notice for customers in Canada CAUTION This Class Bdigital apparatus complies with Canadian ICES-003. ATTENTION Cet appareil nurn#rique de la classe B est conforme a la norme NMB-003 du Canada. Symbol for Separate Collection in European Countries This symbol indicates that this _j product is to be collected separately.
-
Page 9: Table Of Contents
For Your Safety ............................WARNINGS ..............................Notices ............................... Introduction ............................1 About This Manual ..........................Information and Precautions ......................Parts of the Camera ..........................The Camera Body ............................Raising and Lowering the BuiINn Flash ....................Attaching the Camera Strap and Lens Cap .................... The Monitor .............................. - Page 10 Basic Photography and Playback: I_Easy Auto M ode ........Step 1Turn the Camera On and S elect I_(Easy Auto) Mode ......... Indicators Displayed inI_(Easy auto) Mode ..........Step 2Frame aPicture ..............Using the Zoom ..............Step 3Focus and S hoot ..............Step 4Viewing and D eleting Images...
- Page 11 More on Playback ..........................59 Full-frame Operation .......................... Viewing Multiple Images: Thumbnail Playback ................ Calendar DispBy ............................Taking a Closer Look: Playback Zoom ..................Playback Menu ............................Print Set ..............................Slide Show ............................... Delete ............................... Editing Image ............................6 9 Image Editing Function ........................Editing Images ............................
- Page 12 Basic Camera Setup .......................... 9 3 Setup Menu ............................Menus ..............................I_1 Welcome Screen ............................ (_) Date ................................Monitor Settings ............................ [] Date Imprint ............................_} Vibration Reduction ..........................o_ Motion Detection ........................... -]) AF Assist .............................._) Sound Settings ............................Auto Off ..............................
-
Page 13: Introduction
Thank you for purchasing a Nikon COC)LPIX L110 digital camera. This manual was written to help you enjoy taking pictures with your Nikon digital camera. Read this manual thoroughly before use, and keep it where all those who use the product will read it. -
Page 14: Information And Precautions
• Nikon will not be held liable for any damages resulting from the use of this product, • While every effort was made to ensure that the information... -
Page 15: Notices
Notice Concerning Prohibition of Copying or Reproduction Note that simply being in possession of material that was digitally copied or reproduced by means of a scanner, digital camera or other device may be punishable by law. • Items prohibited by law from being copied or reproduced Do not copy or reproduce... -
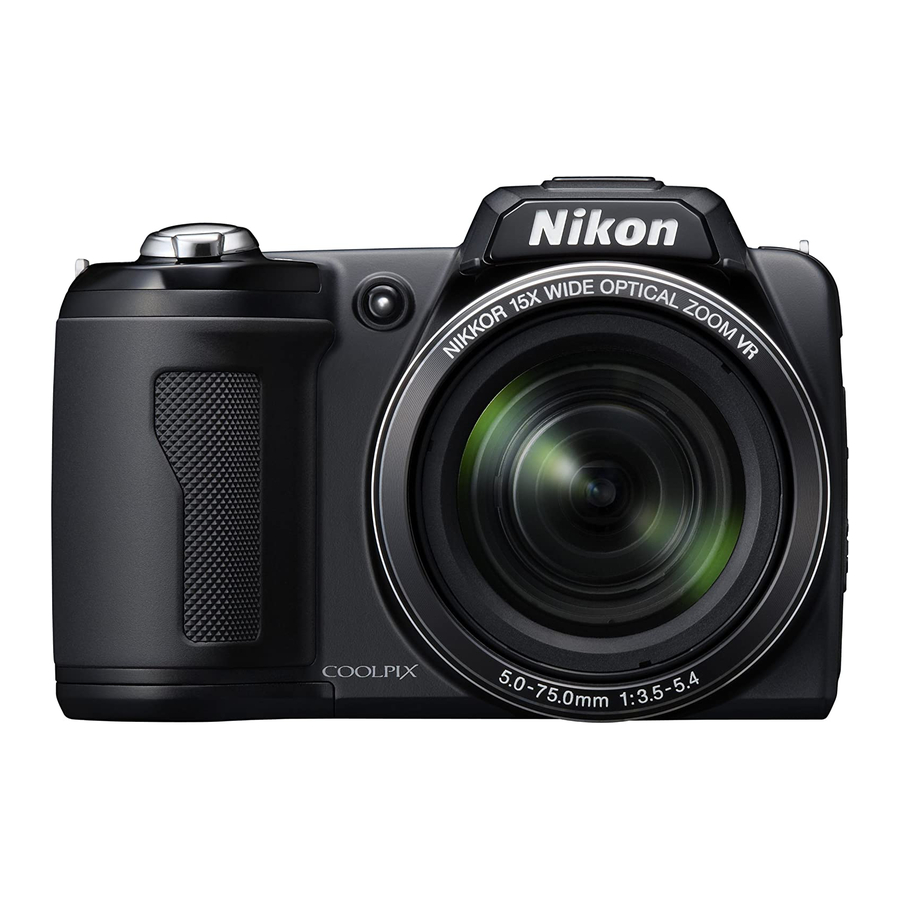
Page 16: Parts Of The Camera
Pin cover ........... 80, 83, 88 AF-assist illuminator ....... 25, 106 Lens ............120, 133 Power switch/Power-on ]amp DC input connector (for AC adapter ..............20, 108 available separatelyfrom Nikon) ..15, ] 22 Speaker .............. DC input connector cover ..... - Page 17 11 109 Monitor ..............I Battery<hamber/ memory card slot cover ....14, 18 Multi selector .........."_ (delete) button ....... 26, 79 I_1 (shooting mode) button ....10 MENU button ..... 12, 50, 63, 75, 94 O (movie-record) button ...... Tripod socket Flash lamp ............
-
Page 18: Raising And Lowering The Buiinn Flash
Raising Lowering Built-in Flash Raising the built-in flash See "Using tile Flash" (_ 29) for more information about flash settings. Lowering the Built-in Flash. Push tile built-in flash down gently to lower tile built- in flash when not in use. -
Page 19: Attaching The Camera Strap And Lens Cap
A,,ach,°O ,h. Cao.,a S,,ap a°d L.°s i:il Attach the lens cap to the camera strap, and then attach the strap to the camera (at two places). _1_ LensCap • Remove the lens cap before you shoot a picture. • At times when you will not be shooting pictures such as when the power is off or while you are... -
Page 20: The Monitor
The Monitor Tile following indicators may be displayed in tile monitor during shooting playback (actual display varies with current camera settings). Tile indicators and photo info displayed during shooting and playback will turn off after a few seconds (1_]] 101). __.£... - Page 21 Playback Date of recording ........Internal memory indicator ....Time of recording ........Movie playback indicator ...... Volume .............. Print-order icon .........._'lJ Battery level indicator ......Small picture ..........Movie options _ ..........D-Lighting icon ..........Image mode _ ..........Protect icon ..........
-
Page 22: Basic Operations
I_1 (shooting mode) button • Press a in playback mode to enter shooting mode. • Press a in shooting mode to display the shooting-mode selection menu and change the shooting mode (_ 34). (playback) button During shooting mode, the camera enters the playback mode when [] is pressed. -
Page 23: The Multi Selector
The Multi Selector This section describes standard uses of the multi selector to select modes, select menu options and to apply selection. Operate the multi selector by pressing it up, down, left, right, or by pressing For Shooting Display _ (flash mode) menu (_) 2g)/select the item above. -
Page 24: Menu Button
MENU button PressMENU t o display the menu for the selected mode. • Use the multi selector to apply settings ] 1). • Select a tab on the left side of the monitor to display the corresponding menu. • To exit the menu display, press MENUagain. -
Page 25: Help Displays
Help Displays Rotate the zoom control to T (_) when _./_ is displayed at the lower right the menu screen to view a description of the currently selected menu option. To return to the original menu, rotate the zoom control to T (_) again. -
Page 26: First Steps
Open the battery-chamber/memory card slot cover. • Beforeopening the battery-chamber/memory card slot cover,hold the cameraupside down to prevent the batteriesfrom falling out. Insert the Batteries • Confirmthat the positive (+) and negative (-)terminals are oriented correctlyasdescribedon the labelat the entrance of the battery chamber, and insert the batteries. - Page 27 Removing Batteries Be_re opening the battery chamber/memory card slot cover, turn the camera off and confirm that the power on lamp and the monitor are off. Additional Precautions Regarding Batteries • Read and follow the warnings and cautkms iii, 119). •...
-
Page 28: Setting Display Language, Date And Time
A language-selection and date setting screen for the internal clock is displayed tt]e first time the camera is turned on. Press the power switch to turn on the camera. The power-on lamp (green)lights for a moment and the monitor turns on. Removethe lenscap. - Page 29 Change the date and time. • Press • or • to edit the highlighted item. • Press i_ to move the cursor in the following order. D-> M-> Y-> Hour-> Minute-> • Press _1 to return to the previous item. Choose the order in which...
-
Page 30: Inserting Memory Cards
Images are saved in the camera's internal memory (approximately 43 MB) or on removable Secure Digital (SD) memory cards (available separately) (_ 122). If a memory card is inserted into the camera, images are automatically saved on the memory card and images saved to the memory card can be played back, deleted or transferred. -
Page 31: Removing Memory Cards
Removing Memory Cards Before opening tile battery-c hamber/merT_ory card slot <:over,turn the camera offand confirm that tile power-on lamp and tile monitor are off. Open tile battery<:ham berfmemory card slot <:overand press tile card in (_) to partially eject tile card. Remove tile card ((2}), being careful not to bend it. - Page 32 In I_ (easy auto) mode, the camera automatically determines an appropriate shooting mode when you frame a picture, allowing you to easily take pictures using a shooting mode that suits tile scene (_ 28). Remove lens cap and press power switch to turn on the...
- Page 33 Indicators Displayed in I_ (Easy auto) Mode mode icon In easy auto mode, the camera automatically selects I_, II_il, I_, Reduce the blurring caused by subject movement or camera shake. I'_il, or _ mode according to the current subject and framing. reduction icon Reduce the effects of...
- Page 34 Readythe camera. • Hold the camera steadily in both hands, keeping your fingers and other objects away from the lens, flash, AF-assist illuminator and microphone. Frame picture. Shooting modeicon • When the camera determines a scene mode, the shooting mode icon changes ([_]] 28).
- Page 35 Using the Zoom Use tile zoom control to activate optical zoom. Zoom out Zoom in Rotate tile zoom control toward T to zoom increasing tile size of the subject. Rotate tile zoom control toward to zoom out, increasing tile area visible in tile frame.
- Page 36 Pressthe shutter-release button halfway. When shooting non- human subjects or when When a face is detected: no faces are detected: -< Shutter Aperture Speed • When digital zoom is used, the focus Focus indicator area is not displayed and the camera __1__ indicator glows green.
- Page 37 During Saving While images are being saved, the number of exposures remaining display will blink Do not open the battery chamber/memory card slot cover Removing the memory card or the battery during saving may result in loss of data or in damage the saved data, camera or card Autofocus...
- Page 38 Viewing Images (Playback Mode) Press i-_-I, a (shooting mode) • The last image taken is displayed in full-frame playback (playback) mode. • Use the multi selector • or • to view additional images.Hold down tile multi selector • or • quickly scan through images.
- Page 39 Playback Mode See "More on Playback" 59) and "Editing Image" (_ 69) for more information. Power by Pressing When the camera is off, hold down to turn on the camera in playback mode. The lens will not extend. Viewing Image •...
- Page 40 Automatic Scene Selection The camera automatically selects one of the following scenes when you point the camera at a subject. • Ir, ll Auto mode (general use) • F_ Portrait (_ • I1_ Landscape (_ • _ Night portrait (_ •...
- Page 41 Indark l ocations orwhen t he subject isbacklit, you can shoot pictures with flash byraising the built-in flash. • The f lash h as arange ofabout 0.5 toS.S m (1 ft.8in. t o18 ft.) w hen t he camera zoomed out a ll t he way, and about 1.5 t o3.5 m(5 ft.to11 ft.) w hen t he camera is zoomed inall t he way.
- Page 42 2 Press _ (flash m ode) onthemulti s elector. • The flash menu is displayed. Press the multi selector • or • to select a mode, and press _), • The icon for the selected flash mode is displayed at the top of the monitor.
- Page 43 ,<: eye. £2_ If the camera detects "red eye" when a picture is taken, Nikon's own In Camera Red Eye Fix processes the image before it is saved. _" Note the following when using red eye reduction: •...
- Page 44 When using the self-timer, pictures are taken 10 seconds after the shutter-release button is pressed. When using the self4imeB use of a tripod is recommended. Set Vibration reduction (_ 104)in the setup menu (_ 93) to Off when using a tripod.
- Page 45 Exposure compensation isused toalter exposure from the value s uggested by the camera tomake images brighter ordarker. 1 Press[] (exposure compensation) onthe multi selector. • The exposure compensation guide is displayed. Press the multi selector • or • to adjust the exposure, and press _).
- Page 46 Select the shooting mode from I_easy auto mode, _'_ scene mode, [] smart portrait, _ sport continuous mode, orI_1 a uto mode. Pressa in shooting mode. • The shooting-mode selection menu is displayed. Use the multi selector • or • to select •...
- Page 47 Camera settings are automatically optimized for t he selected scene type. The following scene modes are available. Portrait _ Beach/snow _ Close-up assist Landscape _ Sunset _1 Food Night portrait Dusk/dawn i_ Museum Party/indoor [] Night landscape t_ Copy ....Selecting a Scene Mode Press a...
- Page 48 Features Tile folbwing icons are used for descriptions in this section: _: flash mode when tile built-in flash is raised (_ 29); _t_): self timer 32); _._: macro mode (_ 49); [_-A:exposure compensation 33). Portrait Use this mode for taking portraits in which the main subject stands out dearly.
- Page 49 Night portrait .._i_[] Use this mode to achieve a natural balance between the main subject and background lighting in portraits taken at night. • Shoot pictures with the buiINn flash raised. • If the camera detects a face, it focuses on the face. See "Face Detection"...
- Page 50 Beach/snow Captures the brightness of such subjects as snowfields, beaches, or sunlit expanses of water. • The camera focuses on the subject in the center of the fra me. Off _ Other settings can be selected, _ Sunset Preserves the deep hues seen in sunsets and sunrises. •...
- Page 51 [] Night landscape _J_[] Slow shutter speeds are u sed toproduce stunning night landscapes • Camera focuses at infinity The focus area or focus indicator ([_) 8) always gEows green when the shutter release button is pressed halfway Note however that objects in the foreground may not always be in focus...
- Page 52 ]1 FoOd Use this mode when taking pictures of food. • Macro mode (I_) 49) will turn ON and the zoom will automatically move to the closest possible shooting position. The closest distance at which the camera can focus varies depending on the zoom position.
- Page 53 copy ..Provides clear pictures of text or drawings on a white board or in print. • The camera focuses on the subject in the center of the fra me. • Use macro mode ([_]] 49) to focus at short ranges. •...
- Page 54 Taking Pictures for a Panorama Tile camera focuses on tile subject in tile center of the frame. Use a tripoct for best results. Set Vibration reduction (_ 104) to Off when using a tripod. Pressa in shooting mode ..display shooting-mode selection menu...
- Page 55 Press _ when shooting is completed. • The camera returns to step Panorama Assist • Set flash mode, selhtimer, macro mode and exposu re compensation before taking the first picture. They cannot be changed after the first picture is taken, images cannot be deleted, nor can zoom or...
- Page 56 The camera detects a smiling face to shoot the face automatically. Pressa in shooting mode display shooting-mode selector • or • to select selection menu use the multi L___" "----- ----- press The camera enters smart portrait mode. Framethe picture. •...
- Page 57 Face Detection Smiling Face Detection features • in some shooting conditions, face detection does not work and faces cannot be detected, • Notes on Face Detection Auto (Standby Mode) When Using Smart Portrait Mode When using smart portrait mode, Auto off (_ 108) will turn the camera off if no operations...
- Page 58 Sport continuous mode allows rapid, continuous shooting while you press and hold the shutter-release button fully. With continuous shooting, instantaneous movements in moving subjects (:an be captured. • With the default setting of Continuous H, the camera shoots up to 20 pictures at a rate of up to about 11.1 frames per second (fps).
- Page 59 Notes on Sport Continuous Shooting • It may take some time to save the images after shooting, The time it takes to save the images depends on the number of shots taken, the image mode, the memory card's write speed, etc. •...
- Page 60 In I_1 (auto) mode, macro mode (_ 49) and exposure compensation 33) can be applied and pictures can be taken using flash mode (_ 29) and self-timer 32). Pressing MENUin I_1 (auto) mode allows you to specily settings for all shooting menu items SO) depending...
- Page 61 Macro Mode Macro mode is used for taking pictures of objects as close as 1 cm (0.4 in.). Note that the flash may be unable to light the entire subject at distances of less than 50 cm (l ft. 8 in.). When using I_1 (auto) mode, follow the procedure below.
- Page 62 Shooting Menu (Auto Mode) While shooting in I_1 (auto) mode 48), tile shooting menu contains tile following options. _i-image mode Choose image size and quality (compression). Also available when using other shooting modes. White baia nee Match white balance to the light source. €oot_,uous l_ ss Change settings to Continuous or BSS (best shot selector).
- Page 63 _" Image Mode (Image Quality/Image Size) Set to I_1 (auto) mode ([_ 48) ") MENI (Shooting menu) -) 41" Image mode Choose image size and quality (compression). The size of the files, and with it the number of images that can be saved, depends on the size and quality (compression) of the images.
- Page 64 Number of Exposures Remaining The _llowing table lists the approximate number of images that can be saved in internal memory and on a 4 GB memory card. Note that the number of images that can be saved will differ depending on the composition of the image (due to JPEG compression).
- Page 65 White Balance (Adjusting hue) mode (_) 48) =_MENU ( Shooting menu) =_ WBWhite balance to I_1 (auto) The color of light reflected from an object varies with the color of the light source. The human brain is able to adapt to changes in the color of the light source, with the result that white objects appear white whether seen in the shade, direct sunlight, or under incandescent lighting.
- Page 66 Preset Manual Preset manual is used with mixed lighting or to compensate for light sources with a strong color cast (for example, to make pictures taken under a lamp with a red shade look as though they had been taken under white light). Place a white or gray reference object under the lighting...
- Page 67 Continuous Set to I_1 (auto) mode ([_) 48) -_ MENU (Shooting menu) -) _ Continuous Change settings to Continuous or BSS (best shot selector). Flash will be switched off for Continuous, BSS or Multi-shot 16, and focus, exposure and white balance are fixed at the values for the first picture in each series. single (default setting) One shot is taken each time shutter-release button...
- Page 68 ISOISO sensitivity MENU to _ (auto) mode (_]] 48) _ ( Shooting menu) ISO ISO sensitivity Sensitivity is a measure of how quickly the camera reacts to light. The higher the sensitivity, the less light needed to make an exposure. Although a high ISO rating is suited for taking pictures of subjects in action or in poor lighting, high sensitivity is often associated with "noise"...
- Page 69 Color Options Setto a/auto/mode/_ 4_/->,_U/Shoo_,ng menu/-> __o,orop_,oo_ h/lake colors more vivid or save images in rnonochrorne. Standard Color(default Setting) Usefor imagesexhibiting natural color. Wv_d c olor Useto achieve a vivid, "photoprint" effect. G_ Black-and-white Saveimages in black-and-white. Saveimages in sepiatones. C,'_ Cyanotype Saveimages in cyan-bluemonochrome.
- Page 70 Camera Settings that Cannot Be Set at the Same Time Certainsettings in tile shooting menu cannot be usedwith ()tiler functions. Restricted Functions Setting Description If set to Continuous, BSS, or Multi-shot Flash mode Continuous ([_] 55) 16, the flash cannot be used. Digital Zoo m When using Multi-shot 16, Image mode...
- Page 71 Press[] button during shooting to switch to playback mode and view images(_ 26). Thefollowing operationscan be performedwhile viewing imagesin fullqrame. ° Description "_"_ _°'_!7_'_÷ Press AV• • to view tile previous Choose images or next image. Hold down the multi sdector A, V, •...
- Page 72 Rotate the zoom control to W (_;_) in full-frame playback mode (_ 26) to display images in "contact sheets" of thumbnail images. The following operations can be performed while thumbnails are displayed. _° _lulul_O_se TI_I_!'_ Description ............Choose images Press the multi selector A, V, _1 or i_.
- Page 73 Calendar Display When displaying 16 thumbnail framesin playback mode (_ 60), switch to calendar display by rotating the zoom control to W (_;_). You (:an select images to view based on the day they were taken. Days containing images have a yellow line under them.
- Page 74 T (q) Rotating the zoom control to during full-frame playback mode (_ 26) zooms the current image, with the (:enter of the image displayed in the monitor. • The guide displayed in the right bottom in the monitor will show which part of the image is currently displayed.
- Page 75 The following options are available in playback mode. _U D-Lighting Enhances brightness and contrast in dark portions of images. Print set Select images to print and the number of copies for each. Slide sh0W View images saved in the internal memory or on a memory card in an automatic slide show.
- Page 76 Print Press the [] button (Playbackmode) "_ MENU ( Playbackmenu) -_ _1,Print set When printing images using one of the following methods, you can select which images will be printed and the number of copies of each image will be printed, and save this electronic "print order"...
- Page 77 S Choose whether ornottoalso print s hooting date and photo information. Choose Date press _) to print date of recording all images in the print order. [] D_t_ Info Choose Info and press _) to print photo information (shutter speed and aperture) on aH images in the print...
- Page 78 Slide Show Press the [] button (Playback mode) -_ MENU (Playback menu) -_ _ Slide show View images saved in the internal memory or on a memory card in an automatic: slide show. Use the multi selector to choose Start and press To repeat the slide show automatically, enable Loop and...
- Page 79 Delete Press the [] button (Playback mode) -) MENU (Playback menu) -) _ Delete Delete selected images or all images. Erase Selected images Delete selected images. _ Selecting Multiple Images (_] 68) Erase all images Delete all images. Notes on Deletion •...
- Page 80 Selecting Multiple Images The screen shown on the right will be displayed in the menus (shown below) when choosing images. Playback menu: Print set: Select images 64), Delete: Erase selected images Setup menu: Welcome screen:Select an image (_ g7), Protect (_ 114), Rotate image (_ 115),...
- Page 81 Nikon No reproduction in any form of this manual, in whole or in part (except for brief quotation in critical articles or reviews), may be made without written authorization from NIKON CORPORATION. NIKONCORPORATION Printed in Japan Fuji BIdg., Marunouchi 3-chome,...
Need help?
Do you have a question about the COOLPIX L110 and is the answer not in the manual?
Questions and answers