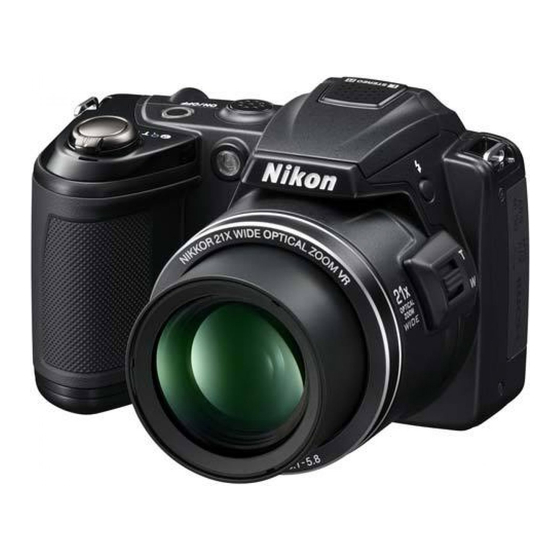
Nikon COOLPIX L120 User Manual
Hide thumbs
Also See for COOLPIX L120:
- Quick start manual (196 pages) ,
- User manual (164 pages) ,
- Brochure (2 pages)
Table of Contents
Advertisement
Quick Links
Advertisement
Table of Contents

Related Manuals for Nikon COOLPIX L120


Summary of Contents for Nikon COOLPIX L120
- Page 1 Nikon DIGITAL CAMERA 2( L120 COOLP User's Manual...
- Page 2 • r_ D-Lighting: Enhancing Brightness and Contrast F)-Lighting car] be used to create copies with enhanced brightness and contrast, brightening dark portions of an image. Enhanced copies are saved as separate files. Select desired image in full-frame playback mode 61) or thumbnail playback mode ([_[_] 62) and...
- Page 3 Small Picture: Decreasing Image Size Create a small copy of the current image. Suitable for uploading to websites or sending by e-mail. The following sizes are available: [] 640x480, 320x240, and [] 160xl 20. Small copies are saved as JPEGfiles with a compression ratio of 1:16.
-
Page 4: Pressthe Menu Button
Crop: Creating a Cropped Copy Create a copy containing only the portion visible in the monitor when I'_1_1 o° _ is displayed with playback zoom (_ 64) enabled. Cropped copies are saved as separate files. Rotatethe zoom control to T (00in full-frame playback mode (iZ[_] 6 1) to zoom in on the image. - Page 5 You can use the camera to record high-definition movies with sound. • The maximum file size for a single movie is 4 GB and the maximum movie length for a single movie is 2g minutes, even when there is sufficient free space on the memory card for longer recording (_ 84).
- Page 6 While Camera Is Saving Movies When movie recording stops, the movie is not completely saved until the shooting screen is displayed, Do not open the battery-chamber / memory card slot cover. Removing the memory card or the battery while a movie is being saved may result in loss of the movie data or damage...
- Page 7 Functions Available in Movie Mode • The settings _r exposure compensation, white balance and color options are applied when recording movies, When macro mode is enabled, movies of subjects closer to the camera can be recorded. Confirm settings before starting movie recording, •...
- Page 8 Changing Movie Recording Settings Tile following options carl be adjusted from the movie menu. M0vie options Selectthe type of moviesthat are recorded. Autofocus mode Selecthow the camerafocuses in movie mode. Electronic VR Selectthe electronic vibration reduction setting that is usedwhen recording movies.
- Page 9 Press • or • to select tab. Press i_ or the button. You can now select an item from the movie menu. Use the multi selector to choose and apply settings 11). To exit the movie menu, press the MENU button or press _1 and select another tab.
-
Page 10: Movie Options
Movie Options Display the shooting screen -') MENU -) _ (Movie menu) (_ 82) -) Movie options Select the type of movies that are recorded. Option Description Movies with an aspect ratio of 16:9 are recorded in high HD 720p (1280x720) definition. - Page 11 Autofocus Mode Display the shooting screen -') MENU -) _ (Movie menu) (_ 82) -)' Autofocus mode Choose how the camera focuses in movie mode. Focus is locked when the • (_1_ I movie-record) button is pressed _ SingleAF to start recording. {default setting) Select this option when the distance between the camera and the subject will remain fairly consistent.
- Page 12 Wind Noise Reduction Display the shooting screen -) MENU - ), (Movie menu) (_ 82) -) Wind noise reduction Reduces the effects of wind noise when recording movies. Setting _-:'! Reduces the sound heard when wind passes over the microphone. Select this setting when recording in places with strong wind.
- Page 13 In full-frame playback mode (_ 26), movies (:an be identified by the Movie options icon (_ 84). To play a movie, display it in full-frame playback mode and press the _) button. Use the zoom control T/W during playback to adjust Pausing the volume.
- Page 14 The desired portions of a recorded movie can be saved as a separate file. Play back the desired movie and pause playback ([:_ 87). Press the multi selector _ or i_ to choose control, then press the _ button. The movie edit screen is displayed. Press •...
- Page 15 Notes on Movie Editing • A movie that was created by editing cannot be trimmed again. To trim another area of the movie, select and edit the original movie. • Movies are trimmed in one second intervals, therefore the actual trimmed portion of the movie may differ slightly...
- Page 16 Connect the camera to a television to play back images on the television. If you have an HDMI compatible TV,you (:an enjoy playing back images at high definition image quality by connecting the camera to the television using an HDMI (:able (available separately from third-party suppliers).
- Page 17 Tune the television to the video channel. See the documentation provided with your television for details. Hold down the _ button to turn on the camera. The camera enters playback mode, and the images captured are displayed on the television. While connected to the TV, the camera...
-
Page 18: Before Connecting
Use the supplied ViewNX 2 CF)and install the following software on the computer. For more information on installing the software, refer to the QuickStortduide. • ViewNX 2: Use the image transfer feature "Nikon Transfer 2" to save images that were captured with the camera on the computer. Saved images (:an be viewed and printed. - Page 19 Transferring Images from a Camera to a Computer Start computer to which ViewNX 2 was installed. Be sure that camera is off, Connect camera to the computer using the supplied USB cable. Be sure that connectors are properly oriented. Do not attempt to insert connectors at an angle, and do not use force when connecting or disconnecting the USB cable.
- Page 20 Import File on the Devices and Printers • L120 screen. • Windows Vista When the AutoPlay dialog is displayed, click Import File using Nikon Transfer 2. • Windows XP When the action sdection dialog is displayed, select Nikon Transfer 2 Import File, and click OK.
- Page 21 When transfer is complete, the ViewNX 2 screen is displayed (ViewNX 2 default setting) and transferred images are displayed. For more information on using ViewNX 2, refer to the ViewNX 2 help information 96). Disconnecting the Camera Do not turn offthe camera or disconnect tile camera from tile computer during transfer.
- Page 22 File menu. For More Information on Using ViewNX 2 and Nikon Transfer For more information on ViewNX 2 or Nikon Transfer 2, start ViewNX 2 or Nikon Transfer 2 and select ViewNX 2 Help from the Help menu. Panorama Creation with...
- Page 23 Users of PictBridge-compatible 144) printers can connect the camera directly to the printer and print images without using a computer. Follow the procedures below to print images. Take pictures Select images for printing using Print order option Print ima_ge at a time Notes on Power Source...
- Page 24 Connecting the Camera and Printer Turn off the camera. _,L* Turn on the printer. Check printer settings. Connect camera to the printer using supplied USB cable. Be sure that connectors are properly oriented. Do not attempt to insert connectors at an angle, and do not use force when connecting or disconnecting the USB cable.
- Page 25 Printing Images at a Time After connecting the camera to the printer correctly (_ 98), print images by following tile procedure below. Use the multi selector to choose the desired image and press the _) button. Rotatethe zoom control to W ([]) to display ] 2 thumbnails,and T (C()to switch back to full-frame playback.
-
Page 26: Printing Multiple Images
Choose Start print press the _) button. Printing starts. Monitor display returns to that shown in step 1 when printing is complete. To cancel before all copies have been printed, press the _) button. Current print/total number of prints Printing Multiple Images After c:onnecting... - Page 27 Choose Print selection, Print all images DPOF printing and press the _) button. Print selection Choose the images (up to 9g) and number of copies (up to nine) of each. • Press the multi selector • or i_ to select images, and press •...
- Page 28 DPOF printing Print images for which a print order was created in Print order (_) 67). • The menu shown on the right is displayed.To print, select Start print and press the _) button. Choose Cancel and press the _) button to return to the print menu.
-
Page 29: Vibration Reduction
The s etup menu contains the following options. Welcome screen [_]!05 Specify the w elcome screen displayed when the camera is turned on. Time zone and d ate [_[_ !06 Set camera clock and c hoose home and d estination time z ones. - Page 30 Displaying the Setup Menu Pressthe MENU button. The menu is displayed. When using easy auto mode, scene mode, or smart portrait mode, press the multi selector (_ 11) • to display the tabs. Press the multi selector You carl now select a tab. Press •...
-
Page 31: Welcome Screen
Welcome Screen MENU b utton ") V (Setup menu) 104) -) Welcome screen Specify tile welcome screen displayed when tile camera is turned None (default setting) The welcome screen is not displayed when the camera is turned on; the shooting mode or playback mode screen is displayed. -
Page 32: Time Zone And Date
Time Zone and Date Set the camera clock. Date and time Set camera clock to current date and time. Use the multi selector to set the date and time. • Choose an item: Press • or i_ (to change between D, M, Y, Hour, and Minute). - Page 33 Setting Travel Destination Time Zone Use the multi selector to choose Time zone and press button. The Time zone menu is displayed. Choose )_" Travel destination press button. The date and time displayed in the monitor changes according to the region currently selected. Press b_.
- Page 34 The Clock Battery The camera's clock is powered by a clock batte_ that is independent of the batteries that power camera, The clock battery charges when the main batteries are installed or an AC adapter connected, and can provide several days of backup power after about 10 hours of charging.
- Page 35 Time Zones The camera supports the time zones listed below, For time zones not listed below, set the camera's clock manually to local time using Date and time in the setup menu. Time zone Time zone Madrid, Paris, Berlin Midway, Samoa Athens, Hdsinki, Ankara Hawaii, Tahiti...
-
Page 36: Monitor Settings
Monitor Settings MENU button -') V (Setup menu) (_ 104) -) Monitor settings The following settings are available. Photo info Choose information displayed in the monitor during shooting and playback mode. (_ 111) Image review • On (default setting): Images are automatically displayed briefly immediately after shooting. -
Page 37: Photo Info
Photo Info Select whether or not photo info is displayed. See "The Monitor" 8, 9) fo_ information on indicators in the monitor. Shooting mode _"'_]ayback mode _'_I ......................... Show info The same information as in Show info is displayed. If no operations are )erformed after a few seconds, the display will be the same as Hide info, (default setting) The information... -
Page 38: Print Date
Print Date MENU button -_ V (Setup menu) 104) -_ Print date The shooting date and time (:an be imprinted on images at the time of shooting. This shooting date and time will be imprinted on images when printing, even if the printer does not support date printing (_ 69). - Page 39 Vibration Reduction MENU button -') V (Setup menu) (_ 104) -) Vibration reduction Specify tile vibration reduction setting for shooting still images. Vibration reduction effectively correc:ts blur that commonly occurs when shooting with zooming or at slow shutter speeds. Set vibration reduction to Off when using a...
- Page 40 Motion Detection MENU button -') V (Setup menu) (_] 104) -) Motion detection Specify whether or not motion detection is used to reduce the effects of subject movement and camera shake when taking still pictures. Auto (default setting) When the camera detects subject movement or camera shake, the ISO sensitivity and shutter speed are automatically increased to reduce blurring.
-
Page 41: Sound Settings
AF Assist MENU button -'_ V (Setup menu) (_] 104) _' AF assist Specify whether or not the AF-assist illuminator is used to help the camera focus when tile subject is poorly lit. Auto (default Setting) AF-assist illuminator will be used to assist the focus operation when the subject is poorly lit. - Page 42 Auto Off MENU button -) V (Setup menu) (_] 104) -) Auto off If no operations are performed for a specified amount of time, the monitor turns offand the camera enters standby mode 15). Use this option to set the amount of time that passes before the camera enters standby...
- Page 43 Format Memory/Format Card MENUbutton -') V (Setup menu) (_] 104) -) Format memory/Format card Use this option to format tile internal memory or a memory card. Formatting the internal memory or memory cards permanently deletes all data. Deleted images cannot be restored. Be sure to transfer important images to a computer before formatting.
- Page 44 Language MENU button -)' V (Setup menu) (_ 104) -)' Language Select one of 26 languages for display of camera menus and messages. Czech Portugu_s Portuguese Danish PyCCKH_ Russian ]German Rom_n_ [(default setting) SUOmi Spanish Espahol EhhqvIK_ Greek T_rkge Turkish Fran(:ais i French YKpa_'HCbKa...
-
Page 45: Blink Warning
TV Settings MENU button -'_ V (Setup menu) (_ 104) -_ TV settings Adjust settings for connection to a television. Video mode Choose from NTSC and PAL, HDMI Select the HDMI output image resolution from Auto (default setting), 480p, 720p, and 1080i. - Page 46 Operating the Did someone blink? Screen The following operations are available when the Did someone blink? screen is displayed. If no operations are performed for a few seconds, the screen automatically returns to the shooting mode screen. Function Control Description Enlarge and display the face of the person T (o)
-
Page 47: Reset All
Reset All MENU b utton -') V (Setup menu) (_] 104) -) Resetall When Reset is selected, the camera's settings will be restored to their default values. Pop-up Menu Scene Mode Sport Continuous Menu Shooting Menu Option i..Default value Image mode (ilZ] $3)[_ 4320x3240 White balance (I_] 5S)Auto... - Page 48 Movie Menu Option " Default Value Movie options ([_] 84) HD 720p (1280×720) Autofocus mode ([_[_ 85) Single AF Electronic VR ([_ Wind noise reduction ([_[_] 86) -En_a'nc_d resolution (1_] 86) Auto Setup Menu Default Value Option Welcome screen ([_] 1051 qone Photo info ([]]_[J110_...
- Page 49 104) -_ Battery To ensure that the camera shows the correct battery level (_ 20), choose the type that matches the batteries currently in use. Alkaline (default setting) LR6/L40(AA-size) a lkalinebatteries Nikon EN-MH2rechargeableNi-MH(nickel metal COOLPIX(Ni-MH) hydride) batteries Lithium '_ ......F"R'6YL'9"i""'i'A'A'_'s';"ze'i""i";"_"h"i"u"m""b'a"t t'e";'i"e"s...
-
Page 50: Firmware Version
Firmware Version MENU button _ V (Setup menu) ((_] 104) _ Firmware version View the current camera firmware version. - Page 51 To ensure continued enjoyment of this Nikon product, observe the following precautions when using or storing the device: Keep The device will be damaged if immersed in water or subjected to high humidity. not drop The product may malfunction if subjected...
- Page 52 Battery • After purchasing replacement rechargeable batteries, charge them before use. They are not fully charged at the time of purchase. Be sure to read and follow the information found in "Optional Accessories" 129) and in the documentation included with the Battery Charger MH 73 (available separately).
- Page 53 Cleaning Avoid touching glass parts with your fingers. Remove dust or lint with a blower (typically a small device with a rubber bulb attached to one end that is pumped to produce a stream of air out the other end). To remove fingerprints Lens or other stains that cannot be removed with a blower, wipe the lens with a soft cloth, using a spiral motion that starts at the center of the lens and working...
- Page 54 • The monitor is lit by an LED backlight, Should the monitor begin to dim or flicker, contact your Nikon authorized service representative. Noteon Smear White or colored streaks may be visible when bright su_ects are framed in the monitor.
- Page 55 • Battery Charger MH-73 (includes four EN-MH2 rechargeabEe Battery charger/ NbMH batteries) Rechargeable batteries! • RepBcement rechargeab]e batteries: Rechargeab]e Ni-MH batteries EN-MH2-B4 (set of four EN-MH2 batteries) AC Adapter EH-67 ..s ............Audio/video cable Audio Video Cable EG-CP162 Lens cap Lens Cap LC-CP222 1 When using with the COOLPIX L120, charge the four EN-MH2 rechargeab]e Ni-MH batteries at a time using Battery Charger MH-73.
-
Page 56: Approved Memory Cards
Approved Memory Cards Tile following Secure Digital (SD) memory cards have been tested and approved for use in this camera. Memory cards with an SD Speed Class rating of 6 or faster are recommended recording movies. Movie recording may stop unexpectedly when memory cards... - Page 57 "P_" plus a three-digit sequence number for images captured using panorama assist (e.g. "101 POOl "; _ 44) and "NIKON" for all other images (e.g. "100NIKON"). When the number of files within a folder 9999, a new folder will be created. File numbers will be assigned reaches automatically starting with %001 ".
- Page 58 other warnings displayed in the The following table lists the error messages them. monitor, as well as the solutions for dealing with Solution Display The lens cap may be Make sure that the lens cap Turn the camera off, attached, or a lens error has has been removed, then remove the lens cap, occurred.
- Page 59 Problem ° Solution Display Memory card is full. Choose smaller image Out of memory. mode. Delete images. 27,87 Insert new memory card. Remove memory card and use internal memory. Error occurred while saving Format internal memory or Image cannot be image.
- Page 60 Problem Solution Display File not created with File cannot be viewed on COOLPIX LJ 20. File contains no image this camera. View file using data. the computer or any other devices which was used to create or edit this file. This file cannot be played back.
- Page 61 Problem Solution Paper hasjammed in the Eject the jammed paper, xinter. Printer error: paper jam select Resume and press the _) button to resume printing. (D/_I" No paper is Goaded in Load the specified paper, Printer error: out of >rinter. select Resume and press paper the _) button to resume...
- Page 62 If the camera fails to function as expected, check the list of common problems below before consuking your retailer or Nikon-authorized service representative. Refer to the page numbers in the right-most column for more information. Display, Settings and Power Supply...
- Page 63 Turn the camera off, remove and replace the battery, then turn the camera on again. In the event of continued malfunction, contact your retailer or Nikon-authorized service representative. Note that disconnecting the power source as described above may result in the loss of any data not saved to internal memory or the memory card at the time the problem occurred.
- Page 64 -7'_Problem _,_,_ Cause/Solution Streaks of light or partial Smear may occur when the camera is aimed at a discoloration are visible in the bright subject. When using muJtiq6, sport monitor. continuous, or when recording movies, avoid bright objects such as the sun, reflections of the sun, and electric lights.
- Page 65 _"_ Problem _"w_ Cause/Solution Images are too dark Flash mode is set to _ (Off}. 7, 28 (underexposed). Flash window is blocked. Subject is beyond flash range. Adjust exposure compensation. Raise the ISO sensitivity. Subject is back]it. Select the Backlighting 28,41 scene mode, or raise the flash and set the flash mode to _ (fill flash).
- Page 66 Battery exhausted. USB cable is not correctly connected. Camera is not recognized by the computer. Computer is not set to launch Nikon Transfer 2 automatically. For more information about Nikon Transfer 2, refer to help information contained in Nikon Transfer 2.
- Page 67 Nikon COOLPIX L1 20 Digital Camera Compact d g tal camera 14.1 million 1/2.3-in. type CCD; 14.48 million total pixds _Le, :3 :ii 21x opticaJ zoom, NIKKOR lens 4.5-94.5mm (angle of view equivalent to that of 25-525 mm Focal length...
- Page 68 !i_iiiiiiii_i ¸¸¸ ::==]T]T?:TT'-T:!---: Metering 2S6-segment matrix, center-weighted (digital zoom less than 2x), spot (digital zoom 2x or more) EXposure contro I Programmed auto exposure with motion detection exposure compensation (-2.0 to +2.0 EV in steps of 1/3 EV) Electronically-contro%d ND filter (-3 AV) selection 2 steps (f/3.] and f/8.7 [W]) _j_:_i ;:::...
- Page 69 Ultimate Lithium batteries. Supplied batteries are f or t rial use o nly. Specifications Nikon will not be held liable for any errors this manual may contain, The appearance of this product and its specifications are subject to change without...
- Page 70 Supported Standards • DCF: Design Rule for Camera File System is a standard widely used in tile digital camera industry to ensure compatibility among different makes of camera • DPOF: Digital Print Order Format is an industry-wide standard that allows images to be printed from...
- Page 71 Svmbols Battery<hamber Battery<hamber/memory card slot cover _) (apply selection) button 5, 11 • movie-record) button S, 10 5,14,18 Beach _ (Playback) button 5, 10 Best shot selector 57 I_1 (shooting mode) button S, 10 I_1 Auto mode 50 Black and white copy [] Black-and-white "_ Delete button 5, 27, 87...
- Page 72 HDMI cable 90 Nickel metal hydride batteries HDMI input 90 Night landscape HDMI mini connector Night Portrait [] Help 35 Nikon Transfer 2 92, 93, 96 Number of Exposures Remaining 20, 54 Identifier Image mode 21,35, 53 Off28 Image review 110...
- Page 73 Shutter speed 24 Shutter-release button 4, 24 Panorama assist _142, 44 Side zoom control 4, 23 Panorama Maker 5 92, 96 Single 57 Paper size 99, 100 Single AF 85 Party/indoor -_'_ " Sleep mode Pet portrait auto release 43 Slide show 70 Pet portrait o_ 43...
- Page 74 Welcome screen 105 White balance 55 Wind noise reduction Zoom control 4, 23, 87 F,"...
- Page 75 Nikon No reproduction in any form of this manual, in whole or in part (except for brief quotation in critical articles or reviews), may be made without written authorization from NIKON CORPORATION. NIl{ON CORPORATION CT1B03(11) 6MM02811-03 © 2011 Nikon Corporation...
Need help?
Do you have a question about the COOLPIX L120 and is the answer not in the manual?
Questions and answers