Table of Contents
Advertisement
Sears
owners
manual
MODEL NO.
113.23111
Serial
Number
Model
and serial
number
may be found
at the rear left-hand
side
of the base.
You
should
record
both
model
and serial
number
in a safe place for
future
use.
CAUTION:
Read
GENERAL
and
ADDITIONAL
SAFETY
INSTRUCTIONS
carefully
CRRFTSMRNo
IO-INCH
RADIAL
SAW
• assembly
• operating
• repair
parts
Sold by SEARS,
ROEBUCK
AND
CO., Chicago,
IL. 60684
U.S.A.
Part No. 63572
Printed in U.S.A.
Advertisement
Table of Contents
Troubleshooting

Related Manuals for Craftsman 113.23111


Summary of Contents for Craftsman 113.23111
- Page 1 Sears owners manual MODEL NO. 113.23111 Serial Number Model and serial number may be found at the rear left-hand side of the base. CRRFTSMRNo should record both model and serial number in a safe place for future use. IO-INCH CAUTION: RADIAL Read GENERAL...
- Page 2 FULL ONE YEAR WARRANTY ON CRAFTSMAN RADIAL SAWS If within one year from the date of purchase, this Craftsman Radial Saw fails due to a defect in material or workmanship, Sears will repair it, free of charge. Warranty service is available...
- Page 3 additional safety instructions for radial saws -WARNING: ALLOW FAMILIARITY CAUTION: Always disconnect power cord before (GAINED FROM FREQUENT YOUR removing the guard, changing the cutting tool, changing the SAW) BECOME COMMONPLACE. ALWAYS set-up making adjustments. Shut motor before REMEMBER THAT A CARELESS FRACTION performing...
- Page 4 additional safety instructions for radial saws support or guide the workpiece, to prevent rotating slippery, the anti-kickback pawls stop or twisting of the workpiece during the operation. kickback. Never "RIP" in the crosscut position. Never make Therefore, rip with the finished side down (next miter...
- Page 5 additional safety instructions for radial saws WEAR YOUR operation power tool result foreign objects being thrown into eyes, which can result severe eye damage. Always wear safety goggles complying with ANSI Z87.1 (shown on Package) before commencing power tool operation. Safety Goggles are available...
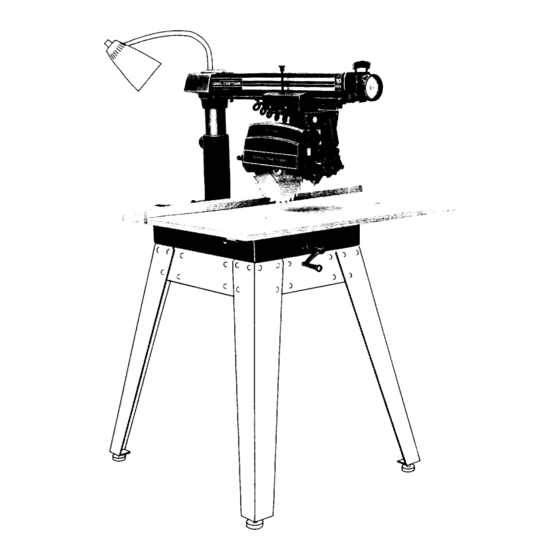
- Page 6 ....Twin nut (for attaching rip-scale indicator) Nut, Speed ......REMOVE SKIDS FROM BASE MOUNT SAW TO CRAFTSMAN BASE LEG SET, OR FLAT BENCH (NOT SUPPLIED IN CANADA) Make sure elevation crank isfree to rotate. The saw must be bolted down. Position your...
- Page 7 ATTACH ELEVATION CRANK. Be sure setscrew istightened onflatof shaft. ELEVATE A RM TOITSMAX. H EIGHT. Remove shipping block. ELEVATION TURN CLOCKWISE INFORMATION REMOVE CARRIAGE STOP SCREW, LOCKWASHER AND TAG. Read warning tag before discarding. _,..._ W'ARN ING ST O P SCREW WRENCH SUPPLIED TIGHTEN...
- Page 8 PROCEDURE The following SIX STEP alignment procedure will bring accuracy which is built in every CRAFTSMAN tool. The secret best results is in knowing how to set up the tool and keep it in good alignment. BE SURE TO CHECK...
- Page 9 Loosen arm lock knob until arm is free to move. Note: In accordance with the UL standard, stops have been provided to prevent 360 ° rotation of the radial arm. Loosen carriage lock knob position against stop (approximately 50 ° Miter) and carriage directly...
- Page 10 unpacking and assembly LATCH LEVEl Position at approximately 30 ° miter setting lock lock knob. Loosen lock knob 1/4 turn and index at 0 ° miter setting. Push the arm latch solidly with palm of hand this will seat the index pin properly.
- Page 11 marked tooth moves into the square when moving the blade from the rear toward the front of the table, tap the left hand front edge of the table with a mallet shown (Loosen table attaching screws slightly necessary). If the marked tooth moves away from...
- Page 12 unpacking and assembly INSTALLING REMAINING REAR TABLE BOARDS. Position (guide) fence, spacer board and rear table board behind the front table board, as shown. Install table clamps in the slots provided them at the rear of the base, and tighten them secu rely.
- Page 13 To correct for either type of "heel" or "toe" condition proceed as follows: Remove left hand carriage cover. Loosen the yoke clamp handle. Loosen (slightly) the two hex_head screws. HEX-HERD SCREvVS Rotate yoke assembly until gap between saw blade and square is eliminated.
- Page 14 unpacking and assembly With the fence in its normal position (next to front table), loosen the yoke clamp handle, lift up on swivel latch pin knob and rotate the yoke as shown to index the yoke 90 ° from the cross cut position. This will locate...
- Page 15 Carriage Lock Depth of Cut The carriage lock knob is rotated clockwise to diagram shows elevation crank which secure carriage on the radial arm, used to raise and lower the saw blade. counterclockwise to release it. Clockwise rotation raises blade When performing a square...
- Page 16 DRUM ASSEMBLY kickback. If the pawls do not catch, readjust. PRECISION INDEXING Experienced operators of precision equipment, such as this Craftsman Radial Saw, normally acquire habit (1/4-2o× 1/2 IN., HEX-HD) indexing machine in one direction only, whenever...
- Page 17 basic saw operations LOCK Basic operations summarized into six categories, explained illustrated following paragraphs. manual entitled "The Radial Saw" is available at your nearest Sears Retail Store Catalog Order House. This manual contains considerable data project ideas LATCH applicable to the radial saw.
- Page 18 basic saw operations OPERATION No. 2 -- MITER CROSSCUT Miter crosscutting is the process of sawing a board at any angle other than a 90 ° (square) cut. The 45 ° miter angle is a popular one, since boards 45 ° assembled to form a 90 °...
- Page 19 PUSH STICK REQUIREMENTS WHEN RIPPING (I-INCH SQUARES) (OPERATIONS 5 AND 6) PUSH STICK 1. Carriage lock knob must be tight. Radial arm must be locked in 0 ° position. 3. Work must be held firmly against table and fence while feeding through.
- Page 20 basic saw operations Since the work is pushed along the fence, it must have a reasonably straight edge order make sliding contact with the fence. Also, the work must make solid contact with table, that it will wobble. Provide a straight edge, even if this...
- Page 21 electrical connections adapter as shown below is available for connecting plugs POWER SUPPLY to 2-prong receptacles. The green grounding lug extending from the adapter must be connected to a permanent ground Motor Specifications such as to a properly grounded outlet box.
- Page 22 LOOSENESS COLUMN TUBE COLUMN workmanship have been incorporated into your Craftsman SUPPORT ELEVATION CRANK OPERATES saw, it is reasonable to expect some wear after long periods ROUGHLY OR CHATTERS WHEN ROTATED. of use. Sooner or later,...
- Page 23 SAW CUTS ANGLE 90 ° TO TABLE TOP. Table support channels not properly leveled. Refer Step under Alignment Procedure ]HOU'LD BE 90 ° Section. ANGLE Blade not square to work table top. Refer to Step four in Alignment Procedure Section. BOARD BLADE ANGLE...
- Page 24 trouble-shooting CARRIAGE BEARINGS LOOSE. test looseness between hearings and tracks radial arm, perform the following steps. Remove left-hand carriage cover. Push the carriage to its full most rearward position. ECCENFRIC Finger hold front carriage bearing as shown apply as much force as possible and at the same...
- Page 25 MOTOR TROUBLE - SHOOTING CHART NOTE: Motors used on wood-working tools are particularly susceptible to the accumulation of sawdust and wood chips and should be blown "vacuumed" frequently prevent interference with normal motor ventilation. TROUBLE SUGGESTED REMEDY PROBABLE CAUSE Motor will not run. 1.
- Page 26 TURN SWITCH "OFF" REMOVE PLUG FROM POWER SOURCE OUTLET BEFORE MAINTAINING OR LUBRICATING YOUR SAW. When receive your Craftsman radial saw, requires no lubrication. radial saw has been partially aligned and all bearings are lubricated and sealed for life. In time,...
- Page 27 recommended accessories IN CANADA, SEE YOUR LOCAL SIMPSONS-SEARS STORE OR CATALOG FOR ACCESSORY SELECTION NUMBERS ITEM CAT.NO. Stand ........9-22202 Steel Legs ....... 9-22238 Castors ......9-22201 - 9-22209 Key Chuck ....... 9-2980 Molding Head Guard 7-Inch ....9-29524 Molding Head Guard 8-Inch ....
- Page 28 PARTS LIST FOR CRAFTSMAN 10-INCH RADIAL MODEL NUMBER 113.23111 "13 24 25 Figure 1...
- Page 29 PARTS LIST FOR CRAFTSMAN IO-INCH RADIAL MODEL NUMBER 113.23111 parts illustrated in Figures 1 through 5 and listed under part numbers may be ordered through any Sears retail mail order store. Order parts by mail from the catalog order store which...
- Page 30 PARTS LIST FOR CRAFTSMAN 10-INCH RADIAL MODEL NUMBER 113.23111 3938 ..------41 47----.-_ t_...____--_36 ,_..-----43 46 ----'-_...
- Page 31 PARTS LIST FOR CRAFTSMAN 10-INCH RADIAL MODEL NUMBER 113.23111 FIGURE Part Part Description Description STD 541431 STD 523106 Nut, Lock, 5/16 *Screw, Mach.Hex.lnd.Hd.,5/16-18 x 1/2 37887 STD 551131 Wrench, Hex. "L", * Lockwasher, 5/16 STD 502503 60013 *Washer, 11/32 x 7/8 x 1/16 *Screw, Set, 1/4-20 x 3/8,Soc.Hd.Cup...
- Page 32 ___.>_12 PARTS LIST FOR CRAFTSMAN 10-INCH RADIAL MODEL NUMBER 113.23111 "13 ,,.l= 25 25 Figure 3...
- Page 33 PARTS LIST FOR CRAFTSMAN 10-INCH RADIAL MODEL NUMBER 113.23111 FIGURE Part Part Description Description 63507 63534 Motor (See Figure 4) Cord with Plug STD 541231 *Nut, Hex 5/16-18 x 1/2 x 3/16 63467 Cap, Flag Terminal 114605 60267 * Lockwasher,...
- Page 34 PARTS LIST FOR CRAFTSMAN 10-INCH RADIAL MODEL NUMBER 113.23111 "0 @ANY ATTEMPT TO REPAIR THIS MOTOR MAY CREATE A HAZARD UNLESS REPAIR IS DONE BY A QUALIFIED SERVICE TECHNICIAN. REPAIR SERVICE IS AVAILABLE AT YOUR NEAREST SEARS STORE. FIGURE 63507 MOTOR...
- Page 35 PARTS LIST FOR CRAFTSMAN 10-INCH RADIAL MODEL NUMBER 113.23111 FIGURE 5 - GUARD ASSEMBLY Part Description 63537 Guard 63541 Bar, Anti-Kickback 63540 Guide, Anti-Kickback 60136 *Washer. 13/64 x 5/8 x 1/32 STD 6O11O3 *Screw, Type T Pan Hd., 10-32 x 3/8...
- Page 36 Sears owners IO-INCH RADIAL SAW manual SERVICE Now that you have purchased your 10-inch radial saw, should a need ever exist for repair parts or service, simply contact Sears Service Center and most Sears, Roebuck and Co. stores. Be sure to provide all pertinent facts when you call or visit.
Need help?
Do you have a question about the 113.23111 and is the answer not in the manual?
Questions and answers
Can I buy a replacement saw motor for my model number 113 23111 radial arm saw