
Related Manuals for Sharp AR-NB2


Summary of Contents for Sharp AR-NB2
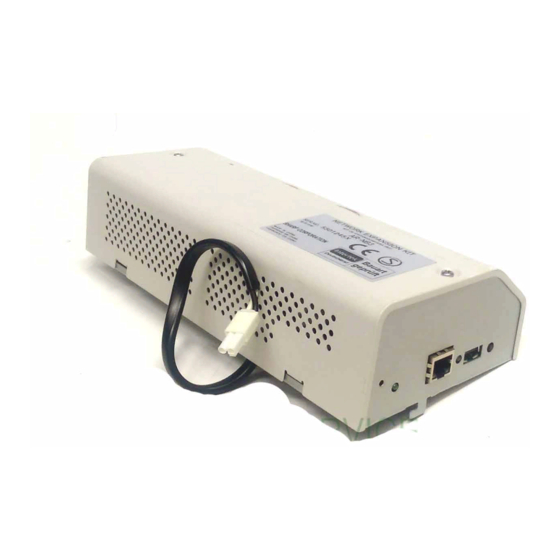
- Page 1 AR-NB2/AR-NB2 N Network expansion kit Online Manual (for network printer) AR-M160/M205 Start Start Click this "Start" button.
-
Page 2: Introduction
Introduction The optional network expansion kit enables the machine to be used as a network printer. This manual explains the network printer functions that can be used when the network expansion kit is installed. To use the machine as a PS printer, the PS3 expansion kit (AR-PK1) must be installed. After installing the expansion kit, the product key (password) must be entered in "Product Key Setting"... -
Page 3: How To Use The Online Manual
How to use the online manual This section explains how to view the online manual. Please read this section before using the online manual. For information on using Acrobat Reader, see Acrobat Reader Help. How to Control the Online Manual Following Links In this manual, the following buttons are displayed at the This manual uses a link function that allows you to jump to a... -
Page 4: Table Of Contents
Contents (part 1) Introduction 2 PRINTER UTILITIES (WINDOWS) How to use the online manual Printer utilities Before using the Printer Status Monitor 1 PRINTING FROM WINDOWS Using the printer utilities Starting up the printer utilities Basic printing Using the printer utilities If the tray runs out of paper during printing Changing the Printer Status Monitor settings Pausing a print job... - Page 5 Contents (part 2) 4 WEB PAGE IN THE MACHINE 6 SPECIFICATIONS About the Web page Printer specifications Accessing Web pages Printer driver specifications Changing the Web page language E-mail print function 7 INDEX Setting up the E-mail print function Using the E-mail print function Directly printing a file in a computer Configuring the printer condition settings How to configure the settings...
-
Page 6: Basic Printing
Before printing, make sure that the correct size of paper for your document has been loaded in the machine. Make sure that the ON LINE indicator on the Make sure that "SHARP AR-XXXX" is selected as the printer. If you need to change any print operation panel is lit. -
Page 7: G If The Tray Runs Out Of Paper During Printing
PRINTING FROM WINDOWS Basic printing (part 2) If the tray runs out of paper during printing When "Paper Source" is set to "Auto Select" If "Paper Source" is set to "Auto Select" in the "Paper" tab of the Add paper to the tray or press the [TRAY SELECT] key ( ) to printer driver setup screen and the correct size of paper for a select a different tray, and then press the [ON LINE] key (... -
Page 8: Opening The Printer Driver From The "Start" Button
Panel". then click "Printers". In Windows 2000, click the "Start" button and select "Settings". Click the "SHARP AR-XXXX" printer driver icon and select "Properties" from the "File" menu. Click "Printers and Other Hardware", and then click "Printers and Faxes". In Windows 2000, click "Printers". -
Page 9: Printer Driver Settings
PRINTING FROM WINDOWS Printer driver settings To view Help for a setting, click the button in the upper right-hand corner of the window and then click the setting. Some restrictions exist on the combinations of settings that can be selected in the printer driver setup screen. When a restriction is in effect, an information icon ( ) will appear next to the setting. -
Page 10: Two-Sided Printing
PRINTING FROM WINDOWS Two-sided printing (part 1) The printer driver setup screen of models that support two-sided printing contains a "Document Style" setting in the "Main" tab. This setting allows you to print on both sides of the paper. To use this function, open the printer driver setup screen and select "2-Sided (Book)" or "2-Sided (Tablet)"... -
Page 11: G Pamphlet Style
PRINTING FROM WINDOWS Two-sided printing (part 2) Pamphlet style Pamphlet style prints two pages each on the front and back of each sheet of paper (four pages total on one sheet) so that the sheets can be folded down the center and bound to create a pamphlet. This function is convenient when you wish to compile printed pages into a pamphlet. -
Page 12: Printing Multiple Pages On One
PRINTING FROM WINDOWS Printing multiple pages on one page This feature allows you to reduce and print two, four, six, eight or sixteen document pages on a single sheet of paper. To use this function, open the printer driver setup screen and select the number of pages per sheet (2-Up, 4-Up, 6-Up, 8-Up, or 16-Up) in "N-Up Printing"... -
Page 13: Fitting The Printed Image To The Paper
PRINTING FROM WINDOWS Fitting the printed image to the paper The printer driver can adjust the size of the printed image to match the size of the paper loaded in the machine. Follow the steps shown below to use this function. The explanation below assumes that you intend to print a Ledger size document on letter size paper. -
Page 14: Rotating The Print Image 180 Degrees
PRINTING FROM WINDOWS Rotating the print image 180 degrees The print image can be rotated 180 degrees. This feature is used to enable correct printing on envelopes and other paper with flaps that can only be loaded in one orientation. To use the feature, select the image orientation in "Image Orientation"... -
Page 15: Printing A Watermark
PRINTING FROM WINDOWS Printing a watermark You can print a watermark such as "CONFIDENTIAL" on your document. To print a watermark, open the printer driver, click the "Watermarks" tab, and follow the steps below. Basic printing for details on how to open the printer driver. How to Print a Watermark From the "Watermark"... -
Page 16: Printing Text And Lines In Black
PRINTING FROM WINDOWS Printing text and lines in black Color text and lines that are faint when printed normally can be printed in black to improve legibility. Printing text in black Printing lines in black Text that is any color other than white is printed in black. Lines and solids that are any color other than white are printed To use this function, open the printer driver setup screen and in black. -
Page 17: Printer Utilities
This allows the administrator to check information on supplies setup guide for network printer. (This is not necessary if the and error states of the machine and other SHARP printers software has already been installed and configured.) (compatible with the Printer Administration Utility) that are connected to the network. -
Page 18: Part
"Local Subnet Click the "Start" button, point to "All Programs" ("Programs" in Search" checkbox. Otherwise, enter the machine's IP operating systems other than Windows XP) and then "SHARP address. For more information, see the Help file. Printer Status Monitor". Select "Help". -
Page 19: Changing The Printer Status Monitor Settings
PRINTER UTILITIES (WINDOWS) Using the printer utilities (part 2) Changing the Printer Status Monitor settings Once installed, the Printer Status Monitor normally runs in the background in Windows. If you need to change the Printer Status Monitor settings, follow the steps below. Right-click the Printer Status Monitor icon ( Change the Printer Status Monitor settings as desired. -
Page 20: Checking The Printer Status
The window expands to show machine status details. By default, the collapsed window initially appears when Note "SHARP AR-XXXX Status" is selected in Step 1. If desired, you can change the setting to have the expanded window initially appear. Changing the Printer Status Monitor settings... -
Page 21: Basic Printing
PRINTING FROM MACINTOSH Basic printing (part 1) To use the machine as a printer for the Macintosh, the PS3 expansion kit (AR-PK1) must be installed and the machine must be connected to a network. To install the PPD file and configure the printer driver settings, see the software setup guide. Before printing, make sure that the correct size of paper for your document has been loaded in the machine. - Page 22 PRINTING FROM MACINTOSH Basic printing (part 2) Configure print settings. Click next to "Copies & Pages" ("General" in Mac OS 8.6 to 9) and select the settings that you wish to configure from the pull-down menu. The corresponding setting screen will appear.
-
Page 23: G Pausing A Print Job
PRINTING FROM MACINTOSH Basic printing (part 3) If the tray runs out of paper during printing When "Paper Feed" is set to "Auto Select" Add paper to the tray or press the [TRAY SELECT] key ( ) to If "Paper Feed" is set to "Auto Select" in the Print window and select a different tray, and then press the [ON LINE] key ( ) to the correct size of paper is not loaded in the machine, the... -
Page 24: About The Web Page
WEB PAGE IN THE MACHINE About the Web page (part 1) The network expansion kit includes a Web page. The Web page is accessed using a Web browser on your computer, and allows you to configure the machine's e-mail settings, settings for printing via e-mail, settings for direct printing by specification of a file on a computer, printer condition settings, and settings for sending e-mail to an administrator or dealer regarding machine usage and errors. - Page 25 WEB PAGE IN THE MACHINE About the Web page (part 2) When you access the Web page in the machine, the following page will appear in your browser. A menu frame appears on the left side of the page. When you click an item in the menu, a screen appears in the right frame that allows you to establish settings for that item.
- Page 26 WEB PAGE IN THE MACHINE E-mail print function (part 1) An e-mail account can be set up for the machine. When this is done, the machine will periodically check the e-mail server for e-mail and automatically print out any file attachments it receives. This provides a means for printing a file from a computer that does not have the printer driver installed, as the user can simply send the file to the machine as an e-mail attachment.
- Page 27 WEB PAGE IN THE MACHINE E-mail print function (part 2) Using the E-mail print function To use the e-mail print function, attach the file that you wish to print to an e-mail message and send the e-mail to the machine's e-mail address.
-
Page 28: Directly Printing A File In A Computer
WEB PAGE IN THE MACHINE Directly printing a file in a computer A file that can be accessed by your computer can be directly printed without using the printer driver by specifying the file's address. Any file that can be accessed by your computer can be printed by this method, including not only files in your computer but files in other computers connected to the same network. -
Page 29: Configuring The Printer Condition Settings
WEB PAGE IN THE MACHINE Configuring the printer condition settings (part 1) The printer condition settings allow basic printer settings to be configured. The following items can be set: Default Settings: Basic settings used in printing. PostScript Settings Sets whether a PostScript error Settings: PCL symbol set, font, line feed code, and page is printed or not when a... -
Page 30: G How To Configure The Settings
WEB PAGE IN THE MACHINE Configuring the printer condition settings (part 2) How to configure the settings To display the Condition Settings screen, click [Condition Settings] in the link menu. For detailed explanations of the procedures for establishing settings, click [Help] in the menu frame. Condition Settings Settings This displays the page for configuring the printer condition... -
Page 31: G Printer Condition Setting Menu
WEB PAGE IN THE MACHINE Configuring the printer condition settings (part 3) Printer condition setting menu Click on a setting to view an explanation of the setting. Condition Settings Condition settings Default Settings Factory default settings PCL Settings Factory default settings Copies Symbol Set PC-8... -
Page 32: G Printer Condition Settings
WEB PAGE IN THE MACHINE Configuring the printer condition settings (part 4) Printer condition settings Factory default settings are indicated in bold. Default Settings Item Selections Description Copies 1 - 999 This is used to select the number of copies. Default Paper Source Auto, Set the default paper tray. -
Page 33: Pcl Settings
WEB PAGE IN THE MACHINE Configuring the printer condition settings (part 5) PCL Settings Item Selections Description Symbol Set Select one of 35 fonts. This specifies which country's characters (PCL symbol set) are assigned to certain of the symbols in the character code list. The factory default setting is "PC-8". - Page 34 WEB PAGE IN THE MACHINE Configuring the printer condition settings (part 6) PostScript Settings The "PostScript Settings" are only effective when the PS3 expansion kit is installed. Item Selections Description Print PS Errors Enable, Disable When this setting is enabled, an error description is printed each time a PostScript error occurs.
-
Page 35: E-Mail Status And E-Mail Alert Settings
WEB PAGE IN THE MACHINE E-mail status and e-mail alert settings (part 1) These functions send information on machine use (print count, copy count, etc.) and error conditions (paper misfeed, out of paper, out of toner, etc.) via e-mail to the administrator of the machine or the dealer. Information setup SMTP setup Machine identification information for the status &... -
Page 36: G Status Message Setup
WEB PAGE IN THE MACHINE E-mail status and e-mail alert settings (part 2) Status message setup Use the status message function to send the current counter information, such as copy count, print count, and total output count, on a basis of the specified schedule. The destinations can be set for administrators and dealers respectively. To set up the status message, follow these steps: When the E-mail Status settings are completed, printer count In the link menu, click [Status Message]. -
Page 37: G Alerts Message Setup
WEB PAGE IN THE MACHINE E-mail status and e-mail alert settings (part 3) Alerts message setup Use the alert message function to send alert information, such as empty toner and trouble including paper misfeeds, to specified destinations when such problems occur. The destinations can be set for administrators and dealers respectively. To set up the alert message, follow the procedure shown below. -
Page 38: Protecting Information Programmed In The Web Page ("Passwords")
If you enable the password protection without entering User or Administrator passwords, the passwords which were previously Note entered will be automatically set. The factory default passwords are "Sharp" for both Admin and User. If passwords have already been established, enter the Admin password in the [Admin Password] field. When setting the passwords for the first time, enter "Sharp"... -
Page 39: Troubleshooting
TROUBLESHOOTING Troubleshooting This chapter explains how to solve network connection problems. For information on paper, removing misfeeds, and replacing the toner cartridge, see the operation manual for the machine. Check the connections I I I I Is the LAN cable disconnected? Points to check on the Macintosh Make sure that the LAN cable is firmly inserted in the I I I I Is AppleTalk enabled? -
Page 40: Removing The Software
TROUBLESHOOTING Removing the software In the event that you need to remove the printer driver or utilities, follow these steps: Windows Macintosh (Mac OS 8.6 to 9.x) Click the "start" button, and then click "Control Insert the "Software" CD-ROM into your Panel". -
Page 41: Printer Specifications
For information on machine and dual function board memory, see the manual for the machine. Available only if the PS3 expansion kit (AR-PK1) is installed. As a part of our policy of continuous improvement, SHARP reserves the right to make design and specification changes for product Note improvement without prior notice. -
Page 42: Printer Driver Specifications
SPECIFICATIONS Printer driver specifications (part 1) Windows Macintosh Function PCL6 PCL5e Frequently used Number of copies 1 to 999 1 to 999 1 to 999 1 to 999 1 to 999 functions Printing orientation Two-sided printing Binding Style Book/Tablet Book/Tablet Book/Tablet Long Side / Long Side /... - Page 43 SPECIFICATIONS Printer driver specifications (part 2) Windows Macintosh Function PCL6 PCL5e Graphics Resolution 600/300dpi 600/300dpi 600dpi 600dpi 600dpi Halftone Graphics Mode Zoom Mirror Image Negative Image Fit to Page Fonts Resident fonts 80 fonts 80 fonts 136 fonts 136 fonts 35 fonts Selectable download bitmap,...
- Page 44 SPECIFICATIONS Printer driver specifications (part 3) Windows Macintosh Function PCL6 PCL5e Other functions Auto configuration Settings ROPM Overlay Watermark Job Compression Bitmap Compression *1 Can only be used when the dual function board is installed. *2 Cannot be used in Mac OS X v10.1. *3 N-up printing cannot be used in Windows NT 4.0.
- Page 45 INDEX Index Printer specifications ......41 Numerics Printer Status Monitor......17 "Help" button.........9 PRINTER UTILITIES ......17 "2-Up Pamphlet" ........ 11 How to configure the settings .....30 Printing a watermark......15 How to use the online manual ....3 PRINTING FROM MACINTOSH ..21 PRINTING FROM WINDOWS....
Need help?
Do you have a question about the AR-NB2 and is the answer not in the manual?
Questions and answers