Sharp XE-A201 Quick Start Manual
Hide thumbs
Also See for XE-A201:
- Instruction manual (276 pages) ,
- Parts and their functions (17 pages) ,
- Quick programming manual (13 pages)
Advertisement
Available languages
Available languages
Quick Links
Quick Start/A4
01.11.11 10:38 AM
Page 1
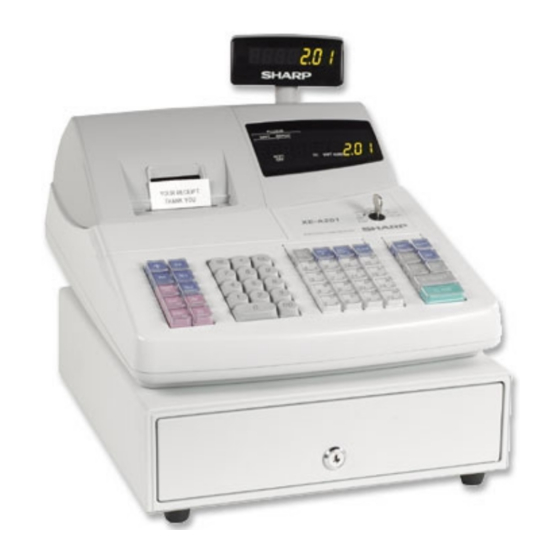
XE-A201 Quick Start Guide
For quick set-up, follow the steps shown below. Note that malfunction may occur if you do not follow the steps. For further information, please read the instruction manual. Before setting up your cash register, prepare
three new R6 or LR6 batteries ("AA" size), which are necessary for memory backup, and find a stable surface near an AC outlet where the cash register is not subject to water sources or direct sunlight.
Preparing the Cash Register
1
Initializing the Cash Register
To ensure the cash register operates properly, initialize it using
the following procedure.
1. Make sure the AC power cord is unplugged and batteries are
not installed on the register.
2. Insert the manager (MA) key into the
OPX/Z
mode switch and turn it to the REG
position.
PGM
3. Insert the plug of the AC power cord into
the AC outlet. A buzzer will sound three
times.
IMPORTANT: This operation must be performed without
batteries installed.
4. The register display should now show "
0.00".
NOTE: If the buzzer does not sound when the plug is inserted,
the initialization has not been done successfully. Wait at least
one minute after pulling out the plug, and insert the plug again.
Installing the Batteries
Install three new R6 or LR6 batteries ("AA" size) according to the
procedure shown below with the power cord connected and set
the mode switch to REG position.
1. Lift the rear of the printer cover and detach it.
2. Open the battery compartment cover.
3. Install three new R6 or LR6 batteries
("AA" size). Make sure that the
batteries are installed as per the
diagram.
4. Confirm the no battery symbol " "
lights off.
5. Close the battery compartment cover.
Installing the Paper Roll
2
(for receipt printing)
1. Make sure the print head release lever is positioned
as per the diagram.
REG
MGR
X1/Z1
X2/Z2
2. Cut off approximately one revolution of the paper roll.
Make sure the paper end is cut as per the diagram.
Correct
Incorrect
3. Set the paper in paper cradle as per the diagram.
To the printer
To the printer
Correct
Incorrect
4. Insert the end of the paper
into the printer until it is
caught by the printer auto-
feed and comes out of the
top of the printer. If the
printer does not catch the
paper, feed the paper
F
while pressing
.
5. Cut off the excess paper
using the edge of the
inner cover, and replace
the printer cover. Press
F
to make sure the
paper end comes out of
the printer cover.
NOTE: If you want to use a paper roll for journal printing,
please refer to GETTING STARTED section of the
instruction manual.
Basic Programming
3
Set the mode switch to the PGM
position.
REG
OPX/Z
MGR
Print head
PGM
release lever
Setting the Date
Enter the date in 8 digits using the day-
month-year format. Then press
s
Example:
26082:2s
Date (26 August, 2002)
Setting the Time
Enter the time in 4 digits ("hhmm"
format) using the 24 hour system. Then
press
s
.
Example:
1430s
Time (2:30 p.m.)
Other programming
While the cash register is
preprogrammed so that it can be used
with minimal set-up, you may need to
program some items such as;
• Setting for introduction of EURO
• Department text and logo message
• VAT/tax
For details of programming, please refer
to the instruction manual.
Printed in Korea / Imprimé en Corée / Gedruckt in Korea / Impreso en Corea
English
Now, you are ready for
4
sales entries.
Set the mode switch to the REG
position, and start sales entry.
Enter a clerk code (1 to 15) and press
X1/Z1
L
. The clerk code 1 is set by default.
X2/Z2
(Once the clerk code is entered, re-entry
of the clerk code is not needed until the
clerk is changed.)
Example:
2L
Clerk code
.
Registration Example
(when selling department items by cash)
1. Enter the price for the first department
item.
For example for 5.00, enter
5:
,
and press the appropriate department
key.
For department 17 to department 32,
press
D
first before pressing the
department key.
For department 33 and above, enter
the price and press
M
, then enter
the department code using numeric
keys and press
d
.
2. Repeat step 1 for all the department
items.
3. Press
s
to display the amount
due.
4. Enter the amount received from the
customer. (You can omit this step if
the amount tendered is the same as
the subtotal.)
A
5. Press
, and the change due is
displayed and the drawer is opened.
6. Tear off the receipt and give it to the
customer with his or her change.
7. Close the drawer.
T(TCADH2414BHZZ) 1
Advertisement

Related Manuals for Sharp XE-A201


Summary of Contents for Sharp XE-A201
- Page 1 01.11.11 10:38 AM Page 1 XE-A201 Quick Start Guide English For quick set-up, follow the steps shown below. Note that malfunction may occur if you do not follow the steps. For further information, please read the instruction manual. Before setting up your cash register, prepare three new R6 or LR6 batteries (“AA”...
- Page 2 Quick Start/A4(D) 01.11.11 10:41 AM Page 1 XE-A201 Schnellstartanleitung Deutsch Für eine schnelle Aufstellung der Registrierkasse beachten Sie bitte die folgenden Schritte. Bei Vernachlässigung dieser Verfahrensschritte kann es zu Störungen beim Registrierkassenbetrieb kommen. Nähere Informationen entnehmen Sie bitte der Bedienungsanleitung. Vor der Aufstellung der Registrierkasse sind drei neue Mignon-Batterien (R6 oder LR6) einzusetzen. Die Batterien dienen zur Speichersicherung. Stellen Sie die Registrierkasse auf einer stabilen Fläche auf, die gegen Spritzwasser und direkte Sonneneinstrahlung geschützt ist.
- Page 3 Quick Start/A4(F) 01.10.31 4:07 PM Page 1 Guide de démarrage rapide de la XE-A201 Français Pour une installation rapide, suivez les étapes indiquées ci-dessous. Notez qu’un fonctionnement défectueux risque de survenir si vous ne suivez pas ces étapes. Pour plus d’informations, veuillez lire le manuel d’instructions.
- Page 4 Quick Start/A4(S) 01.10.31 4:07 PM Page 1 Guía de inicio rápido de la XE-A201 Español Para realizar la configuración rápida, siga los pasos mostrados a continuación. Tenga presente que es posible que se produzca un mal funcionamiento si no siguen los pasos. Para más información, lea el manual de instrucciones. Antes de configurar la caja registradora, prepare tres pilas nuevas R6 o LR6 (tamaño “AA”) que serán necesarias para respaldar la memoria.
Need help?
Do you have a question about the XE-A201 and is the answer not in the manual?
Questions and answers