Table of Contents
Advertisement
Available languages
Available languages
Quick Links
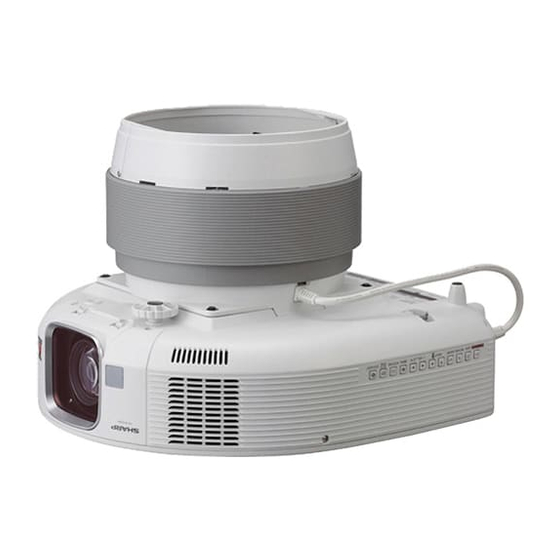
Sharp Projector
Ceiling-mount Rotating Module
MODEL
AN-SV100T
INSTRUCTION MANUAL
Included accessories
• Installation bracket
(x 1)
• Anti-sway plate A (x 1)
• Bolt M4-type
(10 mm) (x 4)
• Screw M3-type
(10 mm) (x 2)
• Terminal cover (x 2)
• Anti-sway plate B (x 2)
• Instruction manual
(This manual)
Contents
Introduction ............................................1
IMPORTANT SAFEGUARDS ..................3
System Dimensions ................................6
Attaching the Installation Bracket ..........8
Rotating Module ................................10
the Ceiling ..........................................12
Attaching the Anti-sway Plates ............15
Ceiling Mount .....................................17
Adjusting the Projection Angle .............18
Installation Examples............................19
Connecting the Cables .........................21
Attaching the Terminal Cover ...............22
Please read this installation adjustment
manual carefully to use the module
properly. Ask your dealer to install it.
• Be sure to keep this manual handy for
future reference.
Advertisement
Table of Contents

Related Manuals for Sharp AN-SV100T


Summary of Contents for Sharp AN-SV100T
-
Page 1: Table Of Contents
Sharp Projector Ceiling-mount Rotating Module MODEL AN-SV100T INSTRUCTION MANUAL Contents Included accessories Introduction ..........1 IMPORTANT SAFEGUARDS ....3 System Dimensions ........6 Attaching the Installation Bracket ..8 Attaching the Ceiling-mount • Installation bracket Rotating Module ........10 (x 1) Attaching the Ceiling Mount to the Ceiling ..........12... - Page 2 The wire which is coloured brown must be connected to the terminal which is marked with the letter L or coloured red. IF YOU HAVE ANY DOUBT, CONSULT A QUALIFIED ELECTRICIAN. Authorized representative responsible for the European Union Community Market SHARP ELECTRONICS (Europe) GmbH Sonninstraße 3, D-20097 Hamburg E.U. ONLY...
-
Page 3: Introduction
Before using the product, please read this instruction manual carefully. Introduction ENGLISH WARNING: To reduce the risk of fi re or electric shock, do not expose this product to rain or mois ture. See top of the ceiling-mount rotating module. The lightning fl... - Page 4 For instructions in English, German, French, Spanish, Italian, Dutch, Swedish, Portuguese, Chinese, Korean and Arabic on how to install this product with your projector, refer to the operation manuals in the CD-ROM supplied with the projector. Anleitungen in Englisch, Deutsch, Französisch, Spanisch, Italienisch, Niederländisch, Schwedisch, Portugiesisch, Chinesisch, Koreanisch und Arabisch, wie man dieses Produkt bei Ihrem Projektor installiert, fi...
-
Page 5: Important Safeguards
IMPORTANT SAFEGUARDS CAUTION: Please read all of these instructions before you operate this product and save these instructions for later use. Electrical energy can perform many useful functions. This product has been engineered and manufactured to assure your personal safety. BUT IMPROPER USE CAN RESULT IN POTENTIAL ELECTRICAL SHOCK OR FIRE HAZARDS. - Page 6 15. Overloading 21. Wall or Ceiling Mounting Do not overload wall outlets, extension cords, This product should be mounted to a wall or integral convenience receptacles as this or ceiling only as recommended by the can result in a risk of fi re or electric shock. manufacturer.
-
Page 7: Notes On Installation
■ Ask your dealer or service shop to install the ceiling mount. Sharp will assume no responsibility whatsoever if inadequate installation causes your projector or attached devices to fall out of place . -
Page 8: System Dimensions
The AN-TK201 or AN-TK202 ceiling mount can be installed onto the system. ■ The dimensional drawing is for the installation of the XG-SV100W. For installation dimensions of other Sharp projectors, please contact a Sharp Authorized Projector Dealer or Service Center. When installed with the AN-TK202 Specifi... - Page 9 When installed with the AN-TK201 Specifi cations Top View (405) Height 99.8 - 159.8 cm (From lens center* (Adjustable in 3 to top surface) cm increments) R4.5 ø9 Adjustment Vertical angle ±10° Range Horizontal angle ±10° Tilt angle ±10° (17) Weight 17.5 lbs (AN-TK201 + AN-SV100T)
-
Page 10: Attaching The Installation Bracket
Attaching the Installation Bracket Remove the bolts (x4) attached to the ceiling-mount rotating module. Place the installation bracket on the ceiling-mount rotating module so that it is aligned with the bracket installation holes on module. - Page 11 Using the bolts (x4) removed from the ceiling-mount rotating module, attach the installation bracket to the module. First, lightly screw all four bolts and then tighten them fi rmly.
-
Page 12: Attaching The Ceiling-Mount Rotating Module
Attaching the Ceiling-mount Rotating Module Turn over the projector and place it upside down on a fl at surface. Remove the connector cover. Place the ceiling-mount rotating module on the bottom of the projector so that it is aligned with the module installation holes on the projector. - Page 13 Using the supplied bolts, attach the ceiling-mount rotating module to the projector. First, lightly screw all four bolts and then tighten them fi rmly.
-
Page 14: Attaching The Ceiling Mount To The Ceiling
Use the washers supplied with the ceiling mount. Caution • Ask your dealer or service shop to install the ceiling mount. Sharp will assume no responsibility whatsoever if inadequate installation causes your projector or attached devices to fall out of place. - Page 15 Attach the height-adjustment pole to the ceiling mount. Pin hole Sleeve 1. Insert the height-adjustment pole into the ceiling mount. 2. Fix the pole in place with the sleeve and pole-fi xing bolt , according to the height of the screen.
- Page 16 Use the washers supplied with the ceiling mount. Caution • Ask your dealer or service shop to install the ceiling mount. Sharp will assume no responsibility whatsoever if inadequate installation causes your projector or attached devices to fall out of place.
-
Page 17: Attaching The Anti-Sway Plates
Attaching the Anti-sway Plates We ask you to secure the projector in place to ensure safety and prevent it from falling. Remove the screws (x3) from the ceiling-mount rotating module. Place the anti-sway plates on the module so that they are aligned with the position-setting pins on the module. - Page 18 Attaching the Anti-sway Plates (Continued) Using the screws (x3) removed from the ceiling-mount rotating module, attach the anti-sway plates to the module. Then tighten all three screws. Install the projector onto the ceiling using chains or wires strong enough (commercially available). * Reinforce the ceiling parts which bear the system's weight through the bolts as required.
-
Page 19: Installing The Projector On The Ceiling Mount
Installing the Projector on the Ceiling Mount Install the projector on the ceiling mount. Line up the cut-out parts on the installation adapter with the bottom of the height-adjusting pole, and hang the projector on the pole. Height-adjusting pole Cut-out parts Caution •... -
Page 20: Adjusting The Projection Angle
Adjusting the Projection Angle Caution What to do before adjustment • Turn on the projector as explained in its operation manual. • Roughly determine the size of the projected picture with the zoom lens, before adjusting tilt angle. • The best picture is produced when the projector is square with the screen. Ask your dealer to mount the module on the ceiling •... -
Page 21: Installation Examples
Installation Examples Caution Important notes on installation • When you install the projector system on a ceiling, reinforce the parts which bear the system's weight through the bolts as required, so as to withstand the load and prevent horizontal rolling. •... - Page 22 Installation Examples (Continued) For concrete ceilings AN-TK201 Ceiling Mounting bolt (M8-type) Anchor nut (M8-type) Supply M8-type anchor nuts that are strong enough to withstand the weight of the whole system. Drive anchor nuts into the ceiling. Screw the mounting bolts into the anchor nuts.
-
Page 23: Connecting The Cables
Connecting the Cables Plug the power cord of the ceiling-mount rotating module into the AC socket on the rear of the projector. Then plug the power cord supplied with the projector into the AC socket on the module and into a socket-outlet. Cut off the caps attached to the terminals you use. -
Page 24: Attaching The Terminal Cover
Attaching the Terminal Cover Fix the hooks of the terminal covers ( ) and fi t the small protrusions on the covers into the slots on the ceiling-mount rotating module ( ). Fasten the terminal covers at the two points with the supplied screws. Screws... - Page 25 Vor der Verwendung des Produkts, lesen Sie sich bitte diese Bedienungsanleitung sorgfältig durch. Einführung DEUTSCH WARNUNG: Um das Risiko von elektrischem Schlag zu verringern, sollte dieses Gerät nicht Regen oder Feuchtigkeit ausgesetzt werden. Der Blitz mit dem Pfeilsymbol innerhalb eines VORSICHT gleichseitigen Dreiecks warnt den Benutzer vor dem Vorhandensein unisolierter, potentiell...
-
Page 26: Wichtige Sicherheitshinweise
WICHTIGE SICHERHEITSHINWEISE 1. Lesen Sie die Anleitungen 13. Schutz des Netzkabels Alle Sicherheitshinweise und Bedienungsanleitungen sollten Netzkabel sollten nicht im Durchgangsbereich von Personen vor der Verwendung des Gerätes gelesen werden. verlegt werden oder an Orten, an denen Gegenstände auf sie 2. - Page 27 Avant d'utiliser le produit, veuillez lire attentivement manuel d'instructions. Introduction FRANÇAIS AVERTISSEMENT: Pour réduire les risques d'incendie et d'électrocution, ne pas exposer cet appareil à la pluie ou à l'humidité. Le symbole de l'éclair inscrit dans un triangle ATTENTION équilatéral est un avertissement à l'attention de l'utilisateur sur la présence, à...
- Page 28 MESURES DE SÉCURITÉ IMPORTANTES 1. Lire les instructions 13. Protection du cordon d'alimentation Avant d'utiliser l'appareil, veuillez lire les instructions de Faites passer le cordon d'alimentation de façon à ce qu'il ne sécurité et d'emploi. puisse être abîmé, piétiné, écrasé par un meuble ou tout objet 2.
- Page 29 Antes de utilizar el producto, lea con atención este manual de instrucciones. Introducción ESPAÑOL ADVERTENCIA: Para reducir el riesgo de que se produzca una descarga eléctrica, no exponga este producto a la lluvia ni a la humedad. El signo del rayo con punta de fl echa en el interior PRECAUCIÓN de un triángulo equilátero, tiene la fi...
-
Page 30: Importantes Medidas De Seguridad
IMPORTANTES MEDIDAS DE SEGURIDAD 1. Lectura de instrucciones 13. Protección de los cables de alimentación Antes de utilizar el producto deberán leerse todas las Los cables de alimentación deberán colocarse de forma que no instrucciones de seguridad y funcionamiento. sean pisados por personas ni aplastados por los objetos que se 2. - Page 31 Prima di utilizzare il prodotto, leggere con attenzione il presente manuale di istruzioni. Introduzione ITALIANO ATTENZIONE: Per ridurre il rischio di incendi o di scosse elettriche, non esporre questo prodotto alla pioggia o all'umidità. Il simbolo con il fulmine con la punta a freccia ATTENZIONE all'interno di un triangolo equilatero serve per avver- tire l'utente della presenza di “tensione pericolosa”...
-
Page 32: Norme Di Sicurezza Importanti
NORME DI SICUREZZA IMPORTANTI 1. Leggere le istruzioni 13. Protezione del cavo di alimentazione Prima di utilizzare il prodotto, occorre leggere tutte le Il percorso dei cavi di alimentazione deve essere scelto in istruzioni di sicurezza e di funzionamento. modo che non sia possibile calpestarli o schiacciarli 2. - Page 33 Lees deze gebruiksaanwijzing zorgvuldig door voordat u dit product in gebruik neemt. Inleiding NEDERLANDS WAARSCHUWING: Stel het apparaat niet bloot aan regen of vocht om brand of een gevaarlijke elektrische schok te voorkomen. Een bliksemsymbool in een gelijkzijdige LET OP driehoek maakt de gebruiker attent op de aanwezigheid van niet-geïsoleerde GEVAARLIJKE SPANNINGEN.
-
Page 34: Belangrijke Veiligheidsvoorschriften
BELANGRIJKE VEILIGHEIDSVOORSCHRIFTEN 1. Lees de gebruiksaanwijzing 13. Bescherming van het netsnoer Lees alle veiligheids- en bedieningsinstructies in de Leg het netsnoer zodanig dat er niet gemakkelijk iemand op gaat gebruiksaanwijzing voordat u het apparaat gebruikt. staan of dat het snoer door een voorwerp wordt platgedrukt. Let 2. - Page 35 Innan produkten används, läs noggrant igenom denna bruksanvisning. Introduktion SVENSKA VARNING: För att begränsa risken för brand eller elstötar skall enheten hållas borta från regn och fukt. Symbolen med en blixt inuti en liksidig OBSERVERA triangel är avsedd att varna användaren RISK FÖR ELSTÖTAR.
- Page 36 VIKTIGA SÄKERHETSFÖRESKRIFTER 1. Läs anvisningarna 13. Skydd av nätkabeln Läs noga alla föreskrifter om säkerhet och drift innan Alla nätkablar skall dras så att det inte fi nns risk att någon produkten tas i bruk. trampar på dem eller att de kläms av möbler eller andra 2.
- Page 37 Antes de utilizar o produto, leia atentamente este manual de instruções. Introdução PORTUGUÊS ATENÇÃO: Para reduzir riscos de incêndios ou choques elétricos, não exponha este aparelho à chuva ou umidade. O símbolo do raio com a extremidade em forma CUIDADO de fl...
- Page 38 INFORMAÇÕES DE SEGURANÇA 1. Leia as instruções 13. Proteção do cabo de alimentação Todas as instruções de segurança e de operação devem ser Os fi os de alimentação devem ser instalados em locais que lidas antes de utilizar o aparelho. não possam ser pisados, nem posicionados sob objetos que 2.
- Page 40 ■...
- Page 46 ■...
- Page 49 MEMO...
- Page 50 MEMO...
- Page 51 MEMO...
- Page 52 Printed in Japan 11P06-JP-NM...
Need help?
Do you have a question about the AN-SV100T and is the answer not in the manual?
Questions and answers