JVC KD-R421 Instructions Manual
Cd receiver
Hide thumbs
Also See for KD-R421:
- Installation & connection manual (2 pages) ,
- Instructions manual (38 pages) ,
- Installation & connection manual (2 pages)
Table of Contents
Advertisement
Having TROUBLE with operation?
Please reset your unit
Refer to page of How to reset your unit
Vous avez des PROBLÈMES de fonctionnement?
Réinitialisez votre appareil
Référez-vous à la page intitulée Comment réinitialiser votre appareil
Dear Customer,
This apparatus is in conformance with the valid
European directives and standards regarding
electromagnetic compatibility and electrical safety.
European representative of Victor Company of
Japan, Limited is:
JVC Technical Services Europe GmbH
Postfach 10 05 04
61145 Friedberg
Germany
EN, FR
© 2010 Victor Company of Japan, Limited
CoverRear_KD-R521_003A_1.indd 1-2
CoverRear_KD-R521_003A_1.indd 1-2
Cher(e) client(e),
Cet appareil est conforme aux directives et
normes européennes en vigueur concernant la
compatibilité électromagnétique et à la sécurité
électrique.
Représentant européen de la société Victor
Company of Japan, Limited:
JVC Technical Services Europe GmbH
Postfach 10 05 04
61145 Friedberg
Allemagne
1010DTSMDTJEIN
KD-R521/KD-R422/
KD-R421/KD-R45
CD RECEIVER / RÉCEPTEUR CD
For canceling the display demonstration, see page 4. / Pour annuler la démonstration des
affichages, référez-vous à la page 4.
For installation and connections, refer to the separate manual.
Pour l'installation et les raccordements, se référer au manuel séparé.
INSTRUCTIONS
MANUEL D'INSTRUCTIONS
ENGLISH
FRANÇAIS
GET0705-003A
[E/EU]
9/7/10 5:20:05 PM
9/7/10 5:20:05 PM
Advertisement
Table of Contents

Related Manuals for JVC KD-R421


Summary of Contents for JVC KD-R421
- Page 1 électromagnétique et à la sécurité électrique. European representative of Victor Company of Japan, Limited is: Représentant européen de la société Victor JVC Technical Services Europe GmbH Company of Japan, Limited: Postfach 10 05 04 JVC Technical Services Europe GmbH 61145 Friedberg...
- Page 2 Temperature inside the car : If you have JVC bears no responsibility for any loss of data parked the car for a long time in hot or cold in an iPod/iPhone and/or USB mass storage weather, wait until the temperature in the car class device while using this System.
-
Page 3: Table Of Contents
How to attach/detach the control CONTENTS panel 3 How to attach/detach the control panel 3 How to reset your unit 3 How to forcibly eject a disc 3 Maintenance About discs Canceling the display How to reset your unit demonstration Setting the clock Your preset adjustments will also be erased. -
Page 4: Canceling The Display Demonstration
Canceling the display demonstration Display demonstration will be activated automatically if no operation is done for about 20 seconds. Turn on the power. Select <DEMO OFF>. [Hold] [Hold] (Initial setting) Finish the procedure. (Initial setting) Setting the clock Turn on the power. Adjust the minute. -
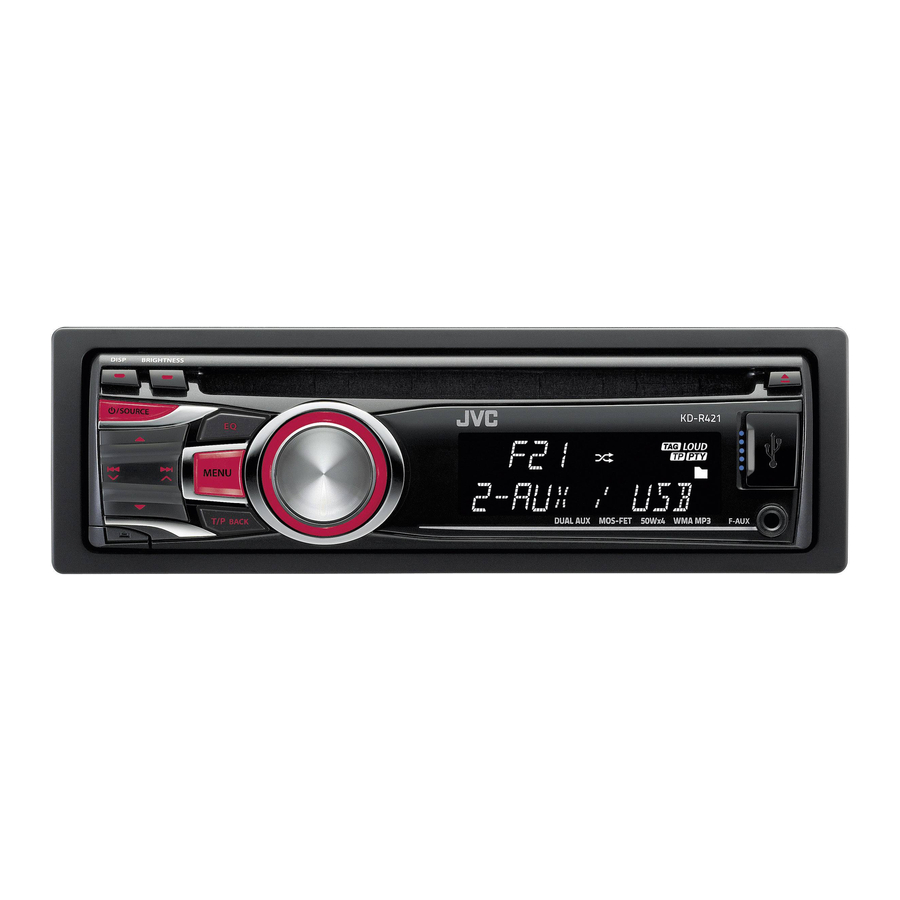
Page 5: Front Panel View
Basic operations Loading slot Display window Ejects the disc Control dial Front auxiliary Remote sensor (for KD-R521/KD-R422/KD-R421) input jack You can control this unit with an optionally purchased remote control, RM-RK52 (page 15, 16). Detaches the panel USB (Universal Serial Bus) input terminal When you press or hold the following button(s)... -
Page 6: Listening To The Radio
Listening to the radio Ÿ • [Press] Searches for stations automatically. • [Hold] Searches for stations manually. “M” flashes, then press the button ] “FM” or “AM” repeatedly. “ST” lights up when receiving an FM stereo broadcast with sufficient signal strength. Improving the FM reception Manual presetting (FM/AM) You can preset up to 18 stations for FM and 6... -
Page 7: Searching For Fm Radio Data System
• To activate the reception, tune in to another The following features are available station providing Radio Data System signals only for FM Radio Data System stations. required for TA Standby Reception. Searching for your favourite • To deactivate the reception, press T/P BACK FM Radio Data System again. -
Page 8: Listening To A Disc
Listening to a disc Playback starts automatically. All tracks will be played repeatedly until you change the source or eject the disc. Stopping playback and ejecting Selecting a track/folder from the list the disc If the ejected disc is not removed within 15 seconds, it will automatically reload into the loading slot. -
Page 9: Connecting The Other External Components
Connecting the other external components You can connect an external component to the auxiliary input jack on the control panel (F-AUX) and/or on the rear side of the unit (R-AUX). Summary of using the external components through the auxiliary input jacks: Preparation Connecting Auxiliary... -
Page 10: Listening To A Usb Device
Listening to a USB device You can operate the USB device in the same way you operate the files on a disc. (page 8) • This unit can play MP3/WMA files stored in a USB mass storage class device (such as a USB memory, Digital Audio Player, etc.). -
Page 11: Listening To An Ipod/Iphone
Listening to an iPod/iPhone Available for KD-R521 Ÿ [Hold] USB input terminal ] Turn on the power. USB 2.0 cable (accessory of the iPod/iPhone) Apple iPod/iPhone All tracks will be played repeatedly until you change the source or disconnect the iPod/ iPhone. -
Page 12: Selecting A Preset Sound Mode
• “ALBUM RND” is not available for some iPod/ may not be performed correctly or as intended. In this iPhone. case, visit the following JVC web site: <http://www. • To return to the previous menu, press jvc.co.jp/english/car/> (English website only). -
Page 13: Menu Operations
Storing your own sound mode You can store your own adjustments in memory. Adjust the sound elements (see table [Hold] below) of the selected tone. Repeat steps 2 and 3 to adjust other tones. The adjustments made is automatically stored and changed to “USER.” ] <PRO EQ>... - Page 14 Menu item Selectable setting, [Initial: Underlined] PRO EQ For settings, see page 13. FADER * R06 — F06 [ 00 ] : Adjusts the front and rear speaker output balance. BALANCE * L06 — R06 [ 00 ] : Adjusts the left and right speaker output balance. LOUD ON : Boost low and high frequencies to produce a well-balanced sound at a low volume level.
-
Page 15: Using The Remote Controller
Menu item Selectable setting, [Initial: Underlined] IPOD SWITCH HEAD MODE : Controls iPod playback through the unit. / IPOD MODE : Controls iPod playback through the iPod/iPhone. / EXT MODE : The sound of any functions (musics, games, applications, etc.) running on the connected iPod/iPhone is emitted through the speakers connected to this unit. -
Page 16: Troubleshooting
UNIT” appears on the display and no insulating tape properly, then reset the unit. (page 3) operations can be done. If the message does not disappear, consult your JVC IN-CAR ENTERTAINMENT dealer or a company supplying kits. The unit does not work at all. - Page 17 Symptom Remedy/Cause Tracks do not play back in the order you The playback order is determined when the files are recorded. have intended them to play. The elapsed playing time is not correct. This sometimes occurs during playback. This is caused by how the tracks are recorded on the disc.
-
Page 18: Using Bluetooth ® Devices
Using Bluetooth ® devices For Bluetooth operations, it is required to connect the Bluetooth adapter, KS-BTA100 (not supplied) to the auxiliary input jack (R-AUX/BT ADAPTER) on the rear of the unit. (page 9) • For details, refer also to the instructions supplied with the Bluetooth adapter and the Bluetooth device. -
Page 19: Specifications
Specifications AUDIO AMPLIFIER SECTION USB SECTION Maximum Power Output : USB Standard : USB 1.1, USB 2.0 Front/Rear : 50 W per channel Data Transfer Rate (Full Speed) : Max. 12 Mbps Continuous Power Output (RMS) : Compatible Device : Mass Storage Class Front/Rear : 20 W per channel into 4 Ω, Compatible File System : FAT 32/16/12 40 Hz to 20 000 Hz at no more than 1% total... - Page 20 Dans ce cas, retirez le disque et attendez que l’humidité s’évapore. JVC ne peut être tenu responsable pour toute Température à l’intérieur de la voiture : perte de données dans un iPod/iPhone et/ Si votre voiture est restée garée pendant ou un périphérique USB à...
- Page 21 Comment attacher/détacher le TABLE DES MATIERES panneau de commande 3 Comment attacher/détacher le panneau de commande 3 Comment réinitialiser votre appareil 3 Comment forcer l’éjection d’un disque 3 Entretien À propos des disques Comment réinitialiser votre appareil Annulation des démonstrations des affichages Vos ajustements préréglés Réglage de l’horloge...
Need help?
Do you have a question about the KD-R421 and is the answer not in the manual?
Questions and answers