JVC KD-R425 Instructions Manual
Hide thumbs
Also See for KD-R425:
- Instructions manual (37 pages) ,
- Installation and connection manual (2 pages) ,
- Connection manual (2 pages)
Table of Contents

Related Manuals for JVC KD-R425


Summary of Contents for JVC KD-R425
- Page 1 ENGLISH KD-R425/KD-R426 KD-R426/KD-R425 CD RECEIVER For canceling the display demonstration, see page 4. For installation and connections, refer to the separate manual. INSTRUCTIONS EN, PE GET0702-011A © 2011 JVC KENWOOD Corporation 0911DTSMDTJEIN [UK]...
- Page 2 Thank you for purchasing a JVC product. Please read all instructions carefully before operation, to ensure your complete understanding and to obtain the best possible performance from the unit. IMPORTANT FOR LASER PRODUCTS 1. CLASS 1 LASER PRODUCT 2. CAUTION: Do not open the top cover. There are no user serviceable parts inside the unit; leave all servicing to qualified service personnel.
-
Page 3: Table Of Contents
How to attach/detach the control CONTENTS panel 3 How to attach/detach the control panel 3 How to reset your unit 3 How to forcibly eject a disc 3 Maintenance Canceling the display demonstration How to reset your unit Setting the clock Preparing the remote controller Your preset adjustments will also be erased. -
Page 4: Canceling The Display Demonstration
Canceling the display demonstration Turn on the power. Select <DEMO OFF>. [Hold] [Hold] (Initial setting) Finish the procedure. (Initial setting) Setting the clock Turn on the power. [Hold] [Hold] (Initial setting) Select <CLOCK>. Select <CLOCK SET>. Adjust the hour. (Initial setting) Adjust the minute. -
Page 5: Preparing The Remote Controller
Preparing the remote controller Caution: When you use the remote controller for the first time, pull out the insulation sheet. • Danger of explosion if battery is incorrectly replaced. Replace only with the same or equivalent type. • Battery shall not be exposed to excessive heat Insulation sheet such as sunshine, fire, or the like. -
Page 6: Basic Operations
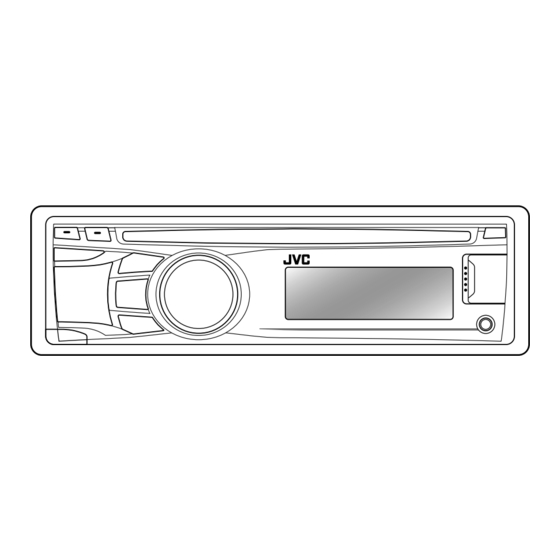
Basic operations Loading slot Display window Ejects the disc Control dial Remote sensor Front auxiliary • DO NOT expose to input jack bright sunlight. Detaches the panel USB (Universal Serial Bus) input terminal When you press or hold the following button(s)... Remote Main unit General operation... -
Page 7: Listening To The Radio
Listening to the radio • [Press] Searches for stations automatically. Ÿ • [Hold] Searches for stations manually. “M” flashes, then press the button ] “FM” or “AM” repeatedly. “ST” lights up when receiving an FM stereo broadcast with sufficient signal strength. Improving the FM reception Manual presetting (FM/AM) You can preset up to 18 stations for FM and 6... -
Page 8: Listening To A Disc
Listening to a disc Playback starts automatically. All tracks will be played repeatedly until you change the source or eject the disc. Stopping playback and ejecting Selecting a track/folder from the list the disc If the ejected disc is not removed within 15 seconds, it is automatically inserted into the loading slot. -
Page 9: Connecting The Other External Components
Connecting the other external components You can connect an external component to the auxiliary input jack on the control panel (F-AUX) and/or on the rear side of the unit (R-AUX). Summary of using the external components through the auxiliary input jacks: Preparation Connecting Auxiliary... -
Page 10: Listening To A Usb Device
Listening to a USB device You can operate the USB device in the same way you operate the files on a disc. (page 8) • This unit can play MP3/WMA files stored in a USB mass storage class device (such as a USB memory, Digital Audio Player, etc.). -
Page 11: Selecting A Preset Sound Mode
Selecting a preset sound mode You can select a preset sound mode suitable Storing your own sound mode for the music genre. You can store your own adjustments in memory. FLAT = NATURAL = DYNAMIC = VOCAL [Hold] BOOST = BASS BOOST = USER = (back to the beginning) While listening, you can adjust the subwoofer ] <PRO EQ>... -
Page 12: Menu Operations
Menu operations Repeat step 2 if necessary. [Hold] • To return to the previous menu, press BACK. If no operation is done • To exit from the menu, press for about 60 seconds, the DISP or MENU. operation will be canceled. Menu item Selectable setting, [Initial: Underlined] DEMO... - Page 13 Menu item Selectable setting, [Initial: Underlined] L/O MODE SUB.W : Selects if the REAR/SW terminals are used for connecting a subwoofer (through an external amplifier). / REAR : Selects if the REAR/SW terminals are used for connecting the speakers (through an external amplifier). SUB.W LPF * LOW 55Hz / LOW 85Hz / LOW 120Hz : Frequencies lower than 55 Hz/85 Hz/120 Hz are sent to the subwoofer.
-
Page 14: Troubleshooting
UNIT” / “WARNING CHK WIRING THEN insulating tape properly, then reset the unit. (page 3) RESET UNIT” appears on the display and If the message does not disappear, consult your JVC car audio dealer no operations can be done. or a company supplying kits. - Page 15 Symptom Remedy/Cause “READING” keeps flashing on the A longer readout time is required. Do not use too many hierarchical display. levels and folders. / Turn off the power then on again. / Reattach the USB device again. “NO FILE” appears on the display. Check whether the device contains playable files.
-
Page 16: Using Bluetooth ® Devices
Using Bluetooth ® devices For Bluetooth operations, it is required to connect the Bluetooth adapter, KS-BTA100 (not supplied) to the auxiliary input jack (R-AUX/BT ADAPTER) on the rear of the unit. (page 9) • For details, refer also to the instructions supplied with the Bluetooth adapter and the Bluetooth device. -
Page 17: Specifications
Specifications AUDIO AMPLIFIER SECTION CD PLAYER SECTION Maximum Power Output : 50 W per channel Type : Compact disc player Continuous Power Output (RMS) : 20 W per Signal Detection System : Non-contact optical channel into 4 Ω, 40 Hz to 20 000 Hz at no pickup (semiconductor laser) more than 1% total harmonic distortion. - Page 18 .ﺭﺍ ﺧﺮﻳﺪﺍﺭی ﻛﺮﺩﻳﺪ ﻣﺘﺸﻜﺮﻳﻢ ﺍﺯ ﺍﻳﻨﻜﻪ ﻳﮏ ﻣﺤﺼﻮﻝ ﻟﻄﻔ ﺎ ﹰ ﻫﻤﻪ ﺩﺳﺘﻮﺭﺍﻟﻌﻤﻞ ﻫﺎ ﺭﺍ ﻗﺒﻞ ﺍﺯ ﺍﺳﺘﻔﺎﺩﻩ ﺑﺎ ﺩﻗﺖ ﺑﺨﻮﺍﻧﻴﺪ ﺗﺎ ﻣﻄﻤﺌﻦ ﺷﻮﻳﺪ ﻛﻪ ﺑﻄﻮﺭ ﻛﺎﻣﻞ ﺁﻧﻬﺎ ﺭﺍ ﺩﺭک ﻛﺮﺩﻩ ﻭ ﺑﻬﺘﺮﻳﻦ .ﻧﺘﻴﺠﻪ ﻣﻤﻜﻦ ﺭﺍ ﺍﺯ ﺩﺳﺘﮕﺎﻩ ﻛﺴﺐ ﻛﻨﻴﺪ ﺑﺮﺍﻱ...
- Page 19 ﺭﻭﺵ ﻭﺻﻞ/ﺟﺪﺍ ﻛﺮﺩﻥ ﭘﺎﻧﻞ ﻛﻨﺘﺮﻝ ﻓﻬﺮﺳﺖ ﻣﻄﺎﻟﺐ ٣ ﺭﻭﺵ ﻭﺻﻞ/ﺟﺪﺍ ﻛﺮﺩﻥ ﭘﺎﻧﻞ ﻛﻨﺘﺮﻝ ٣ ﭼﮕﻮﻧﻪ ﺩﺳﺘﮕﺎﻩ ﺧﻮﺩ ﺭﺍ ﺩﻭﺑﺎﺭﻩ ﻣﻴﺰﺍﻥ ﻛﻴﻨﺪ ٣ ﭼﻄﻮﺭ ﺩﻳﺴﻜﻰ ﻛﻪ ﮔﻴﺮﻛﺮﺩﻩ ﺭﺍ ﺧﺎﺭﺝ ﻛﻨﻴﺪ ٣ ﻧﮕﻬﺪﺍﺭ ﻟﻐﻮ ﻧﻤﺎﻳﺶ ﻧﻤﻮﻧﻪ ﻧﻤﺎﻳﺸﯽ ۴ ﺗﻨﻈﻴﻤﺎﺕ ﺳﺎﻋﺖ ۴ ﭼﮕﻮﻧﻪ ﺩﺳﺘﮕﺎﻩ ﺧﻮﺩ ﺭﺍ ﺩﻭﺑﺎﺭﻩ ﻣﻴﺰﺍﻥ ﻛﻴﻨﺪ ﺁﻣﺎﺩﻩ...
- Page 20 ﻟﻐﻮ ﻧﻤﺎﻳﺶ ﻧﻤﻮﻧﻪ ﻧﻤﺎﻳﺸﯽ ۴ ١ .ﺭﺍ ﺍﻧﺘﺨﺎﺏ ﻛﻨﻴﺪ .ﺩﺳﺘﮕﺎﻩ ﺭﺍ ﺭﻭﺷﻦ ﻛﻨﻴﺪ <DEMO OFF> []ﻧﮕﻪ ﺩﺍﺭﻳﺪ ۵ ٢ []ﻧﮕﻪ ﺩﺍﺭﻳﺪ ()ﺗﻨﻈﻴﻢ ﺍﻭﻟﻴﻪ ۶ ٣ .ﻣﺮﺍﺣﻞ ﻛﺎﺭ ﺭﺍ ﺑﻪ ﺍﺗﻤﺎﻡ ﺭﺳﺎﻧﻴﺪ ()ﺗﻨﻈﻴﻢ ﺍﻭﻟﻴﻪ ﺗﻨﻈﻴﻤﺎﺕ ﺳﺎﻋﺖ ١ .ﺩﺳﺘﮕﺎﻩ ﺭﺍ ﺭﻭﺷﻦ ﻛﻨﻴﺪ []ﻧﮕﻪ...
- Page 21 ﺁﻣﺎﺩﻩ ﺳﺎﺯی ﻛﻨﺘﺮﻝ ﺍﺯ ﺭﺍﻩ ﺩﻭﺭ :ﺍﺣﺘﻴﺎﻁ ﻫﻨﮕﺎﻣﯽ ﻛﻪ ﺑﺮﺍی ﺍﻭﻟﻴﻦ ﺑﺎﺭ ﺍﺯ ﻛﻨﺘﺮﻝ ﺍﺯ ﺭﺍﻩ ﺩﻭﺭ ﺍﺳﺘﻔﺎﺩﻩ ﻣﯽ .ﻛﻨﻴﺪ، ﻭﺭﻗﻪ ﻋﺎﻳﻖ ﺭﺍ ﺑﻴﺮﻭﻥ ﺑﻜﺸﻴﺪ ﺩﺭ ﺻﻮﺭﺗﯽ ﻛﻪ ﺑﺎﺗﺮی ﺑﻄﺮﺯ ﺍﺷﺘﺒﺎﻩ ﺟﺎ ﺯﺩﻩ ﺷﻮﺩ، ﺧﻄﺮ • ﺍﻧﻔﺠﺎﺭ ﻭﺟﻮﺩ ﺩﺍﺭﺩ. ﻓﻘﻂ ﺑﺎ ﻧﻮﻉ ﻣﺸﺎﺑﻪ ﻳﺎ ﻣﻌﺎﺩﻝ ﺗﻌﻮﻳﺾ .ﺷﻮﺩ...
- Page 22 ﻋﻤﻠﻜﺮﺩﻫﺎﻯ ﺍﺻﻠﻰ ﺷﻜﺎﻑ ﺑﺎﺭﮔﺰﺍﺭی ﭘﻨﺠﺮﻩ ﻧﻤﺎﻳﺶ ﺩﻳﺴﻚ ﺭﺍ ﺧﺎﺭﺝ ﻛﻨﻴﺪ ﺩﺭﺟﻪ ﻛﻨﺘﺮﻝ ﺳﻨﺴﻮﺭ ﺍﺯ ﺭﺍﻩ ﺩﻭﺭ ﻓﻴﺶ ﻭﺭﻭﺩی ﺩﺭ ﺑﺮﺍﺑﺮ ﻧﻮﺭ ﺧﻮﺭﺷﻴﺪ ﻗﺮﺍﺭ ﻛﻤﻜﯽ ﺟﻠﻮ • .ﻧﺪﻫﻴﺪ ﺗﺮﻣﻴﻨﺎﻝ ﻭﺭﻭﺩی ﺑﺮﺩﺍﺷﺘﻦ ﭘﺎﻧﻞ Universal Serial Bus ...ﻫﻨﮕﺎﻣﯽ ﻛﻪ ﺩﻛﻤﻪ )ﻫﺎی( ﺯﻳﺮ ﺭﺍ ﻓﺸﺎﺭ ﻣﯽ ﺩﻫﻴﺪ ﻳﺎ ﻧﮕﻪ ﻣﯽ ﺩﺍﺭﻳﺪ ﺩﺳﺘﮕﺎﻩ...
- Page 23 ﮔﻮﺵ ﺩﺍﺩﻥ ﺑﻪ ﺭﺍﺩﻳﻮ ]ﻓﺸﺎﺭ ﺩﻫﻴﺪ[ ﺍﻳﺴﺘﮕﺎﻩ ﻫﺎ ﺭﺍ ﺑﻪ ﺻﻮﺭﺕ ﺧﻮﺩﻛﺎﺭ ﭘﻴﺪﺍ • .ﻣﯽ ﻛﻨﺪ ]ﻧﮕﻪ ﺩﺍﺭﻳﺪ[ ﺍﻳﺴﺘﮕﺎﻩ ﻫﺎ ﺭﺍ ﺑﻪ ﺻﻮﺭﺕ ﺩﺳﺘﯽ ﭘﻴﺪﺍ ﻣﯽ • ﻳﺎ “FM” } “AM” .ﻛﻨﺪ .ﭼﺸﻤﮏ ﻣﯽ ﺯﻧﺪ، ﺳﭙﺲ ﺩﻛﻤﻪ ﺭﺍ ﻣﻜﺮﺭ ﺍ ﹰ ﻓﺸﺎﺭ ﺩﻫﻴﺪ “M”...
- Page 24 ﮔﻮﺵ ﺩﺍﺩﻥ ﺑﻪ ﺩﻳﺴﮏ .ﭘﺨﺶ ﺑﻪ ﻃﻮﺭ ﺧﻮﺩﻛﺎﺭ ﺷﺮﻭﻉ ﻣﻰ ﺷﻮﺩ ﺗﻤﺎﻡ ﺗﺮﺍﻙ ﻫﺎ ﺗﺎ ﺯﻣﺎﻧﻰ ﻛﻪ ﻣﻨﺒﻊ ﺭﺍ ﻋﻮﺽ ﻛﻨﻴﺪ ﻳﺎ ﺩﻳﺴﻚ ﺭﺍ ﺧﺎﺭﺝ ﻧﻤﺎﻳﻴﺪ .ﺑﻪ ﺻﻮﺭﺕ ﺗﻜﺮ ﺍﺭ ﭘﺨﺶ ﻣﻰ ﺷﻮﻧﺪ ﺍﻧﺘﺨﺎﺏ ﻳﮏ ﺗﺮﺍک/ﭘﻮﺷﻪ ﺍﺯ ﻟﻴﺴﺖ ﻣﺘﻮﻗﻒ ﻛﺮﺩﻥ ﭘﺨﺶ ﻭ ﺑﻴﺮﻭﻥ ﺩﺍﺩﻥ ﺩﻳﺴﮏ ﺩﺭﺻﻮﺭﺗﻴﻜﻪ...
- Page 25 ﺍﺗﺼﺎﻝ ﺑﻪ ﺳﺎﻳﺮ ﺩﺳﺘﮕﺎﻫﻬﺎی ﺧﺎﺭﺟﯽ ( ﻭ/ﻳﺎ ﺑﻪ ﻓﻴﺶ ﻭﺭﻭﺩی ﻛﻤﻜﯽ ﭘﺸﺖ ﺩﺳﺘﮕﺎﻩ ) ﻣﯽ ﺗﻮﺍﻧﻴﺪ ﺩﺳﺘﮕﺎﻩ ﺧﺎﺭﺟﯽ ﺭﺍ ﺑﻪ ﻓﻴﺶ ﻭﺭﻭﺩی ﻛﻤﻜﯽ ﺩﺭ ﭘﺎﻧﻞ ﻛﻨﺘﺮﻝ F-AUX .( ﻭﺻﻞ ﻛﻨﻴﺪ R-AUX :ﺧﻼﺻﻪ ﺍﺳﺘﻔﺎﺩﻩ ﺍﺯ ﺩﺳﺘﮕﺎﻫﻬﺎی ﺧﺎﺭﺟﯽ ﺑﺎ ﺍﺳﺘﻔﺎﺩﻩ ﺍﺯ ﻓﻴﺶ ﻫﺎی ﻭﺭﻭﺩی ﻛﻤﻜﯽ /ﻛﺎﺑﻞ...
- Page 26 ﮔﻮﺵ ﺩﺍﺩﻥ ﺑﻪ ﺩﺳﺘﮕﺎﻩ .ﺭﺍ ﺑﻪ ﻫﻤﺎﻥ ﺻﻮﺭﺕ ﻛﻪ ﻣﯽ ﺧﻮﺍﻫﻴﺪ ﺑﺎ ﻳﮏ ﻓﺎﻳﻞ ﺩﺭ ﺩﻳﺴﮏ ﻛﺎﺭ ﻛﻨﻴﺪ، ﻋﻤﻞ ﻧﻤﺎﻳﻴﺪ ﻣﯽ ﺗﻮﺍﻧﻴﺪ ﺑﺎ ﺩﺳﺘﮕﺎﻩ (٨ )ﺻﻔﺤﻪ ، )ﻣﺎﻧﻨﺪ ﺣﺎﻓﻈﻪ ﺫﺧﻴﺮﻩ ﺷﺪﻩ ﺩﺭ ﻳﮏ ﺩﺳﺘﮕﺎﻩ ﺫﺧﻴﺮﻩ ﺍﻃﻼﻋﺎﺕ ﺍﻳﻦ ﺩﺳﺘﮕﺎﻩ ﻣﯽ ﺗﻮﺍﻧﺪ ﺗﺮﺍک ﻫﺎی WMA/MP3 •...
- Page 27 ﺍﻧﺘﺨﺎﺏ ﻣﺪ ﻫﺎﻯ ﺻﺪﺍﻯ ﺍﺯ ﭘﻴﺶ ﺗﻨﻈﻴﻢ ﺷﺪﻩ ﺫﺧﻴﺮﻩ ﻛﺮﺩﻥ ﺣﺎﻟﺖ ﺻﺪﺍﻯ ﺷﺨﺼﯽ ﻣﯽ ﺗﻮﺍﻧﻴﺪ ﺣﺎﻟﺖ ﺻﺪﺍی ﭘﻴﺶ ﺗﻨﻈﻴﻢ ﺷﺪﻩ ﻣﺘﻨﺎﺳﺐ ﺑﺎ ژﺍﻧﺮ .ﻣﻮﺳﻴﻘﯽ ﺭﺍ ﺍﻧﺘﺨﺎﺏ ﻛﻨﻴﺪ .ﻣﯽ ﺗﻮﺍﻧﻴﺪ ﺗﻨﻈﻴﻤﺎﺕ ﺧﻮﺩ ﺭﺍ ﺩﺭ ﺣﺎﻓﻈﻪ ﺗﻨﻈﻴﻢ ﻛﻨﻴﺪ ١ []ﻧﮕﻪ ﺩﺍﺭﻳﺪ + DYNAMIC + NATURAL + FLAT ٢...
- Page 28 ﻋﻤﻠﻴﺎﺕ ﻣﻨﻮ ٣ ٢ ١ ﺩﺭ ﺻﻮﺭﺕ ﻟﺰﻭﻡ ﻣﺮﺣﻠﻪ ٢ ﺭﺍ ﺗﻜﺮﺍﺭ []ﻧﮕﻪ ﺩﺍﺭﻳﺪ .ﻛﻨﻴﺪ ،ﺑﺮﺍی ﺑﺮﮔﺸﺘﻦ ﺑﻪ ﻣﻨﻮﻫﺎی ﻗﺒﻠﯽ • ﺍﮔﺮ ﻇﺮﻑ ٠۶ ﺛﺎﻧﻴﻪ ﻫﻴﭻ ﻛﺎﺭ .ﺭﺍ ﻓﺸﺎﺭ ﺩﻫﻴﺪ BACK ﺍﻧﺠﺎﻡ ﻧﺸﻮﺩ، ﻋﻤﻠﻴﺎﺕ ﻟﻐﻮ ﻣﻰ ﻳﺎ ،ﺑﺮﺍی ﺧﺮﻭﺝ ﺍﺯ ﻣﻨﻮ DISP •...
- Page 29 [ﺣﺎﻟﺖ ﻗﺎﺑﻞ ﺍﻧﺘﺨﺎﺏ، ]ﻭﺿﻌﻴﺖ ﺍﻭﻟﻴﻪ: ﺧﻂ ﺯﻳﺮﻳﻦ ﺩﺍﺭﺩ ﺁﻳﺘﻢ ﻣﻨﻮ ﺑﺮﺍی ﻭﺻﻞ ﻛﺮﺩﻥ ﺳﺎﺏ ﻭﻭﻓﺮ )ﺍﺯ : ﺩﺭ ﺻﻮﺭﺗﯽ ﻛﻪ ﺍﺯ ﺗﺮﻣﻴﻨﺎﻟﻬﺎی SUB.W L/O MODE SW/REAR : ﺩﺭ ﺻﻮﺭﺗﯽ .ﻃﺮﻳﻖ ﺁﻣﭙﻠﻴﻔﺎﻳﺮﻫﺎی ﺧﺎﺭﺟﯽ( ﺍﺳﺘﻔﺎﺩﻩ ﻣﯽ ﻛﻨﻴﺪ، ﺍﻧﺘﺨﺎﺏ ﺷﻮﺩ REAR / (ﺑﺮﺍی ﻭﺻﻞ ﻛﺮﺩﻥ ﺑﻠﻨﺪﮔﻮﻫﺎ )ﺍﺯ ﻃﺮﻳﻖ ﺁﻣﭙﻠﻴﻔﺎﻳﺮﻫﺎی ﺧﺎﺭﺟﯽ ﻛﻪ...
- Page 30 ﻋﻴﺐ ﻳﺎﺑﻰ ﺟﺒﺮﺍﻥ ﻛﺮﺩﻧﻬﺎ/ﻋﻠﻞ ﻋﻮﺍﺭﺽ ﻣﻄﻤﺌﻦ ﺷﻮﻳﺪ .ﺍﻧﺪﺍﺯﻩ ﺻﺪﺍ ﺭﺍ ﺑﺮ ﺭﻭ ﻣﻴﺰﺍﻥ ﺑﻬﻴﻨﻪ ﺁﻥ ﺗﻨﻈﻴﻢ ﻧﻤﺎﻳﻴﺪ .ﺻﺪﺍ ﺍﺯ ﺑﻠﻨﺪﮔﻮﻫﺎ ﺷﻨﻴﺪﻩ ﻧﻤﻰ ﺷﻮﺩ (۶ ﻣﻜﺚ ﻗﺮﺍﺭ ﻧﺪﺍﺷﺘﻪ ﺑﺎﺷﺪ. )ﺻﻔﺤﻪ ﻛﻪ ﺩﺳﺘﮕﺎﻩ ﺩﺭ ﺣﺎﻟﺖ ﺑﯽ ﺻﺪﺍ .ﻛﺎﺑﻠﻬﺎ ﻭ ﺍﺗﺼﺎﻻﺕ ﺭﺍ ﺑﺮﺭﺳﻰ ﻛﻨﻴﺪ ﺑﺮﺭﺳﯽ...
- Page 31 ﺟﺒﺮﺍﻥ ﻛﺮﺩﻧﻬﺎ/ﻋﻠﻞ ﻋﻮﺍﺭﺽ ﺑﻪ ﺯﻣﺎﻥ ﺧﻮﺍﻧﺪﻥ ﺑﻴﺸﺘﺮﻱ ﻧﻴﺎﺯ ﺍﺳﺖ. ﺍﺯ ﺯﻳﺮ ﺷﺎﺧﻪ ﻫﺎ ﻭ ﭘﻮﺷﻪ ﺑﻪ ﭼﺸﻤﻚ ﺯﺩﻥ ﺑﺮ ﺭﻭ ﻋﺒﺎﺭﺕ “READING” ﺳﭙﺲ ﺩﻭﺑﺎﺭﻩ ﺑﺮﻕ ﺩﺳﺘﮕﺎﻩ ﺭﺍ .ﻫﺎی ﺯﻳﺎﺩ ﺍﺳﺘﻔﺎﺩﻩ ﻧﻨﻤﺎﻳﻴﺪ .ﺻﻔﺤﻪ ﺍﺩﺍﻣﻪ ﻣﻰ ﺩﻫﺪ .ﺭﺍ ﺩﻭﺑﺎﺭﻩ ﻭﺻﻞ ﻛﻨﻴﺪ ﺩﺳﺘﮕﺎﻩ .ﺧﺎﻣﻮﺵ...
- Page 32 ﺍﺳﺘﻔﺎﺩﻩ ﺍﺯ ﺩﺳﺘﮕﺎﻫﻬﺎی Bluetooth ® ) )ﺍﺭﺍﺋﻪ ﻧﺸﺪﻩ ﺍﺳﺖ( ﺭﺍ ﺑﻪ ﻓﻴﺶ ﻣﻮﺟﻮﺩ ، ، ﻻﺯﻡ ﺍﺳﺖ ﺁﺩﺍﭘﺘﻮﺭ ﺑﺮﺍی ﻋﻤﻠﻴﺎﺕ /R-AUX KS-BTA100 Bluetooth Bluetooth (٩ ( ﺩﺭ ﭘﺸﺖ ﺩﺳﺘﮕﺎﻩ ﻭﺻﻞ ﻛﻨﻴﺪ. )ﺻﻔﺤﻪ BT ADAPTER ﻫﻢ ﻣﺮﺍﺟﻌﻪ ﻭ ﺩﺳﺘﮕﺎﻩ ﺑﺮﺍی ﺟﺰﺋﻴﺎﺕ ﺑﻴﺸﺘﺮ، ﺑﻪ ﺩﺳﺘﻮﺭﺍﻟﻌﻤﻞ ﻫﺎی ﺍﺭﺍﺋﻪ ﺷﺪﻩ ﻫﻤﺮﺍﻩ ﺑﺎ ﺁﺩﺍﭘﺘﻮﺭ Bluetooth Bluetooth •...
- Page 33 ﻣﺸﺨﺼﺎﺕ ﺑﺨﺶ ﭘﺨﺶ ﻛﻨﻨﺪﻩ ﺑﺨﺶ ﺁﻣﭙﻠﻰ ﻓﺎﻳﺮ ﺻﻮﺗﻰ : ﻧﻮﻉ : ﺣﺪﺍﻛﺜﺮ ﻗﺪﺭﺕ ﺧﺮﻭﺟﻰ ﭘﺨﺶ ﻛﻨﻨﺪﻩ ﺩﻳﺴﻚ ﻛﻮﭼﻚ ﻫﺮﻛﺎﻧﺎﻝ ۵٠ : ﺳﻴﺴﺘﻢ ﻛﺸﻒ ﺳﻴﮕﻨﺎﻝ ﺩﺍﻣﻪ ﻗﺪﺭﺕ ﺧﺮﻭﺟﻰ ﭘﻴﻜﺎپ ﻧﻮﺭ ﻏﻴﺮ ﺗﻤﺎﺳﻰ )ﻟﻴﺰﺭ ﻫﺮ ﻛﺎﻧﺎﻝ ﺑﻪ ٢٠ (RMS) (ﻧﻴﻤﻪ ﻫﺎﺩ ، ٠۴ ﻫﺮﺗﺰ ﺑﻪ ٠٠٠ ٠٢ ﻫﺮﺗﺰ ﺩﺭ ﺣﺪﻭﺩ ١% ﺍﺯ ﻛﻞ ۴...
Need help?
Do you have a question about the KD-R425 and is the answer not in the manual?
Questions and answers