Table of Contents
Advertisement
Quick Links
Advertisement
Table of Contents

Related Manuals for Epson DREAMIO EH-DM3


Summary of Contents for Epson DREAMIO EH-DM3
-
Page 2: Notations Used In This Guide
Notations used in this guide Indicates content that may cause the unit damage or malfunction. Indicates additional information and points that may be useful to know regarding a topic. Indicates a page where useful information regarding a topic can be found. Indicates operating methods and the order of operations. -
Page 3: Table Of Contents
Contents Contents... Safety Instructions... Use and Storage... Discs and USB Storage ... 10 Parts Name and Functions... 12 Preparing the Remote Control... 16 Quick Start Installation ... 18 Projection distance and screen size ... 18 Connecting the power cable ... 18 Disc Playback ... -
Page 4: Safety Instructions
Safety Instructions All safety and operating instructions should be read before using the unit. After you have read all instructions, save this information for later reference. The documentation and the unit use graphical symbols to show how to use the unit safely. Please understand and respect these caution symbols in order to avoid injury to persons or property. -
Page 5: Important Safety Instructions
Important safety instructions Follow these safety instructions when setting up and using the projector : • Read these instructions. • Keep these instructions. • Heed all warnings. • Follow all instructions. • Do not use this apparatus near water. • Clean only with dry cloth. •... - Page 6 To reduce the risk of fire or electric shock, do not expose this apparatus to rain or moisture. Unplug the unit from the outlet and refer all repairs to qualified service personnel under the following conditions: • If smoke, unusual smells or unusual noises come from the unit. •...
- Page 7 Do not place containers with liquids, water or chemicals on top of the unit. If the containers spill and the contents get inside the unit, fire or electric shock may result. Never look into the unit lens when the lamp is switched on as the bright light can damage your eyes. Never push metallic or flammable objects or any other foreign materials through the air intake or air exhaust vents, fire or electric shock may result.
-
Page 8: Class 1 Laser Product
Class 1 LASER Product Do not open the top cover. There are no user serviceable parts inside the unit. Do not use the unit in places where there are lots of humidity or dust, near cooking or heating appliances, or in places where it may come into contact with smoke or steam. Do not use or store this unit outdoors for an extended length of time. - Page 9 Unplug the unit from the outlet before cleaning. This avoids electric shock during cleaning. When cleaning the unit, do not use wet cloths or solvents such as alcohol, thinner or benzine. Water infiltration or deterioration and breakage of the unit case could result in electric shock. Incorrect battery usage may cause leakage of battery fluid and battery rupture, which could result in fire, injury or corrosion of the unit.
-
Page 10: Use And Storage
When the unit is not in use, be sure to attach the lens cover. • EPSON will not be held responsible for damage arising from projector or lamp failure outside the While the projector is... -
Page 11: Lcd Panel
LCD panel • The LCD panel is manufactured using extremely high-precision technology. However, black dots may appear on the panel, or some red, blue or green dots may light up extremely brightly at times. Furthermore, sometimes striped color irregularities or brightness irregularities may also appear. -
Page 12: Discs And Usb Storage
Discs and USB Storage Discs Readable disc types The following discs can be played. Symbols used in Disc types this guide DVD video Commercially available software containing high-quality movies and forms of visual images. You cannot play DVD videos if the disc region code does not correspond to the region code label on the side of this unit. -
Page 13: Disc Handling
Unreadable disc types • The following discs cannot be played. - DVD-ROM - CD-ROM - DVD audio - SACD - DVD-RAM • Round discs with a diameter other than 8 cm or 12 cm • Irregularly shaped discs Disc Handling •... -
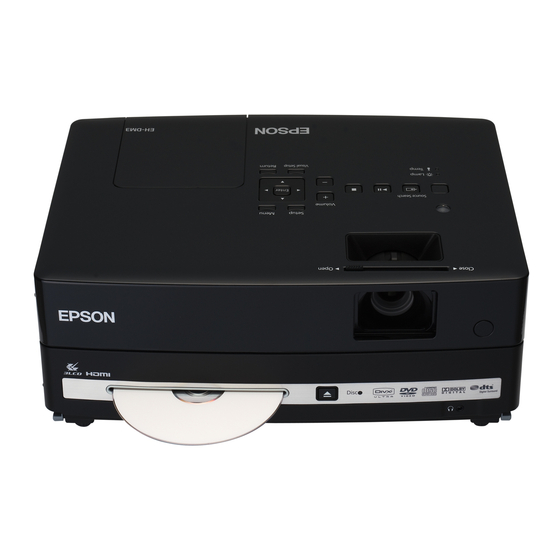
Page 14: Parts Name And Functions
Parts Name and Functions Front Name Slide lens cover knob. Slide lens cover Disc indicator Eject button Disc slot Foot adjust lever Front adjustable foot Headphone jack Handle (Security cable installation point) Security slot (j) Air intake vent (Air filter cover) Remote control light- receiving area Projection lens... - Page 15 Rear Name Can be connected to the audio output port of the connected video device or a computer. Audio input port Video input port Can be connected to the ordinary image output port of a video device. Computer input port Can be connected to the RGB output port of a computer.
- Page 16 vPower button sp. 22 vSource Search button sp. 46 Name Focusing ring Status indicator Ambient light sensor Lamp cover Lens cover knob vVolume adjustment buttons sp. 20 vPlay/Pause button sp. 23 vStop button sp. 22 Move to the left or right for image focusing. If a problem occurs in the unit, the status indicator blinks or lights up to indicate the problem.
-
Page 17: Remote Control
Remote Control Handy functions sp. 37 sp. 32 sp. 34 sp. 39 sp. 50 sp. 51 sp. 35 sp. 40 sp. 59 Buttons used during playback sp. 22 sp. 23, 24 sp. 23, 24 sp. 23, 24 sp. 24 sp. 24 sp. -
Page 18: Preparing The Remote Control
Preparing the Remote Control Inserting the batteries Caution Check the positions of the (+) and (-) marks inside the battery holder to ensure the batteries are inserted the correct way. Remote control usage range Operable range (horizontal) Approx. 30° Approx. 30° Operable range (vertical) Approx. -
Page 19: Quick Start
Quick Start Playback procedure No complicated connections are necessary. You do not even need to select the television type or change the input. You can enjoy your DVDs on the big screen by following these four easy steps. The standard speakers support virtual surround sound system, and you can enjoy real stereo surround sound using the left and right speakers. -
Page 20: Installation
Installation Projection distance and screen size Place the unit in a position that will enable the optimum size image to be projected on the screen. When you use a 16:9 ratio, 80” type widescreen, for example, place the unit approximately 241 cm away from the screen. -
Page 21: Disc Playback
Disc Playback Playing a disc and projecting Insert the disc into its slot by facing the disc label upward. If you are using a dual-side disc, face the side you wish to play downwards. Insert an 8-cm disc into the disc slot center position. -
Page 22: Adjusting The Projection Position And Volume
Adjusting the projection position and volume Adjust the volume and image being projected. Focusing (Focus ring) Fine-tuning the projection size (Zoom) Adjust the projection size in the Visual Setup menu. sp. 57 Press and select "Signal" - "Zoom". Using the main unit Using the remote control Volume control (Volume) Using the main unit... -
Page 23: Correcting Keystone Distortion Of The Image
Correcting keystone distortion of the image (Keystone) • Adjusting the height of your image This unit automatically detects vertical tilt and corrects the images that are keystone distorted. If the projected image is still distorted, you can adjust it from the Visual Setup menu or using the remote control. -
Page 24: Stopping Playback
Stopping playback Press stopping, when you press resumed from the interrupted scene (resume). Notes on resume play • If you press when “Loading” is displayed on the screen, “Resume Play” is displayed and the disc is played from the last stop position. •... -
Page 25: Basic Playback Operations
Basic Playback Operations From here on, operations are explained primarily using the buttons of the remote control. You can also use the buttons with the same markings as those on the unit control panel to achieve the same effect. Pause Press during playback. -
Page 26: Skip
Skip Press during playback or when paused. If you press during chapter/track playback, playback returns to the start of the chapter or track being played. After this, playback returns to the start of the previous chapter/track each time you press playback returns to the start of the previous chapter/ track each time you press •... -
Page 27: Temporarily Using The Projector's Light As Illumination (Break)
Temporarily using the projector’s light as illumination (Break) The break function is useful if, in the middle of a movie, you want to get up or move around, get a drink, or some food, and so on. By simply pressing the button you can pause the disc being played until you can get up to turn the lights on in the room. -
Page 28: Advanced Operations
Advanced Operations Becoming a playback expert Playback from a DVD menu Some discs have the following kinds of original menus saved in them. •Root Menu: When multiple titles (image and audio) have been recorded, this integrated disc information is displayed. To display the top menu Press and hold for about 3 seconds to display the top menu. -
Page 29: Playback A Video Cd From The Menu
Playback a Video CD from the menu Press • Certain discs may not contain a menu. If a menu is not recorded, these operations cannot be executed. • Depending on the disc, playback may begin automatically, even if is not pressed. You can play a disc by selecting the desired chapter from any of the following two menus. - Page 30 To turn to the previous/next page of the menu screen Press when the menu screen is displayed. To call the menu screen during playback Each time is pressed, the menu goes back by one step. Press until the menu is displayed. To call the PBC menu screen When you display the playback information or the preview screen, the PBC mode is canceled.
-
Page 31: Jpeg, Mp3/Wma And Divx® Playback
JPEG, MP3/WMA and DivX Select the track you want to see using and press The selected track is played. ® playback Although the a USB storage device are played back by selecting the desired file from a File List, the function varies depending on the file, as follows. - Page 32 • If is displayed, you will return to the File List when you press twice. • When you select “Others” from the settings menu and set the “MP3/ JPEG Nav” to “Without Menu”, all MP3, WMA, JPEG and DivX are listed. “With Menu” is set by default. •...
- Page 33 When playing MP3/WMA audio Once menu selection is complete and the audio begins, close the lens cover. You can enjoy just the music being played. Simultaneous MP3/WMA and JPEG playback If a disc contains a mix of MP3/WMA and JPEG files, you can enjoy the Slideshow with sounds.
-
Page 34: Playback By Selecting The Chapter Or Track Number
Playback by selecting the chapter or track number Repeat play and random play Set the [Function] position before performing operations During playback or when paused, select the chapter or track number you wish to play by pressing the numeric buttons. s “When using the numeric buttons”... - Page 35 (If “Others” is selected from the settings menu and if “MP3/JPEG Nav” is set to “With Menu”) Screen Function display Repeat One File repeat Repeats the current file. Repeat Folder Folder repeat Repeats files in the current folder. Shuffle Random play Randomly plays files in the current folder.
-
Page 36: Program Play
Program play Set the [Function] position before performing operations You can set titles, chapters, and tracks to playback in your order of preference. Press during play or when paused. The program screen will appear for you to set a playback sequence. Using the numeric keys, enter title and track/chapter numbers sequentially. -
Page 37: Zoom In
Zoom In Set the [Function] position before performing operations You can zoom (enlarge or compress) the projection image on the unit screen. If the enlarged image exceeds the screen size, you can display it by panning. Press during playback. The magnification (or zoom rate) is displayed. Select the desired magnification by pressing repeatedly. -
Page 38: Changing The Audio Language
Changing the audio language Changing the subtitles display When a disc has been recorded with multiple audio signals or languages, you can switch to the available audio signal or language of your preference. Press during playback. The current audio settings are displayed on the screen. Select the desired settings by pressing •... -
Page 39: Changing The Angle
Changing the angle Carrying out operations from the playback information screen Set the [Function] position before performing operations For discs that have been recorded with multiple camera angles, you can switch from the main angle to a different camera angle of your preference, such as from above, or from the right, during playback. - Page 40 Pressing , position the pointer on the desired item and press • You can set the title/chapter/track number and time by using the numeric keys, and set the play start time.sp. 26 • When the selected item appears, select the desired value using and press •...
-
Page 41: Setting The Sleep Timer
Setting the sleep timer Set the [Function] position before performing operations When the time you set on the sleep timer has passed, the unit power switch is turned off automatically. You can prevent unnecessary power from being consumed if you fall asleep while watching a movie. If the sleep timer is set to “Sleep Off”... -
Page 42: Changing The Aspect Ratio
Changing the aspect ratio Set the [Function] position before performing operations When projecting by using the built-in DVD player Screen Size 16:9 Letterbox Fixed to Normal when the Slideshow is executed. The unit automatically recognizes the aspect suitable for the input signal, and the image is projected in the appropriate aspect. - Page 43 When projecting component video (SDTV)/HDMI (SDTV), composite video images Screen Size Letterbox When projecting component video (HDTV)/HDMI (HDTV) images Screen Size 16:9 When projecting computer images Wide panel computer images are always projected at the normal (wide screen) setting. If wide panel computer images are not projected in the correct aspect, press the aspect.
-
Page 44: Playback By Attaching A Peripheral Device
Playback by attaching a peripheral device Connecting a USB storage device You can attach a USB memory or multicard reader that conform to the USB 1.1 to the unit and play the following format files. • MP3/WMA files • JPEG files •... -
Page 45: Connecting To Another Video Device, A Tv Set, Or A Computer
Connecting to another video device, a TV set, or a Computer Aside from the built-in DVD player, this unit can project images by connecting to a computer or the following devices with a video output port. - Video recorder - Game machine - Video device with built-in TV tuner - Video camera and others Video equipment signal format The kind of video signal that can be output depends on the video equipment. -
Page 46: Connecting With An Hdmi Cable
Connecting with a component video cable Output Audio For a D port output device, use a commercially available D port - component conversion cable. Connecting with an HDMI cable Output HDMI Use a HDMI cable that meets the HDMI standard. Otherwise, the image may not be displayed clearly or lost. PCM Audio is supported. -
Page 47: Connecting With A Computer
Connecting with a computer Computer cable (commercially available) (Mini D-Sub 15-pin Mini D-Sub 15-pin) To display output port To Audio out port Use a cable marked “No resistance” when you use a commercially available 2RCA To PC input port White 2RCA Stereo mini-pin audio cable (commercially available) -
Page 48: Projecting Images From External Video Equipment Or A Computer
Projecting images from external video equipment or a computer This unit automatically detects input signals and changes the projected image. The projector automatically detects signals being input from connected equipment, and the image being input from the equipment is projected. You can project the target image quickly as input ports with no image signal being input are ignored when you change by pressing the Open the lens cover and press... - Page 49 (the key is usually labeled s Computer “Documentation” After switching, wait a few seconds for projection to start. Examples of Switching Output Epson Panasonic SOTEC Macintosh Set mirroring or display detection. Depending on your OS, you can set them by pressing Depending on the computer, each time the key to change the output is pressed, the display status may also change as follows.
-
Page 50: Audio Settings
Audio Settings Listening with headphones Caution • When listening with headphones, make sure the volume is not too high. You may damage your hearing when listening to sounds at high volume over an extended period of time. • Do not set the volume too high from the outset. A loud sound may be produced suddenly that may cause damage to your headphones or your hearing. -
Page 51: Connecting A Microphone
Connecting a microphone You can output microphone audio from the projector's speaker by connecting a microphone to the projector's Mic Input Port. To adjust audio from the Mic input port, press • When the Mic Input Level is too low, adjust it using •... -
Page 52: Connecting To Audio Equipment With A Digital Coaxial Audio Input Port
Connecting to audio equipment with a digital coaxial audio input port You can connect to AV amplifiers and so on or equipment capable of making digital recordings when they are equipped with a coaxial digital audio input port. When connecting, use a commercially available coaxial digital cable. To a digital coaxial audio input port AV amplifier... -
Page 53: Selecting The Digital Sound Effects
Selecting the digital sound effects Set the [Function] position before performing operations You can select the sound effects appropriate to the musical genre of the current disc. Press The current settings are displayed on the screen. Select the desired settings by pressing The sound effects, which you can select according to the inserted disc or the connected source, are switched as follows: Concert _ Drama _ Action _ Standard... -
Page 54: Settings And Adjustments
Settings and Adjustments Setup Menu Operation and Functions The settings of this unit can be adjusted to suit the environment in which it is used. Using the setup menu Press during playback or when stopped. The following setup menu is displayed. Press and select the desired icon. -
Page 55: Setup Menu List
Setup menu list Language page Eject the disc before the setup. You cannot make the setting below when a disc is inserted. Setting Item Disc Menu Select the DVD video menu language. Audio Select the DVD video soundtrack language. Subtitle Select the DVD video subtitle language. -
Page 56: Audio Page
Audio page Setting Item Digital Output Select the kind of output signal according to the equipment connected to the Digital Coaxial Audio-Out port. For detailed information sp. 56 Night Mode Compensates for the variation in the way we hear loud and quiet sounds when playing back at low volume. -
Page 57: Language Code List
Language code list Abkhazian 6566 Gaelic; Scottish Gaelic Afar 6565 Gallegan Afrikaans 6570 Georgian Amharic 6577 Gikuyu; Kikuyu Arabic 6582 Guarani Armenian 7289 Gujarati Assamese 6583 Hausa Avestan 6569 Herero Aymara 6589 Azerhaijani 6590 Hiri Motu Bahasa Melayu 7783 Hrwatski Bashkir 6665 Interlingua... -
Page 58: Digital Output" Settings And Output Signals
“Digital Output” settings and output signals Playback Disc Linear PCM DVD video DTS DVD video Dolby digital DVD video Audio CD, Video CD, SVCD DTS Audio CD MP3/WMA disc “Digital Output” Settings Stream Linear PCM Stereo DTS bit stream Dolby digital bit stream 44.1 kHz, 16 bit stereo linear PCM/48 kHz, 16 bit linear PCM DTS bit stream 32/44.1/48 kHz, 16 bit linear PCM... -
Page 59: Operations And Functions On The Visual Setup Menu
Operations and functions on the Visual Setup menu You can adjust the brightness, contrast, and other values of the projected image. Operations on the Visual Setup menu Press during projection. The following menu is displayed. Press to select the item to be set, and then press Press to select the item to be set, and then... -
Page 60: Visual Setup Menu
Visual Setup menu Image page When the color mode is set to “Auto”, you cannot make the setting. sp. 25 Setting Item Brightness Contrast Color Saturation Tint Sharpness Color Temp. Auto Iris Signal page Setting Item Keystone Auto Keystone Zoom Power Consumption When the color mode is set to “Auto”, you cannot make the setting. -
Page 61: Option Page
Option page Setting Item Mic Input Level User Button Child Lock on the main unit to lock the power- High Altitude Mode Set this mode when you use this unit at high altitudes. Info page Item Information Lamp Hours: Total usage time of the lamp. 0H is displayed for 0 to 10 hours. Changes to units of Displays the 1 hour at 10 hours and above. -
Page 62: Security Functions
Security Functions Anti-Theft Lock The projector includes the following security devices to prevent from being stolen. • Security slot The security slot is compatible with the Microsaver Security System manufactured by Kensington. You can find details about the Microsaver Security System on the Kensington homepage http://www.kensington.com/. -
Page 63: Appendix
Appendix Troubleshooting Reading the indicators You can check the status of this unit using the indicators on the top panel. Check each condition in the following table and follow the steps to remedy the problem. * If all indicators are not lit, the power cable is not connected correctly or the unit is not powered. - Page 64 When lights on red Internal failure Wait for approximately 1 minute and 30 seconds. Then, disconnect and reconnect the power cable. If the indicator status does not change when is pressed and the power turned on... Fan related error/Sensor error High temperature error (overheating) The lamp turns off automatically and...
- Page 65 When the indicators are off Standing-by Orange During warming up (Approx. 30 Green sec) Projection in Progress Green Cooling down Orange Break Green Child Lock Flashes orange two times Normal Shows that the unit is ready to be used. In warm-up mode, pressing has no effect.
-
Page 66: When The Indicators Provide No Help
When the indicators provide no help If this unit is not functioning normally, check the following notes before requesting repairs. However, if the unit fails to improve, contact your dealer for advice. At these times Power does not turn on No images appear Images are fuzzy or out of focus... - Page 67 When using external video or computer mode At these times • Is the power for the connected equipment turned on? No images appear Switch on the power to the connected equipment, or start playback depending on the playback method for the connected equipment. •...
-
Page 68: Maintenance
Maintenance This section describes maintenance tasks such as cleaning the unit and replacing consumable parts. Caution Before starting the maintenance, unplug the power cable from the electrical outlet. Cleaning Cleaning the air filter and air intake vent When dust builds up on the air filter or the air intake vent, or the message “The unit is overheating. -
Page 69: Consumables Replacement Period
Consumables replacement period Air filter replacement period When the air filter gets dirty or is broken Lamp replacement period • The message “Replace the lamp” appears on the screen when projection starts. • The projected image gets darker or starts to deteriorate. •... -
Page 70: How To Replace Consumables
How to replace consumables Replacing the air filter Dispose of used air filters properly in accordance with your local regulations. Filter: Polypropylene Frames: ABS resin Turn the power switch off and when a short beep sounds, unplug the power cable. Remove the air filter cover. -
Page 71: Replacing The Lamp
Replacing the lamp Caution The lamp is hot immediately after use. Once the power has been switched off, allow approximately one hour to pass before replacing the lamp to allow it to cool thoroughly. Turn the power switch off, and when a short beep sounds, unplug the power cable. -
Page 72: Resetting The Lamp Operating Time
Tighten the lamp attachment screws firmly. Install the lamp cover. • Install the lamp and the lamp cover securely. If the lamp or the lamp cover is not installed correctly, this unit will be turned off as a safety precaution. •... - Page 73 Select “Yes” and press to initialize the setting.
-
Page 74: Projection Distance And Screen Size
Projection Distance and Screen Size Refer to the following table and place the unit in a position which allows the best possible projection for the size of the screen. Values are just reference. 16:9 Screen Size (Zoom Adjustment Wide) 30” 66 x 37 40”... -
Page 75: Compatible Resolution List
Compatible Resolution List Composite video Signal Resolution TV (NTSC) 720 x 360 TV (PAL, SECAM) 720 x 432 * Letterbox signal Component video Signal Resolution SDTV (480i, 60Hz) 720 x 360 SDTV (576i, 50Hz) 720 x 432 SDTV (480p) 720 x 360 SDTV (576p) 720 x 432 HDTV (720p) 16:9... -
Page 76: Computer Image
Signal SXGA3_60 HDTV(1080i) HDTV(1080p,50Hz) HDTV(1080i,60Hz) * Letterbox signal Computer image Signal VGA60/72/75/85, iMac SVGA56/60/72/75/85, iMac XGA60/70/75/85, iMac SXGA1_70/75 WXGA60/75/85 WXGA60-1 WXGA60-2 SXGA2_60 SXGA3_60/75/85 MAC13” MAC16” MAC19” MAC21” * 1 You cannot connect to models where the VGA output port is not installed. * 2 Letterbox signals Even when signals other than those mentioned above are input, it is likely that the image can be projected. -
Page 77: Compatible Mpeg Format List
Compatible MPEG format list Extension Video Codec .AVI MPEG-1/MPEG-2/ MPEG- 4(Advanced Simple Profile) .VID/.DIV/ MPEG-4(Advanced Simple .DIVX(Home Theater)/ Profile) .XVID .MPE/ .MPG/ .MPEG MPEG-1/ MPEG-2 .DAT MPEG-1 .VOB MPEG-2 The file format must meet the following requirements • Resolution: up to 720 x 576 •... -
Page 78: Specifications
Specifications Product name EH-DM3 Dimensions 335W x 136H x 239D mm (Including projections) Panel size 0.54” wide Display method Polysilicon TFT active matrix Resolution 518,400 pixels (960W x 540H dots) x 3 Focus adjustment Manual Zoom adjustment Digital type (Approx. 1:1.35) Lamp (light UHE lamp, 200W, Model No.: ELPLP56 source) - Page 79 Changes or modifications not expressly approved by the manufacturer could void the user’s authority to operate the equipment. DECLARATION of CONFORMITY According to 47CFR, Part 2 and 15 : Epson America, INC. : 3840 Kilroy Airport Way MS:3-13 Long Beach, CA 90806...
-
Page 80: Glossary
Glossary HDMI An abbreviated form of "High-Definition Multimedia Interface", which is the digital transmission standard for transmitting images and sound using one cable. The HDMI has been established primarily for digital home appliances and PCs, and this standard allows high-quality image signal transmission without signal compression. -
Page 81: Index
Index Audio page ... 54 Auto Setup ... 65 Break ... 25 Brightness ... 58 Chapter ... 78 Child lock ... 59 Cleaning the air filter and air intake vent ... 66 Cleaning the main unit ... 66 Cleaning the projection lens ... 66 Color Mode ... -
Page 82: Inquiries
A more up-to-date contact address can be obtained from the corresponding website listed here. If you do not find what you need on any of these pages, please visit the main Epson home page at www.epson.com. < EUROPE, MIDDLE EAST & AFRICA >... - Page 83 200 Sur y 200 Oeste Apartado Postal 1361-1200 Pavas San Jose, Costa Rica Tel: (506) 2210-9555 Web Address: http://www.epson.com.cr SLOVAKIA : EPSON EUROPE B.V. Branch Office Czech Republic Slavickova 1a 638 00 Brno Hotline: 0850 111 429 (national costs) Email: infoline@epson.sk Web Address: http://www.epson.sk...
- Page 84 Web Address: http://www.epson.com.pe VENEZUELA (Dominican Republic, Jamaica, Trinidad, Barbados, Aruba, Curacao ) : EPSON Venezuela S.A. Calle 4 con Calle 11-1 Edf. Epson La Urbina Sur Caracas, Venezuela Tel: (58 212) 240-1111 Web Address: http://www.epson.com.ve SINGAPORE : EPSON SINGAPORE PTE. LTD.
- Page 85 Seiko Epson Corporation’s operating and maintenance instructions. Seiko Epson Corporation shall not be liable against any damages or problems arising from the use of any options or any consumable products other than those designated as Original Epson Products or Epson Approved Products by Seiko Epson Corporation.
Need help?
Do you have a question about the DREAMIO EH-DM3 and is the answer not in the manual?
Questions and answers