Table of Contents
Advertisement
Advertisement
Table of Contents

Related Manuals for Woodstock Shop Fox Fence W1410


Summary of Contents for Woodstock Shop Fox Fence W1410
- Page 1 P.O. Box 2309 Bellingham, WA 98227 COPYRIGHT © 1996 BY WOODSTOCK INTERNATIONAL, INC. WARNING: NO PORTION OF THIS MANUAL MAY BE REPRODUCED IN ANY SHAPE OR FORM WITHOUT THE WRITTEN APPROVAL OF WOODSTOCK INTERNATIONAL, INC. REVISED MAY, 1997 PRINTED IN USA...
-
Page 2: Table Of Contents
TABLE OF CONTENTS INTRODUCTION ........................2 A. SAFETY RULES FOR ALL TOOLS ..................3 B. UNPACKING ..........................4 C. PIECE INVENTORY ......................... 4 D. CLEAN UP ..........................4 INSTALLATION ........................5 A. ORDER OF INSTALLATION ....................5 B. TOOLS REQUIRED ........................5 C. -
Page 3: Introduction
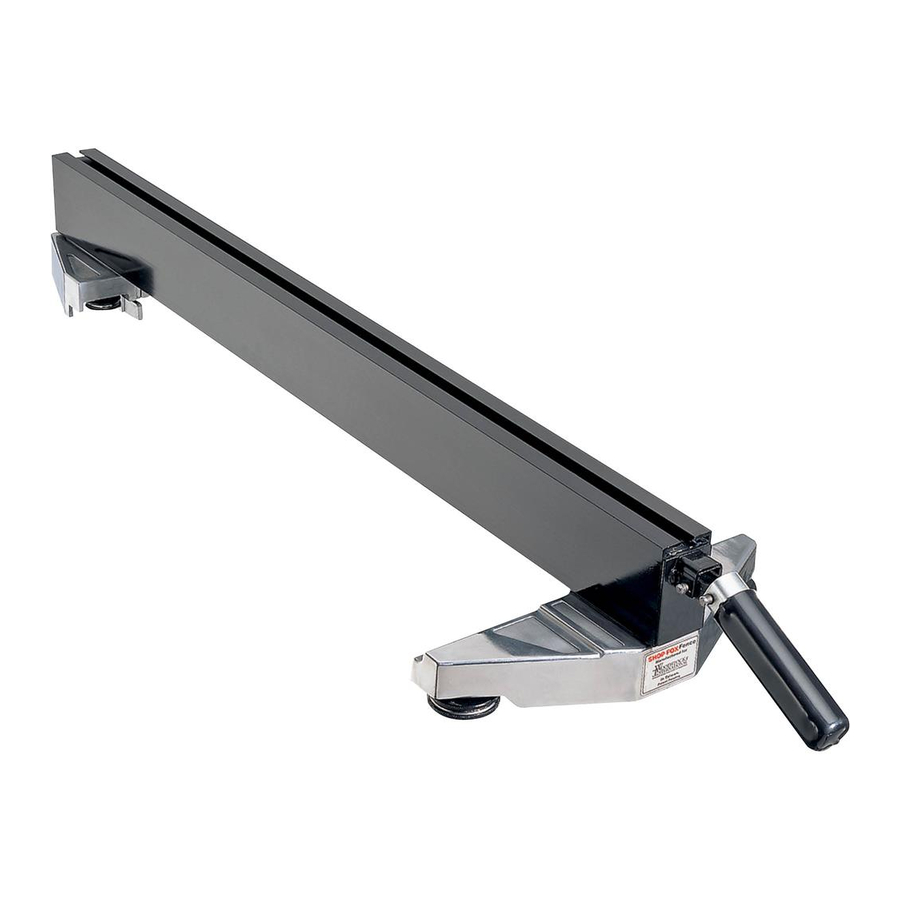
Fence fits most contractor ® and cabinet-style table saws with tables measuring Woodstock is pleased to provide this manual to 27" from front to back. assist in the installation and operation of the Shop Fence. It represents our effort to offer the ®... -
Page 4: Safety Rules For All Tools
A. SAFETY RULES FOR TABLE SAWS KNOW YOUR TABLE SAW. Read the 13. DO NOT REACH BEHIND TABLE SAW owner’s manual carefully. Learn the tool’s TO GRAB CUTOFF PIECE. If wood binds applications and limitations, as well as its against saw blade it will kick back faster than particular hazards. -
Page 5: Unpacking
In the event that any parts or hardware are miss- Although this is not a common occurrence, it is ing, please contact Woodstock at the phone num- possible that one or more of the parts could have ber or address found on page 2 and we will send been missed during the machining and deburring replacements right away. -
Page 6: Installation
SECTION II: INSTALLATION A. ORDER OF INSTALLATION C. MOUNTING THE RAILS Installation of the Shop Fox Fence is quick and Step 1. ® easy. Installation involves mounting the front and back rails to your table saw and then attaching Locate the back fence rail (the rail with the oval the fence to the rails. - Page 7 drill chuck. Loosen the chuck, detach the tap and continue turning the tap into the hole with an adjustable wrench. Advance the tap half a turn, back it out half a turn, advance another half turn, etc. until the tip of the tap extends ⁄...
- Page 8 Step 9. Measure the distance between both ends of the rails to determine if they are parallel. The differ- ence between the two ends of the rails should be no more than ± ⁄ ". Note: relative parallelism between the ends of the rails is not critical to the accuracy of the fence, but will prevent the unlocked fence from moving by itself in the direction of the taper.
-
Page 9: Optional Extension Rails
D. OPTIONAL EXT. RAILS E. MOUNTING THE FENCE An extended rail set is available for the Shop Fox With the lock handle in the ''UP'' (unlocked) posi- ® Fence increasing the rip capacity to the right of the tion, attach the fence to the rails by skewing the blade to 49''. -
Page 10: Blade Guards
Please refer to installing Woodstock's optional bracket. Figure 9. your table saw operator’s manual. Please contact Woodstock at the phone number or address on page 2. One of the challenges of working with a blade guard lies in cutting narrow pieces. -
Page 11: Adjustments
SECTION III: ADJUSTMENTS Your Shop Fox Fence has been pre-adjusted at increase the spring tension while loosening the ® the factory. However, it will be necessary to check adjustment nut will reduce the tension. To adjust and fine tune each adjustment with the fence tracking: installed on your saw. -
Page 12: Lock Handle
C. LOCK HANDLE The lock handle (#2) actuates and holds the clamp- ing jaws when in the engaged (down) position and releases the jaws in the up position. This handle is already adjusted for use out of the box. However, Check nut Setscrew stop further adjustment may be necessary after a short... -
Page 13: Fence Clamping Pressure
Step 2. D. FENCE CLAMPING PRESSURE Now engage the locking lever several times to see how securely the front clamp holds. It should If you can move the locked fence by exerting only require 5-10 pounds of force to push the lever approximately 50 lbs. - Page 14 Step 6. Once the front clamp is properly adjusted, rein- stall both cotter pins. If the front clamp cannot be made to function properly, refer to Section V, Troubleshooting on page 20. Remove Step 7. Remove The procedure for adjusting the rear clamp is vir- tually identical to the procedure for adjusting the front clamp.
-
Page 15: Parallelism To Blade
CAUTION: DO NOT cut from the right side of E. PARALLELISM the fence if lead was adjusted for cutting on the left side of the fence. The wood will pinch and If your table saw has been properly adjusted, the could cause dangerous kick-back. -
Page 16: To Tabletop
F. 90˚ TO TABLETOP The fence must also be adjusted so the face of the fence is square or 90° to the table surface. Use a good quality square to check. To square the fence to the table, proceed as follows: Rotate nut to rotate axle Step 1. -
Page 17: Scale/Indicator
Rotate nut to rotate axle Figure 21. Adjusting the left roller axle. Figure 22. Placement of the scale. Step 3. Continue to rotate the axle until the fence is square to the table. Tighten the setscrew. Step 2. Step 4. Remove the fence and apply a strip of masking tape along the the rail ⁄... -
Page 18: Fence Stop
Step 4. Reinstall the fence on the rails and slide it along slowly, checking to make sure that neither the roll- ers nor the upper clamp jaw contact the scale. Step 5. Note which side of the indicator the hairline is imprinted on. -
Page 19: Operations
Fence, DO NOT USE IT ® Figure 26. Fine fence adjustment. until you have resolved any questions or concerns you might have. Please contact Woodstock at the phone or address listed on page 2. B. BOARD BUDDIES ® The T-slot in the top of the Shop Fox Fence has ®... -
Page 20: Wood Facing
Step 2. C. WOOD FACING Drill and counterbore at least two mounting holes The Shop Fox Fence can be faced with ⁄ " kiln ® in the wood face piece. Refer to Figure 27 as dried hardwood, plywood or medium density fiber a guide for hole placement. -
Page 21: Troubleshooting
3 ⁄ ". Figure 28. considerable modifications. Contact Woodstock International at (360) 734-3482 for further infor- mation. To adjust the fence for rails up to 27 ⁄... -
Page 22: Front Clamp Will Not Adjust
C. FRONT CLAMP WILL NOT ADJUST If the cap screws (#37) that hold the front carriage (#30) to the fence are not tight enough, the car- riage may shift slightly when locked, thus releas- ing pressure on the front clamp. Step 1. -
Page 23: Rear Clamp Will Not Adjust
Step 4. D. REAR CLAMP WILL NOT ADJUST If none of the above steps work, it may be nec- essary to check and adjust the length of the tie If the cap screws (#37) that hold the rear carriage rod (#20) inside the fence. To proceed, refer to (#44) to the fence are not tight enough, the car- the instructions in Part B of this troubleshooting riage may shift slightly when the jaws are locked. -
Page 24: Fence Will Not Adjust Parallel To Blade
Re-install the bearing/roller upside down. b. Shift the roller on the bearing in a press. c. Contact Woodstock International for replace- ment parts (#36, 49, 51 and 52). d. Use a file to enlarge the rail cut-outs in the rear carriage slightly. -
Page 25: Part Documentation
SECTION VI: PART DOCUMENTATION -24- Shop Fox Fence ®... - Page 26 Shop Fox Fence -25- ®...
- Page 27 REF# DESCRIPTION REF# FRONT ROLLER GRIP BEARING 6000-2RS LOCKING HANDLE CAP SCREW ⁄ "-20 x 1" PIVOT PIN PLASTIC CAP SNAP RING 8mm FENCE POWER LINK HAIRLINE INDICATOR DRAW BAR INDICATOR CLAMP FRONT END CAP FLAT WASHER #8 PIVOT PIN PHILLIPS HEAD SCREW 8-32 x ⁄...
-
Page 28: Specifications
SECTION VII: SPECIFICATIONS W1410 SHOP FOX FENCE ® Design Type: ...................... T-Square Roller Fence Overall Dimensions and Specifications: Length ........................... 30'' Width ............................2" Height ........................... 3 ⁄ " Max cut to the right ......................25" Max cut to the left ........................ 7 ⁄... -
Page 29: Warranty
SECTION XIII: WARRANTY Woodstock International, Inc. (Woodstock) war- Woodstock shall be tried in the State of rants this product against defects in workman- Washington, County of Whatcom. ship and materials under normal use and service for a period of one year. This warranty extends...
Need help?
Do you have a question about the Shop Fox Fence W1410 and is the answer not in the manual?
Questions and answers