
Related Manuals for Sylvania SRD2900


Summary of Contents for Sylvania SRD2900
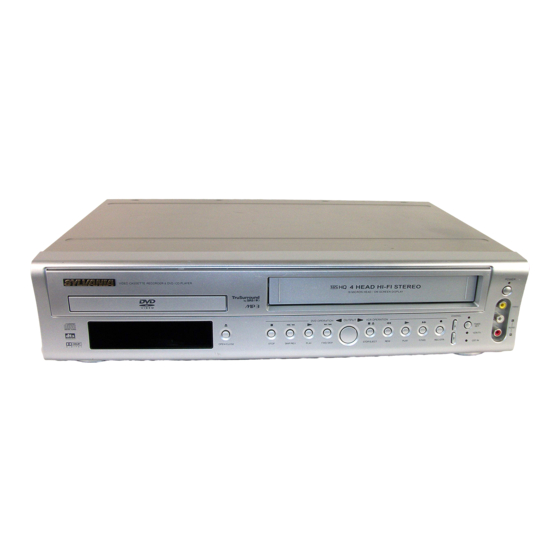
- Page 1 SYLVANIA DVD PLAYERwithVIDEOCASSE'I-I'E RECORDER SRD2900 TruSurround AYlP 3 [VHS_ DIGITAL bySRS Ce_)" OIG_JDIO VIDEO oooo ooooo I INSTRUCCIONES EN ESPANOL INCLUIDAS.
- Page 2 WARNING: TO REDUCE THE RISK OF FIRE OR ELECTRIC SHOCK, DO NOT EXPOSE THIS APPLIANCE TO RAIN OR MOISTURE. The lightning flash with arrowhead symbol, within an equilateral triangle, is intended kCAUTION alert the user to the presence of uninsulated "dangerous voltage"...
- Page 3 IMPORTANT SAFEGUARDS I. Read Instructions - All the safety and operating instruc- proper grounding of the mast and supporting structure, tions should be read before the appliance is operated. grounding of the lead-in wire to an antenna discharge unit, size of grounding conductors, location of antenna-dis-...
- Page 4 A NOTE ABOUT RECYCLING This product's packaging materials are recyclable and can be reused. Please dispose of all materials in accordance with your local recycling regulations. Batteries should never be thrown away or incinerated but disposed of in accordance with your local regulations concerning chemical wastes.
- Page 5 CONTENTS TABLE PLAYING A DVD VIDEO OR AN AUDIO CD ..• LASER SAFETY ........USING THE DVD MENUS ......• IMPORTANT SAFEGUARDS ......USING THE TITLE MENU ......ABOUT COPYRIGHT ......PAUSING PLAYBACK OR DISPLAYING A STILL SUPPLIED ACCESSORIES ......
- Page 6 FEATURES Mode display • On-screen • Dolby Digital sound This player can handle Dolby Digital surround sound Information about the current operation can be displayed with 5.1 channels when connected to a Dolby Digital on the TV screen, allowing you to confirm the currently decode_ active functions...
- Page 7 Playback Mode • S-VHS Quasi Playback (SQPB) Hardware specifications (Allows you to view a tape recorded in S-VHS format.) • Auto Head Cleaner • Auto Repeat e4 Head HiFi Stereo • 2 Step Picture Search Operation • Bilingual on-screen menu display selectable in •...
- Page 8 ABOUT DISCS [DVD] following discs be played back on this DVD/VCR COMBINATION UNITS. Data on a DVD is divided into sections called "titles", and then into subsections called "chapters", each of which is Maximum given a title or chapter number. Playback conditions Disc Type Logo Contents...
- Page 9 OPERATING CONTROLS AND FUNCTIONS [ FRONT PANEL ] l;:£tl!7Tit, I,'3 I ,', I 12 10 [ REMOTE CONTROL I 26 finished. 7. POWER Button [page "_ Press to turn the power on and off. 8. POWER Light Lights up when the power is on. 9.
- Page 10 19. STOP/EJECT Button (VCR) [page 21] 32. << (REV) Button • EJECT Button • DVD mode Press to remove the tape from the VCR. Press to view the DVD picture in fast reverse • STOP Button motion or to reverse playback of an Audio CD. •...
- Page 11 53. SLOW Button [page 19] 48. ENTER Button During tape playback, press to view the video tape in Press to accept a setting. slow motion. Press again to resume normal playback. 49. I_ (FWD) Button This button does not affect DVD playback. ODVD mode 54.
- Page 12 59. DVD/VCR AUDIO OUT Jacks and to the TV's Video In jack. 64. VIDEO IN Jack Connect the supplied audio cables here and to the Audio In jacks of a television or other audio Connect a cable coming from the video out jack of a camcorder, another VCR, or an audio-visual equipment.
- Page 13 VCR/DVD SWITCHING Since this product is both a VCR and DVD player, it is necessary to select the correct out- put mode: SWITCHING TO DVD MODE SWITCHING TO VCR MODE Press the DVD button on the remote control. Press the VCR button on the remote controL. (Verify that the DVD OUTPUT Light is lit.) (Verify that the VCR OUTPUT Light is lit.) Notes...
- Page 14 HOOKUPS 1. Disconnect the AC power cord of the TV from the If your TV does not have A/V terminals: AC outlet. When the DVD/VCR COMBINATION UNITS is in the 2. Disconnect the antenna or cable from the TV. VCR Playback mode or when the DVD/VCR COMBI- 3.
- Page 15 JACKS WITH COMPONENT VIDEO Use a component video cable (commercially available) in place of the yellow video cable to enjoy higher qual- ity pictures. Note • The component video connection only supplies video (picture) in the DVD mode of the DVD/VCR COMBI- NATION UNITS.
- Page 16 If using this DVD/VCR COMBINATION UNITS to play a DVD disc in 5.1 channel Dolby Digital surround, DTS surround formats, the DVD/VCR COMBINATION UNITS outputs a Dolby Digital, or DTS data stream from its COAXIAL DIGITAL AUDIO OUT jack. By hooking the DVD/VCR COMBINATION UNITS up to a...
- Page 17 SETUP Begin channel preset by pressing the F.FWD button once, The tuner scans and memorizes all active channels in your area, The VCR can automatically program the tuner to scan only the channels which are available in your area. • The VCR distinguishes between oChannel memory...
- Page 18 TO ADD/DELETE CHANNELS When scanning, some channels may be skipped due to a weak signal. In such cases, you can add the channels to the VCR memory manually. Set the clock accurately for proper automatic timer recording. We suggest that you use a TV or radio sta- Press the MENU button until the main menu tion as your time source.
- Page 19 PLAYBACK FUNCTION Select "AUTO REPEAT" by pressing the PLAY or the STOP button. Begin auto repeat playback by pressing the Insert a prerecorded tape.The VCR will turn F.FWD button so that [ON] appears next to on, and the VCR/TV Light and "AUTO REPEAT".
- Page 20 RECORDING FUNCTION It may be UNLAWFUL to record copyrighted materi- al without the consent of the copyright owner. This feature allows you to set the recording length simply by Accidental Erasure Prevention pressing the REC/OTR button on the VCR. To prevent accidental recording on a]_fif-_S.i'...
- Page 21 • If a tape ends during TIMER RECORDING, VCR will stop, eject the tape, and switch to the DVD 3) Set the date fp._.°NE ",MENL_IIF_P"OGRAM,, • mode automatically as the TIMER SET light blinks. First, pressthePLAYbuttonor theSTOP I _T_T r,.E'_i_'_ :: (If the DVD power is off, the VCR will switch to buttonforthe month.Then,pressthe F.FWD CHANNEL...
- Page 22 SPECIAL FEATURES RCA-type connectors. Standard audio cables are not recommended. • You can use a video disc player, satellite receiver, or other audio/video component with A/V outputs place of the playing VCR. You can make copies of video tapes made by friends or relatives for your enjoyment.
- Page 23 When a tape reaches the end during recording, play- • This shows the elapsed recording or playback time back, or fast-forward, the tape will automatically in hours, minutes, and seconds. (The displayed time rewind to the beginning. After rewinding finishes, the will not change during blank portions of the tape.) VCR will eject the tape.
- Page 24 With a DVD containing a title menu, you can select the desired titles from the menu. Press the STOP button during playback. Press theTITLE button. • Playback will stop, and then appear the resuming message at the center. • The title menu will appear. •...
- Page 25 Press the I_1_ (FWD) or the _1_1 (REV) but- Press the Number buttons to enter the ton during playback. desired track number. • For DVDs, pressing the _ (FWD) or -,11-,11 (REV) • The selected track will be located, and playback will start. button cycles the playback speed in four steps.
- Page 26 By using only the Number buttons. TITLE SEARCH: E 3Y3 Directly enter the desired title number with the Number buttons with playback stopped. CHAPTER SEARCH: You can define the part to be called back. Directly enter the desired chapter number with the Number buttons when the disc is Press the SEARCH MODE button three being played or paused.
- Page 27 Press the REPEAT button during playback, You can define a section to be played back repeatedly. For DVDs Press the A-B REPEAT button during playback. • A single title or chapter can be played back repeat- • The starting point (A) will then be edly.
- Page 28 Press the MODE button in stop mode. Images can be enlarged on the screen to your taste. • The program screen will appear. Press the ZOOM button during playback. • The image will be enlarged at the center of the screen.
- Page 29 information on an MP3 disc in play can be Insert an MP3 file recorded on disc. checked. • The MP3 menu screen is displayed. Press the DISPLAY button during playback. • Folders are referred to as "Albums" and files are •...
- Page 30 Press the MODE button in STOP mode, Press the SEARCH MODE button during play- back. • The program screen is displayed. • The SEARCH menu is displayed. • The track currently being played or in RESUME PROGRAM FOLDER NAME will be highlighted. In the case of RESUME OFF, the first track of the disc will be highlighted.
- Page 31 SETTINGS Notes • Pressing the Audio button may not work on some DVDs with multiple audio languages (e.g. DVDs which allow audio language setting on the disc menu). Operation varies between discs, so refer to the manual accompanying the disc. The DVD has a function which allows you to select the desired audio language and sound mode.
- Page 32 o It may take time to display the subtitles in the selected language. • The screen display wilt disappear after about seconds. • When "'SUBTITLE NOT AVAILABLE" appears on screen, it means that no subtitle has been recorded. The DVD has a function which allows you to select the desired language for subtitles.
- Page 33 Press the DISPLAY button again. r..11 TIME: ALL: You can check the information regarding the disc by Current track number / the total number of pressing the DISPLAY button on the remote control. tr_Cl_S For DVDs • Use the Number buttons to start from a desired track, Press the DISPLAY button during playback.
- Page 34 CHANGING THE SETUP ITEMS PLAYER MENU: (The on-screen display appears in selected language.) SET UP _NGUAGE CONTR_S Press the SETUP button in STOP mode. 4 pLAyeR MENU ENGLISH _2HZ • The setup screen is displayed. [ SE%UP I LANGUAGE =Lky Press the Arrow buttons (&IV) to select a desired item, and then press the ENTER but-...
- Page 35 ANGLE ICON (Default: ON) Display or not display the Angle icon on the screen. ¢- I s_.uP OISPLAY CONTROLS Press the SETUP button in STOP mode. 1 T'_ ApEC? 4 3 E_ _ &ANGLE ICON • The setup screen will appear. 4 A _IB ;...
- Page 36 DTS (Default: OFF) On : Output DTS sound Set to On when the unit is connected to DTS Decoder. • ISETUP Press the SETUP button in STOP mode. I AU0[O CONTROLS I /I ..• The setup screen will appear. /+"...
- Page 37 When Parental Level is selected • Press theArrow buttons (&IV) select an item from "ALL" or 8 to 1 and then press the ENTER but- Press the SETUP button in STOP mode. ton. • The setup screen will appear. SET'UP PARENTALCONTI_3LS SET'UP 2CHANGE...
- Page 38 LANGUAGE CODE LIST Language Country code Language Country code Afar 4747 Latvian; Lettish 5868 4748 5953 Abkhazian Malagasy 4752 Maon Afrikaans 5955 Macedonian Amharic 4759 5957 Arabic 4764 5958 Malayalam Assamese 4765 596O Mongolian Moldavian 4771 5961 Aymara 4772 Marathi 5964 Azerbaijani 4847...
- Page 39 ROUBLESHOOTING GUIDE If the DVD/VCR COMBINATION UNITS does not perform properly when operated as instructed in this Owner's Manual, check the player consulting the following checklist. PROBLEM CORRECTIVE ACTION No power. • Make sure the power plug is connected to an AC outlet. •...
- Page 40 HANDLING PRECAUTIONS " HE " • AUTO _AD (_LEANING SERVICING • Automatically cleans video heads as you insert or remove a cas- Should your DVD/VCR COMBINATION UNITS sette, so you can see a clear picture. become inoperative, do not try to correct the problem •...
- Page 41 SPECIFICATIONS Product type: DVD player with Video Cassette Recorder Discs: DVD video Audio CD Video Cassette tape VHF Channel 3 or 4. Converter output: Power source: 120 V AC +/- 10%, 60 Hz +/- 0.5% Power consumption: 25 W (standby: 7.2 W) 5°C to 40°C Operating temperature: Dimensions:...
- Page 42 CONTROLES DEL FUNCIONAMIENTO Y SUS FUNCIONES [ PANEL DELANTERO I!I T !?:! T !7T:I; l I PANEL REMOTO 12 10 9. Toma VIDEO IN 27-- Conecte aqui un cable de vide6 procedente de la toma de salida de vide6 de un camcorder, otro VCR o una fuente de vide6 (reproductor de discos hiser,camcorder, etc.).
- Page 43 • Bot6n Stop Presione para corregir digitos cuando ajuste progra- Presione detener el movimiento de la cinta. ma. (Por ejemplo: ajuste de reloj o programa con Presione para entrar dfgitos cuando ajuste progra- temporizador). Presione para afiadir o cancelar ma. (Por ejemplo: ajuste reloj o programa con tem- ndmeros de canal durante preajuste de canal.
- Page 44 54. Bot6n VCR/TV ma. (Por ejemplo: ajuste reloj o programa con tem- porizador), presione para determinar su selecci6n y Utilice para seleccionar la posici6n VCR o TV. Si la Luz proceder al siguiente paso que usted desea entrar. VCRFFV aparece en la parte delantera del VCR, est_ien la Presione para determinar los modus de ajuste del posici6n VCR (en cualquier modo VCR o DVD).
- Page 45 CAMBIO DE VCR/DVD Producto se tltili_ de ! reprOductor VCR y DVD,:_ necesario cambiar tmo del CAMBIO AL MODO CAMBIO AL MODO Presione el Bot6n VCR en el control remote. Presione el Bot6n DVD en el control remote. (Verifique que la Luz VCR OUTPUT estfi enendida.) (Verifique que la Luz DVD OUTPUT estfi encendida) Notas •...
- Page 46 CONEXIONES Si su TV no tiene terminales A/V: l. Desconecte el cord6n de alimentaci6n AC del toma de corriente AC. Cuando UNIDADES COMBINADAS 2. Desconecte la antena o cable del TV. DVD/VCR est_i en modo de Reproducci6n VCR o cuando UNIDADES COMBINADAS 3.
- Page 47 REPRODUCCION DE UN DISCO Ajuste el reloj con precisi6n para grabaci6n con tempo- rizador autom_itica adecuada. Le sugerimos que usted utilice un T¥ o estaci6n de radio como su fuente de tiempos. Presione [MENU] dos veces para Ilamar el mend Para empezar principal.
- Page 48 it fixed, ,vou,_rhome orours! Your Home For repair- in your home-of all major brand appliances• lawn and garden equipment, or heating and cooling systems, no matter who made it, no matter who sold it! For the replacement parts, accessories owner's manuals that you need to do-it-yourself.
Need help?
Do you have a question about the SRD2900 and is the answer not in the manual?
Questions and answers