Table of Contents
Advertisement
@
@
DVD
Recorder
with
Video
Cassette
Recorder
NOTE:You
can either
use A/V
connection
or COAXIAL
connection
with
this
unit.
(Back of TV)
Video
cable
[
(supplied)
Audi_o
cable
(supphed)
[Cable Box or Satellite Box]
Cl__m
Cable or
OR
Satellite Company
From Cable
Company
(Back of this unit)
(No Cable Box)
® Both
A!V
and COAXIAL
cables
must
be connected
to the TV for
operation.
® See pages 14 and
15 of the
Owner's
Manual
for
the
detailes.
This unit can record
to DVD-R
and DVD-R_/discs.
DVD-R
discs can only be recorded
to once and cannot be erased. DVD-RW
discs can be recorded
to
and erased many times.
DVD-R
discs can only be recorded
in Video
mode, while DVD-RW
discs can select a recording
format
between Video
mode and VR mode.
...... ;l'i-
o
RW
DVD-RW:
1-4x
R
R4.7
DVD-R:
2x.4x.8x
_ll_tlm
tgim | | f_ _
Video mode
VR mode
Video mode
t!lltllql_lJl_.
Playing, limited recording,
limited editing
Playing, recording,
Original/Playlist
editing
Playing, limited recording,
limited editing
8cm/12cm, single-sided, single layer disc
Approx. max. recording
time (SEP mode):
600 minutes
(4.7GB) (for 12cm)
180 minutes
(1AGB)
(for 8cm)
8cm/12cm, single-sided, single layer disc
Approx. max. recording
time (SEP mode):
600 minutes
(4.7GB) (for 12cm)
180 minutes
(1AGB)
(for 8cm)
r i '
® ..... iil
SELECT
j
//
X
iNPUT SELECT button
(Exampme of a TV remote
contro[)
(ExampIe of a TV)
1. Switch the input selector on yourTV
to an appropriate
external input channel (usuaLLynear channel 0).
2. Hit a button
on the TV's original
remote
control
(see the table
below)
to select
an external
input
channel
until the DVD
recorder's
picture
appears.
NOTE:
These
steps
are for AiV cable connection
only.
Admiral
Curtis
Mathis
GE
Hitachi
JVC
Kenwood
input Mode Names for Common TV Brands
AUX
LtNE1, UNE2. 00. 90, 91, 92, 93
INPUT, TV/VCR
00_ 90 91 92_ 93
INPUT, AUX
AiM CHANNEL, INPUT1,SVIDEO, I NPUT2
AUX
LXhSeries
Magnavox
Panasonic
RCA
Samsung
Sanyo
00
AUX CHANNEL
TV/V_DEO
_NPUT, TV/VCR, 0& 90, 91,92, 93
TV/V_DEO
V_DEO
Sharp
[ oo
Sony
VIDE01, VIDE02. V_DE03
Toshiba
/ TV/GAME
Zenith
| oo
Hit [DVD]
on the remote
control
first.
Hit [SETUP].
Using [_,/Y],
select
"Channel"
from
the Menu.
Select "Auto
Preset"
and the unit will start
getting
available
channels
in your
area.
Advertisement
Table of Contents

Subscribe to Our Youtube Channel
Related Manuals for Sylvania DVR90VF


Summary of Contents for Sylvania DVR90VF
- Page 1 NOTE:You can either use A/V connection or COAXIAL connection with this unit. (Back of TV) [Cable Box or Satellite Box] Cl__m Cable or Recorder with Video Cassette Recorder Video Audi_o cable Satellite Company cable (supplied) (supphed) From Cable Company (Back of this unit) (No Cable Box) ®...
- Page 2 o You can set up to 8 programs (once, daily or weekly). o Be sure to set the clock before starting a timer programming. Hit [DVD] on the remote control first. )lay the Timer Select recording select recording speed: Select blank line and hit [ENTER].
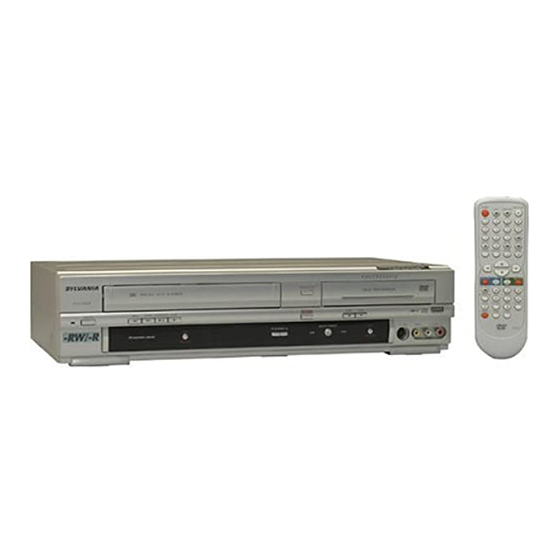
- Page 3 SYLVANIA DVR90VF Remote control • RF cane • Audio/Video canes . Owner's Manual Quick Use Guide (NB121UD) ('[VHN20397) (WPZO901THO02) (WPZ0102TH015 (1VMN20392) with two AA batteries WPZOIO2LTE01) Note Connect this unit directly to the TV. If the AIV cables are connected...
-
Page 4: A Note About Recycling
Before start WARNING: TO REDUCETHE RISK OF FIREOR ELECTRICSHOCK, DO NOT EXPOSETHISAPPLI- ANCETO RAIN OR MOISTURE. The lightning flash with arrowhead symbol, CAUTION within an equilateral triangle, is intended to alert the user to the presence of uninsulated "dangerous voltage" within the product's enclosure... - Page 5 Before start IMPORTANT SAFEGUARDS 1_ Read Insu*uctions - All safety operating instructions pordng structure, grounding of the lead-in wire co an antenna should read before the appliance is operated. discharge uniL size of grounding conducrors. _ocation of anten- na-discharge unit, connection grounding electrodes,...
- Page 6 Before start For safety and optimum performance of this unit: o Install the unit in a horizontaH and stabile position, Do not phce anything directly on top of the unit. Do not phce the unit directly on top of the TV. o ShieHd it from direct sunHight and keep it away from sources of intense heat.
-
Page 7: Cleaning The Cabinet
Before start SERVmCmNG . PHeaserefer to reHevant topics on the Troubleshooting Guide on pages 78-81 before returning the product. , [f this unit becomes inoperative_ do not try to correct the probHem by yourseff.There are no useroserviceabHe parts inside.Turn off_unpHug the power pHugand pHeasecaHH o ur heHp Hinementioned on the front page to Hocate an Authorized Service Center. - Page 8 Before start Zoom ........Before you start ....Marker Setup ......Precautions ......Search ......... Tabme of contents ......Tide/Chapter search ....... Features ........ Track search ......Funcdenam overview ....... Time search ....... Ins_lling batteries in the remote control ..Repeat/Random/Program playback ..
- Page 9 Before start This unit not only plays back DVDs, CDs andVHS tapes but also offers features for you to record on DVD discs and edit them after that.The following features are offered with this unit. Recording [DVD mode I [VCR mode I [DVD mode I This unit is compatible with both DVD-RW, which is...
- Page 10 Before you start (*) The unit can also be turned on by pressing these buttons. 2221" 14 12 10" 13. VCR indicator POWER button ! indicator (DVD/VCR) Hit to turn on and off the unit. Appears when theVCR output mode is selected. Red LED lights up when power is on, 14.
- Page 11 < Before start 23. CLEAR button (DVD/VCR) I 0. _ button (DVD/VCR) o DVD mode * DVD mode Hit to clear the password During phyback, hit to play back in fast reverse. entered, to cancel the program- mint for CD, to clear the high- Or when phyback is paused, hit lighted marker number in the to play bad<...
- Page 12 Before start Using a remote control JnstaRing batteries in the remote control Install two "AA" size batteries Keep in mind the following when using the remote (suppHied), matching controH: their poHarity to those indicated inside battery corn° ° Hake sure that there is no obstacHe between the of the remote partment controH.
- Page 13 Before start This unit uses the following on=screen menu for most operations: Easy Setting Menu_Advanced Setting Menu_ TitHe Hist_ PhyHist_OriginaH and DISPLAY menu.They allow you to change the phyback status of the disc during phyback. The DISPLAY menu aHsogives you information on the playback status of the disc or a videotape.
- Page 14 Before you start DISPLAY menu 5_ Each icon means: Indicates a disc type and a [ DVD mode ] format mode. Search _ _lllli_ Note: In some descriptions on First: iw_'_ :Audio _his manual, only one disc type Hit [DmSPLAY] co caHH up the is indicated as an example.
-
Page 15: Disc Playback
................XP SP Current status of the unit 3_ Recording Disc type Current speed status of the unit Appears when a disc or a Indicates the recording speed videotape play is paused. Appears when an audio CD the disc or a videotape. or a disc with HP3 files is Appears when playing 4_ Title/Track... - Page 16 Connections ARtenna Cable TV signal (Back of TV) Hug in theAC power cord of this unit. C2_z_ (Back of this unit) Basic Audio Good picture Better picture Best picture Video SWideo cable Component cable video cables (supplied} (commercially (commercially available) available) VIDEO S-VIDEO...
- Page 17 Connections "Afteer you have compmeted connections . Switch the input selector on yourTV to an appropriate external input channel (usually near channel 0). Press a button on the TV's original remote control that selects an external input channeJuntil the DVD recorder's picture appears. Check yourTV owner's manual for details.
- Page 18 Connections oWhen you change the connections+ all devices should be turned off, o Refer to the operation manual accompanying external devices for more information. Stereo system Domby Digitam decoder, MD deck or DAT deck Audio Coaxial Digital cable (commercially Audio cable available) (supplied) DIGITAL...
- Page 19 Getting started The following wiHHheHpyou to understand easiHyhow to record to DVD discs. Note: Hake sure batteries are in the remote controH and /ou have connected this unit and the TV correcdy..There are severaH types of recordabHe DVD discs to choose from.
-
Page 20: Finalizing A Disc
Getting started Step 3: Select Step 4: Select Step 5: Record desired discs Recording • oeeeeeeee eooeeeeeee • oooeeeee • ....p.ee ..channel • eeooeeeeee eeoomeeeee • eoomoee • VIDEOm DIs_Y spAc_ CLEA_ ....®®® @ j\ nECSPE_D PLAY _DEO You can select the title you want to playback from a displayedmenu,and immedio... - Page 21 <( Getting started _> Right after the purchase of the _meoom_mooQmeQoo_m_oQme_oomm_ooQme* unit and whenever you move to a new area, we recommend to pro- Usi_ [_k / _], select "A_to gram available channels in your Preset", [ENTER]_ area using "Auto Preset"...
-
Page 22: Adding/Deleting Channels
Adding/deleting *eemeoBBeeeeemeeoBmeeeemoeoBeeeeeeo channels Using [A I TI, select "Add" The channels you no longer or _DeJete', tENTER1, receive or seldom watch can be channel number will @ @ @,@1 deleted from the memory.You added or deleted from the chan: also add channels manually into nel memory.Then,... - Page 23 <_ Getting started )> You cansdectan audiochanneH • ,,,eeeee moeoo,,,,,,eeeee moeoo,,,,, to output from TV. Using [A I V], seJect "TV [ENTER]. Audio SeJect".Hit Hit [SETUP]. Option window will appear. Easy Setting Menu or Advanced Setting Menu will appear. IfAdvanced Setting Menu is dis- pHayed, proceed...
- Page 24 Set the chock before you try the OBetOOOOOOImOOOOBBetOOOOOOImOOOOBB* Timer Recording. If PubHic Broadcasting Service (PBS) is available in your area, follow the * Jf you do not know the PBS Auto CHock Setting below. If not_ channem number in your follow the HanuaH CHock Setting aFea_ on page 23.
- Page 25 <_ Getting started Manual Clock Setting ,leeooBBlleeeeeelleeooBBlleeeeeello _®o®®®®®®®®_®®®®®®®®®_®®®®®®®®®®®_ [A I V], enter Using time (hour / minute]. Press [_/_] to move the cur- Easy Setting Menu or Advanced 9_S@ sor. Setting Menu w@ appean <DOQ !!!!i!!ijjjjj [& / V], select Using "Clock'.
-
Page 26: Setting The Daylight Saving Time
Getting started Setting daylight QOOIOOBBtOOOOIOOOBtOOOOIOOOBeOOOOO" saving time Using [A / T], select When Daylight SavingTime is ON, "Daylight SavingTime'L the clock will automatically move forward one hour on the first Option window will appear.. Sunday in April and move back one hour on the last Sunday in October, Easy Setting Menu or Advanced Setting Menu will appear. -
Page 27: Recording Speed
Information Recording speed TNs unit can record on DVD=R and DVD=RW discs. You can seHect a recording speed among 6 opdons, DVD-R discs allow you to record programs onHy and the recording rime wiHH depend on the record° once, and the recorded contents cannot be erased. -
Page 28: Restrictions On Recording
Restrictions on on other DVD Making discs playable recording player (Finalize) You cannot record copy=protected mateMaHs using this unit. Copy=protected material incHudesDVD= After recording, you must finaHize the disc in order Video discs and some sateHHite b roadcasts. to pHay on other units. (Refer to page 36.) If copy-protected mateMaH is encountered during a recording, recording wiHH be paused or stop automat- icaHHy and an error messagewiHH be displayed... - Page 29 Choosing the recording format of a blank disc _ ii i ii ! iii _'''¸¸¸ _i_i!i'_ _""_ ..........When inserting a bHank disc_ the Using [A I V], semect "Video unit starts to initiaHize it automati- _i_!_ii_i_i_i_# mode" or "VR mode".
- Page 30 Recording Reformatting a disc _ Video mode is the defauk record- ing format for DVD°RVV. Using [_ / _], select"Yes". You can change it toVR mode from the Setting Menu. Formatting will s_arc 1- 2 Easy Setting Menu orAdvanced Setting Menu will appear. _000 _sing [_ / _], select "Disc".
-
Page 31: Checking The Recording
"Video mode" has been seleo:ed as the defauN. Refer to "Choosing Follow steps below to record TV the recording forma_ of a blank programs. disc" on page 27. When a DVD-_ disc is loaded: @@O_) First: DVDoRdiscswill be always]nVideomode. Turn on the unit. - Page 32 i_iiii_]ii!ii_i_ _ _[j_?_ t_Miiiiiiiiiiimi_iiiiiiiii_//_ _ _!iiiiiiiii_i?_? ii_7%i_¸ This is a simpHe way to set the recording time in bHocks of 30 Using _ / _] or the minutes. Check that the disc has Number buttons, select a @@@,@ desired channel to record.
- Page 33 Recording )> !iiii ¸{/_ii_ i _ i ..............When hitting [T] at the current You can choose the timer date,Timer Recording mode wiHH programming menu by hitting iiiil change as follows. [TJ_ER PROG.]. In this You can program the unit to record case, continue with step 4.
- Page 34 Recording oeeeeeeeeeeeeeeeeeeeeeeeeeeeeeeeeee* _®w®®e®®_e®®_e®®_e®®_e®®_e®®_e®®_e_ Nit [ENTER] when informao Nit [ToSET]. tion is entered. The unit will be set in the timer Your program setting will be stored. standby mode. G? G) G) oTo set another program, repeat indicator will appear on the steps 4 to 10.
- Page 35 Recording Hints forTimer Recording , If there is a power failure or this unit has been unplu_ed for more than 30 seconds, the dock setting and aUtimer settings will be lost. , If a recordable disc is not on the tray or an unrecordable disc is on the tray, the DVD indicator on the front panel...
- Page 36 Connect the external source properly to the unit by using input jacks either LINE2 (Front) or LINE1 (Rear). 'When connecting an external equipment of monaural output to this unit, use AUDIO L jack of LINE 1 (Rear) or LINE 2 (Front). Use commerdaly available S-Video orVideo cable and an Audio...
- Page 37 iiiiiill!/iii_/_'_!i_ 'ii !i................. i !! i!ii!i!i Before recording from an externaH source, see the instructions for the connection on page 34. I° Turn on the TV and the unit and be sure to seJect the input of theTV to which the unit is connected°...
- Page 38 To ¢_nce_ fin_;izJngoo. You willneed t ofinalize discs (DVD-RW on_y) recorded inVideo m ode t o play oTo cancel finalizing at step 4, them back o notherDVD players, hit [STOP 1@], s elect"Yes", Finalizing may t ake several minutes then hit [ENTE_]. Finalizing uptoanhour, (Itcan take upto 15 @_wxYzvl_o_rv...
- Page 39 Recording Auto finalize You can finaHize discs automaticaHHy usingAuto FinaHize function.This Using [_ / _], semect "Disc <5@@@ or"End function automaticaHHy finaHizes Full" of Timer Rec'. discs after aHH T imer Recordings Hit [ENTER]. pons _ {_wxvz w_0/rv are completed and when the disc Option...
- Page 40 Using [A / V], select You can copy a DVD disc to a "Recording". [ENTER]. videotape or copy a videotape to a Recording menu will appear. DVD disc.This function wifl be pos° sibHeonHyif the DVD disc or the po_,_ w×YZ _lo_orr_ videotape is not copy protected.
- Page 41 Recording • eetoeetoeetoeetoeetoeetoeetoeetoee Using [A / T], semect "VCR Using [_ / _], select "DVD DVD". Hit [ENTER]. VCR'. Hit [ENTER]. Hit [SETUP] to exit. Hit [SETUP] to exit. Hit: Hit: Make sure to select a recording Make sure to select a recording speed using [REC SPEED].
-
Page 42: Disc Playback
Disc Playback Before you play back DVD discs, read the following information. Playable discs Region codes This unit is compatible with the following discs. This unit has been designed to play back DVD discs To play back a DVD, make sure that it meets the with Region One (1). - Page 43 Disc Playback Playback Hit [TOP HENU] to display the title menu. *eeomeeomeeomeeomeeomeeomeeomeeomee ° You can change "Original" (DOO "Phylist" of VR mode using Hit [POWER]. Hit [DVD]. qD qD_ When you are playing back a DVD, ®O_@) Video mode: turn on theTV and be sure to select the input to which the unit is con- nected.
- Page 44 Disc Playback • illelllelllelllelllelllelllelllell* Hit [PLAY to start play= back° Hit [POWER]. Hit [DVD]. ooo,_ Playback will start. When you are phying back a DVD or an audio CD, turn on theTV ff you are playing back a DVD=Video and be sure to select the input to disc, a menu may appear.
- Page 45 Disc PJayback PJaying back discs using disc menu Continue this step to set up all A DVD disc contains a disc menu you want or to start the features that describes the contents or _OWE_ 0_EN_OSE @ @'_°® playing back the disc from the allows you to customize the play- @@61, , menu.
- Page 46 Disc Playback Resume playback Hit [PLAY_]. You can resume piaybac[< from VVithin a few seconds_ @ayback where you stopped it last time. will resume from the point at 0®®® ®o_o which it stopped hst.You can resume @ayback at the same During playback, hit [STOP 1@1.
-
Page 47: Slow Forward
Disc Playback Pause i?i+ Hit [PLAY @] to resume play+ OOq_O _UBm_G ZOO_ AUDtO Step by step playback To playback step by step ms_Y SPA¢_ CLEAR _TUP backward; • IIIIIIIIIIIIIIIIIIIIIIIIIIIIIIIIII • Hit [SKIP repeatedly+ 000_ Every time you hit the button+ the phyback will go backward by one During playback, hit [PAUSE... - Page 48 Disc Playback Zoom SPACE S_TUP ®O_@) Using [A / V], select a desired _®o®®®®®®®®®®®®®®®®®®®®®®®®®®®®®®®_ zoom factor to zoom° Hit During playback, The zoom area will be displayed. Zoom menu will appear. Note • When selecting a smaller factor than the current one, the zoom area will not be displayed.
-
Page 49: Using [Display]
Disc PJayback _> Title/Chapter search ............i:i:: During pJayback, hit [SKIP to skip the current titJe or chapter and move to the next. @@0(_ To go bacH< to the beginning of the current tithe or chapter, hit [SKIP _:]. Hit it repeated7 to go to the previous titles or chapters. -
Page 50: Track Search
<_ Disc Playback Track search During pmayback, hit [$KmP _'¢_!1 to skip the current track _000 move to the next. To go bacH< to the beginning of the current track, hit [$KmP k_]. Hit it repeatedly to go to the previous tracks. Using [DISPLAY] _®®_®®®®®®======®®®®®®®®®®®®®®®®®®======®®®®®®®®®®®®®®®®®®======®®®®®®®®®_ During... -
Page 51: Random Playback
<( Disc PJayback Repeat pmayback Using [A / V], select a desired option for repeat playback° 9 S@ Hit [ENTER]. ®®® _®®®®e®®®e®®®e®®®e®®®e®®®e®®®e®®®e® The selected repeat piaybad< wiil start. During pmayback, hit _MNU _fENU_ST _ET_N _TE_ Tide: The display menu wiil appear. The current tide wiil be played back repeatedly. -
Page 52: Program Playback
Disc Playback Program pmayback _ You can program a phyback sequence in your desiredorden Using [A / vl or the Number buttons, select a desired First: track°Press [ENTERI or [_I° A cursorwill move to the next. Easy Setting Henu orAdvanced Setting Henu will appear. -
Page 53: Switching Audio Soundtrack
Disc Playback Switching audio soundtrack When playingback a DVD-Video disc recorded with cwo or more sound- Using [_ / T], select a desired audio soundtrack or audio tracks (these are often in different lan- q) (!) _ wxyz vm_0_v guages),you can switch between them q) 0 during playback. - Page 54 <_ Disc Playback _> Switching camera angles Some DVD=Video discs feature scenes shot from two or more Using [_ / _], select angles.The disc package should icon. Hit [ENTER]° marked with an angle icon if it Angle will change each time you contains muitioangie scenes.
-
Page 55: Editing
Guide to a title list Editin_ discs in Video mode Tide list allows you to check the tides recorded "You can edit discs inVideo mode for the following items. play the disc easily.You can choose a tide to it back Be sure that once you edit titles, you cannot change from this screen and easily edit the tithes as you preo them back to the original... -
Page 56: Deleting Titles
Deleting titles You can delete titles 'which you do not need anymore. Using ['A / V / @ / _],se[ect Be advised that the tithes once desired tide. Hit [ENTER]. deHeted cannot be recovered. Edit menu wiHHappear. In Video mode, recordabHe disc space of DVD°RVV disc wiHH... -
Page 57: Putting Names On Titles
Putting names on titles You can name tithes and change PeWER 0PEN_O_ names from this menu. Using [A / T], select "Yes". Hit [ENTER]° names tithes 6 '®51'6' disphyed will a tidefist. name entered will activated. First: • ®®o®®®®®®®®®®®®®®®®®®®®®®®®®®®®®®® @ @ @ _9- Follow steps 1 to... - Page 58 Setting or cmearing chapter markers You can put chapter markers each tithe and use them for the Using [A / _1_ select "Yes"° chapter search feature. Hit [ENTE_ You can specify time interva[ Chapter markers will be added. ®O® chapter markers for tithes Hast If you select "OFF"...
- Page 59 Deleting titles When a title is deleted from an original list inVR mode_ the Using [A / V], select "Tide recordabie disc space wiil Delete'. Hit [ENTER]. increase. Confirmation window wiil appear, O0(D Be advised that the tides once deleted cannot be recovered. ®®_ First: Nit [SETUP].
- Page 60 Setting titles to protect To prevent accidental editing or title erasing, you can protect After this operation is corn- contents in the original menu. pieted, hit [SETUP] to exit. Q)@(D Writing the data on the disc wi[[ wxYz v_0_rv First: _ oee®®®®®®®®®®®®®®®®®®®®®®®®®®®®®®®...
-
Page 61: Releasing Titles From Protecting
Releasing titles from protecting You can canceH the titHe-protecting feature. After this operation is com- pleted, hit [SETUP] to e×it. First: @@@@ 6<55 Writing the data on the disc wiHH p@r_s _ wxYz wD_c_rv _s_A_ SPACE CL_Ar_ FoHHowsteps 1 to 3 on page 57 to display the OriginaH menu. - Page 62 Deleting titles In VR mode, even if a title is [_ / V], seJect Using "Title deleted from a Playlist, the DeJete". Hit [ENTER]. original title will remain Confirmation window will appear. the Original list, and recordabHe disc space wi[[ not increase. NS_kly Spree ®(g)_...
- Page 63 Deleting parts of titles You can delete a specific part of a title. Using [A / T], select Even if a part of a title is deleted "Delete". Hit [ENTER]. from the play[is:, the original title Confirmation window will appear. w[H remain as [t was_ and record- able disc space will not increase.
- Page 64 Putting names on titles You can name titles and change names in this menu. Using [A / V], select "Yes". Hit lENTEn]. names titles displayed The name you entered will be will a title list. Q) @ (g? activated. First: NS_kly Spree S_TUp...
- Page 65 <_ Editing _> Setting or clearing chapter markers <Delete>: You can put chapter markers each title and can use them for the chapter search feature. You can put a chapter marker anywhere you 'want until the total number of the markers reaches 999.
- Page 66 <( Editing Setting pictures thumbnails You can set an image picture for each title as a thumbnail, it helps you After this operatio_ is corn- remember the contents of the tide pieted, hit [$ETOP] to exit. during playback.The default setting Writing the data on the disc will chooses the first scene of each title...
-
Page 67: Dividing A Title
<( Editing Dividing a title You can divide a tithe into new tides. After this operation is com- pleted, hit [SETUP] to exit. First: Writing the data on the disc wi[[ pans wxvz v_D_c_rv _®®o®e®®®e®®®e®®®e®®®e®®®e®®®e®®®e®* start momentarily. NSNAY _PACE CLEAR SE_d_ Follow steps 1 to 3 on page 60 to disphy the PhyHist menu. -
Page 68: Combining Titles
Editing Combining titles _ ®®®®®e®®®e®®®e®®®e®®®e®®®e®®®e®®®e • You can combine two tithes into a singie dde. Using [A. / V], semect "Yes". Hit [ENTER]. @ @3 @ First: m _mmm_mm_mm_mm_mm_mm_mm_mm_ _s_ta* 5w_¢E gL£_ S_TUp Follow steps I to 3 on page 60 to dispiay the Piayiist menu. -
Page 69: Adding Titles To A Playlist
Adding titles to a Playlist You can add or delete a tithe on Using [A / V / @ / @],seJect the piayiist as you prefe_ desired tide. Hit [ENTER]. You can add up to 99 tithes to a Phylist. First: The selected title will appear to ®oo -... -
Page 70: Setting Menu
The following table shows the items which you can change the setting and their default settings. Refer to the following table for your convenience. Contents Setting menu Nems (highlight is the default) 1,Language setting Disc Menu Language Pages 69-70 Audio Language Subtitle Language Set the language for subtitles. - Page 71 <_ Changing the Setting menu _> Hit [STOP m] if you are playing back a disc, ooQooBoooQoomoooooomooeooolooeoooloomoooooomooooooQooBoooQoomooooo @ @Ira, Hit [SETUP]. @ @1_@ Easy Setting Menu or Advanced Setting Menu will appear. ffAdvanced Setting Menu is disphyed, proceed to step 3. Using [A / V], select "Advanced Setting...
- Page 72 Changing the Setting menu $ubdde Language (Defaumt : OFF) Set the Subtitle hnguage. • Using [A / T], semect alan° "Other" is selected, enter 4-digit code using the Number buttons. Note ••••••eeeeeeeeeelmloiiillllllieeee • When finish entering • OnHy the Hanguagessupported the disc can be seHected.
- Page 73 <( Changing the Setting menu Language (Defaumt : Engmish) _ Set the language for OSD. " Using [A / T], select a lan= FL Dimmer (Default : Bright) Set the idling time before the screen saver function starts. " Using [A / _'], select a set= "...
- Page 74 <_ Changing the Setting menu @@@@ Advanced Setting Menu win appear. ®®_ ®®®@ Using [A / V], select _'PJayback". Nit [ENTER]. Option window will appear. Using [_ / T1, select a desired item. Nit [ENTER1. ®®®® o Dynamic Range Control function is available only on the discs which are...
- Page 75 Changing the Setting menu _> Dynamic Range Control (Default : ON) Set to ON to compress the range between soft and loud sounds. ° Using [A / T], select a set- ting. Hit [ENTER]. Your setting will be activated. Fast Forward with Audio (Default...
- Page 76 Changing the Setting menu Parental Loci< (Default :All) Set the Parental Lock level. • Using [A / V:], change parentam meveL Hit Option window will appear. Proceed to step A or B. A password has not been set yet • Using [A / T], select "Yes'L Using the Number...
-
Page 77: Vcr Functions
VCR functions eeoeeeoeeeoeeeoeeeoeeeoeeeoeeeoeee During pmayback, Nit [POWER] on the remote [PAOSE _W]. controm or the front panem of Playback will pause and sound will the unit. be muted. When you are @ayinga video- _e®_®e®®®e®®®e®®®e®®®e®®®e®®®e®®®e®_ tape, turn the TV on and be sure to sdect the input to which the unit is connected. -
Page 78: Index Search
VCR functions This feature allows you to set the To change the recording length recording length simply by pressing [REC/OTR] (VCR) on the remote Recording, hit [RECIOTR] repeat- control or [VCR RECORD] q_ Oq_ edly until the desired length appear. the front panel of the unit. -
Page 79: Time Search
VCR functions Time search POWER OP_N_OS_ TIME SEARCH 2sO:: @@ 61,@ This feature allows you to go to a @@ 51'6' specific point on a videotape entering the exact amount of time you wish to skip in order to reach the point. -
Page 80: Others
Others Before requesting service for this unit, check the tabre below for a possible cause of the probIem you are experiencing, Some simpre checks or a minor adiustment on your part may eliminate the probrem and restore proper performance. The power does not turn on. •... - Page 81 < > Others There is no picture. • The Setup Display appears. Hit [RETURN _u] (or [SETUP]) to turn off the display. • Check if the INTERLACE/PROGRESSIVE mode is set correctly according to your TV. See page 14. Picture noise appears. •...
- Page 82 <( Others )> Repairing appears on the display • If there is a power failure or unplugging during recording, finalizing, formatting or editing (even after "wait for a moment," message is disappeared), a Repairing process will begin automatically soon after turning the unit on again, It may take several minutes...
- Page 83 <( Others )> Recording Error You are trying to record onto the Delete unnecessary tides disc on which the number of (pages 54, 57), YOU cannot record more than 99 titles on one disc, recording titles already reached the maximum (99).
- Page 84 <( Others Analog audio Domby Digital Regions code The system developed by Doiby Regions associate discs and players with An electrical signal that directly represents Laboratories to compress digital sound. particular areas of the world.This unit sound. In contrast, digital audio which can be an electrical signal,but is an indirect rep- It offers you sound of stereo(2ch) wil! only play back discs that have com-...
-
Page 85: Specifications
<( Others )> Can [ record on CDoR/RW._ No, this unit records onHy DVDs. Can [ play bacH<DVDoVideo that is bought in another country._ PossibHeonHy if the region code of the disc is 1 and ALL --Is this unit JPEG compatible. _ Can [ connect the unit to my PC? No, you cannot controH the unit by PCs. - Page 86 <( Espaho[ Estas instrucdones [e ayudar_n a entender f_d[mente c6mo grabar discos DVD. Nora: Aseghrese que [as pi[as esrdn en e[ mando a distanda que ha conectado correctamente unidad y e[ TV_ ..• eeeeeee. Nando a distancia Puede eHegir entre distintos tipos de discos DVD grabab[es.
- Page 87 Espaffo[ Paso $: Grabe Paso 3: Seleccione Paso 4: Seleccione velocidad de discos el canal ....deseado ... t0p_E_u Men'JUST RE_U_ Em_ @@@_) @@Oq_ ® @ @ q]) q_ _smQ Aurae Puede sdeccionar e[ gitulo gue desea reproducir de un men@indicado y empiece a reproducir inmedi= Into de g[ab...
- Page 88 • oloooloooloooloooloooloooloooloool • Pres[one [POWER] en e[ mando a d[stanc[a o e[ pane[ frontal de [a un[dad_ Cuando reproduzca una c[nta_ _o_s wxYz w_0ffv conecte e[ TV y aseg_rese de se[ecdonar [a entrada donde se conecta [a unidad. Pres[one: Co[oque una c[nta pregraba- pres[one...
- Page 89 Espaffo[ Grabaci6n m_M_u _NU_ST _ETU_ Antes de graban aseg@ese de que: , Se selection6 e[ canal deseado Presione [REC/OTR] (VCR) presionando los botones humeri° para empezar ia grabad6n, cos en e[ mando a distanda o Para detener temporaimente [CHANNEL _ / T] en e[ pane[ grabaci6n o continuaria_ presione frontal de la unidad.
- Page 90 SYLVANIA LmMITED WARRANTY FUNAI CORR will repair this SYLVANIA product, free of charge in the USA in the event of defect in mate- rials or workmanship as follows: DURATION: PARTS: FUNAI CORR will provide parts to replace defective parts without charge for one (1) year...
Need help?
Do you have a question about the DVR90VF and is the answer not in the manual?
Questions and answers