Table of Contents
Advertisement
Quick Links
Download this manual
See also:
Owner's Manual
Advertisement
Table of Contents

Related Manuals for Sylvania LD155SL8


Summary of Contents for Sylvania LD155SL8
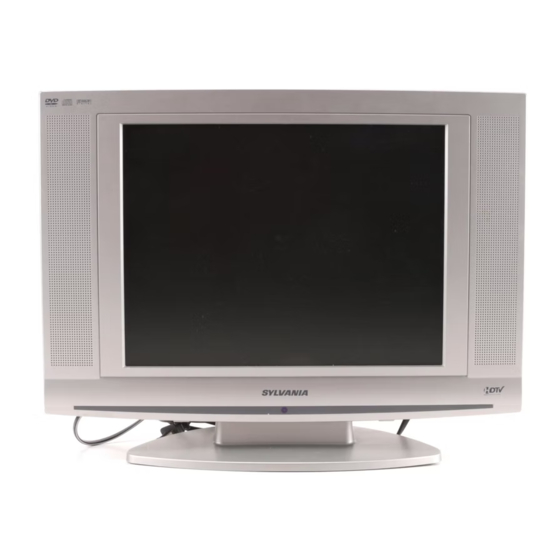
- Page 1 SYLVANIA 15" Digital / Analog LCD TV built-in DVD Player Owner's Manual LD155SL8 Disc ONLY...
-
Page 2: Important S Afeguards
WARNING:TO REDUCE THE RISK OF FIRE OR ELECTRIC SHOCK, DO NOT EXPOSE THIS APPLIANCE TO RAIN OR MOISTURE. CAUT,ON / A THIS SYMBOL INDICATES THAT DANGEROUS VOLTAGE CONSTITUTING A RISK OF ELECTRIC SHOCK IS PRESENTWlTHIN THIS UNIT. CAUTION: TO REDUCE THE RISK OF ELECTRIC SHOCK, THIS SYMBOL INDICATES THATTHERE ARE DO NOT REMOVE COVER (OR BACK). -
Page 3: Precautions
OBJECTAND LIQUID ENTRY- Never push objects of any kind into e. If the TV has been dropped or damaged in any way. this TV through openings asthey may touch dangerous voltage f. When theTV exhibits a distinct change in performance, this indicates a need for service. -
Page 4: Suppliedaccessories
LOCATION For safe operation and satisfactory performance ofthe unit, keep the following inmind when s electing aplace for i ts installation: •Shield itfrom direct sunlight and k eep i taway from sources ofintense heat. •Avoid dusty orhumid places. •Avoid places with insufficient ventilation for p roper heat dissipation. -
Page 5: Table Of Contents
[] Contents /N I_RODUCT/ON DVD Functions OPERA Y NG DVD Important S afeguards ..........Precautions ............PlayableMedia..........SuppliedAccessories ..........UnplayableMedia..........TiltStand ............Playback ........... SymbolsUsed inthisManual........DVD Menu ..........Features ............Resume Playback..........Remote ControlFunction.......... Pause............Installing t he Batteries..........Step-by-step Playback .......... -
Page 6: Features
_Features • DTV/TV/CATV • Dolby Digital Sound - You can use your remote control to select channels - Enjoy Dolby Digital multi-channel surround sound which are broadcast in digital, conventional analog, when you connect the unit to your Dolby Digital decoder. -
Page 7: Remote Controlfunction
[] Remote Control Function buttons (p16) EJECTA button (p28) Press to adjust the volume. Press to eject the disc. 6• PAUSE button (p28) 13• INPUT button (p17) ii ii}i Press to accessa connected external device Press to pause disc playback. SKIP 141HII / b41_l b utton (p31) like a video game, camcorder or VCR. -
Page 8: Controlpanel
[] Control Panel SETUP button (p14 / p38) Press to display the main menu. STOP • button (p28) Press to stop disc playback. PLAY I1_ button (p28) Press to begin disc playback. EJECT _i button (p28) Press to eject the disc. VOLUME /_buttons(p16) Press to adjust the volume. -
Page 9: Attaching Awallmount Bracket (Sold Separately)
[]Attaching a Wall Mount Bracket (sold separately) Thefollowingisa description ofthe methodforattachinga wall mounttothisunit. Whenperforming thisoperation,referto theinstruction manualincluded with thewall mountkit. Youneedthefollowingwall mountkit forthisunit. VisionMount LCD Mounts/model number:VMFb Formoreinformation, p lease visitCSAV websiteat www.csavinc.com rear of this unit i_iiiii! _ O_,and _2_ indicate h,i_' position of the screw holes... -
Page 10: Basic C Onnection
[] Basic Connection Thissection describes h owto c0nnect t he unit toan antenna,cable/satellite box, e tc. Note: • Besure your an tenna or other device is connected properly before plugging in the power cord. [Antenna Cable Connection] When connecting the unit to an antenna or cable TV company (without cable/satellite... -
Page 11: External Device Connection
o !il [] External Device Connection [Component Video Cable Connection] Component video connection offers better picture quality for video devices connected to the unit. Use a component video cable to connect the unit to external video devices equipped with component video output jacks. - Page 12 [Video Connection] Video connection offers standard picture quality for video devices connected to the unit. If you connect to the unit's video input jack, connect RCA audio cables to the audio L/R jacks of VIDE01. When the audio jack of the video device is monaural, connect the RCA audio cable to the audio L input jack.
-
Page 13: Initial Setup
[] Initial Setup No to: • Ifyou connect the cable system directly, contact the CATV Thissection will guideyouthrough the unit'sinitialsettingwhichincludes installer. selectinga language foryouron-screen menuand"AUTO PRESET CH", w hich • Ifyou press [POWER] or [SETUP] during "AUTOPRESET CH", automatically scans and memorizes v iewable channels, this setting will be canceled. -
Page 14: Mainmenu
[] Main Menu [] Auto Channel Scan Thissection describes t he overview ofthe mainmenudisplayed when you If youswitch wires(e,g,,betweenantennaandCAW)orif youmovethe press [SETUP]. Formoredetails,seethe reference pagefor eachitem. unitto a differentareaafter theinitial setting,orif yourestore the DTV Themainmenuconsists o fthe functionsettingitemsbelow. channel y oudeleted,youwill needto performautochannel s can, Before you begin: Makesureif the unitis connectedto antenna or cable. -
Page 15: Language S Election
[] Language Selection Note: • If you connect the cable system directly, contact the CATV You can choose English, Spanish, or French as your on-screen language. installer. • Ifyou press [POWER] or [SETUP] during auto channel scan, the setting will be canceled. Press [SETUP] to display... -
Page 16: Channel S Election
[] Channel Selection [] Volume Adjustment Selectchannels bypressing [CH.A/V] or [the Numberbuttons]. Thissection describes h owto adjust the volume. T hemutefunction, w hich turnsthe soundoff andon,isalsodescribed. •To select the memorized channels, use [CH.A/V] Use [VOL. ] to adjust the audio volume. [the Number buttons]. -
Page 17: Switchingeach Mode
[] Switching Each Mode [] MTS System Youcaneasilyswitchwith the remotecontrol t othe DTV(ATSC) andTV MTS(multichannel televisionsound)system isthe methodof encoding3 additionalchannels ofaudiointo an NTSC-format audiocarrier, T hissection (NTSC) o rto access a n external device whentheyare connected tothe unit, describes h owtoswitchthe audioin the analog modeandhowto switch theaudiolanguage in the digitalmode, Press [INPUT] repeatedly... -
Page 18: Screeninformation
[] Screen Information Youcandisplay the currently selected channel o r otherinformation suchas the audiomodeonthe TVscreen. In the digital mode,the detailed broadcastinginformation for the current Inthe analog mode,the current channelnumberis displayed. channelsuchas program title, programguidesare displayed. Press [DISPLAY], Press [DISPLAY] repeatedly to cycle through available display modes. -
Page 19: Tvscreen Display Mode
o !!i []TV Screen Display Mode [] Sleep Timer Thesleeptimer can beset to automatically turn offthe unit after an incremental period of time. 2 types of display modescan beselectedin the digital modewhen the broadcastingstation is sending16:9video signal. Press [SCREEN MODE] repeatedly to switch the TV Press [SLEEP] to set the sleep timer. -
Page 20: Channel A Dd/Delete
[] Channel Add/Delete Note: • "ADD/DELETE(DTV)" or '`ADD/DELETE(TV)" m enu will Thechanneladd/deletefunctionletsyouaddthechannelthat wasnot disappear automatically in about 10seconds. addedby theauto channelscandueto the reception statusat theinitial • In the digital mode (DTV),you can add or delete channels setting. Youcan also deletethe unnecessary channels. only for major channel •... -
Page 21: Closed Caption
i i!:¸ [] Closed Caption Press [SETUP] to exit. Youcan view closedcaptioning (co)for TVprograms,moviesand news. Closedcaption referto text of dialogueor descriptionsdisplayed0n-screen f0r the hearingimpaired. No re: Press [SETUP] to display the main menu. • To show the closed caption on your TVscreen, broadcast signal must contain the dosed caption data. -
Page 22: Dtv Closed Caption
[] DTV Closed Caption [] DTVCC Style In addition tothe basicclosedcaption described on page21, DTVhasits Youcanchange the style of DTV CC suchasfont, colororsize,etc. ownclosed caption called DTVCC Usethismenuto change thesettings for DTVCC Press [SETUP] to display the main menu. Press [SETUP] to display the main menu. Use [Cursor A/V] to select"DTVCC", then press... -
Page 23: Back Light Setting
i i!:¸ [] Back Light Setting Youcansetthe desired brightness mode, display Press [SETUP] main menu. • CAPTION SIZE Closed captioning font size can be changed as below. • FONT STYLE Use [Cursor A/V] to select'BACK LIGHT", then press Font style of the displayed caption can be switched [ENTER] repeatedly... -
Page 24: Colortemperature
[]V-chil [] Color Temperature Youcanadjust color temperature ofthe TVscreen. V-chipreads the ratingsforprograms, t hendeniesaccess to the programs whichexceedtheratinglevelyouset. With thisfunction,youcanblock certainprogramming inappropriate forchildren. Press [SETUP] to display the main menu. Press [SETUP] to display the main menu. Use [Cursor • IV] to select"COLOR TEMP", then press Use [Cursor•IV] to select"V-CHIP SETUP", then press... - Page 25 i!!:!!! Use [Cursor A/V] to select'TV RATING", then press Rating Category [ENTER]. TV-Y Appropriate for all children lower e.g.) digital TV mode TV-Y7 Appropriate for allchildren 7 and older - V-CHIP SETUP - TV-G General audience _- TV RATING MPAARATING DOWNLOADABLE RATING TM-PG...
- Page 26 MPAA Rating isthe ratingsystem createdbyMPAA(Motion Picture Although the default code "0000" issuppliedwith the unit,you can set Associationof America). your own password. Use [Cursor AIr] to select"CHANGE PASSWORD", then Use [Cursor A_F] to select'MPAA RATING", then press [ENTER]. press [ENTER]. - V-CHIP SETUP - -- V-CHIP SETUP -- TV RATING W RATING...
-
Page 27: Playablemedia
[] Playable Media _1,2,4,6,10,11 DVDRW DVDR digital video title 1 title 2 "1,3,4,5, (MPEG2) 6,7,8,%10 DVD+RW DVD+R 5 inches * 1,4,5,6,9, _V_+ReW_taMe DVD+R (12 cm) audio audio CD "4,6,10 digital audio CD RW NGITAL AUDIO CD R _ 4, 5, 6, 9,10 DIGITAL AUDIO is a trademark... -
Page 28: Playback
[] Playback No te: • "Q" may appear at the top-right on the TV Before you begin: screen when the operation is prohibited by the disc or this unit. Turnontheamplifierandanyotherequipment whichisconnected to this unit, Makesurethe external audioreceiver aresetto thecorrectinput • Some DVD may start playback from title 2 or 3 due to specific mode, programs. -
Page 29: Step-By-Step Playback
i i!:¸ [] Step-by-step Playback [] Zoom Thezoom function allows you to enlargethe video image and to pan Each time you [PAUSE I I] in the pause "1 through the enlarged image. mode, the disc goes forward one frame at a time. -
Page 30: Mp3Playback
[] MP3 Playback MP3is a methodof compressing files.YoucancopyMP3files This unit recommends the files recorded under on CD-RW/-R from the personalcomputer and playthe files on this unit. following circumstances: Applicable MP3 file Remarks Insert an CD-RW/-R with MP3 files, playback starts Sampling frequency: automatically. -
Page 31: Searchfunctions
[] Search Functions c ¸ Using [MODE] Using [MODE] During playback, press [MODE] repeatedly until During playback, press [MODE] repeatedly until " "appears. "_" appears. • If you want to perform the title search, press [Cursor A/V] repeatedly until" "appears. i_ii!ill MODE Press [the Number... -
Page 32: Repeatplayback
[] Repeat Playback Youcan repeatplayback chapters,titlesor tracks/files ona disc. During playback, press [MODE] repeatedly until During p layback, press "" appears. [MODE] repeatedly until "_" / "[Z_" appears. MODE e.g.) DVD Press [Cursor A/T] to change the repeat mode. MODE Use [Cursor A/V] repeatedly... -
Page 33: Programmed Playback
i i!:¸ © Note: Note: •Repeat setdng (except "ALL")will be cleared when moving to • Press[CLEAR] to erase the last track in the program if you another dtle, chapter, track/file or folder. make an error. •During programmed playback, repeat setting will be effective •... -
Page 34: 0N-Screendisplay
[] On-screen Display Youcan checkthe informationabout the currentdisc by pressing [DISPLAY] the remote control. DISPLAY appears only when multi- Fangle is available on the DVD _ 1_.2 1.[i , i._ current playback status TR (Track): remaining time of the current current track number chapter... -
Page 35: Special S Ettings
[] Special Settings c ¸ Thisunitallows youto selecta subtitle language (if available) duringDVD Thisunit allowsyou to select an audio language(if multiple languagesare playback. available) duringDVDplayback. During playback, press [MODE] repeatedly until During playback, press [AUDIO] repeatedly until the desired language appears. - Page 36 Youcan enjoyvirtual surroundon yourexisting 2 channelstereosystem. Adjust t he blacklevelto make thedarkareasof theTVpicturebrighter. During playback, press [MODE] repeatedly until During playback, press [MODE] repeatedly until "_" appears. "" appears. MODE MODE Use [Cursor AI Y] to adjust the black level. Use [Cursor A/V] to select the sound level,...
- Page 37 i!!:!!! Thisfeature allows youto assigna specificpoint on a discto becalled back later. iili_i To return to the marker later To set a marker During playback, press [MODE] repeatedly until To select a desired marker, repeat steps 1-3 in "To set a marker". ""/""...
-
Page 38: Dvdlanguage S Etting
!fyou m ake s_tting for"TV MODE'! or !'DOLBY DIGITAL", Use [Cursor A/V] to select the desired item, then press can a lso e nter from the'!QUICK" menu. Use [Cursor • ly] to [ENTER]. select"QUlCKN and press [ENTER]at step 3. [AUDIO] "1, *2 (Default: ORIGINAL) -
Page 39: Display Setting
i i!:¸ © [] Display Setting Youcan changetheTVaspectratio and still modeclarity in"DISPLAY" Use [Cursor •IV] to select the desired item, then press menu. [ENTER]. In stop mode, press [SETUP] to display"TV SETUP". [TV MODE] (Default: 4:3 LETTER BOX) Select the desired TV aspect ratio. -- TV SETUP - _"... -
Page 40: Dvd Audiosetting
[] DVD Audio Setting Choose t he appropriate audiosettings foryourequipment, It onlyaffects Use [Cursor A/V] to select the desired item, then press duringthe playback of DVD. [ENTER]. In stop mode, press [SETUP] to display"TV SETUP". [DRC] (Default: Sets the dynamic range control. -
Page 41: Parentalsetting
[] Parental Setting Parental s etting prevents yourchildrenfrom viewinginappropriate m aterials. Use [Cursor • IV] to select the desired item, then press (passwordprotected.) Playback will stopif the ratings exceed the levels youset. [ENTER]. In stop mode, press [SETUP] to display"TV SETUP". -
Page 42: Others
[] Others Youcan changetheother functions. Use [Cursor AIr] to select the desired item, then press [ENTER]. In stop mode, press [SETUP] to display"TV SETUP". [ANGLE ICON] (Default: -- TV SETUP - Set to "ON" to show the angle icon when multiple LANGUAGE [ENGLISH] camera angles are available... -
Page 43: Reset T Othe Default S Etting
i i!: ¸ [] Reset to the Default Setting [] Language Code List You can reset all the settings except for the parental setting and Language Code Language Code 0n-screen menu language, Marathi 5964 Abkhazian 4748 Moldavian 5961 Afar 4747 In stop mode, press... -
Page 44: Troubleshooting Guide
[]Troubleshooting Guide If the unit does not perform properly when operated as instructed in this owner's manual, check the following chart once before calling for service. Be sure the power cord is plugged No power If a power failure occurs, unplug the power cord for 30 minutes to allow the unit to reset itself. -
Page 45: Information
The entered channel number Many digital channels have alternate channel numbers.The unit c hanges the numbers changes automatically automatically tothe ones signifying the broadcasting stations.These are the numbers used for a nalog broadcasts. Remote control does n ot w ork Check theantenna orcable c onnection tothemain unit, Check thebatteries oftheremote control. -
Page 46: Glossary
[]Glossary ATSC Dolby Digital Region Code Acronym that stands for Advanced Television The system developed by Dolby Regions associate discs and players with Systems Committee and the name of the Laboratories to compress digital sound. It particular areas of the world, this unit will offers stereo sound (2ch) or multi-channel only play back discs that have compatible... -
Page 47: Cable Channel D Esignations
[] Cable Channel Designations If yousubscribe t o cableTV,the channels aredisplayed as1-135. Cable companiesoftendesignate channels w ith lettersor letter-numbercombinations. Pleasecheck with yourlocalcablecompany. Thefollowingisa chartof common cablechannel d esignations. TV DispEay w+sw++ TV DEspEay 22 TV DEspEay 43 W÷41, TV DispEay W++O _V++I IV DispEay W+66... -
Page 48: Limited Warranty
SYLVANIA LIMITED WARRANTY FUNAI CORP.will repair this product, free of charge in the USA in the event of defect in materials or workmanship as follows: DURATION: PARTS: FUNAI CORP.will provide parts to replace defective parts without charge for one (1) year from the date of original retail purchase.
Need help?
Do you have a question about the LD155SL8 and is the answer not in the manual?
Questions and answers