Casio Exilim EX-S1 User Manual
Hide thumbs
Also See for Exilim EX-S1:
- Service manual and parts list (25 pages) ,
- User manual (62 pages) ,
- File management manual (54 pages)
Table of Contents
Advertisement
Quick Links
EX-S1/EX-M1 User Documentation Files
• The EX-S1/EX-M1 user documentation available here has been divided among a number of files in order to facilitate download-
ing. You can download the entire manual, or you can save time by using the table of contents below to find specific information
and then download only the files you need.
File 1 (File name : EXS1_EXM1_e_1.pdf)
2
Unpacking .................................................................... 2
Features ....................................................................... 8
Precautions .................................................................. 9
14
Getting Ready ............................................................ 14
To record an image .................................................... 15
To view a recorded image .......................................... 15
To delete an image ..................................................... 16
17
General Guide ............................................................ 17
Using the Controller ................................................... 19
Monitor Screen Contents ........................................... 20
Indicator Lamps .......................................................... 22
Attaching the Strap .................................................... 22
Power Requirements ................................................. 23
Using the On-screen Menus ...................................... 30
34
Recording an Image ................................................... 34
Using Zoom ................................................................ 36
Using the Flash .......................................................... 37
Using the Self-timer ................................................... 39
Specifying Image Size and Quality ............................ 40
42
Exposure Compensation (EV Shift) ........................... 42
Adjusting the White Balance ...................................... 43
Using the Night Scene Mode ..................................... 45
Using the Movie Mode ............................................... 46
Recording Audio (EX-M1 Only) .................................. 47
REC Mode Camera Settings ..................................... 50
9
11
11
53
12
12
Basic Playback Operation .......................................... 53
12
12
Zooming the Displayed Image ................................... 55
Resizing an Image ..................................................... 56
Playing a Movie .......................................................... 57
Adding Audio to a Snapshot (EX-M1 Only) ............... 58
61
Deleting a Single File ................................................. 61
Deleting All Files ........................................................ 62
17
18
File 2 (File name : EXS1_EXM1_e_2.pdf)
63
Folders ....................................................................... 63
23
24
28
Protecting Files .......................................................... 64
29
29
DPOF .......................................................................... 65
Exif Print ..................................................................... 68
35
Using the FAVORITE Folder ...................................... 69
35
38
71
Turning the Key Tone On and Off .............................. 71
40
Specifying an Image for the Startup Screen ............. 71
41
Changing the Date and Time Setting ........................ 72
Changing the Display Language ............................... 73
Formatting Built-in Memory ........................................ 73
44
1
II .............................................
47
49
50
51
52
54
59
63
64
65
66
66
67
68
69
70
70
72
Advertisement
Table of Contents

Subscribe to Our Youtube Channel
Related Manuals for Casio Exilim EX-S1


Summary of Contents for Casio Exilim EX-S1
-
Page 1: Table Of Contents
EX-S1/EX-M1 User Documentation Files • The EX-S1/EX-M1 user documentation available here has been divided among a number of files in order to facilitate download- ing. You can download the entire manual, or you can save time by using the table of contents below to find specific information and then download only the files you need. - Page 2 USING A MEMORY CARD Using a Memory Card ..........75 To insert a memory card into the camera To remove a memory card from the camera Formatting a Memory Card Memory Card Precautions Copying Files ............. 77 To copy all the files in built-in memory to a memory card To copy a file from a memory card to built-in memory...
-
Page 3: Digital Camera
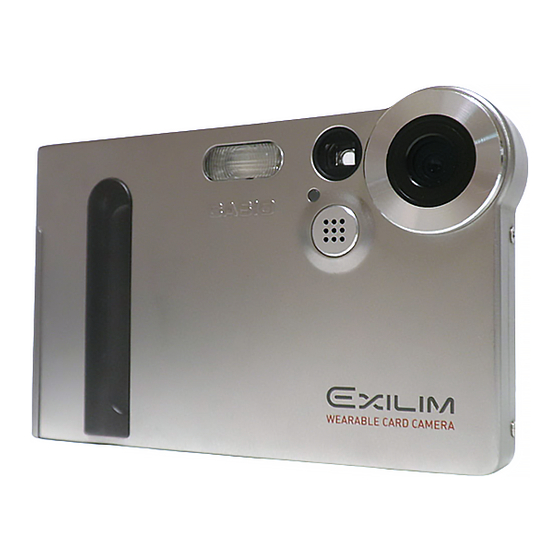
Digital Camera EX-S1/EX-M1 User’s Guide Thank you for purchasing this CASIO Product. Before using it, be sure to read the precautions contained in this User’s Guide, and keep the User’s Guide in a safe place for future reference. All the illustrations in this manual show the EX-M1. -
Page 4: Introduction
INTRODUCTION INTRODUCTION Unpacking Check to make sure that all of the items shown below are included with your camera. If something is missing, contact your dealer as soon as possible. Camera Rechargeable lithium ion USB Cradle Special AC Adaptor battery (NP-20) EX-M1 AC power cord * Strap... - Page 5 INTRODUCTION GETTING READY Contents General Guide ............17 Camera INTRODUCTION USB Cradle Using the Controller ........... 19 Unpacking ..............2 Monitor Screen Contents ........... 20 Features ............... 8 Indicator Lamps ............22 Precautions ..............9 General Precautions Attaching the Strap ............ 22 Data Error Precautions Power Requirements ..........
- Page 6 INTRODUCTION Using Zoom ..............36 PLAYBACK Using the Flash ............37 Basic Playback Operation .......... 53 Flash Precautions Playing an Audio Snapshot (EX-M1 Only) Using the Self-timer ........... 39 Zooming the Displayed Image ........55 Specifying Image Size and Quality ......40 Resizing an Image .............
- Page 7 INTRODUCTION DPOF ................65 USING A MEMORY CARD To insert the date during printing To configure print settings for a single image Using a Memory Card ..........75 To configure print settings for all images To insert a memory card into the camera PRINT Image Matching II ..........
- Page 8 INTRODUCTION PLAYING AN AUDIO FILE (EX-M1 Only) Transferring Audio Files to the Camera ..... 94 Preparing the Camera for Audio Player Operation ... 95 Using the Camera as an Audio Player ...... 96 General Guide Basic Remote Controller Operations Specifying the Audio Playback Mode Selecting a Specify Track for Playback Specifying the Track Playback Sequence Disabling Remote Controller Button Operations...
- Page 9 EX-S1/EX-M1. • Photo Loader and Photohands are the property of • CASIO COMPUTER CO., LTD. shall not be held liable CASIO COMPUTER CO., LTD. Except as stipulated for any damages or losses suffered by you or any third...
-
Page 10: Features
INTRODUCTION • DCF Data Storage Features DCF (Design rule for Camera File system) data storage • 1.24 million Effective Pixels protocol provides image inter-compatibility between the The 1.24-megapixel CCD (1.34 million total pixels) not only digital camera and printers. provides plenty of resolution for normal image recording, it •... -
Page 11: Precautions
High-voltage internal components create the MP3 (MPEG-1 Audio Layer-3) files. risk of electric shock when exposed. Always leave mainte- nance and repair work up to CASIO authorized service pro- viders. • Never look at the sun or any other bright light through the camera’s viewfinder. - Page 12 After making sure there is no more smoke com- cording images. Doing so will not only make storage of the ing from the camera, take it to your nearest CASIO autho- current image impossible, it can also corrupt other image rized service provider for repair.
-
Page 13: Data Error Precautions
INTRODUCTION Data Error Precautions Operating conditions • Your digital camera is manufactured using precision digital • This camera is designed for use in temperatures ranging components. Any of the following creates the risk of cor- from 0°C to 40°C. ruption of data in camera memory. •... -
Page 14: Condensation
Condensation can cause malfunc- placed by a CASIO authorized service provider. Note that tion of the camera, so you should avoid exposing it to con- you will be charged for LED backlight replacement. -
Page 15: Declaration Of Conformity
(2) this device must accept any interference received, in- cluding interference that may cause undesired operation. Model Number: EX-S1/EX-M1 Trade Name: CASIO COMPUTER CO.,LTD. NOTICE Responsible party: CASIO INC. This equipment has been tested and found to comply with the limits for Address: 570 MT. -
Page 16: Quick Start Guide
QUICK START GUIDE QUICK START GUIDE Getting Ready Load the battery (page 23). Place the camera onto the USB cradle to charge the battery (page 24). • It takes about two hours to achieve a full charge. Configure screen message language, and current time settings (page 32). -
Page 17: To Record An Image
QUICK START GUIDE To record an image To view a recorded image (See page 34 for details.) (See page 53 for details.) Press the power button to turn on the camera. Press the power button to turn on the camera. Align the mode selector with “REC”. -
Page 18: To Delete An Image
QUICK START GUIDE To delete an image (See page 61 for details.) 3, 4, 5, 6 Press the power button to turn on the camera. Align the mode selector with “PLAY”. Rock the controller down to select Rock the controller left or right to scroll through images and display the one you want to delete. -
Page 19: Getting Ready
GETTING READY GETTING READY This section contains about things you need to know about and do before trying to use the camera. General Guide The following illustrations show the names of each component, button, and switch on the camera. Camera ! Front ! Back Operation/Flash charge... -
Page 20: Usb Cradle
GETTING READY ! Bottom USB Cradle Simply placing your CASIO digital camera onto the USB cradle lets you perform the following tasks. • Battery charging (page 24) • Automatic transfer of images to a computer (page 87) Connector cover Memory card slot... -
Page 21: Using The Controller
GETTING READY NOTE Using the Controller • See “Using the Camera as an Audio Player” on page The controller is used to select on-screen items and to ex- 96 for information about the LCD remote controller ecute functions. The following are the terms used in this that comes with the EX-M1. -
Page 22: Monitor Screen Contents
GETTING READY Monitor Screen Contents The monitor screen uses various indicators and icons to keep you informed of the camera’s status. ! REC Mode Self-timer Recording Mode indicator Snapshot White balance indicator Night Scene None Auto Movie Sunlight Snapshot Audio (EX-M1 only) Shade Voice Recording (EX-M1 only) Light Bulb... -
Page 23: Play Mode
GETTING READY ! PLAY Mode IMPORTANT! • Some information may not display properly if you dis- play an image that was recorded using a different digi- tal camera model. Folder number/File number Image protection Image size indicator 1600 x1200 pixels 1280 x 960 pixels 640 x 480 pixels Quality... -
Page 24: Indicator Lamps
GETTING READY Indicator Lamps Attaching the Strap You can find out the operational status of the camera and the Attach the strap to the strap bar as shown in the illustration. USB cradle at a glance by checking the color of the indicator lamps, and whether a lamp is lit or flashing. -
Page 25: Power Requirements
GETTING READY Swing the battery cover closed, and then slide Power Requirements it in the direction indicated by the arrow while Your camera is powered by a rechargeable lithium ion bat- pressing down on it. tery (NP-20). To load the battery Pressing the battery cover on the side of the camera, slide it in the direction indicated by the arrow and then swing it open. -
Page 26: To Charge The Battery
GETTING READY To charge the battery Turn off the camera and remove its connector cover. Connect the AC power cord to the AC adaptor. Plug the other end of the AC power cord into a household power outlet. Connector cover Connect the AC adaptor to the DC IN 5.3V con- nector of the USB cradle. - Page 27 GETTING READY IMPORTANT! • The CHARGE lamp flashing red indicates that an error occurred while charging. An error can be caused by • It takes about two hours to achieve a full charge. Ac- any of the following: a problem with the cradle, a prob- tual charging time depends on current battery capac- lem with the camera, or a problem with the battery or ity and charging conditions.
- Page 28 Flash turned off contact a CASIO authorized service provider. Normal temperature (25°C) • Recording one image per minute under the above condi- tions reduces battery life to about one sixth of that noted above.
-
Page 29: Low Battery Indicator
GETTING READY ! Tip to Make the Battery Last Longer • The above values are based a new battery starting from a full charge. Repeated charging shortens battery life. If you do not need the flash while recording, use the menu to •... -
Page 30: Power Supply Precautions
See the instructions that come with the rechargeable lithium damaged (exposed internal wiring), request a ion battery for important precautions you need to observe replacement from a CASIO authorized service during its use. provider. A damaged AC adaptor cord creates the danger of fire or electric shock. -
Page 31: Turning The Camera On And Off
GETTING READY Turning the Camera On and Off Auto Power Off (APO) Press the power button to turn the Auto Power Off (APO) automatically turns off the camera camera on and off. when you do not perform any operation for certain amount of Pressing the power button to turn time. -
Page 32: Using The On-Screen Menus
GETTING READY " Menu Screen Operations Using the On-screen Menus When you want to do this: Do this: Pressing MENU displays menus on the monitor screen that Move between tabs Rock the controller left or right you can use to perform various operations. The menu that appears depends on whether you are in the REC mode or Move from the tab to the Rock the controller down... - Page 33 GETTING READY Rock the controller left or right to select the tab Next, do either of the following. you want, and then rock it down to move the If you want to do this: Do this: selection cursor from the tab to the settings. Apply the setting and exit the •...
-
Page 34: Configuring Display Language And Clock Settings
GETTING READY IMPORTANT! Configuring Display Language and Clock Settings • The camera’s clock settings are cleared whenever power is totally cut off. This can happen if the battery Be sure to configure the following settings before using the goes dead while the camera is not being supplied camera to record images. - Page 35 GETTING READY Press the power button to turn on the camera. Set the date and the time. Rock the controller up or down to select the language you want. : Japanese To do this: Do this: English : English Move the cursor between Rock the controller left or Français : French settings...
-
Page 36: Basic Image Recording
BASIC IMAGE RECORDING BASIC IMAGE RECORDING This section describes the basic procedure for recording an Compose the image 1600 1600 1200 1200 image. on the monitor NORMAL NORMAL screen. • The focusing range of Recording an Image the camera is approxi- Your camera automatically adjusts shutter speed in accor- mately 1 meter to 02/12/24... -
Page 37: About The Rec Mode Monitor Screen
BASIC IMAGE RECORDING • Depending on the distance or angle between the sub- Recording Precautions ject and the camera, the image you see in the • Never open the battery cover or place the camera onto the viewfinder may not be exactly the image that is re- USB cradle while the operation/flash charge lamp is flash- corded. -
Page 38: Using Zoom
BASIC IMAGE RECORDING Rock the controller up or down in the REC Using Zoom mode to change the digital zoom factor. You can use the digital zoom feature of your camera to zoom Rock up to zoom in. in on the center of an image. Performing a zoom operation Rock down to zoom out. -
Page 39: Using The Flash
BASIC IMAGE RECORDING To do this: Select this setting: Using the Flash Have the flash fire automatically Auto Perform the following steps to select the flash mode you when required (Auto Flash) want to use. Turn off the flash (Flash Off) In the REC mode, press MENU. -
Page 40: Flash Precautions
BASIC IMAGE RECORDING NOTE Flash Precautions • You can use the key customization feature (page 51) • Take care that your fingers do not block the flash when you to configure the camera so the flash mode changes hold the camera. Covering the flash with your finger can whenever you rock the controller left or right while in greatly reduce its effectiveness. -
Page 41: Using The Self-Timer
BASIC IMAGE RECORDING • When the red-eye reduction mode ( ) is being used, Using the Self-timer flash intensity is adjusted automatically in accordance with the exposure. The flash may not fire at all when the subject The self-timer delays shutter release so it is performed about 10 seconds after you press the shutter release button. -
Page 42: Specifying Image Size And Quality
BASIC IMAGE RECORDING Self-timer lamp Record the image. Specifying Image Size and Quality • The self-timer lamp You can specify the image size and image quality to suit the flashes and the shutter type of image you are recording. releases about 10 seconds after you press the shutter release To specify the image size... -
Page 43: To Specify The Image Quality
BASIC IMAGE RECORDING To specify the image quality NOTE • Use the “Fine” setting when image quality is your top priority and file size is secondary. Conversely, use the In the REC mode, press MENU. “Economy” setting when file size is your top priority and image quality is secondary. -
Page 44: Other Recording Functions
OTHER RECORDING FUNCTIONS OTHER RECORDING FUNCTIONS This chapter describes the other powerful features and func- Rock the controller up or down to change the tions that are available for recording. exposure compensation value, and then click. • Clicking the controller registers the displayed value. Exposure Compensation (EV Shift) Up : Increases the EV value. -
Page 45: Adjusting The White Balance
OTHER RECORDING FUNCTIONS Record the image. Adjusting the White Balance The wavelengths of the light produced by various light IMPORTANT! sources (sunlight, light bulb, etc.) can affect the color of a subject when it is recorded. White balance lets you make •... -
Page 46: Adjusting White Balance Manually
OTHER RECORDING FUNCTIONS Rock the controller up or down to select the Adjusting White Balance Manually setting you want, and then click. Under some light sources, automatic white balance under the “Auto” setting can take a long time to complete. Also, the When shooting under these auto white balance range (color temperature range) is lim- Select this setting:... -
Page 47: Using The Night Scene Mode
OTHER RECORDING FUNCTIONS Point the camera at a white piece of paper or Using the Night Scene Mode similar object under the lighting conditions for You can use the Night Scene mode in combination with flash which you want to set the white balance, and for slow sync shooting of people against a twilight or night then press the shutter release button. -
Page 48: Using The Movie Mode
OTHER RECORDING FUNCTIONS Remaining capacity Rock the controller Using the Movie Mode up or down to select You can record movies up to 30 seconds long. The EX-M1 (Movie), and then even lets you record audio along with your movies. click. -
Page 49: Recording Audio (Ex-M1 Only)
OTHER RECORDING FUNCTIONS IMPORTANT! Recording Audio (EX-M1 Only) • The flash does not fire in the Movie Mode. • The EX-M1 also records audio. Note the following Adding Audio to a Snapshot points when recording a movie with the EX-M1. You can add audio to a snapshot after you record it. - Page 50 OTHER RECORDING FUNCTIONS In the REC mode, press MENU. Press the shutter release button to start audio recording. Select the “REC” tab, select “REC Mode”, and • The operation/flash charge lamp flashes green as re- then rock the controller to the right. cording is performed.
-
Page 51: Recording Your Voice
OTHER RECORDING FUNCTIONS Recording Your Voice Press the shutter release button to start voice recording. The Voice Recording Mode provides quick and easy record- • The remaining recording time value counts down on ing of your voice. the monitor screen and the operation/flash charge lamp flashes green as recording is performed. -
Page 52: Rec Mode Camera Settings
OTHER RECORDING FUNCTIONS ! Audio Recording Precautions REC Mode Camera Settings • Keep the microphone on the front of the camera pointed Turning the Monitor Screen On and Off at the subject. Turning off the monitor screen when recording helps to con- •... -
Page 53: Assigning Functions To The Controller
OTHER RECORDING FUNCTIONS IMPORTANT! Rock the controller up or down to select the setting you want, and then click. • The monitor screen turns back on automatically in the following cases, even if “LCD-OFF” is selected with When you want to assign this the above procedure. -
Page 54: Specifying Power On Default Settings
OTHER RECORDING FUNCTIONS Specifying Power On Default Settings In the REC mode, press MENU. The camera’s “mode memory” feature lets you specify the Select the “Memory” tab, select the item you power on default settings individually for the recording want to change, and then rock the controller to mode, flash mode, digital zoom mode, and white balance the right. -
Page 55: Playback
PLAYBACK PLAYBACK You can use the camera’s built in monitor screen to play Rock the controller right (forward) or left back files. (back) to scroll through files on the monitor screen. Basic Playback Operation Use the following procedure to scroll through files stored in the camera’s memory. -
Page 56: Playing An Audio Snapshot (Ex-M1 Only)
PLAYBACK Playing an Audio Snapshot (EX-M1 Only) IMPORTANT! • Audio volume can be adjusted during playback only. Perform the steps below to display an audio snapshot (indi- • When you have the LCD remote controller connected cated by a indicator) and play its audio. to the camera, audio is output through the stereo headphones (page 95) instead of the camera’s In the PLAY mode, rock the controller left or... -
Page 57: Zooming The Displayed Image
PLAYBACK After clicking the Zooming the Displayed Image controller, you can Perform the following procedure to zoom the image currently then rock it up, down, on the monitor screen up to four times its normal size. left, or right to scroll to different parts of In the PLAY mode, rock the controller left or the zoomed image. -
Page 58: Resizing An Image
PLAYBACK Rock the controller up or down to select the Resizing an Image setting you want, and then click. You can use the following procedure to change a snapshot image to either VGA size (640 x 480 pixels) or QVGA size To do this: Select this: (320 x 240 pixels). -
Page 59: Playing A Movie
PLAYBACK • You can perform the following operations while a Playing a Movie movie is playing. Use the following procedure to play back a movie recorded To do this: Do this: in the movie mode. Fast forward or fast reverse Rock the controller left or the movie right. -
Page 60: Adding Audio To A Snapshot (Ex-M1 Only)
PLAYBACK In the PLAY mode, rock the controller left or Adding Audio to a Snapshot (EX-M1 Only) right to scroll through snapshots until the one The “after-recording” feature lets you add audio to snap- to which you want to add audio is displayed. shots after they are recorded. -
Page 61: To Re-Record Audio
PLAYBACK To re-record audio IMPORTANT! • Keep the microphone on the front of the camera pointed at In the PLAY mode, rock the controller left or the subject. right to scroll through snapshots until the one • Take care that you do not whose audio you want to re-record is dis- block the microphone with played. -
Page 62: Playing Back A Voice Recording File (Ex-M1 Only)
PLAYBACK IMPORTANT! Playing Back a Voice Recording File (EX-M1 Only) • Audio volume can be adjusted during playback only. • When you have the LCD remote controller connected Perform the following steps to play back a voice recording to the camera, audio is output through the stereo file. -
Page 63: Deleting Files
DELETING FILES DELETING FILES You can delete a single file, or you can delete all files cur- Deleting a Single File rently in memory. Perform the following steps when you want to delete a single file. IMPORTANT! • Note that file deletion cannot be undone. Once you In the PLAY mode, delete a file, it is gone. -
Page 64: Deleting All Files
DELETING FILES IMPORTANT! Deleting All Files • If a file cannot be deleted for some reason, the mes- The following procedure deletes all unprotected files cur- sage “The function is not supported for this file.” ap- rently in memory. pears when you try to delete it. In the PLAY mode, rock the controller down . -
Page 65: File Management
FILE MANAGEMENT FILE MANAGEMENT The file management capabilities of the camera make it easy Each folder can hold files numbered up to 9,999. to keep track of images. You can protect files against dele- Trying to store the 10,000th file in a folder causes the next tion, and even use its DPOF feature to specify images for serially numbered folder to be created. -
Page 66: Protecting Files
FILE MANAGEMENT Rock the controller Protecting Files up or down to select Once you protect a file it cannot be deleted. You can protect “On”, and then click. files individually or you can protect all files in memory with a •... -
Page 67: To Protect All Files In Memory
FILE MANAGEMENT To protect all files in memory DPOF The letters “DPOF” stand for “Digital Print Or- In the PLAY mode, press MENU. der Format”, which is a format for recording on a memory card or other medium which digital Select the “PLAY”... -
Page 68: To Insert The Date During Printing
FILE MANAGEMENT To insert the date during printing To configure print settings for a single image NOTE • To insert the date during printing, you need to use the In the PLAY mode, following procedure to turn on the date insertion fea- rock the controller up ture before configuring other print settings. -
Page 69: To Configure Print Settings For All Images
FILE MANAGEMENT Rock the controller up or down to specify the To configure print settings for all images number of copies. • You can specify up to 99 for the number of copies. In the PLAY mode, rock the controller up Specify 00 if you do not want to have the image (DPOF). -
Page 70: Print Image Matching Ii
FILE MANAGEMENT PRINT Image Matching II Exif Print Images include PRINT Image Matching Exif Print is an internation- data (mode setting and other camera ally supported, open stan- setup information). A printer that sup- dard file format that makes it ports PRINT Image Matching reads possible to capture and dis-... -
Page 71: Using The Favorite Folder
FILE MANAGEMENT Rock the controller left or right to select the file Using the FAVORITE Folder you want to copy to the FAVORITE folder. You can copy snapshots from a file storage folder (page 92) to the FAVORITE folder in built-in memory (page 92). This Rock the controller up or down to select makes it easy to keep track of important files. -
Page 72: To Display A File In The Favorite Folder
FILE MANAGEMENT To display a file in the FAVORITE folder To delete a file from the FAVORITE folder In the PLAY mode, press MENU. In the PLAY mode, press MENU. Select the “PLAY” tab, select “Favorites”, and Select the “PLAY” tab, select “Favorites”, and then rock the controller to the right. -
Page 73: Other Settings
OTHER SETTINGS OTHER SETTINGS Turning the Key Tone On and Off Specifying an Image for the Startup Screen Use the following procedure to turn the tone that sounds You can specify an image you recorded as the startup when you press a key on and off. screen image, which causes it to appear on the monitor screen for about two seconds whenever you turn on the camera. -
Page 74: Changing The Date And Time Setting
OTHER SETTINGS Changing the Date Format Changing the Date and Time Setting You can select from among three different formats for dis- Use the following procedure to change the date and time play of the date. setting. In the REC mode or PLAY mode, press MENU. In the REC mode or PLAY mode, press MENU. -
Page 75: Changing The Display Language
OTHER SETTINGS Changing the Display Language Formatting Built-in Memory You can use the following procedure to select one of six lan- Formatting built-in memory deletes any data stored in it. guages as the display language. IMPORTANT! In the REC mode or PLAY mode, press MENU. •... -
Page 76: Using A Memory Card
USING A MEMORY CARD USING A MEMORY CARD You can expand the storage capabilities of your camera by IMPORTANT! using a commercially available memory card (SD memory • Make sure you turn off the camera before inserting or card or MultiMedia Card). You can also copy files from built- removing a memory card. -
Page 77: Using A Memory Card
CASIO authorized service provider. • Never remove a card from the camera while the op- To remove a memory card from the camera eration/flash charge lamp is flashing. -
Page 78: Formatting A Memory Card
USING A MEMORY CARD Formatting a Memory Card Load the memory card into the camera. Formatting a memory card deletes any data already stored Turn on the camera. Next, enter the REC mode on it. or PLAY mode and press MENU. IMPORTANT! Select the “Set Up”... -
Page 79: Memory Card Precautions
USING A MEMORY CARD Memory Card Precautions Copying Files • Use only an SD memory card or a MultiMediaCard with this Use the procedures below to copy files between built-in camera. Proper operation is not guaranteed when any memory and a memory card. other type of card is used. -
Page 80: To Copy A File From A Memory Card To Built-In Memory
USING A MEMORY CARD Rock the controller up or down to select “Built- To copy a file from a memory card to Card”, and then click. built-in memory • This starts the copy operation and displays the mes- sage “Busy... Please wait...” Perform steps 1 through 3 of the procedure un- •... -
Page 81: Installing The Software On The Cd-Rom
USING THE CAMERA WITH A COMPUTER USING THE CAMERA WITH A COMPUTER The USB cradle that comes with your camera makes it easy Installing the Software on the CD-ROM to connect to a computer that is equipped with a USB port. You can also transfer files using the memory card, if your Before you can exchange files with your computer, you first need to install the software contained on the CD-ROM that... -
Page 82: Operating Environment
USING THE CAMERA WITH A COMPUTER Internet Explorer (for Macintosh) Operating environment This is a browser for reading HTML files. Images loaded by The operating environment required may vary depending on Photo Loader will be stored and maintained in a folder called the software used. -
Page 83: Installing The Software
USING THE CAMERA WITH A COMPUTER Installing the software NOTE • Depending on the configuration of the computer, the Install the software included in the attached CD-ROM on menu may not launch automatically. In this case, open your computer. the driver in which the CD-ROM is inserted, and double-click “menu.exe”... -
Page 84: Software Installation
USING THE CAMERA WITH A COMPUTER ! Reading “Read me” ! Software Installation Read “Read me” for the application software before install- Click on [Software] in the menu. ing it. This contains necessary information for installing the software. Click on the application you want to install. Click Software in the menu. - Page 85 USING THE CAMERA WITH A COMPUTER ! Reading instruction manual (PDF file) Macintosh version The CD-ROM includes the applications and instruction Click [Manual] in the menu. manuals for each language. Check the folders in CD-ROM to determine whether the ap- Click the application you want to read.
- Page 86 USING THE CAMERA WITH A COMPUTER ! Installing the software (except USB driver) IMPORTANT! • Users upgrading to the new version of Photo Loader It is recommended that you install (1) Internet Explorer first from the previous version and users using library man- before installing (2) and (3) software.
- Page 87 Open the “UsbDriver” folder in the CD-ROM. camera to the Macintosh. Drag & drop the files, “CASIO-USB StorageDriver” • The shape of the icon and “CASIO-USB StorageClassShim” in the displayed will vary “UsbDriver” folder into the “Extensions” folder.
- Page 88 " Reading an instruction manual of a camera NOTE Open “Manual” folder. • Uninstalling the USB Driver Open “zzzzzzzz” folder in “Digital Camera” Delete “CASIO-USB StorageDriver” file and “CASIO- folder. USB StorageClassShim” file in the “Extensions” folder. The uninstallation process is now complete. Open “camera_xx.pdf”.
-
Page 89: Transferring Files To A Computer
USING THE CAMERA WITH A COMPUTER Transferring Files Over a USB Connec- Transferring Files to a Computer tion The CD-ROM that comes bundled with your camera con- tains a copy of Photo Loader and a USB driver. This soft- Connecting the bundled USB cradle to a computer that is ware lets you transfer the contents of the camera’s memory equipped with a USB port makes it possible to transfer files to your computer quickly and easily. - Page 90 USING THE CAMERA WITH A COMPUTER ! To connect the USB Cable Plug Connector B on the bundled USB cable to the USB port of the USB cradle. Connect the AC power cord to the AC adaptor, USB cable Connector B and then plug the other end of the AC power (bundled) cord into a household power outlet.
- Page 91 • Do not place the to supply power to the camera. camera onto the USB • The optionally available CASIO QC-1U USB cable cradle while it is turned cannot be used with this camera. • Never disconnect the USB cable while the PC is ac- cessing camera memory (indicated by a flashing USB lamp).
-
Page 92: Using A Memory Card To Transfer Images To A Computer
USING THE CAMERA WITH A COMPUTER ! Terminating a USB Connection Using a Memory Card to Transfer Images to a Computer Windows XP, Me or 98 The procedures in this section describe how to transfer im- Turn off the camera, and then remove the camera from the ages from the camera to your computer using a memory USB cradle. -
Page 93: Memory Data
USING THE CAMERA WITH A COMPUTER Using a Commercially Available SD Memory Card Memory Data Reader/Writer Images recorded with this camera and other data are stored See the user documentation that comes with the SD memory in memory using DCF (Design Rule for Camera File System) card reader/writer for details about how to use it. -
Page 94: Memory Directory Structure
USING THE CAMERA WITH A COMPUTER ! Folder and File Contents Memory Directory Structure • Parent folder ! Directory Structure Folder that stores all of the digital camera files. • Storage folder <¥DCIM¥> (Parent Folder) Folders for storing files stored with the digital camera. 100CASIO (Storage folder) •... -
Page 95: Image Files Supported By The Camera
USING THE CAMERA WITH A COMPUTER Image Files Supported by the Camera Built-in Memory and Memory Card Precautions • Image files recorded with the CASIO EX-S1/EX-M1 Digital Camera • Note that the folder named “DCIM” is the parent (top) folder • DCF protocol image files of all the files in memory. -
Page 96: Transferring Audio Files To The Camera
PLAYING AN AUDIO FILE (EX-M1 Only) PLAYING AN AUDIO FILE (EX-M1 Only) You can transfer MP3 music data files from your computer to Transferring Audio Files to the Camera the camera and then use the camera as a portable audio player. -
Page 97: Preparing The Camera For Audio Player Operation
PLAYING AN AUDIO FILE (EX-M1 Only) Connect the LCD remote controller to the Preparing the Camera for Audio Player camera’s connector, and then plug the stereo Operation headphones into the Headphones jack of the Perform the following steps to prepare the camera for opera- LCD remote controller. -
Page 98: Using The Camera As An Audio Player
PLAYING AN AUDIO FILE (EX-M1 Only) IMPORTANT! Using the Camera as an Audio Player • All remote controller buttons are disabled when the camera’s mode selector is set to “REC” or “PLAY”. General Guide • The camera’s monitor screen is off while the camera is in the AUDIO mode. - Page 99 PLAYING AN AUDIO FILE (EX-M1 Only) ! Display Playback mode indicator This icon indicates the playback mode. This type of icon: Indicates this: Normal playback All track repeat 1-track repeat Track number Battery level indicator Shows the track number of the current track. Track name, artist name, volume level •...
-
Page 100: Basic Remote Controller Operations
PLAYING AN AUDIO FILE (EX-M1 Only) ! To skip to the beginning of the next track Basic Remote Controller Operations Press the [ ] button (remote controller beeps). ! To start playback To keep skipping forward, press the [ ] button multiple Press the [ ] button. -
Page 101: Specifying The Audio Playback Mode
PLAYING AN AUDIO FILE (EX-M1 Only) Specifying the Audio Playback Mode Selecting a Specify Track for Playback You can use the following procedure to select one of three You can use the following procedure to display a list of avail- playback modes: normal playback, all-track repeat, or 1- able tracks and select one of them for playback. -
Page 102: Specifying The Track Playback Sequence
PLAYING AN AUDIO FILE (EX-M1 Only) Press the remote controller’s [ ] button to Specifying the Track Playback Sequence start playback from the currently selected Normally, all tracks in memory are played back in the order track. they are saved. You can use the following procedure to cre- ate a play list that tells the camera the sequence to use when playing back AUDIO mode tracks. - Page 103 PLAYING AN AUDIO FILE (EX-M1 Only) " Example Folder Structure " Example PLAYLIST.TXT File Contents <¥AUDIO¥> (Folder containing MP3 files) AUDIO001.MP3 AUDIO002.MP3 AUDIO001.MP3 (MP3 file) AUDIO002.MP3 (MP3 file) POPS ROCK\ROCK0002.MP3 PLAYLIST.TXT (PLAYLIST file) POPS (Folder containing MP3 files) POPS0001.MP3 (MP3 file) POPS0002.MP3 (MP3 file) The above PLAYLIST.TXT file specifies the following play-...
-
Page 104: Disabling Remote Controller Button Operations
PLAYING AN AUDIO FILE (EX-M1 Only) NOTES Disabling Remote Controller Button • If there is no PLAYLIST.TXT file in the camera’s AU- Operations DIO folder, all tracks are played back in the order they The remote controller has a lock switch that you can use to are saved in memory. -
Page 105: Lcd Remote Control Error Messages
PLAYING AN AUDIO FILE (EX-M1 Only) LCD Remote Control Error Messages Audio Playback Precautions The following describes the error messages that appear on • Listening to audio at a high volume for long periods can the LCD remote controller’s display. damage your hearing. -
Page 106: Menu Reference
APPENDIX APPENDIX Menu Reference White Balance Auto / (Sunlight) / (Shade) / (Light Bulb) / (Fluorescent) / Manual The following shows lists of menus that appear in the REC L/R Key REC Mode / EV shift / Flash / White Balance mode and PLAY mode, and their settings. -
Page 107: Indicator Lamp Reference
APPENDIX ! PLAY Mode Indicator Lamp Reference " PLAY tab menu Camera Indicator Lamps Zoom The camera has two indicator lamps: an operation/flash Protect On/Off / All Files : On/Off / Cancel charge lamp and a self-timer lamp. These lamps light and Dubbing *EX-M1 only flash to indicate the current operational status of the camera. -
Page 108: Rec Mode
APPENDIX ! REC Mode ! PLAY Mode Operation/Flash Operation/Flash Self-timer Lamp Self-timer Lamp Charge Lamp Meaning Charge Lamp Meaning Color Status Color Status Color Status Color Status Green Power on Green Power on Amber Pattern 1 Flash charging Green Pattern 2 Deleting image Green Monitor screen off... -
Page 109: Usb Cradle Indicator Lamps
APPENDIX USB Cradle Indicator Lamps The USB cradle has two indicator lamps: a CHARGE lamp and a USB lamp. These lamps light and flash to indicate the current operational status of the cradle and camera. USB lamp CHARGE lamp CHARGE lamp USB lamp Meaning Color... -
Page 110: Troubleshooting Guide
APPENDIX Troubleshooting Guide Symptom Possible Cause Action Power does not turn on. The battery is dead. Charge the battery (page 24). If the battery goes dead soon after being charged, it means the battery has reached the end of its life and needs to be re- placed. - Page 111 APPENDIX Symptom Possible Cause Action Color of the playback image Sunlight or light from another source is shining di- Position the camera so sunlight does not shine di- is different from the image rectly into the lens during recording. rectly into the lens. on the monitor screen dur- ing recording.
- Page 112 APPENDIX Symptom Possible Cause Action All buttons and switches are Circuit problem caused by electrostatic charge, im- Remove the battery from the camera, reinsert it, disabled. pact, etc. while the camera was connected to an- and then try again. other device. Monitor screen is off.
-
Page 113: Display Messages
No Favorites file! There is no FAVORITE file. SYSTEM ERROR Your camera system is corrupted. Contact your re- tailer or a CASIO authorized service provider. This function cannot You attempted to copy files from built-in memory to be used. a memory card while there is no memory card loaded in the camera (page 77). -
Page 114: Specifications
APPENDIX Approximate Memory Capacity and File sizes Specifications • Snapshots Main Specifications File Size Approximate Built-in flash SD Memory Quality (pixels) Image File Size memory 12MB Card* 64MB Product ....... Digital Camera 1600 x 1200 Fine 1050KB 10 shots 53 shots (UXGA) Normal 710KB... - Page 115 APPENDIX Delete ........Single-file, all files (with protection) Recording Functions ..Snapshot (with audio for EX-M1 only); self-timer; Night Scene; Movie (with au- Effective Pixels: ....1.24 million dio for EX-M1 only); voice recording (EX-M1 only) Imaging Element: ....1.27-inch square pixel color CCD * Audio is monaural (Total pixels: 1.34 million) Audio Recording Time (EX-M1 only)
-
Page 116: Power Supply
APPENDIX ! Audio Player Function (EX-M1 Only) ! Power Supply Data Compression/ Power Requirements ..Rechargeable lithium ion battery (NP- Decompression ....MP3 (MPEG-1 Audio Layer-3) 20) x 1 Sampling Frequencies ..32kHz, 44.1kHz, 48kHz Approximate Battery Life: Bit Rates ......32 to 210 kbps, VBR-compatible Continuous Recording 80 minutes (480 shots) Continuous Playback (Continuous... - Page 117 APPENDIX ! Other Dimensions ......95(W) x 55.5(H) x 39.5(D) mm (3.7˝(W) x 2.2˝(H) x 1.6˝(D)) Dimensions (excluding projections) EX-S1: ......88(W) x 55(H) x 11.3(D) mm Weight ......... Approximately 56 g (2.0 oz) (3.5˝(W) x 2.2˝(H) x 0.4˝(D)) (excluding projections) EX-M1: ......
Need help?
Do you have a question about the Exilim EX-S1 and is the answer not in the manual?
Questions and answers