Table of Contents
Advertisement
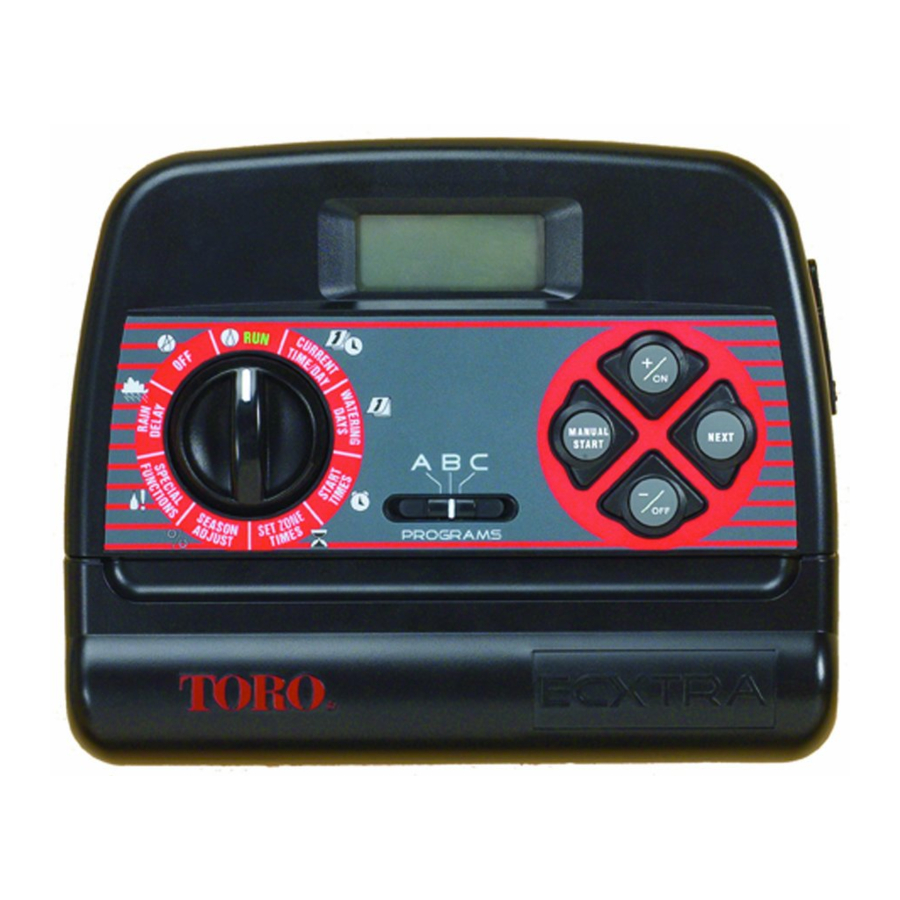
User's Guide
A
OUTDOOR MODEL
ON
MANUAL
NEXT
START
B C
OFF
ON
MANUAL
NEXT
START
OFF
INDOOR MODEL
Sprinkler Timer with
Computer Programming
Option
ECXTRA Features
• Easily expandable to 10 Zones (Indoor
model) or 12 Zones (Outdoor Model) with
2-zone Plug-in Modules
• Snap-in Wire Connectors
• Compatible with Optional Scheduling
Software Package
• 3 Independent Watering Programs with:
- Calendar, Interval and Odd/Even Days
- Selective Day Exclusion
- 1-minute to 4-hour Zone Run Time
- 4 Start Times
• Seasonal Run Time Adjust
• Rain Delay
• Compatible with Normally Closed or
Normally Open Rain Sensors
• Automatic 24 VAC Circuit Protection
• Program Memory Backup without Battery
• Programmable Pump Start
Advertisement
Table of Contents

Subscribe to Our Youtube Channel
Related Manuals for Toro ECXTRA Sprinkler Timer


Summary of Contents for Toro ECXTRA Sprinkler Timer
- Page 1 Sprinkler Timer with Computer Programming User’s Guide Option ECXTRA Features • Easily expandable to 10 Zones (Indoor model) or 12 Zones (Outdoor Model) with 2-zone Plug-in Modules • Snap-in Wire Connectors • Compatible with Optional Scheduling Software Package MANUAL NEXT START •...
- Page 2 Notes:...
-
Page 3: Table Of Contents
Setting an Odd or Even Schedule ....24 Table of Contents Using the Day Exclusion Feature ....25 Turning Off a Program ........26 Timer Components ........2-5 Setting Program Start Times ......27 Timer Installation Setting Zone Run Times ....... 28 Indoor Model Installation ........ -
Page 4: Timer Components
Timer Components Timer Components MANUAL NEXT START SENSOR 24 VAC... - Page 5 2 - Control Buttons Timer Components button – Increases the time display, scrolls The following are brief descriptions of the timer forward through the program information and selects components and display elements. Each of these items watering days. will be explained in further detail within the appropriate button –...
- Page 6 Port – Accepts the (optional) ECXTRA 12 - Time Pod – Shuts off and prevents all automatic and Time Pod unit to transfer Toro computer-aided manual watering activity. watering schedule data from your PC to the 4 - Program Select Switch – Three-position slide ECXTRA timer.
- Page 7 Timer Components MANUAL NEXT START Pump/MV 24VAC MANUAL NEXT START...
-
Page 8: Timer Installation
Timer Installation Note: The ECXTRA indoor timer is not weather resis- tant and must be installed indoors or in a protected area. Indoor Model Installation 1. Select a location for the timer within 4′ (1,2m) of an electrical outlet to enable the transformer cord to easily reach. -
Page 9: Connecting The Valves
You will need this information when connecting Valve Common Wire the valve wires to the timer. CAUTION: Use Toro Waterproof Wire Connectors 5. Referring to “Timer Components” on page 5 and the (Model # 53687) or grease caps on all exposed wire... -
Page 10: Connecting A Pump Start Relay
Connecting a Pump Start Relay Connecting the Plug-In Transformer CAUTION: To prevent timer damage, ensure the CAUTION: Do not plug the transformer into an 24 VAC pump relay current draw does not exceed electrical outlet until all of the wiring procedures have 0.30 Amps. Do not connect the timer directly to the been completed. -
Page 11: Outdoor Model Installation
2. Remove the two phillips screws from the transformer (E) - 1/2″ (13mm) for optional Toro RainSensor wires. access cover (B). Pull the cover outward from the (F) - 3/4″ (19mm) for sprinkler valve wires. -
Page 12: Installing The Cabinet
Installing the Cabinet 1. For safe, reliable operation, select an installation site which will provide the following conditions: • Protection from irrigation spray, exposure to direct sun during the hottest hours, wind and snow. • Access to a grounded power source which is not controlled by a light switch or utilized by a high 6″... -
Page 13: Connecting The Valves
CAUTION: To prevent corrosion, connection fail- the terminal labeled COM (10). Connect the individual ure and possible short circuit, use Toro waterproof zone valve wires to the appropriate zone module wire connectors (Model # 53687) or grease caps on all terminals (11). -
Page 14: Connecting A Pump Start Relay
Connecting a Pump Start Relay Connecting the Power Source CAUTION: To prevent timer damage, ensure the WARNING: relay current draw does not exceed 0.30 Amps. Do AC power wiring must be installed and connected not connect the timer directly to the pump starter. by qualified personnel only. All electrical compo- 1. -
Page 15: Connecting A Rain Sensor
2. Remove the plastic piece from the Sensor terminal Connecting the Power Source (cont.) connectors. Connect the two sensor wires in any order. BATTERY MANUAL NEXT START 3. Set the Sensor Configuration Switch (6) to NC Connecting (optional) Rain Sensor (Normally Closed) or NO (Normally Open) operation A rain sensor is a remote sensing device that can be as required by the type of sensor connected. -
Page 16: Getting Started
Getting Started Automatic Sprinkler System Basics Valve 1 The three main operating components of every auto- matic sprinkler system are the timer, control valves and Timer sprinklers /drip emitters. The timer is the brain of the system, signaling the control Valve 2 MANUAL valves when to start and stop the flow of water to the START NEXT... -
Page 17: Watering Schedule Basics
Watering Schedule Basics Watering Program Diagram A watering schedule consists of three basic instructions: Program starts at 4:00 • What days to water –called watering days • When to water – called a start time • How long to water – called a run time Zone 1 The following example illustrates how a program has a watering schedule set for the sprinkler system shown on... -
Page 18: Watering Program Details
This illustration shows how an Inter- Watering Program Details val schedule would be displayed. In This section covers in detail each of the three parts of a this example, program B has a 3- watering program – watering days, program start times day Interval schedule which will start and zone run times. -
Page 19: Selecting Program Start Times
Selecting Program Start Times Setting the Zone Run Time A program start time is the time of day you select to A zone run time is the length of time the zone (controlled begin an automatic program watering cycle. by the valve) will water during the program watering It is important to remember that a program only cycle. -
Page 20: Planning Your Watering Schedule
Planning Your Watering Schedule When filling out this form, use a pencil so changes Note: You can use your personal computer and the Toro can be easily made. After installing the indoor model Scheduling Advisor interactive software to guide you timer, remove the form and store it in the pocket formed through the complete watering schedule process. -
Page 21: Watering Schedule Forms
(Example) Watering Schedule Form PROGRAM A PROGRAM B PROGRAM C CALENDAR SU MO TU WE TH FR SA SU MO TU WE TH FR SA SU MO TU WE TH FR SA INTERVAL WATERING DAY SCHEDULE ODD/EVEN EVEN EVEN EVEN TU WE TH FR SA SU MO TU WE TH FR SA SU MO TU WE TH FR SA EXCLUDE ZONE... - Page 22 Watering Schedule Form PROGRAM A PROGRAM B PROGRAM C CALENDAR SU MO TU WE TH FR SA SU MO TU WE TH FR SA SU MO TU WE TH FR SA INTERVAL WATERING DAY SCHEDULE ODD/EVEN EVEN EVEN EVEN TU WE TH FR SA SU MO TU WE TH FR SA SU MO TU WE TH FR SA EXCLUDE ZONE LOCATION...
-
Page 23: Programming The Timer
Setting the Current Time and Date Programming the Timer About the Watering Program Memory Once programmed, the ECXTRA memory will be retained for several years without power. Only the cur- rent time and date information will be lost and will need Month to be reset if power is disconnected from the timer for more than 24 hours. -
Page 24: Setting The Watering Day Schedule
Setting the Watering Day Schedule Note: For each program, you can select Calendar, Inter- val Odd, Even or Off. To set a Calendar schedule, con- tinue here. To set an Interval schedule see page 23. To set an Odd or Even schedule, see page 24. To turn Off a program, see page 26. -
Page 25: Setting An Interval Schedule
Setting an Interval Schedule Turn the control dial to the watering days position. Check the switch setting. If necessary, programs reposition the switch to select the desired program. The current watering schedule will be displayed. If Int (Interval) is not displayed, press the +/ or –/ button as needed to select Int. -
Page 26: Setting An Odd Or Even Schedule
Setting an Odd or Even Schedule Turn the control dial to the watering days position. Check the switch setting. If necessary, programs reposition the switch to select the desired program. The current watering schedule will be displayed. If Odd or Even is not displayed, press the +/ button as needed to select Odd or Even. -
Page 27: Using The Day Exclusion Feature
Using the Day Exclusion Feature A Calendar watering day schedule is used to select spe- cific days of the week to water. However, if an Interval or Odd/Even watering schedule is preferred (or required due to watering restrictions in your area), specific days of the week can be removed from the watering schedule by using the Day Exclusion feature. -
Page 28: Turning Off A Program
Turning Off a Program Note: Turning off a program does not alter or erase a preset watering day schedule. Selecting Off simply places the program on hold until one of the watering day schedules is selected. Turn the control dial to the watering days position. -
Page 29: Setting Program Start Times
Setting Program Start Times Turn the control dial to the program start time position. Check the switch setting. If necessary, programs 3 5 7 9 reposition the switch to select the desired program. Program start time number 1 will begin flashing. The 4 6 8 current program start time or OFF will be displayed for start time number 1. -
Page 30: Setting Zone Run Times
Setting Zone Run Times PGM A Turn the control dial to the set zone times position. 1 2 3 4 5 6 Check the switch setting. If necessary, programs reposition the switch to select the desired program. Zone number 1 will be flashing and its current run time or OFF will be shown. -
Page 31: Pump Control
Pump Control The Special Functions dial position provides optional control features specifically for pump system operation. Pump/Master Valve control circuit operation is active (On) with two seconds of delay time (turns on two sec- onds before the first zone begins watering) but can be turned Off for each watering program as needed. -
Page 32: Timer Operation
The Automatic mode is selected when the control dial is in the position. While in the automatic mode, the Timer Operation display will show two types of information: Status and Operating. The ECXTRA timer has three modes of operation: Auto- This example shows the Status matic, Manual and Off. -
Page 33: Manual Operation
Manual Operation Manual operation enables the automatic watering pro- Flashing grams or selected zones assigned to the program to be started manually. During operation, temporary changes Flashing can be made to increase or decrease the zone run time, step through the zone sequence and pause or stop watering using the “Watering Control Features”... -
Page 34: Watering Control Features
To Cancel Watering Watering Control Features Press the +/ and –/ buttons at the same time - The following watering control features enable you to fur- two times. ther control the watering program during operation. • All watering operations will be canceled and the timer All watering control features apply to watering programs will return to the automatic mode. -
Page 35: Using The Rain Delay Feature
Flashing Using the Rain Delay Feature This feature enables all watering operations to be delayed from 1 to 7 days. For example, rain is forecast in your area for the next two days. Instead of turning the timer off (and possibly forgetting to turn it back on), a rain delay of 3 days can be easily entered. -
Page 36: Using The Season Adjust Feature
Using the Season Adjust Feature Changes in season and temperature generally require a change in zone run time to maintain a healthy landscape and conserve water. The Season Adjust feature enables you to change the run time of all zones assigned to a program, simultaneously up or down, in 10% increments –... -
Page 37: Turning Off The Ecxtra
Turning Off the ECXTRA When the control dial is turned to the position, the timer immediately shuts off any watering operation cur- rently in progress. Leaving the control dial in the position will prevent all automatic and manual watering operations. The timer will continue to track the current time and day of the week. -
Page 38: Service And Specifications
Example 1 Service and Specifications Clearing the Program Memory Once programmed, the ECXTRA memory will be retained for several years with or without power. Only the current time and date information will be lost and will need to be reset if power is disconnected for more than 24 hours. -
Page 39: Automatic Circuit Protection
Adding a Zone Module Automatic Circuit Protection 1. Turn the control dial to the position. The ECXTRA features built-in circuit protection to help prevent damage to the timer caused by excessive current 2. Remove the lower front cover from the timer housing draw on the zone and/or pump/master valve circuits. by sliding it downward. -
Page 40: Troubleshooting
If you are having a problem with the timer, check the following symptoms, possible causes and remedies. If the problem cannot be resolved, or you would like assistance with any Toro irrigation product, call our toll-free Toro Help Line at 1-800-367-8676, Monday through Friday, 7:30 a.m. – 4:00 p.m. (Pacific Time). -
Page 41: Specifications
Indoor Model Plug-in Transformer, Class 2, UL Listed, CSA Certified Scheduling Advisor An exclusive Toro software program which guides you (or equivalent) easily through the ECXTRA programming process to • Input: 120 VAC 60 Hz, 0.5A select the optimum watering schedule for your landscape. - Page 42 Master Valve An automatic or manual control valve Pump Start Relay located between the irrigation water source and the Since the timer is not designed to connect directly to sprinkler system valves and/or backflow preventer. the pump, a 24 VAC pump start relay switch must be installed between the timer and pump start circuit.
- Page 43 Season Adjust Watering Program Season Adjust enables the run time of all zones to be A watering program (or schedule) is the information adjusted up or down simultaneously in 10% increments stored in the timer memory that determines when an from 10% to 200%.
-
Page 44: Warranty
This warranty gives you specific legal rights and you may have other rights which vary from state to state. © 2009 The Toro Company, Irrigation Division • Toro HelpLine - 800-367-8676 • www.toro.com 373-0531 Rev. A...
Need help?
Do you have a question about the ECXTRA Sprinkler Timer and is the answer not in the manual?
Questions and answers
do these timers have a fuse. One time FUSE showed and I was told by a sprinkler company that these timers don't have fuses.
Yes, the Toro ECXTRA Sprinkler Timer has automatic 24 VAC circuit protection, which functions similarly to a fuse by protecting the system from electrical overloads.
This answer is automatically generated
How do I access the timer fuse? Where is it located?