Table of Contents
Advertisement
Quick Links
Advertisement
Chapters
Table of Contents

Related Manuals for Epson EQUITY Y14499113001


Summary of Contents for Epson EQUITY Y14499113001
- Page 1 EQUITYI+ User’s Guide Diagnostics ® EPSON...
- Page 2 ® EPSON Equity™ I + User’s Guide Y14499113001...
-
Page 3: Important Notice
Seiko Epson Corporation. No patent liability is assumed with respect to the use of information contained herein. While every precaution has been taken in the prep- aration of this publication, Seiko Epson Corporation assumes no responsibility for errors or omissions. -
Page 4: Fcc Compliance Statement
Disconnect the peripheral devices and their input/output cables one at a time. If the interference stops, it is caused by either the peripheral device or its I/O cable. These devices usually require shielded I/O cables. For Epson peripheral devices, you can obtain the proper shielded cable from your dealer. For non- Epson peripheral devices contact the manufacturer or dealer for assistance. -
Page 5: Table Of Contents
Introduction ........How to Use This Manual ......Setting Up Your System . - Page 6 Making backup copies ......Using a single floppy disk drive ....Using a hard disk drive .
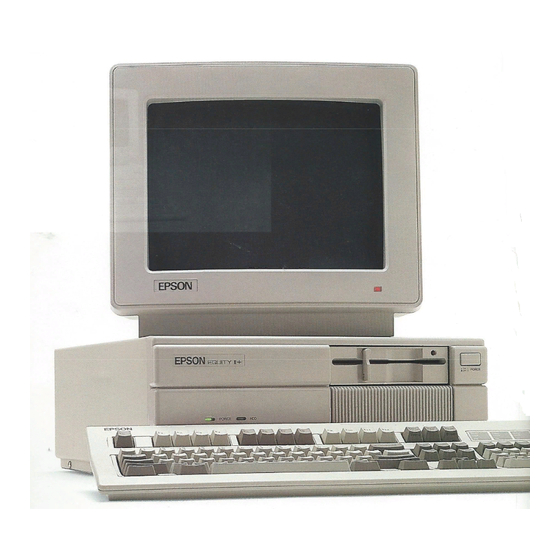
- Page 7 System arrangement ......Rear panel ........Front panel .
-
Page 8: Introduction
Graphics or enhanced graphics video card An Epson printer or plotter. Check with your Epson dealer from time to time to find out which peripherals and option cards are available. You can use most of the cards designed for the IBM... -
Page 9: How To Use This Manual
IBM PC on your Equity I+. Refer to your software program documentation for information on using the software. Additionally, the Equity I+ supports multiple users and multiple tasking with the appropriate operating system. Consult your Epson dealer for more information. How to Use This Manual This user’s guide explains how to set up and care for your Equity I+. -
Page 10: Setting Up Your System
In addition to these items, you probably purchased a compatible video monitor and video card. You’ll find one registration card with your Equity I+. Fill the card out now and mail it to Epson. With your registration card on file, Epson can send you update information. Chapter 1... -
Page 11: Removing The Disk Drive Protector Sheet
Removing the disk drive protector sheet A cardboard sheet occupies the disk slot in the floppy disk drive. This sheet is inserted at the factory to protect the recording read/write heads. Be sure to remove it before you connect any cables. Press the button on the left side of the drive. -
Page 12: Arranging The Components
No electromagnetic interference. Locate your system away from any electrical device that generates an electromagnetic field. Surprisingly, even your telephone can cause problems, especially if you keep diskettes right next to it. When you find the ideal location for your Equity I+, you can start to set up your system. -
Page 13: The Rear Panel
Before you connect the cables, take a look at the rear and front panels of the main unit. rear panel Look at the rear panel to identify the Equity I+ input/output ports. Figure 1-2 shows where you connect the peripheral devices. WARNING: Do not connect the power cord until you have con- nected all peripheral devices. -
Page 14: The Front Panel
RS-232C serial port. Allows you to connect a peripheral with a serial interface, such as a modem, another computer or a printer. Parallel port. Allows you to connect a peripheral with a parallel inter- face, such as a printer or plotter. Option card access slots. -
Page 15: Connecting The Power Cord
Slot for optional disk drives. You can install a second floppy disk drive or a hard disk drive in this optional slot. All Equity I+ units come with at least one floppy disk drive. The main unit above is shown with a second floppy disk drive. -
Page 16: Connecting The Video Monitor
Connecting the Video Monitor To connect the video monitor, place it on top of or near the Equity I+ main unit. It is easiest to connect the monitor cable if the backs of the monitor and the main unit are facing you. Note: Your dealer probably installed a video card in your main unit to control your monitor. -
Page 17: Connecting The Keyboard
Table 1-1. Monitor/video curd compatibility Monitor Video card Monochrome Monochrome or graphics or enhanced graphics Color or Graphics or color graphics Enhanced color or enhanced graphics Plug the monitor’s power cable first into the power inlet on the monitor and then into an electrical outlet. If a monochrome monitor has the proper type of plug, you can plug it into the auxiliary outlet next to the power inlet at the back of the main unit. -
Page 18: Connecting The Cable To The Main Unit
Insert the keyboard connector as shown in Figure 1-7. Do not force the connector, but make sure you insert it all the way. See that the cable exits to the right of the main unit. Figure 1-7. Connecting the cable to the main unit Gently push the cable into the retaining clip, and close the cover. -
Page 19: Connecting The Printer
Just follow the instructions below. Parallel interface The parallel connector on the Equity I+ is a CentronicP-compatible interface with a DB-25 socket. Most Epson printers have a parallel interface. 1-10... -
Page 20: Locating The Printer
To connect your printer to a parallel interface: Place the printer in a convenient location next to your system, as shown in Figure 1-9 for example. Before connecting any cables, make sure the power switches on both the main unit and the monitor are switched off, If you are not sure which cable you need, consult your dealer. -
Page 21: Serial Interface
ASCII codes. In most cases, if you try to print these characters on a standard printer, you get italic characters instead. Many Epson printers support the IBM character set (like those used on the Equity I+) as a standard feature, and other printers can be adapted. In addi- tion, some application programs print the special graphics characters on a standard printer using a special printer driver program. -
Page 22: Setting The Dip Switches
Figure 1-11. Figure 1-11. Location Your Epson dealer should have set these switches for you. However, read this section to be sure the settings match your system configuration. If you upgrade your computer later (by adding a hard disk drive for example) you may need to alter the DIP switch settings. -
Page 23: Dip Switch Set 1 (Internal Operations)
SWITCH I WBNPE ENHANCED COPROCESSOR NOTINST MONOCHROME NO.OFFDMS) 1 S I N G L E ” (DUAL When a switch is up, it is on. When a switch is down, it is off. To change a setting, use a hard, thin object, such as a small screwdriver. DIP switch set 1 (internal operations) The system functions controlled by each switch in set 1 are listed in Table 1-2 and described below. - Page 24 Switch 1 (keyboard)-tells your computer what kind of keyboard is attached to your system. The factory setting is off for the standard (enhanced) key board which comes with your Equity I+. Switch 2 (coprocessor)-tells your computer whether or not an optional math coprocessor is installed.
-
Page 25: Dip Switch Set 2 (Parallel And Serial Port Operations)
DIP switch set 2 (parallel and serial port operations) The parallel and serial port functions controlled by DIP switch set 2 are listed in Table 1-3 and described below. Switches 1, 2, 3, and 4 tell the computer how to access the built-in parallel and serial ports. - Page 26 Switches 3 and 4 (serial port)-tell the computer how to access the built-in serial port. The built-in serial port functions as either the primary or secondary serial port. However, if you install any option card with its own serial port you must set these two DIP switches so there is no conflict between the built- in serial port and the added card.
-
Page 27: Turning On The Computer
Chapter 4 on troubleshooting, or if you want to install an optional 8087 math coprocessor, consult your Epson dealer. To install or remove option cards, always turn off the power, disconnect the main power cord, and wait for a few minutes before removing the cover from the computer. -
Page 28: Initial Setup Procedure
The Equity I+ needs a disk operating system (DOS) to function. It comes with MS-DOS version 3.2. If you want to use another operating system, consult your Epson dealer. To load an operating system, insert the system diskette you want to use (see “Inserting and removing diskettes”... - Page 29 If your system has a hard disk, you need to prepare it before you can run an operating system on it. Refer to “Using a hard disk drive” in Chapter 2 (and to your Diagnostics and MS-DOS manuals) for instructions on how to prepare a hard disk for use.
-
Page 30: Using Your Equity I
Using Your Equity I+ Once you have set up your Equity I+, you’re ready to take advantage of its versatility. This chapter describes the special keys on the keyboard, how to change your computer’s operating speed, and how to reset and turn off your computer. -
Page 31: Selecting Execution Speed
Tabk- Caps Lock Shift Ctrl Backspace + Enter +I Insert (Ins) Delete (Del) Home, End, Paw UP (Pg U Page Down (Pg Dn) Num Lock F1 - F12 Print Screen (Prt Scroll Lock Pause Num Lock, Scroll Lock, when you press them. When the function is enabled, the corresponding light on the upper-right corner of the keyboard is on. -
Page 32: Resetting The Computer
To change the speed, move the switch on the front panel as shown in Figure 2-2. To run the computer at 4.77MHz, move the switch to the left. To run it at 10 MHz, move the switch to the right. You can do this at any time without rebooting the system. -
Page 33: Turning Off The Computer
There are three ways to reset; you should use them in this order: If you are using MS-DOS, press on the numeric keypad at the right of the keyboard. The screen goes blank for a moment, and any system disk in drive A reloads. If the problem is not corrected after trying this, try the second method. -
Page 34: How Disks Work
How disks work The floppy disks (diskettes) you insert in your system’s floppy disk drives are round pieces of flexible plastic coated with magnetic material and enclosed in protective jackets. Like a record, a diskette has circular tracks on both sides. The computer stores the data you enter as magnetic patterns on these circular tracks. - Page 35 Keep disks away from magnetic fields. (Remember that disks store their information magnetically.) There are many sources of magnetism in and around your home or office, such as electrical appliances and tele- phones, and particularly loudspeakers. Keep disks in a moderate environment. They work best at normal room- temperature and humidity conditions.
-
Page 36: Inserting And Removing Diskettes
Never attempt to open the hard disk unit. The disk itself is enclosed in an air-tight container to protect it from dust. If you plan to move the hard disk unit, the read/write head must be moved away from the disk recording area. The MS-DOS program to protect the read/write head is HDSIT. -
Page 37: Write-Protecting Diskettes
Note: You need to format your blank diskettes before you can use them with your operating system. Refer to your MS-DOS or other operat- ing system manual for instructions on how to format your blank diskettes. There are two ways to avoid losing the valuable information stored on your disks;... -
Page 38: Making Backup Copies
To unwrite-protect a 31/2” diskette, move the switch up toward the center of the diskette so the hole is covered. Making backup copies It is a good idea to make copies of all your important data and program diskettes. With program diskettes, or the system master diskette supplied with your Equity I + , you should use backup copies, and keep the originals in a safe place-away from your working disks. -
Page 39: Using A Hard Disk Drive
MS-DOS manual. Using a hard disk drive The Epson hard disk for Equity I+ has a capacity of 20 megabytes- about 20 million characters. This is equivalent to around 60 floppy disks. Using the hard disk greatly reduces the number of floppy disks you need and eliminates much of the disk-swapping you have to do. - Page 40 Before you use the Epson internal hard disk, you must do the following things to prepare it: Use the Format Hard Disk program on your diagnostics diskette to format the hard disk. Partition the hard disk to run the MS-DOS operating system using the MS-DOS program FDISK.
-
Page 41: Installing Option Cards
Option cards are available from Epson as well as other vendors. In addi- tion, multifunction boards (available from other vendors) allow you to add other features without using additional slots. Consult your Epson dealer for more information. -
Page 42: Back Panel Screws
The back panel is secured with three screws as shown in Figure 3-1. Remove the screws and put them to one side. Slip the back panel off the main unit. The top cover is secured by two screws on each side of the computer as shown in Figure 3-2. -
Page 43: Inserting The Option Card
Tilt the cover up slightly from the back and pull it toward you and away from the main unit, as shown in Figure 3-3. Set the cover aside for now. Inserting the Option Card The video card must be placed in the qh slot. Figure 3-1 shows the cor- rect placement of a video card. -
Page 44: Inserting Option Card
Note: Pay specific attention to the warnings in your option card instructions. Some devices have delicate CMOS chips you should not touch. When you handle the card, be careful not to touch any of the contacts on the circuit board, especially along the gold edge connections. If you need to put it down before installing it, place it with the component side facing down on top of the original packing. -
Page 45: Removing An Access Slot Cover
Secure the retaining bracket to the frame of the computer with the small screw and washer. Also replace the ground screw if there is one. The free end of long option cards is held in position by a piece of foam inside the top of the main unit lid and by the card bracket on the inside of the front panel. -
Page 46: Replacing The Cover
Replacing the Cover With the option card properly installed or removed, the last step is to replace the cover of the main unit: With the back of the main unit facing you, position the cover over the computer with the side feet to the left of the main unit and the front edge pointing slightly downward. -
Page 47: Post-Installation Setup
Post-installation Setup After you install an option card (and replace the main unit’s cover and reconnect the power cord and peripherals), you may need to change your DIP switches to update the configuration information. For example, if you add a floppy disk drive, you need to change switches 1-7 and 1-8 so the computer knows it has the additional drive. -
Page 48: Troubleshooting
Most of the minor difficulties you might encounter can be resolved by one of the suggestions below. If none of these solves the problem, consult an Epson dealer about servicing the computer. WARNING: If the computer has to be turned off for any reason, always wait at least five seconds before switching it back on. -
Page 49: The Computer Locks Up Or Freezes
Use the controls on the monitor to adjust the brightness and contrast. Check DIP switches 1-5 and 1-6 on the front of the main unit to make sure they are set correctly for your monitor. Remove any diskettes, then turn off the monitor and main unit. Check to see that the monitor power cable is securely connected to the electri- cal outlet, and that the monitor cable is properly connected to both the monitor and the main unit. -
Page 50: Hard Disk Problems
If you have not done so and your hard disk does not function properly, have an autho- rized Epson service center check your hard disk. Never open the air-tight container that encloses the recording disk. -
Page 51: Printer Problems
Some programs, for compatibility reasons, may require the computer to run at 4.77MHz. Try changing the CPU speed with the switch on the front panel. See “Selecting Execution Speed” in Chapter 2. Printer Problems Most of the problems encountered while using a printer can be solved by checking the manual that came with the printer. -
Page 52: Changing Jumper Settings
Changing Jumper Settings This appendix describes how to set the jumpers inside the Equity I+ if you install optional devices that require different jumper settings than those set by the factory in the main unit. It is best if your dealer installs the option and makes all necessary adjustments when you buy it. - Page 53 For detailed instructions on how to connect the drives to the optional floppy disk controller card, consult the documentation supplied with the card itself. The drive cables for drives A and B are normally connected to connector CN5 on the system board (shown in Figure A-2). If a different cable was supplied to connect the drives to the optional controller card, make a careful note of how the original drive cable was connected, and remove it from the computer.
-
Page 54: Jumper J2, Parity Ram
You can continue work by adjusting Jumper J2 to disable th e parity RAM, but other errors may also occur, and you should report the problem to your Epson dealer as soon as possible. FRONT... -
Page 55: B Specifications
Main Unit 16-bit CPU Main memory Coprocessor Read Only Memory (ROM) Direct Memory Access (DMA) Interrupt (8259) Timer/counter (8253-5) Clock/calendar RAM Parallel interface Serial interface Speaker interface Option slots Appendix B Specifications 8088 microprocessor; 4.77MHz. or 10MHz clockrate; switch selectable 640KB 8087 microprocessor (optional) 16KB... -
Page 56: Keyboard
Keyboard Layout Function keys Mass Storage Standard Optional Hard disk drive Power Supply Switching type, fan-cooled Environmental Requirements Temperature Humidity Detachable, three positions, 101 sculpted keys 58-key QWERTY main keyboard, 17-key numeric pad, 12 function keys (user definable) Three levels (normal/shift/alternate) user- definable Four drives maximum St&inch, half-height floppy disk drive;... -
Page 57: Physical Characteristics (Cpu Only
(12-inch diagonal) RGB color monitor (13-inch diagonal) Supports Epson or IBM-compatible mono- chrome monitor; 80-character x 25-line display; 9 x 14 character block; installs in option slot Supports Epson- or IBM-compatible RGB color or composite video monitor; 40- character x 25-line display (low-resolution text);... -
Page 58: C Glossary
ASCII American Standard Code for Information Interchange. A standardized coding system for representing characters, such as numbers, letters, and graphic symbols. An ASCII character occupies one byte of storage. Files transmitted in ASCII code can be used by many different computers, printers, and programs. -
Page 59: Dip Switches
Command An instruction you enter on the keyboard to direct your computer to perform a specific function. Configuration The particular setup of a group of components. For example, a CPU with two floppy disk drives, connected to a monochrome monitor and a printer is a typical system configuration. -
Page 60: Floppy Disk
Disk drive The physical device which allows the computer to read from and write to a disk. A floppy disk drive has a disk slot on the front panel of the main unit into which you insert diskettes. A hard disk is permanently fixed inside the main unit, hidden behind the front panel. - Page 61 H a r d w a r e Any physical component of a computer system, such as a monitor, printer, keyboard, or CPU. Input/output port See Port. Interface A physical or software connection used to transmit data between equip ment or programs. Jumper A small electrical connector that alters some of the computer’s functions.
-
Page 62: Monochrome Monitor
Monochrome monitor A monitor that displays in only one color, such as green or amber, as opposed to a color monitor which can display in several colors. MS-DOS An operating system from Microsoft. See DOS, Operating system. Operating system A collection of programs that allow a computer to control its operations. The operating system determines how programs run on the computer and supervises all input and output-for example, MS-DOS. - Page 63 Read To copy data from one area to another. For example, when you open a text file stored on disk, the computer reads the data from the disk and displays it on the screen. Read/write head The physical device inside a disk drive that reads and records data on the magnetic surface of a disk.
-
Page 64: Write-Protect Notch
Tracks Addressable concentric circles on a diskette, resembling the grooves on a record, which help to divide the diskette into separate accessible areas. There are 40 tracks on each side of a double-sided, double-density disk- ette and 80 tracks on each side of a double-sided, high-density diskette. Write To store data on a disk. -
Page 65: Index
Access slot cover, 3-5 AC power inlet, 1-4 AC power outlet, 1-4 Alt, 2-2 Air circulation, 1-2 Application programs, 2-1-2 ARCHIVE utility, 2-10 Arranging components, 1-3 ASCII, 1-12, C-1 Auto-dial modems, 1-5, 3-1 Auxiliary outlet, 1-4 Back panel screws, 3-2, 3-7 BACKUP command, 2-10 Backup copies daily, 2-9... - Page 66 Electromagnetic interference, 1-3 End key, 2-2 Enter key, 2-2 Environmental conditions, 1-2 Environmental requirements humidity, B-2 temperature, B-2 Epson printers, 1-10 Index-2 Equity I+ cable connections, 1-6 components, arranging the, 1-2 disk drive, See Disk drive disk, See Disk electromagnetic interference, 1-17...
- Page 67 Hard disk drive care of, 2-9 internal, 2-9 partition, 2-11 problems, 4-3 using, 2-10 Home key, 2-2 HDSIT, 2-7 IBM-PC character set, 1-12, 2-1 diskette format, compatibility, 2-9 Interrupt, 3-1 Initial system testing message, 1-19 Input/output ports, 1-4, 1-16 Insert key, 2-2 Inserting and removing disks, See Disk Interfaces...
- Page 68 Option cards access slot cover, 3-5 connector pins, 3-4 connector slot, 3-4 external device connector, 3-5 installing, 1-13, 3-1-8 long, 3-3 metal cover plate, 3-5 panel, back, 3-1 post-installation setup, 3-7 problems, 4-4 retaining bracket, 3-5 retaining screw, 3-3 removing, 1-18, 3-7 slots, 1-5, B-1 washer, 3-4 Outlet...
- Page 69 System arrangement, 1-3 disk, C-6 testing message, 1-19 Tab key, 2-2 Timer, B-1 Troubleshooting, 4-1-4 Turning off the computer, 2-4 Turning on the computer, 1-17-19 Unpacking the Equity I+, 1-1 Using the Equity I+, 2-1-12 Video monitor, See Monitor Write-protect disks, 2-8-9 notch, 2-8 switch, 2-9...
- Page 70 ® EPSON Diagnostics for the Equity Y 1 4 4 9 9 1 0 2 2 0 0...
-
Page 71: Copyright Notice
OT hy any rrx~ns, electromc, mechnmcal, photocopying, rccordmg or other- wsc, without the pr~x women permlss~on of Seiko Epson Corporation. No patent lability LS assumed wth respect to the use of informanon contained hcrem. ‘Whllc everv precaution has been taken in the preparation of this pubhcatul, Seiko Epson Corporation a~sumcs nc respons~hil~ty for errors or onus- Sims. - Page 72 Introduction ........Running the Diagnostics ..Starting the Diagnostics .
- Page 73 Color Graphics Adapter and CRT Check ... Color graphics adapter check ....Attribute check .
- Page 74 Error Codes and Messages ..... Power-on Diagnostics ....System Device Check .
-
Page 75: Introduction
This manual describes how to initialize your Epson it is assembled, and how to test the condition of your computer and peripherals. To set up and test your system, you use a set of programs called diagnostics. The five main diagnostics programs are:... - Page 76 Chapter 1 describes how to start the diagnostics programs, select options from the menus, and exit the programs. Chapters 2 through 6 describe each of the five programs individually, and Chapter 7 describes the three system- dependent utilities (HELP ROMBIOS, and SYSTAT). Appendix A lists the error codes and messages that may appear during diagnostics checks, and Appendix B explains the power-on diagnostics messages.
-
Page 77: Running The Diagnostics
Running the Diagnostics This chapter describes how to start and use the diagnostics programs. Starting the Diagnostics To start the diagnostics programs, follow these steps: Turn off the computer and wait for a few seconds. Place the diagnostics diskette in drive A, and secure the disk drive. Turn on the computer. -
Page 78: The Operation Menu
The OPERATION MENU After the power-on self test completes successfully, the diagnostics start and you see the OPERATION MENU: OPERATION MENU 1 - S e t u p - Format hard disk ; - Format diskette 4 - System diagnostics 5 - Prepare hard disk for moving j2 - Exit to DOS fur more utilities Enter selection number:... -
Page 79: Diagnostics And Ms-Dos Commands
If you have run a diagnostics program, you see this selection on the OPERATION MENU: 0 - Exit and reset In this cast, when you press 0 and selecting this option, remove the diagnostics diskette from drive A and insert your system diskette so the system can hoot normally. If you want to hoot from your hard disk, make sure no diskette is inserted in drive A. - Page 80 You can also execute the commands directly from the diagnostics diskette, without loading diagnostics. For example, if you are logged onto drive C, and you want to prepare your hard disk for moving, follow these steps: Insert the diagnostics diskette into drive A. At the C) prompt, type: A:HDSIT 3.
-
Page 81: Setting Up The System
Setting Up the System This chapter describes how to change the information stored in the computer’s CMOS RAM. You can select Setup from the OPERATION MENU, or you can execute the MS-DOS SETUP command. You must run the Setup program when you turn on your computer for the first time. - Page 82 When you start Setup, the main menu is displayed: Select options from this menu using t and 1 to move the cursor block. When the selection you want is highlighted, press Each option on the main menu (except Exit) displays another menu of choices.
-
Page 83: Setting The Real-Time Clock
When you finish using the Setup program, select the Exit option from the main menu. The program displays a list of the current settings you just made. Check the list before placing the settings in CMOS RAM. Below the list you see this menu: m Change settings m Exit without saving ** EXIT AND SAVE **... - Page 84 To set the real-time clock, follow these steps: On the main menu, press 1 to move the cursor block to Real-time clock and press Enter. 19:lt5:55 12-31-1986 To set the time, move the cursor to Time and press hh:mm:ss Enter the time in the exact form shown in the box, using two digits for each part;...
-
Page 85: Changing Serial Port (Rs-232C) Settings
Changing Serial Port (RS-232C) Settings Use the Primary serial port and Secondary serial port options to change the default parameters for the serial ports installed in your computer. The primary serial port is the one that you refer to in MS-DOS as COM1: - normally the built-in serial port. - Page 86 Move the cursor to the desired communication speed and press To set the type of parity check, move the cursor to Parity and press The screen displays: Enter. None Even Move the cursor to the correct type of parity check and press To change the data length, move the cursor to The number changes to either 7 or 8, whichever was not displayed Enter.
-
Page 87: Formatting A Hard Disk
Formatting a Hard Disk This chapter describes how you check or format a hard disk drive after installation. After the hard disk is formatted, it can be partitioned and for- matted for a particular operating system. Formatting destroys all data on the hard disk, in all partitions, so use this program with extreme care. - Page 88 The first two options format a hard disk. Normally you use option 1, Conditional format (Normal). This option automatically locates any bad tracks that are Pug& by the manufacturer and marks them so that they are never used. Option 2, Unconditional format, requires you to enter the list of bad tracks.
-
Page 89: Conditional Format (Normal)
Conditional Format (Normal) Use this option to format the hard disk. All flagged tracks are marked so that they are never used. To start the Conditional format, press 1 and then The program starts to scan the disk to find all tracks flagged as bad, starting from the innermost cylinder of the disk. - Page 90 If you cancel formatting at either stage, you see these messages: Format cancelled. Press ENTER to return to the menu. If you continue with formatting, you see: Now formatting . . . When formatting is complete, any bad tracks are flagged, and you see a series of messages like these: Format finished.
-
Page 91: Unconditional Format
Unconditional Format Use this option to format your hard disk when you want to enter the list of bad tracks before formatting begins. The main difference between uncon- ditional and conditional formatting is the way in which bad tracks are identi- fied. -
Page 92: Destructive Surface Analysis
To add a bad track, follow these steps: Press You see this prompt: Enter cylinder number (1 - xxxx): Type the number of the cylinder containing the missing bad track, and press You see this prompt: Enter. Enter head number ($3 - yy): Type the head number for the bad track, and press mum valid cylinder and head numbers ( the type of the hard disk. - Page 93 This test operates by a complex process of writing, reading, and information on every track of the hard disk, except for tracks that are already flagged as bad tracks. To start the test, press Analyze Hard Disk Read/Save/Write/Read/Restore/Read check for all tracks...
-
Page 94: Non-Destructive Surface Analysis
To flag the error tracks as bad, press the tracks as they are flagged. You see these messages: Flagging bad tracks... Cylinder is 237, head is 2 Press ENTER to return to the menu. Press to return to the HARD DISK FORMAT MENU. Enter Non-destructive Surface Analysis The Non-destructive surface analysis is slightly simpler than the... -
Page 95: Formatting A Diskette
Formatting a Diskette This chapter briefly describes how to format a diskette with diagnostics. Normally, you format a diskette using the MS-DOS FORMAT command. However, if you are running diagnostics and decide to test your floppy drives (which requires a formatted diskette), you can select option 3, Format disk- ette, from the OPERATION MENU. -
Page 96: Performing System Diagnostics
Performing System Diagnostics This chapter describes how to check the operation of the main unit and peripheral devices of your Equity I+. You check these devices using System diagnostics, option 4 on the OPERATION MENU. Always run diagnostics after adding or removing optional devices, or if you are unsure whether a device is performing correctly. -
Page 97: Using The System Diagnostics Program
Using the System Diagnostics Program When you start the System diagnostics, the computer checks: The setting of the DIP switches on the front panel The positions of the internal jumpers The peripheral devices that are connected to the system. After these items are checked, you see a list of the devices available for testing. -
Page 98: Modifying The Device List
Modifying the DEVICE LIST If an installed device is missing from the DEVICE LIST, it is important that you add it to the list and test it carefully. In response to this prompt: Is the DEVICE LIST correct (Y/N)? press N followed by Enter. -
Page 99: Selecting A Test
Type the number of the item you wish to add and press disappears from the Additional DEVICE LIST on the screen. You can add as many devices as necessary. When you finish adding devices, press 0 and Enter Note: Even if you have both monochrome and color monitor video cards installed, you can only test the monitor that is currently selected by DIP switches 1-5 and 1-6 on the front panel. -
Page 100: Resuming From An Error
You can specify that the test be performed one time only or any number of times in the range from 1 to 9999. Running a test multiple times is for reliability testing of essential functions only; in most cases, running a test only once is sufficient. -
Page 101: System Board Check
They ensure that the CPU instruction set is functioning correctly. If an error is reported, write down the error code and message, or print them out, and contact your Epson dealer. Attempting to correct system board errors yourself may violate your warranty agreement. -
Page 102: United Kingdom
The final message is usually: KB OK If an error is reported, write down the error code and message, or print them out, and contact your Epson dealer. Attempting to correct memory errors yourself may violate your warranty agreement. Keyboard Check Use this option to check the operation of the keyboard. -
Page 103: Monochrome Display Adapter And Crt Check
You can find diagrams of all the international keyboard layouts in the MS-DOS manual. If any key is incorrect, press and message, or print them out , and contact your Epson dealer. Monochrome Display Adapter and CRT Check Use this option to check the operation of a monochrome display adapter and monitor. -
Page 104: Monochrome Adapter Check
If they are still incorrect, press Enter. Contact your Epson dealer to make sure that your monitor is able to display all the attributes available, and to ensure that your monitor cable is not damaged. -
Page 105: Character Set Check
Character set check To check your character set, press 3 and then fonts that are included in the internal character generator are displayed. Check the characters displayed on your screen against this illustration: After checking the character fonts, respond to the prompt: Is the display correct (Y/N)? If the characters displayed match the illustration, press Y and find a problem with the characters on the screen, press N and then... -
Page 106: 18 - Sync Check
Sync check This test is provided for service purposes only. If you accidentally select this option, press any key to end the test. Run all above checks To run all the tests on the menu in sequence, press When you choose this option, all checks for the monochrome adapter and CRT are performed automatically in sequential order. -
Page 107: Attribute Check
Enter If the colors are not correct, adjust the controls on your display monitor. If they are still incorrect, press Contact your Epson dealer to verify any monitor problems. 5-12 1 ad if the display is correct. N and Enter. -
Page 108: Character Set Check
Character set check Is the display correct (Y/N)? After checking the character fonts, respond to the prompt: Is the display correct (Y/N)? If the characters displayed match the illustration, press Y and then Enter. If the characters on the screen, press N an‘] Enter to you find a problem with the display the error message. -
Page 109: 40-Column Character Set Check
40-column character set check To check your 40-column character set, press 4 and then character fonts that are included in the internal character generator are displayed. Check the characters displayed on your screen against this illus- tration: After checking the character fonts, respond to the prompt: Is the display correct (Y/N)? If the characters displayed match the illustration, press find a problem with the characters on the screen, press... -
Page 110: 640X200 Graphics Mode Check
If any colors are displayed incorrectly, first check the adjustment of your monitor, and make sure that both ends of the cable are plugged in firmly. If a problem still exists, press 640x200 graphics mode check check your h-f@dO@ The screen displays three patterned squares against a black background as shown below. -
Page 111: Screen Paging Check
Screen paging check To check the screen paging of your monitor, press The video RAM on the color graphics adapter is divided into eight independent display pages. This test checks the eight pages by first filling all eight with a number corresponding to the page, and then displaying each page in turn. -
Page 112: Color Video Check
If you do not have a light pen attached, press press You see this prompt: Enter. PLACE LIGHT PEN ON CENTER OF WHITE Touch the center of the white block on the screen with the light pen. When the light pen is correctly positioned, the block mows to another part of the screen for a second test. -
Page 113: Synccheck
Sync check This test is provided for service purposes only. If you accidentally select this option, press any key to end the test. Run all above checks To run all the tests on the menu in sequence, press When you choose this option, all checks for the color adapter and CRT are performed automatically in sequential order. -
Page 114: Random Seek Check
Press and then If any errors occur, record the error code and message and contact your Epson dealer. Always have the floppy disk drive serviced by your Epson dealer. Sequential seek check This test checks the ability of the read/write heads to locate any part of the diskette. -
Page 115: Speedcheck
Use only a formatted test. Any data present may be erased. If using drive A, remove your Diagnostics Disk. Enter Y to start this check. Enter N to return to the menu. Make sure the blank diskette you prepared is in drive A, then press Enter. -
Page 116: Math Coprocessor Check (8087)
When you choose this option, all checks for the floppy disk drive(s) and controller are performed automatically in sequential order. Although you do not start each test, you must still supply the appropriate responses to progress from one test to the nest. Math Coprocessor Check (8087) Use this option to check the operation of the 8087 math coprocessor if you have one installed in your computer. -
Page 117: Parallel Port (On Video Adapter) Check
Parallel Port (on Video Adapter) Check Use the Parallel port (on video adapter) check to test the functions of the primary port. This tests either the built-in port, if it is set up to act as the primary port, or the parallel port on a monochrome adapter (such as the IBM monochrome display and printer adapter) if you have one installed in your computer. -
Page 118: Alternate Serial Port Check
Each baud rate is tested in turn, and the display informs you of the progress of the test. If the port does not become ready correctly, a timeout error occurs. If any data received does not match the data sent, a verify error occurs, and the computer reports the transmitted and received data at the time of the error. -
Page 119: Hard Disk Drives And Controller Check
The bit-image data is sent to the printer using a command (ESC K) compatible with Epson and IBM printers. If this pattern is printed correctly, you can use the MS-DOS GRAPHICS program to print out copies of graphics screens. -
Page 120: Seek Check
When you select option 17 from the DEVICE LIST, you see this menu: HARD DISK DRIVE(S) AND CONTROLLER CHECK MENU Seek check Write, read check - Error detection. and correction - Read, verify check 5 - Run all above checks $? - Eqit Enter selection number: If you specified to run the hard disk drive check multiple times, this... - Page 121 Note: This test destroys all data on the innermost cylinder of the selected hard disk drive. This cylinder is reserved for diagnostics, and is never used for storage by MS-DOS. Therefore, data created by MS-DOS is not destroyed. Select option 2 from the menu to start this test. You see these messages: The data on the highest physical cylinder may be destroyed by this check.
-
Page 122: Run All Above Checks
Press and then Enter menu is displayed. An error occurs only if the drive is malfunctioning. In this case, back up all your files, and have the drive serviced immediately. (The drive may be corrupting your data.) Read, verify check This test reads and verifies data from all tracks of the disk, checking each cylinder and using both heads. -
Page 123: Moving The Hard Disk
You can also secure the heads on your hard disk by executing the MS-DOS HDSIT command. Note: If you are using a non-Epson hard disk that does not have a pre- defined cylinder for securing the heads, you may need to specify the cylinder number when giving the HDSIT command. -
Page 124: System-Dependent Utilities
System-dependent Utilities This chapter describes the utilities that are included on your diagnostics diskette. These utilities are used exclusively by your Equity I+ system: HELP ROMBIOS SYSTAT Each utility is an MS-DOS command. You can copy the commands to your hard disk or to a directory on another floppy disk. - Page 125 When the menu is displayed, you see this prompt at the bottom of the screen: ?l-++ Select command name, Enter to display command, Esc to Exit Use the cursor keys to select a command name. (You can only select one command name at a time from the menu.) When the correct command is highlighted, press Enter.
-
Page 126: The Rombios Utility
APPEND to locate the directory that contains HELP.TXT The ROMBIOS Utility Use this command to display the Epson name and ROM BIOS version number of the computer you are using. Because computer systems are frequently updated, it is a good idea to occasionally check with your dealer for update information. - Page 127 Examples Type SYSTAT only and press see a screen similar to this: Enter. You To display the next screen page of information, press You see a Enter. screen similar to this:...
- Page 128 To exit the SYSTAT program, press ESC. Messages Setup error is found SYSTAT found an error in the way your computer is set up. Use the Setup program to correct your system parameters. Checksum error found This error displays if you run SYSTAT before using Setup to define the system parameters.
-
Page 129: System Board
Error Codes and Messages This appendix lists all the error codes and messages that may appear during diagnostics checks. Table A-1. Error codes and messages Error code System board Memory Keyboard Monochrome display adapter and CRT Appendix A Message 8088 CPU ERROR 27128 ROM CHECKSUM ERROR 8254 TIMER COUNTER REGISTER ERROR COUNTER ERROR... -
Page 130: Color Graphics Adapter And Crt
Table A-l. Error codes and messages (continued) Error code Color graphics adapter and CRT Floppy disk drives and controller Math coprocessor (8087) Parallel port Parallel port on video adapter Slgl Message V-RAM ERROR ATTRIBUTE ERROR CHARACTERSET ERROR 40-COLUMN CHARACTERSET ERROR GRAPHICS MODE ERROR 640 x 200 GRAPHICS MODE ERROR... -
Page 131: Hard Disk Drives And Controller
Table A-1 Error codes and messages (continued) Message Error code Serial port (RS-232C) ERROR DTR DSR, DSR ALWAYS HIGH/LOW 11g1 ERROR RTS CTS, CTS ALWAYS HIGH/LOW 11g1 11p2 TIMEOUTERROR VERIFYERROR 1183 Alternate serial port ERROR DTR DSR, DSR ALWAYS HIGH/LOW 12p1 12g1 ERROR RTS CTS, CTS ALWAYS HIGH/LOW... -
Page 132: Power-On Diagnostics
Power-on Diagnostics The built-in memory (ROM) of your computer contains a series of diag- nostics programs. These programs are run automatically by the system every time you turn on the power. The diagnostics programs check the internal devices such as ROM, RAM, keyboard controller, timer, video controller, and floppy disk driver. -
Page 133: Clock And Cmos Ram Check
Clock and CMOS RAM Check When the system device check is completed successfully, the computer checks the timer and CMOS RAM. If the information contained in the RAM does not match the actual system installation, you see this message: 161~System options not set (Run SETUP in DIAGNOSTICS) The information stored in the CMOS RAM must be corrected. -
Page 134: Floppy Disk Drive Seek Check
Floppy Disk Drive Seek Check The computer checks its floppy disk drives by searching the rend/write heads for any malfunction. If any seek errors are found, you see this message: 6@1-Diskette error If this error occurs, confirm that the system diskette is inserted into drive A. If this number still appears after you insert the diskette, you may then want to run the System diagnostics and select option 6 from the DEVICE LIST. - Page 135 Adapter, Color graphics, 5-11-12 Monochrome display, 5-8-9 Alternate serial port check, 5-23 Analysis, hard disk, Destructive surface, 3-6 Non-destructive surface, 3-8 Attribute check, Monochrome adapter, 5-9 Color graphics adapter, 5-12 Bad tracks, hard disk, 3-2-8 Board checks, system, 5-6 Boot system, 1-4, 2-2-3 Caps Lock, 5-8 Character set checks, Color graphics adapter, 5-13-14...
- Page 136 FDISK, 5-26 Flagged tracks, 3-2-8 Floppy disk, Controller check, 5-18-21 Drive check, 5-18-21, B-3 Formatting, 4-1 Random seek check, 5-19 Sequential seek check, 5-19 Speed check, 5-20, B-3 Write, read check, 5-19 Format, Diskette, 4-1 Hard disk, 3-1-8 HARD DISK FORMAT MENU, 3-1-2, 3-4, 3-8 Graphics mode check, 5-11, 5-14-15 Hard disk,...
- Page 137 OPERATION MENU, 1-2-3, 2-1, 2-3, 3-1, 4-1, 5-1-2, 5-26, 6-1, 7-1 Paging, screen check, 5-16 Parallel port check, 5-21-22 Power-on diagnostics (self test), 1-1, B - 1 - 3 Primary serial port, 2-2, 2-5-6 Printer interface check, 5-21-22 Printer, dot-matrix, 5-23-24 Program, Setup, Intro-1, 1-2-3, 2 - 1 - 6 RAM,...
- Page 138 Unpacking your Computer Arranging the Components Connecting the Video Monitor Connecting a Printer Choosing a Location Connecting the Power Cord Connecting the Keyboard Setting the DIP Switches Turning on the Computer...
Need help?
Do you have a question about the EQUITY Y14499113001 and is the answer not in the manual?
Questions and answers