Advertisement
Quick Links
Chucks are heavy! Get assistance when
installing or removing the chuck from the
lathe. Wear heavy duty leather boots for
foot and toe protection, and keep hands and
fingers away from all pinch points. Ignoring
this warning can lead to a severe crushing
injury or finger amputation!
Specifications
•
OD Clamping Range ... 0.32"-6.30" (8-160mm)
•
ID Clamping Range .. 2.17"-5.90" (55-150mm)
•
Outer Diameter ........................6.57" (167mm)
•
Maximum Chuck Key Torque .........65 ft/lbs*
•
Maximum Jaw Gripping Force ....... 6744 lbs*
•
Maximum Speed ......................... 4000 RPM**
•
Two-Piece Hardened Steel Jaws ............... Yes
•
Plain Back Mounting ................................. Yes
•
Jaw Mounting Cap Screw Torque ......29 ft/lbs
•
Grease Fitting Lubricated ......................... Yes
•
Steel Construction ..................................... Yes
•
Chuck Weight ......................................... 22 lbs
•
Origin ................................................... Taiwan
* Maximum handle torque and gripping force
is achieved at full jaw and scroll gear engage-
ment only.
** The maximum speed above is ONLY possible
when the chuck jaws and the workpiece are in
complete rotational symmetry, and when the
workpiece is within safe weight limits for the
lathe and chuck.
If you need help with your new item, contact
us at: (360) 734-1540 • FAX: (360) 676-1075
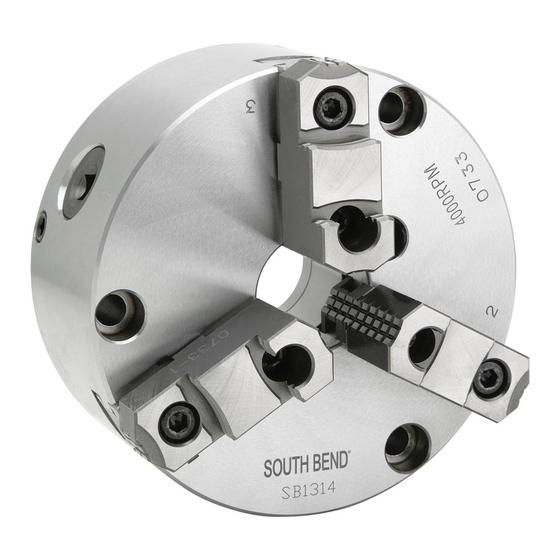
Instruction Sheet
Model SB1314
High Precision 6" Lathe Chuck
Hardened steel jaws
for durability and
extreme clamping
force and grip
Designed for
up to
4000 RPM
Universal
plain-back
mounting
Figure 1. Features.
Installation
1.
DISCONNECT LATHE FROM POWER!
2.
Mount the back plate on the spindle.
3.
Accurately measure the inside of the back
relief bore on the chuck. This dimension is
critical and should be ± 0.001''.
4.
Face and true the diameter of the back plate.
Make passes across the face until its entire
surface has been cut.
5.
Turn a shoulder that is 0.015'' smaller in
diameter than that of the chuck relief bore.
The shoulder height must also be tall enough
so when the chuck is mounted and is being
aligned, the chuck alignment screws have a
surface to jack against.
Grease fitting for
complete internal
lubrication
Two-piece
jaws for speedy
internal/external
clamping changes
Four chuck
alignment set
screws
-1-
Advertisement

Related Manuals for South bend SB1314


Summary of Contents for South bend SB1314
-
Page 1: Specifications
Instruction Sheet Model SB1314 High Precision 6" Lathe Chuck Grease fitting for Hardened steel jaws complete internal for durability and lubrication extreme clamping Chucks are heavy! Get assistance when force and grip installing or removing the chuck from the lathe. Wear heavy duty leather boots for Designed for foot and toe protection, and keep hands and up to... - Page 2 I N S T R U C T I O N S Model SB1314 Mfg. Since 3/10 Operation and Safety Remove the back plate from the lathe and place it on a workbench. Chuck Key Safety: • A chuck key left in the chuck can become a dangerous projectile Set the chuck on the back plate, and roughly when the spindle is started.
- Page 3 I N S T R U C T I O N S Mfg. Since 3/10 Model SB1314 Care & Maintenance Always disconnect machine from power before performing maintenance or serious personal injury may result. For optimum performance from your chuck, Note: Each jaw is marked follow the maintenance schedule below, and 1, 2, or 3 to correspond...
-
Page 4: Troubleshooting
I N S T R U C T I O N S Model SB1314 Mfg. Since 3/10 Troubleshooting If you need replacement parts, or if you are unsure how to do any of the solutions given here, feel free to call us at (360) 734-1540. Symptom Possible Cause Possible Solution...
Need help?
Do you have a question about the SB1314 and is the answer not in the manual?
Questions and answers