Table of Contents
Advertisement
Available languages
Available languages
Operator's IVlanual
Fr MRN °
iViodel N o. 580.752190
HOURS: IVlon.- Fri. 8 a.m. to 5 p.m. (CT)
WARNING
Before using this product, read this
manual and follow aii Safety Rules
and Operating Instructions.
ADVERTENCiA
Antes de utiiizar el producto, lea este
manual y siga todas las Reglas de
Seguridad e Instrucciones de Uso.
,, Safety
,, AssernbJy
,, Operation
,, Maintenance
,, Parts
,, EspaNoJ, p. 30
This pressure washer is rated in accordance to the Pressure Washer Manufacture Association
(PWMA) standard PW101 (Testing and Rating Performance of Pressure Washers).
Esta limpiadora a presi6n est_ clasificada conforme a la norma PWI01 (comprobaci6n y clasificaci6n de rendimiento de limpiadoras
a presi6n) de la Asociaci6n de fabricantes de bombas a presi6n (Pressure Washer Manufacture Association, PWMA).
Sears, Roebuck and Co., HoffrnanEstates,IL 60179 U.S.A.
Visit our Craftsman website: www.craftsman.com
Part No. 205424GS Draft C (08/25/2008)
O
Advertisement
Table of Contents

Related Manuals for Craftsman 580.752190


Summary of Contents for Craftsman 580.752190
- Page 1 Esta limpiadora a presi6n est_ clasificada conforme a la norma PWI01 (comprobaci6n y clasificaci6n de rendimiento de limpiadoras a presi6n) de la Asociaci6n de fabricantes de bombas a presi6n (Pressure Washer Manufacture Association, PWMA). Sears, Roebuck and Co., HoffrnanEstates,IL 60179 U.S.A. Visit our Craftsman website: www.craftsman.com Part No. 205424GS Draft C (08/25/2008)
-
Page 2: Important Safety Information
If this pressure washer fails due to a defect in material or workmanship within one year from the date of purchase, return it to any Sears store, other Craftsman outlet, or Sears Parts & Repair Center in the United States or Canadafor free repair (or replacement if repair proves impossible). - Page 3 A. WARNING: The engine exhaustfrom this product A. WARNING: Fuel and its vapors are extremely contains chemicals known to the State of California to flammable and explosive. cause cancer, birth defects, or other reproductive harm. Fire or explosion can cause severe burns or death.
- Page 4 NOTICE:High pressure spray may damage fragile items _i, WARNING: The high pressure stream of water that this including glass. • DONOT pointspraygun at glasswhenusingred(0°) spraytip. its underlying tissues, leading to serious injury equipment produces can cut through skin and • NEVER aimspraygun at plants. and possible amputation.
-
Page 5: Know Your Pressure Washer
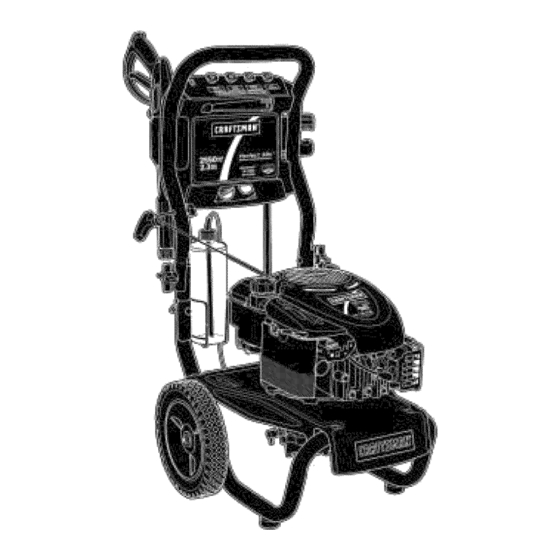
KNOWYOURPRESSURE W ASHER Read the Operator's Manual and safety rules before operating your pressurewasher. Comparethe illustrations with your pressure washer to familiarize yourself with the locations of various controls and adjustments. Savethis manual for future reference. A - Spray Gun-- Controls the application of water onto IVl- Bottle Bracket -- Cleaningsolution bottle fits in wire form bracket here. -
Page 6: Assembly
5. If any parts are missing or damaged, call the pressure washer helpline at 1-888-222-3136. ASSEMBLING PRESSURE WASHER Your Craftsman pressure washer will need assembly before operation: insert multi-colored Quick Connect spray tips and other Fill out and send in registration card. - Page 7 Attach rope guide (A) through handle with plastic knob Standard SiphonTube (B). Tighten by hand. Route engine recoil rope through Cleartube with filter: guide. When using the clear siphon tube, dilute 1 part PerfectMix Extreme Concentrate to 16 parts water (4 oz of concentrate makes 1/2 gallon of mix.) Attach Project Pro®...
-
Page 8: Connect Hose And Water Supply To Pump
AddFuel CAUTION! Alcohol-blended fuels (called gasohol, ethanol or methanol) can attract moisture, which leadsto separation and Fuel mustmeet these requirements: formation of acids during storage. Acidic gas can damage the fuel system of an engine while in storage. Clean, fresh, unleaded gasoline. A minimum of 87 octane/87 AKI (91 RON). -
Page 9: Checklistbefore Starting Engine
Attach other end of high pressure hose to high pressure A, WARNING: Risk of eye injury. outlet on pump. Tighten by hand. Spray can splash back or propel objects. • Always wear safety goggles when using this equipment or in vicinity of where equipment is in use. -
Page 10: Pressure Washer Location
HOWTOUSEYOURPRESSURE W ASHER To Start YourPressureWasher To start your engine-powered pressure washer for the first If you have any problems operating your pressure washer, time, follow these instructions step-by-step. This information please call the pressure washer helpline at 1-888-222-3136. also applies whenever you start the engine after you have let PressureWasher Location the pressure washer sit idle for at least a day. -
Page 11: How To Stop Your Pressure Washer
IMPORTANT: Before starting t hepressure washer, besure A. WARNING: The high pressure stream of water that this 'ouarewearing adequate safety g oggles. equipment produces can cut through skin and A. WARNING: Risk of eye injury. its underlying tissues, leading to serious injury and possible amputation. -
Page 12: How To Use Accessory Tray
IMPORTANT: Spray g untraps high water p ressure, even Foflow these instructionsto changespray tips: when engine i sstopped andwater is disconnected. Puff back collar on quick-connect and pull current spray tip off. Store spray tips in holder provided on the How to Use Accessory Tray accessory tray. - Page 13 Make sure garden hose is connected to water inlet. NOTICE: Contact with the hot muffler can damage detergent siphoning tube. Checkthat high pressure hose is connected to spray gun • When inserting the siphon into a detergent solution bottle, route and pump.
- Page 14 ALWAYS point spray gun in a safe direction push red Cleanin9 Detergent Siphoning Tube button and squeezespray gun trigger to release retained If you used the clear detergent siphoning tube, you must high water pressure. flush it with clean water before stopping the engine. IMPORTANT:Spray gun traps high water pressure, even Place detergent siphoning tube/filter in a bucket full of when engine is stopped and water is disconnected.
-
Page 15: Operation
EN61NE TECHNICAL i NFORMATiON PRODUCT S PECIFICATIOHS This is a single cylinder, L-head, air cooled engine, it is a low Pressure Washer Specifications emissions engine. Max Outlet Pressure ....... 2,550 PSi Jnthe State of CaJJfornia, M odeJ120000 engines are certified Max Flow Rate...... -
Page 16: Owner's Responsibilities
OWNER'SRESPONSiBiLiTiES Emissions Control Maintenance, replacement, or repair of the emissions Follow the hourly or calendar intervals, whichever occurs controldevices and systemsmay be performedby any non- first. More frequent service is required when operating in adverse conditions noted below. road engine repair establishment or individual. However, to obtain "no charge"... -
Page 17: Engine Maintenance
Check Gun and Spray Tip Extension O-Ring Maintenance Purchasean O-Ring RepairKit at your local Searsor by calling Examinehoseconnectionto spraygun and makesure it is 1-800-4-1VlY-HOME (469-4663) or online at www.sears.com, it secure.Testtrigger by pressingit and makingsure it springs back into placewhenyou releaseit. Do not depress red button is not includedwith the pressurewasher.This kit includes and test trigger. -
Page 18: Service Air Cleaner
CheckingOil Level Tip your pressure washer to drain oil from oil fill into a suitable container making sure you tip your unit away Oil level should be checked prior to each use or at least every from spark plug. When crankcase is empty, return 8 hours of operation. -
Page 19: After Each Use
AFTEREACHUSE Checkelectrode gap with wire feeler gauge and reset spark plug gap to recommended gap if necessary (see Water should not remain in the unit for long periods of time. Specifications). Sediments or minerals can deposit on pump parts and "freeze"... -
Page 20: Winter Storage
WINTER STORAGE Change O il While engine is still warm, drain oil from crankcase. Refill with recommended grade. See ChangingEngine Oil. NOTICE: You must protect your unit from freezing Oil Cylinder Bore temperatures. • Failure to do so will permanently damage your pump and render Remove spark plug and pour about 1/2 ounce (15 ml) of your unit inoperable. - Page 21 Problem Cause Correction Low pressure spray tip installed. Replacewith high pressure spray tip. Water inlet is blocked. Clearinlet. Inadequate water supply. Provide adequatewater flow. Straighten inlet hose, patch leak. inlet hose is kinked or leaking. Pump has following problems: Checkand clean inlet hose strainer. Clogged inlet hose strainer.
- Page 22 CRAFTSMAH2550 PSi Pressure Washer 580.752190 Main Unit m ExpJodedView ..... // / /' //...
- Page 23 CRAFTSIVJAH 2550 PSi Pressure Washer 580.752198 Main Unit m Parts List item Part # Description item Part# Description 205909GS BASE,w/Vib Mounts 200595GS EXTENSION, Q C M204257GS HANDLE 204484GS WIREFORM KiT, Nozzles 205911GS KiT, Billboard w/Clips & Decals 204971GS 195964GS Clips, Tree 198841GS Nozzle,Soap 196006GS...
- Page 24 EHGIHE, Bri99s & Stratton, 126T02 - Exploded View 684 2 842 ___ 24 1_ 10'_ 404 Q 15 8 22 _ 443 _, 529 _::P 9_0 '_...
- Page 25 EHGIHE, Bri99s & Stratton, 126T02 - Exploded View 633 ® 1o8_ 2 3_1_ 977 CARBURETOR GASKET SET 121 CARBURETOR OVERHAUL KIT 670 0 13, Oz 276 0 633® 104 ':::% 617 633 ® 1_ _ _7% o_o 1_ 127_276 633A ® 65 _' 58 ____ 1386 13887...
- Page 26 EHGIHE, Briggs & Stratton, 126T02 - Parts List Description item Part # Description item Part # 791291 Housing-Blower 697322 Cylinder Assembly 691108 Screw (Blower Housing) 399269 Kit- Bushing/Seal (Magneto Side) 790836 Shield-Cylinder 299819S Seal-Oil (Magneto Side) 690345 Screw (Cylinder Shield) 493279 Sump-Engine 690662...
- Page 28 Sears, Roebuckand Co., D.S.A. (Sears), the CaliforniaAir ResourcesBoard(CARB)and the UnitedStates EnvkonmentalProtectionAgency(U.S.EPA) Emissions ControlSystemWarrantyStatement (Owner'sDefect WarrantyRightsand OhligaUons) The California Air Resources Board (CARB), U.S. EPA and Sears are • Carburetor and internal parts pleased to explain the Emissions Control System Warranty on your •...
-
Page 29: Emission Information
Emission information Certain engines wiii be certified to meet the United States Environmental Protection Agency (USEPA) Phase2 emission Engines that are certified to meet the California Air Resources standards. For phase 2 certified engines, the Emissions Board (CARB) Emission Standards must display information Compliance Period referred to on the Emissions Compliance regarding the Emissions Durability Period and Air index. - Page 30 Si la limpiadora a presiOnfalla debido a defectos de materiales o mano de obra en el plazo de un a_o a partir de la fecha de compra, devuOlvalaa cualquier almacOnSears, punto de venta de Craftsman o centro de reparaciOny repuestos de Sears de los Estados Unidos o CanadO, p ara su reparaciOngratuita o, en caso de que _sta no sea posible, para su sustituciOn.
- Page 31 A. ADVERTENCIA:El escape del motor de este producto A. ADVERTENCIA: L a gasolina y sus vapores son extremadamenteinfiamables y contiene elementos quimicos reconocidos en el Estado de California pot producir c_ncer, defectos de nacimiento u explosivos. El fuego o una explosi6n pueden causar otros da_os de tipo reproductivo.
- Page 32 A. ADVERTENCIA: El uso de limpiadora a presiOn puede A. ADVERTENCIA: Chispear involuntario puede tener ',, lib como resultado el fuego o el golpe el6ctrico. resbalosas. crear los charcos y superficies Ei retroceso de la pistola rociadora CUANDOAJUSTEO HAGAREPARACIONES A SU MAQUINA puede provocar caidas.
- Page 33 CONOZCA SU MAQUINASISTEMA DE LllViPIEZA Lea el Manual del Operafio y las reglas de segufidad antes de poner en marcha su sistema de limpieza. Compare las ilustraciones con su sistema de limpieza para familiafizarse con las ubicaciones de los diferentes controles y ajustes. Guarde este manual para referencias futuras.
-
Page 34: Contenido De La Caja
ASada aceite al motor. Su sistemade limpieza requierede ciertoensamble y estar_, lista paraser usadoQnicamente d espu_s de haberdepositado el ASada gasolina al tanque de combustible. combustible y el aceiterecomendado. Conecte manguera a alta presi6n a pistola rociadoray a bomba. Si tiene problemas c onel ensamble desum_quina limpiadoraa Conecte el suministro de agua a bomba. - Page 35 Fije la guia de la cuerda (A) al asa con el pomo de pl_.stico Tubo de inyecci6nest_ndartransparente negro (B). Apfiete a mano. Pasela cuerda del arrancador por el Tubo transparente con filtro: fijador. Cuando utiliceel tubo de inyecci6n transparente, diluya 1 partede concentradopor 16 partesde agua.
- Page 36 Limpie el _,reaalrededor de la tapa de Ilenado del combustible, Agregue Aceite de Motor retire latapa. Co[oque la limpiadora a presi6n en una superficie plana y nivelada. A_ada lentamente gasolina sin plomo (A) al depOsitode combustible (B). NO a_adacombustible en exceso. Deje Limpie la zona de alrededor de[ orificio de Ilenado de aceite y aproximadamente 4 cm (1,5") de espacio (C) en el dep6sito quite el tapOn amarillo.
-
Page 37: Conectela Manguera Y El Suministrode Aguaa La Bomba
Haga correr el agua a trav@sde la manguera de su jardin por Conectela Manguera y el Suministrode Aguaa la Bomba 30 segundos para limpiar cualquier escombro que se encuentre en ella. Desconecteel agua. IMPORTANTE:Hace NO agua de parar de siphon para el AVISO: NO haga funcionar la bomba si no tiene el abastecimiento de agua. - Page 38 COMOUSARSU SISTEMADE LIMPIEZA Para Porteren Marcha el Sistemade Limpieza Para darle arranque a su sistema de limpieza movido a motor por Si tiene probiemas con el funcionamiento de su m6,quinalimpiadora primera vez, siga estas instrucciones paso a paso. Esta informaci6n a presi6n, por favor Ilame a la I[nea de ayuda de la m6,quina acerca de la puesta en marcha inicial tambi_n es v_.lida para cuando limpiadora a presi6n al 1-80D-222-3136.
- Page 39 IMPORTANTE:Antes de poner en marcha la limpiadora a presi6n, A. ABVERTENOIA: El chorro de agua a alta presi6n que asegQresede Ilevar gafas de protecci6n adecuadas. este equipo produce, puede atravesar la piel y A. ABVERTENCIA: R iesgo de lesiones oculares. los tejidos subcut_neos, provocando lesiones de El agua rociada puede salpicar o propulsar gravedad que podrian dar lugar a la amputaci6n...
-
Page 40: C6Mousar Las Puntasde Rocio
SIEMPREfusil de punto en una direcci6n segura, presione el C6mousar las puntasde rocio seguro (bot6n rojo) y el disparador del fusil del rocio del La conexi6n r_,pidade la extensi6n para boquillas le permite usar estruj6n para Nberarla presi6n retenida de la pleamar. quatro puntas de roc[o diferentes. - Page 41 • Para un enjuagado de maxima potencia (alta presi6n y AV/SO:. Usted deber_ conectar todas las mangueras antes bajo caudal), para superficies rebeldes o de dificil acceso, de darle arranque al motor. como superficies de plantas altas, eliminaci6n de pintura, * Arrancar el motor sin tenor todas las mangueras conectadasy sin manchas de aceite, eliminaci6n de 6xido u otras ei suministro de agua ABIERTO(ON) causar_, e l da_o de la...
-
Page 42: Limpieza Del Tubo De Inyecci6N De Detergente
Arranque el motor conforme alas instrucciones de Puesta en Limpieza del tubo de inyecci6n de detergente funcionamiento de la limpiadora a presi6n. Si us6 el tubo, debe lavarlo con agua limpia antes de parar el motor. Aplique el detergente sobre la superficie seca, comenzando en Coloque el fiitro y la inyecci6n de detergente en un balde Ileno la parte inferior del _.reay dirigi_ndose hacia arriba, utilizando de agua limpia. - Page 43 INFOBMACI6N TECNICASOBBEEL MOTOR ESPECIFICACIONES DELPBODUCTO El motor es de uno cilindros, de L-cabeza, refrigerado por aire y de Especificaciones de la M_quina Limpiadora a baja emisi6n. Presi6n En el Estado de California, los motores de la sefie 120000 han Presi6n de salida mb, xima ......2,550 PSI obtenido la certificaci6n del California Air Resources Board (Consejo Caudalm6,ximo ........
-
Page 44: Recomendaciones Generales
RECOMENDACIONES G ENERALES Control de Emisiones Cualquier establecimiento o individuoespecializadoen la Plan de mantenimiento reparaci_nde motoresque no sean de automoci_npuede encargarse del mantenimiento, la sustituci_ny la reparaci_n de Siga los intervalos de horas o de calendafio, los que sucedan los dispositivos y sistemasde controlde ernisiones,Noobstante, (se_aladas antes. - Page 45 10. Ponga en marcha el motor siguiendo las instrucciones de la Revise la Pistola y la Extensi6n para BoquiJJas seccidn CSmoponer en funcionambnto la limpbdora a presiSn. Examinez le branchement du boyau au pistolet b.pulv_risation et assurez-vous que le branchement est solide. Faites I'essai de la 11.
- Page 46 ** Por e ncima de27°C (80 °F) e luso deaceite 10W30 puede Camhie el aceite cuando el motor siga estando caliente despu_s aumentar elconsumo deaceite. Compruebe elnivel deaceite de haber funcionado: con mayor frecuencia. Drene el tanque del combustible haciendo funcionar la m6,quinalimpiadora a presi6n hasta que el tanque est6 vac[o.
-
Page 47: Despues Decadauso
Sistemade Refrigeraci6nde Aire Remplace la Bujia Cambie la buj[a ayudarb,a su motor a arrancar mb, s fb, c ilmente y Con el tiempo, se pueden acumular residuos en las aletas de funcionar mejor. refrigeraci6n dei ciiindro y pasar inadvertidos mientras no se desmonte parciaimente ei motor. -
Page 48: Almacenamiento Prolongado
ALMACENAMJENTO PARAJNVJERNO Cambio de aceite Con el motor todavia caliente, drene el aceite de la caja del cigi,ie_al. Vueiva a Ilenarlocon el grado de aceite recomendado. Vea Cambio AVISO: Usted deber_ proteger su unidad de las de Aceite del Motor en la secci6n Mantenimiento del Motor. temperaturas de congelamiento. - Page 49 Problema Soluci6n C_US_ Est_ usando la puntas de rodo de baja Cambie la puntas de rocio a una de las dos presi6n (negra). puntas de rocio de alta presi6n. La entrada de agua est,. bloqueada. Limpie la entrada. Suministro de agua inadecuado. Proporcione fiujo de agua adecuado.
- Page 50 Sears, Roebuck and Co., U .S.A.(Sears),CaliforniaAir ResourcesBoard(Consejo de Recursos sobreeJARede CaJifornia, g ARB,per sus sigJasen ingJ_s) y United StatesEnvironmentaJ Protection A gency (Agenciade Proteccign A mbientaJ d e EE.UU., EPA,persus siglas en ingles). Declaracign d e garantJa del sistema de control d e emisiones (derechos y obligacionesdel propietario para la garantiacontra defectos) CaliforniaAir Resources Board(gARB),U.S.
- Page 51 Informaci6n sobre emisiones Algunos motores cuentan con la certificaci6n de cumplimiento de la fase 2 de las normas sobre emisiones de la United States Los motores con certificaci6n de cumplimiento de la normativa Environmental Protection Agency (USEPA,Agencia estadounidense sobre emisiones del California Air ResourcesBoard (CARB) deben de protecci6n del medioambiente ).
-
Page 52: Troubleshooting
Your Home For expert troubleshooting and home solutions advice: www.managemyhome.com For repair - in your home - of all major brand appliances, lawn and garden equipment, or heating and cooling systems, no matter who made it, no matter who sold it! For the replacement parts, accessories owner's manuals that you need to do-it-yourself.
Need help?
Do you have a question about the 580.752190 and is the answer not in the manual?
Questions and answers