Table of Contents
Advertisement
Available languages
Available languages
Quick Links
Operator's Manual
3000 PSI MAX
2.7 GPM MAX
PRESSURE WASHER
CLEANING SYSTEM
Model No. 580.752140
PRESSURE WASHER
CUSTOMER HELPLINE
1-800-222-3136
HOURS: Mon. - Fri. 8 a.m. to 5 p.m. (CT)
WARNING
Before using this product, read this
manual and follow all Safety Rules
and Operating Instructions.
Sears, Roebuck and Co., Hoffman Estates, IL 60179 U.S.A.
Visit our Craftsman website: www.craftsman.com
Part No. 203773GS Draft - (04/25/2007)
ADVERTENCIA
Antes de utilizar el producto, lea este
manual y siga todas las Reglas de
Seguridad e Instrucciones de Uso.
• Safety
• Assembly
• Operation
• Maintenance
• Parts
• Español, p. 34
Advertisement
Chapters
Table of Contents

Related Manuals for Craftsman 580.752140


Summary of Contents for Craftsman 580.752140
- Page 1 Safety Rules manual y siga todas las Reglas de and Operating Instructions. Seguridad e Instrucciones de Uso. • Español, p. 34 Sears, Roebuck and Co., Hoffman Estates, IL 60179 U.S.A. Visit our Craftsman website: www.craftsman.com Part No. 203773GS Draft - (04/25/2007)
-
Page 2: Table Of Contents
If this pressure washer fails due to a defect in material or workmanship within one year from the date of purchase, return it to any Sears store, other Craftsman outlet, or Sears Parts & Repair Center in the United States or Canada for free repair (or replacement if repair proves impossible). - Page 3 WARNING WARNING The engine exhaust from this product contains Fuel and its vapors are extremely flammable and chemicals known to the State of California to cause explosive. cancer, birth defects, or other reproductive harm. Fire or explosion can cause severe burns or death.
- Page 4 WARNING WARNING Starter cord kickback (rapid retraction) can result The high pressure stream of water that this in bodily injury. Kickback will pull hand and arm equipment produces can cut through skin and its toward engine faster than you can let go. underlying tissues, leading to serious injury and possible amputation.
- Page 5 WARNING NOTICE High pressure spray may damage fragile items including Starter and other rotating parts can entangle glass. hands, hair, clothing, or accessories. • DO NOT point spray gun at glass when using MAX (0°) nozzle. • NEVER aim spray gun at plants. •...
-
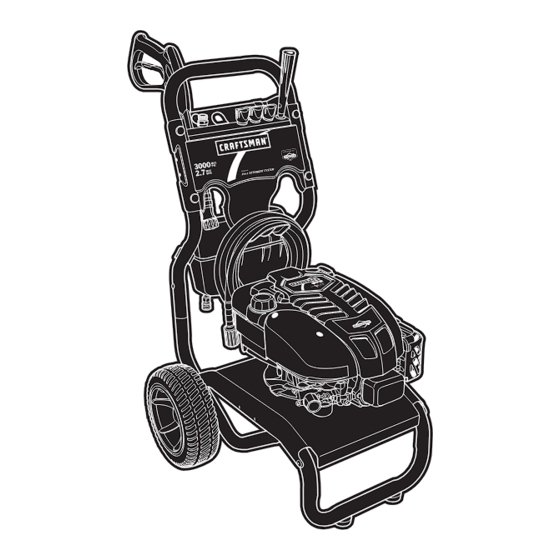
Page 6: Features And Controls
FEATURES AND CONTROLS KNOW YOUR PRESSURE WASHER Read the Operator’s Manual and safety rules before operating your pressure washer. Compare the illustrations with your pressure washer to familiarize yourself with the locations of various controls and adjustments. Save this manual for future reference. Nozzle Extension with Spray Gun Quick Connect... -
Page 7: Assembly
6. If any parts are missing or damaged, call the pressure washer helpline at 1-800-222-3136. ASSEMBLING CLEANING SYSTEM Your Craftsman cleaning system will need assembly before operation: Insert multi–colored ProjectPro™ nozzles and other Fill out and send in registration card. - Page 8 Attach Detergent Siphon Hose to Pump Add Fuel The pressure washer is equipped with two detergent Fuel must meet these requirements: siphoning hoses. One is attached to the cleaning tank and • Clean, fresh, unleaded gasoline. one is loose for siphoning pressure washer safe detergents •...
- Page 9 CAUTION! 4. Reinstall fuel cap on fuel tank. Alcohol-blended fuels (called gasohol, ethanol or methanol) can attract moisture, which leads to separation and formation of acids during storage. Acidic gas can damage the fuel system of an engine while in storage. To avoid engine problems, the fuel system should be treated with a fuel preserver or emptied before storage of 30 days or longer.
- Page 10 Attach other end of high pressure hose to high pressure Turn ON water, point gun in a safe direction and squeeze outlet on pump. Tighten by hand. trigger to purge pump system of air and impurities. WARNING Risk of eye injury. Spray can splash back or propel objects.
-
Page 11: Operation
OPERATION HOW TO USE YOUR CLEANING SYSTEM To Start Your Cleaning System To start your engine-powered cleaning system for the first If you have any problems operating your pressure washer, time, follow these instructions step-by-step. This information please call the pressure washer helpline at 1-800-222-3136. also applies whenever you start the engine after you have let Pressure Washer Location the pressure washer sit idle for at least a day. - Page 12 Move throttle lever (A) to “Fast” position, shown here as 12. Return recoil starter slowly. DO NOT let rope “snap a rabbit. back” against starter. 13. When engine starts, slowly move choke lever to “Run” position, as engine warms. If engine falters, move choke lever to “Choke”...
- Page 13 How to Stop Your Cleaning System Place spray gun through hole on accessory tray on right side of unit. Release spray gun trigger and let engine idle for two Insert multi–colored ProjectPro™ nozzles in spaces minutes. provided in accessory tray. Move throttle to SLOW position, then STOP position.
- Page 14 Select desired ProjectPro™ nozzle: Pull back on collar, insert selected ProjectPro™ nozzle and release collar. Tug on ProjectPro™ nozzle to make • For delicate rinse (lower pressure and higher flow), sure it is securely in place. for gentle cleaning of cars/trucks, boats, RV’s, patio furniture, lawn equipment, etc., select yellow For most effective cleaning, keep ProjectPro™...
- Page 15 Make sure detergent shut-off valve on cleaning tank is in 11. Allow HydroFoam™ wash to soak in between “Off” position. 3–5 minutes before washing and rinsing. Reapply as needed to prevent surface from drying. DO NOT allow If using cleaning tank, pour detergent into cleaning tank. HydroFoam™...
-
Page 16: Specifications
SPECIFICATIONS ENGINE TECHNICAL INFORMATION PRODUCT SPECIFICATIONS This is a single cylinder, overhead valve (OHV), air cooled Pressure Washer Specifications engine. It is a low emissions engine. Max Outlet Pressure ..... . . 3,000 PSI In the State of California, Model 120000 engines are certified Max Flow Rate . -
Page 17: Maintenance
MAINTENANCE OWNER’S RESPONSIBILITIES Follow the hourly or calendar intervals, whichever occurs first. More frequent service is required when operating in adverse conditions noted below. MAINTENANCE SCHEDULE OPERATING INTERVALS SERVICE DATES Every 25 Every 50 Every 100 FILL IN DATES AS YOU COMPLETE Before MAINTENANCE TASK Hours or... - Page 18 • Use a vacuum cleaner to pick up loose dirt and debris. 3. Remove nozzle from end of nozzle extension. 4. Use a small paper clip to free any foreign material NOTICE clogging or restricting nozzle (A). Improper treatment of pressure washer can damage it and shorten its life.
- Page 19 ENGINE MAINTENANCE Checking Oil Level Oil level should be checked prior to each use or at least every WARNING 5 hours of operation. Keep oil level maintained. Make sure pressure washer is on a level surface. Remove oil dipstick and wipe dipstick with clean cloth. Unintentional sparking can result in fire or Replace and tighten dipstick.
- Page 20 Service Spark Plug Clean area around oil fill, remove oil fill cap/dipstick. Wipe dipstick clean. Service the spark plug every 100 hours of operation or Tip your pressure washer to drain oil from oil fill into a yearly, whichever occurs first. suitable container making sure you tip your unit away Clean area around spark plug.
- Page 21 Air Cooling System 3. Disconnect hose from spray gun and high pressure outlet on pump. Drain water from hose, gun, and nozzle Over time debris may accumulate in cylinder cooling fins and extension. Use a rag to wipe off the hose. cannot be observed without partial engine disassembly.
-
Page 22: Storage
STORAGE WINTER STORAGE • Check level of fuel preserver cartridge. Fuel preserver is dark in color. NOTICE • If cartridge is almost empty or empty, replace with a new fuel preserver cartridge following the instructions in Fresh You must protect your unit from freezing temperatures. Start™... -
Page 23: Troubleshooting
TROUBLESHOOTING Problem Cause Correction HydroFoam™ launcher installed. Replace HydroFoam™ launcher with high pressure nozzle. Water inlet is blocked. Clear inlet. Inadequate water supply. Provide adequate water flow. Inlet hose is kinked or leaking. Straighten inlet hose, patch leak. Pump has following problems: Clogged inlet hose strainer. -
Page 24: Replacement Parts
PARTS CRAFTSMAN 3000 PSI Cleaning System 580.752140 Main Unit — Exploded View... - Page 25 CRAFTSMAN 3000 PSI Cleaning System 580.752140 Main Unit — Parts List Item Part # Description Item Part # Description 202947GS ASSY, Base 16 202949GS KIT, Wheel B196526GS HANDLE 201313GS Axle 202948GS ASSY, Billboard/Decals with Clips 200517GS Hubcap 195964GS Clip, Tree...
- Page 26 CRAFTSMAN 3000 PSI Cleaning System 580.752140 Pump — Exploded View...
- Page 27 CRAFTSMAN 3000 PSI Cleaning System 580.752140 Pump — Parts List Item Part # Description 190571GS CAP, Oil 190574GS MANIFOLD 190578GS 190581GS CAP, 1/8 194298GS THERMAL RELIEF 190594GS KIT, UNLOADER 190588GS KIT, WATER INLET, ANODIZED 190589GS KIT, OUTLET, ANODIZED 193808GS KIT, HEAD BRASS...
- Page 28 ENGINE, Briggs and Stratton, 12S512 – Exploded View...
- Page 29 ENGINE, Briggs and Stratton, 12S512 – Exploded View...
- Page 30 ENGINE, Briggs and Stratton, 12S512 – Exploded View...
- Page 31 ENGINE, Briggs and Stratton, 12S512 – Parts List Item Part # Description Item Part # Description 697893 Cylinder Assembly 802574 Armature-Magneto 399269 Kit-Bushing/Seal (Magneto Side) 691061 Screw (Magneto Armature) 299819S £ Seal-Oil (Magneto Side) 692051 Plug-Spark 498983 Sump-Engine 692390 Wire-Stop 792381 Head-Cylinder 792384...
-
Page 32: Emission Control Warranty
EMISSION CONTROL SYSTEM WARRANTY Sears, Roebuck and Co., U.S.A. (Sears), the California Air Resources Board (CARB) and the United States Environmental Protection Agency (U.S.EPA) Emissions Control System Warranty Statement (Owner's Defect Warranty Rights and Obligations) The California Air Resources Board (CARB), U.S. EPA and Sears are •... - Page 33 Emission Information Certain engines will be certified to meet the United States Environmental Protection Agency (USEPA) Phase 2 emission Engines that are certified to meet the California Air Resources standards. For phase 2 certified engines, the Emissions Board (CARB) Tier 2 Emission Standards must display Compliance Period referred to on the Emissions Compliance information regarding the Emissions Durability Period and Air label indicates the number of operating hours for which the...
-
Page 34: Español
Si la limpiadora a presión falla debido a defectos de materiales o mano de obra en el plazo de un año a partir de la fecha de compra, devuélvala a cualquier almacén Sears, punto de venta de Craftsman o centro de reparación y repuestos de Sears de los Estados Unidos o Canadá... - Page 35 ADVERTENCIA ADVERTENCIA El escape del motor de este producto contiene elementos químicos reconocidos en el Estado de California La gasolina y sus vapores son extremadamente por producir cáncer, defectos de nacimiento inflamables y explosivos. u otros daños de tipo reproductivo. El fuego o una explosión pueden causar quemaduras severas e inclusive la muerte.
- Page 36 ADVERTENCIA ADVERTENCIA El retroceso (repliegue rápido) del cable del arrancador El chorro de agua a alta presión que este equipo puede producir lesiones. El retroceso impedirá que el produce, puede atravesar la piel y los tejidos usuario suelte el cable a tiempo y tirará de su mano y subcutáneos, provocando lesiones de gravedad que brazo hacia el motor.
- Page 37 ADVERTENCIA AVISO El rociado de alta presión puede dañar elementos frágiles, El arrancador y otras piezas que rotan pueden enredar incluyendo el vidrio. las manos, el pelo, la ropa, o los accesorios. • NO dirija la pistola rociadora hacia un cristal cuando utilice la boquilla MAX (punta de alfiler).
-
Page 38: Características Y Controles
CARACTERÍSTICAS Y CONTROLES CONOZCA SU MAQUINA SISTEMA DE LIMPIEZA Lea el Manual del Operario y las reglas de seguridad antes de poner en marcha su sistema de limpieza. Compare las ilustraciones con su sistema de limpieza para familiarizarse con las ubicaciones de los diferentes controles y ajustes. Guarde este manual para referencias futuras. -
Page 39: Montaje
MONTAJE Su sistema de limpieza requiere de cierto ensamble y estará lista Conecte manguera a alta presión a pistola rociadora y a bomba. para ser usado únicamente después de haber depositado el Conecte el suministro de agua a bomba. combustible y el aceite recomendado. Conecte boquilla la extensión al pistola rociadora. - Page 40 Montaje de Manguera de Sifón del Detergente a ADVERTENCIA la Bomba La limpiadora a presión está equipada con dos mangueras de La gasolina y sus vapores son extremadamente inyección de detergente. Una de ellas está conectada al depósito de inflamables y explosivos. limpieza, y la otra está...
- Page 41 Tapón de Combustible para Mejorar el Arranque Gran altitud El uso de conservante de combustible mantiene el combustible en En altitudes superiores a 1.524 metros (5.000 pies), se deberá buen estado y limpia los carburadores, lo que facilita el arranque en utilizar gasolina con un mínimo de 85 octanos / 85 AKI (89 RON).
- Page 42 Antes de que conecte la manguera de jardín a la entrada de ABRA el agua, apunte con la pistola hacia una dirección segura y apriete el gatillo para eliminar el aire y las impurezas del agua, inspeccione el colador de la entrada. Limpie el colador (A) sistema de bombeo.
-
Page 43: Operacion
OPERACION COMO USAR SU SISTEMA DE LIMPIEZA Para Poner en Marcha el Sistema de Limpieza Para darle arranque a su sistema de limpieza movido a motor por Si tiene problemas con el funcionamiento de su máquina limpiadora primera vez, siga estas instrucciones paso a paso. Esta información a presión, por favor llame a la línea de ayuda de la máquina acerca de la puesta en marcha inicial también es válida para cuando limpiadora a presión al 1-800-222-3136. - Page 44 Mueva el control de la válvula de admisión (A) a la posición ADVERTENCIA "Rápido" ("Fast"), que se distingue con la figura de un conejo. El retroceso (repliegue rápido) del cable del arrancador puede producir lesiones. El retroceso impedirá que el usuario suelte el cable a tiempo y tirará...
- Page 45 Utilización de la Bandeja de Accesorios ADVERTENCIA La unidad está equipada con una bandeja de accesorios con El contacto con la zona del silenciador puede producir compartimentos para guardar las boquillas ProjectPro™, el lanzador HydroFoam™, la pistola rociadora y el prolongador de la boquilla. La quemaduras graves.
- Page 46 Para cambiar las boquillas ProjectPro™, siga estas instrucciones: Desplace hacia atrás el anillo, inserte la boquilla ProjectPro™ elegida y suelte el anillo. Tire de la boquilla ProjectPro™ para Coloque el pestillo de seguridad de la pistola de rociado. comprobar que está bien montada. Desplace hacia atrás el anillo del conector rápido y tire de las Para una limpieza más efectiva, mantenga la boquilla de boquillas ProjectPro™.
- Page 47 Repase el uso de la boquilla ProjectPro™ y del lanzador 11 Deje que el HydroFoam™ detergente empape la superficie HydroFoam™. durante 3-5 minutos antes de lavar y aclarar. Vuelva a aplicar la solución cuando sea necesario para evitar que la superficie Prepare el detergente HydroFoam™...
-
Page 48: Especificaciones
ESPECIFICACIONES INFORMACIÓN TÉCNICA SOBRE EL MOTOR ESPECIFICACIONES DEL PRODUCTO El motor es de uno cilindros, de válvulas en cabeza (OHV), Especificaciones de la Máquina Limpiadora a refrigerado por aire y de baja emisión. Presión En el Estado de California, los motores de la 120000 han obtenido la Presión de salida máxima . -
Page 49: Mantenimiento
MANTENIMIENTO RESPONSABILIDADES DEL PROPIETARIO Siga el programa de mantenimiento según el número de horas o según el calendario, lo que suceda primero. Se requiere de servicio con mayor frecuencia cuando opere la unidad en las condiciones adversas descritas a continuación. TAREA DE MANTENIMIENTO INTERVALO DE OPERACIÓN POR HORA FECHAS DE SERVICIO... - Page 50 Remueva la boquilla del extremo de la extensión de la boquilla. AVISO Use el pequeño sujeta papeles para liberar cualquier material El tratamiento inadecuado del limpiadora a presión puede dañarlo extraño que esté tapando la boquilla (A). y acortar su vida productiva. •...
- Page 51 MANTENIMIENTO DEL MOTOR Comprobación del nivel de aceite Compruebe el nivel de aceite antes de cada uso o cada 5 horas de ADVERTENCIA funcionamiento, como mínimo. Rellene si es necesario. Coloque el limpiadora a presión sobre una superficie nivelada. Retire la varilla de medición y limpie la varilla de medición. Chispear involuntario puede tener como resultado el Instale el varilla de medición, apriete firmemente.
- Page 52 Incline su máquina limpiadora a presión para drenar el aceite a Revise la separación del electrodo con un calibrador de través del orificio de llenado en un recipiente adecuado alambre y ajuste la separación a 0.020 pulgadas (0.50 mm), si asegurándose de inclinar la unidad hacia el lado opuesto de la es necesario.
- Page 53 DESPUES DE CADA USO Desconecte manga del fusil del rocío y salida alta de presión en la bomba. Desagüe agua de la manga, del fusil, y de la No deberá haber agua en la unidad por largos períodos de tiempo. extensión de boquilla.
-
Page 54: Almacenamiento
ALMACENAMIENTO ALMACENAMIENTO PARA INVIERNO • Compruebe el nivel del cartucho de aditivo para el combustible. El aditivo es de color oscuro. AVISO • Si el cartucho está vacío o casi vacío, cámbielo por otro nuevo conforme a las instrucciones de la sección Tapón de Usted deberá... -
Page 55: Reparacion De Daños Repuestos
REPARACION DE DAÑOS Problema Causa Solución Lanzador HydroFoam™ instalado. Cambie el lanzador HydroFoam™ por la boquilla de alta presión. La entrada de agua está bloqueada. Limpie la entrada. Suministro de agua inadecuado. Proporcione flujo de agua adecuado. La manguera de entrada está doblada o Estire la manguera de entrada, coloque un presenta fugas. -
Page 56: Notas
NOTAS... - Page 57 NOTAS...
-
Page 58: Garantia Del Control De Emisiones
GARANTIA DEL SISTEMA DE CONTROL DE EMISIONES Sears, Roebuck and Co., U.S.A. (Sears), California Air Resources Board (Consejo de Recursos sobre el Aire de California, CARB, por sus siglas en inglés) y United States Environmental Protection Agency (Agencia de Protección Ambiental de EE.UU. , EPA, por sus siglas en inglés). - Page 59 Información sobre emisiones Algunos motores cuentan con la certificación de cumplimiento de la fase 2 de las normas sobre emisiones de la United States Los motores con certificación de cumplimiento de la normativa Environmental Protection Agency (USEPA, Agencia estadounidense sobre emisiones de nivel 2 del California Air Resources Board de protección del medioambiente ).
Need help?
Do you have a question about the 580.752140 and is the answer not in the manual?
Questions and answers