
Related Manuals for Haier XPB60-287S


Summary of Contents for Haier XPB60-287S
-
Page 1: User Manual
Twin-tub Washing Machine User manual This manual is for XPB60-287S Please read this manual carefully before using. Retain it for future reference. -
Page 2: Table Of Contents
Contents Parts and features Important safety instructions Installation Preparation before washing Cautions Usage of the detergent Washing sequence Additional spinning Rinsing Spinning Care and cleaning Trouble-Shooting Accessories supplied Specification... -
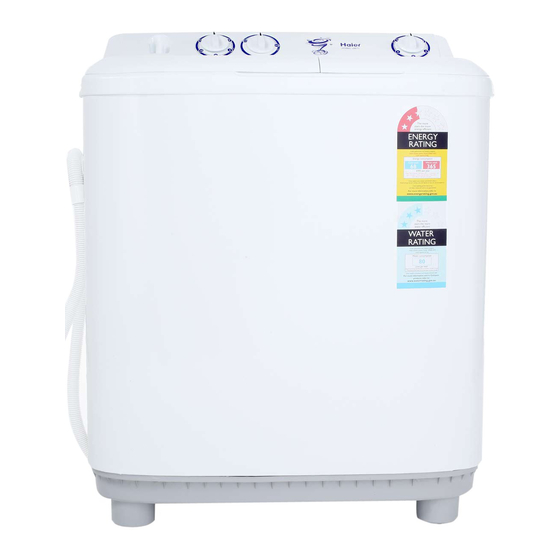
Page 3: Parts And Features
Parts and features Water inlet Water filling switch Drain hose hook Lint filter Power cord (Installed by user) Meaning and description of the symbols Contents marked with this symbol are related Warning to the safety of the product and the personal safety of the users. -
Page 4: Important Safety Instructions
Important safety instructions Important! Warning - to reduce the risk of fire, electric shock, or injury when using your appliance, follow basic precautions, including the following: Read all instructions before using the appliance. This appliance is not intended for use by persons (including children) with reduced physical, sensory or mental capabilities, or lack of experience and knowledge, unless they have been given supervision or instruction concerning use of the appliance by a person responsible for their safety. -
Page 5: Installation
Installation Please install and adjust the machine in accordance with this manual. It is very important for your safety and for the correct operating of your machine. Install the lint filter After opening the package , please take out the lint filter from the bag , install it to the overflow filter of the wash tub. -
Page 6: How To Change The Direction Of The Drain Hose
Installation How to change the direction of the drain hose Figure 1 indicates the ex factory Back installation position of the drain hose. Soft cloth Front Extend the drain hose from the side of the spin tub Figure 1 Put a soft cloth on the ground. Lean the machine down gently with the front surface facing the ground. -
Page 7: Preparation Before Washing
Ï ´ Ç ° × ¼ ± ¸ Preparation before washing Positioning your washer 1.Connect the water inlet hose. 2.Select a suitable location for the washer on a hard, even surface away from direct sunlight or heat sources, e.g radiators, cooking appliances etc. 3.The washer must not be placed in an area where the temperature is below freezing point. -
Page 8: Cautions
Cautions Ï ´ µ Ó Ð ë Ö ª The rated washing/spinning capacity refers to the largest dry weight of a load that can be washed/spun. The thickness, size and type of clothes will influence the actual capacity. Be careful to only load a reasonable amount of laundry. -
Page 9: Washing Sequence
Washing sequence Wash timer Wash selector Spin timer (To set to below 2 minutes, (Delicate, normal, (to set to below 1 minute, first set to 6 minutes then Water inlet Drain) first set to 2 minutes then turn it back. This can increase turn it back. -
Page 10: Additional Spinning
Additional spinning Additional spinning If you want to remove more foam, you can use this function. 1.Put the clothes into the spin tub evenly. 2.Spin (1) Put the retainer in properly. Please use the retainer even if the clothes quantity is small. Push retainer down Push Correct... -
Page 11: Rinsing
Rinsing Rinsing 1. Put the clothes into the wash tub. Select suitable mode according to the clothes load. 2.Adjust the water level Set the water level using the water level adjusting lever according to the clothes quantity. Then fill. 3.Rinse Adjust the wash timer to a suitable rinse length. -
Page 12: Care And Cleaning
Care and cleaning Ï ´ º ó ´ ¦ À í Please first pull out the power plug from the electrical supply before cleaning. Cleaning the lint filter The lint filter must be used during washing. It must be cleaned after each wash. 1. -
Page 13: Cleaning The Overflow Filter
Care and cleaning Cleaning the overflow filter Too much lint on the overflow filter will influence the normal usage of the machine. Please clean it every two months. 1 Take off the overflow filter. As indicated in the figure, squeeze Elastic fixing the elastic fixing claw and pull it in claw... -
Page 14: Trouble-Shooting
Ï ´ º ó ´ ¦ À í Care and cleaning Clean the cabinet Use only a damp cloth for cleaning the control panel. To avoid any kind of damage to cabinet finish, use a Thinner small amount of liquid dishwashing detergent with Petrol Alcohol warm water to wipe the washer cabinet as required. -
Page 15: Operating Problems
Trouble-shooting When the remaining water is frozen To prevent freezing drain after using. After complete draining, set the "WASH SELECTOR" at "STRONG" or "STANDARD". If it is set at "DRAIN", it will be more difficult for the frozen water to melt. When the water is frozen Below 50 c Below 50 c... -
Page 16: Accessories Supplied
Accessories supplied × ° Ï ä Ë µ Ã ÷ Name Quantity User's manual One piece One piece Warranty manual Water inlet hose One piece Lint filter One piece Retainer One piece Specification Maximum/41L Medium/36L Water level/Water quantity (about) Minimum/30L Water pressure(MPa) 0.02-0.2...
Need help?
Do you have a question about the XPB60-287S and is the answer not in the manual?
Questions and answers
my washing machine resets the count to 0 and turn off
The Haier XPB60-287S washing machine resetting the count to 0 and turning off could be caused by a power failure or a loose power plug.
This answer is automatically generated