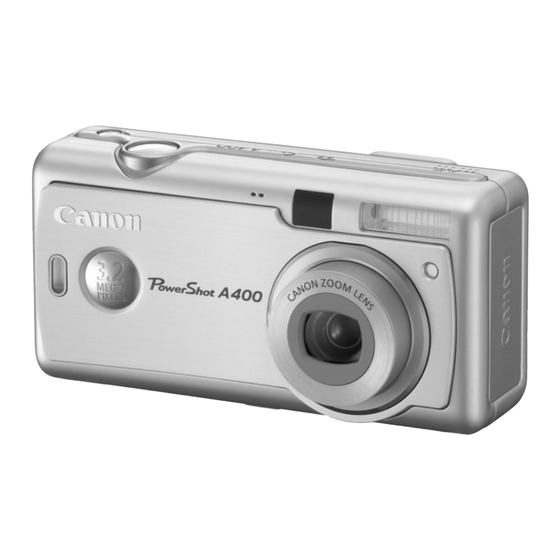
Canon PowerShot A400 User Manual
Hide thumbs
Also See for PowerShot A400:
- Quick start manual (396 pages) ,
- Software starter manual (114 pages) ,
- Brochure & specs (6 pages)
Table of Contents
Advertisement
PRINTED IN CHINA
t_
o_
o_
r-
c3
m
o
3
@I
fJ.
Carton
_Po_,erNhotA 400
DIGITAL
CAMERA
Camera User Guide
DIG!C
PictBridge
DPOF DIREa BUBnLE JET
PRINT DIREL3
s Please read the Read This First section (p. 5),
• Please also see the Software Starter Guide and the Direct Print User Guide,
II 1 lltil !11111
llli IIIII
CDI-EIt,
O
Advertisement
Table of Contents

Related Manuals for Canon PowerShot A400


Summary of Contents for Canon PowerShot A400
- Page 1 II 1 lltil !11111 llli IIIII Carton CDI-EIt, _Po_,erNhotA 400 DIGITAL CAMERA Camera User Guide DIG!C PictBridge DPOF DIREa BUBnLE JET PRINT DIREL3 s Please read the Read This First section (p. 5), • Please also see the Software Starter Guide and the Direct Print User Guide, PRINTED IN CHINA...
- Page 2 Use of genuine Canon accessories recommended. This product is designed to perform optimally when used with genuine Canon accessories. Canon shall not be liable for any damage to this product and/or accidents such as fire, etc., caused by the malfunction of non-genuine Canon ThisGu accessories (e.g., a leakage and/or explosion of...
- Page 3 Ifyour camera isused f orprolonged periods, the camera body m ay b ecome warm. Please beaware ofthis and take c are when o perating the camera for a nextended period. The LCD monitor isproduced with extremely high- precision manufacturing techniques. More t han 99.99% o fthe pixels operate tospecification.
- Page 4 • SD is a trademark. • Other names and products not mentioned above may be registered trademarks or trademarks of their respective companies. Copyright © 2004 Canon Inc. All fights reserved. This mark denotes additional topics that complement the basic operating procedures.
- Page 5 Items marked with _"are lists orcharts that _Macro/_ Infinity Modes ........summarize camera functions orprocedures. Self-timer ............Digital Zoom ............Please Read ............I_llContinuous Shooting ........Safety Precautions ..........Shooting Panoramic Images (Stitch Assist) ..46 Preventing Malfunctions ........SCN Special Scene Mode ........
-
Page 6: Table Of Contents
Table of Contents Switching between Light Metering Modes ..75 Adjusting the Exposure ......... Adjusting the Tone (White Balance) ..... Changing the ISO Speed ........Changing the Photo Effect ........Replacing the Date Battery ........ 120 Setting the Auto Rotate Function ...... - Page 7 Against Copyright Infringement Please note that Canon digital cameras are intended for personal use and should never be used in a manner that infringes upon or contravenes international or domestic copyright laws and regulations. Please be advised that in certain cases the copying of images from performances,...
- Page 8 Read This First Safety Precautions • Before using the camera, please ensure that you have read and understood the safety precautions described below. Always ensure that the camera is operated correctly. • The safety precautions noted on the following pages are intended to instruct you in the safe and correct operation of the camera and its accessories to prevent injudes or damage to yourself, other persons and equipment.
- Page 9 Immediately turn the camera's power off, remove the camera batteries or unplug the power cord from the power outlet. Confirm that smoke or fume emissions have ceased. Please consult your camera distributor or the closest Canon Customer Support Help Desk. • Stop operating the equipment if it is dropped or the casing is damaged.
- Page 10 Continued use of the equipment may result in fire or electdcaI shock, Please consult your camera distributor or the closest Canon Customer Support Help Desk, •...
- Page 11 Use of batteries not expressly recommended this equipment may cause explosions or leaks, resulting in fire, injury and damage to the surroundings. • If using A_&.-size NiMH batteries, use only Canon A_&.-sizeNiMH batteries and the charger recommended for use with these batteries. Use of another charger may cause batteries to overheat or deform, posing risk of fire or electric shock.
- Page 12 Read This First /_ CAUTIONS • Avoid using, placing or storing the equipment in places subject to strong sunlight or high temperatures, such as the dashboard or trunk (boot) of a car. Exposure to intense sunlight and heat may cause the batteries to leak, overheat or explode, resulting in fire, bums or other injuries. High temperatures may also cause deformation of the casing.
- Page 13 Read This First Preventing Malfunctions Avoid Strong Magnetic Fields Never place the camera in close proximity to electric motors or other equipment generating strong electromagnetic fields. Exposure to strong magnetic fields may cause malfunctions or corrupt image data. Avoid Condensation Related Problems Moving the equipment rapidly between hot and cold temperatures...
- Page 14 ON/OFF Button (p. 2 3) Shutter Button (p.31) Microphone (p.84) Viewfinder Window Speaker Flash ( p. 3 9) Strap M ount* -AF-assist Beam (p. 3 4) Red-eye Reduction Lamp (p. 4 1) Self-timer Lamp (p. 4 3) Lens/Lens Cover * Be careful not to wave the camera about or catch it on other items when dangling it from the wrist strap.
- Page 15 - PictBridge Compliant Printers: Interface Cable IFC-400PCU (supplied with the camera) • PictBridge Compliant Non-Canon Printers: Interface Cable IFC-400PCU (supplied with the camera) Please refer to the System Map or the Direct Print User Guide supplied with the camera for direct print compatible printer information,...
- Page 16 Components Guide SET Button Mode Switch Omni Selector (p. 39, 42, 43, 45, 75) _IFNU Button (p. 63) _ (Continuous) _ (Self4imer)/• _ (Macro)! _ (Inflnity)i_ Zoom Button (p. 31) Sbaoting: _ (Wide Angle)i _ (Telephoto) (p. 31)7 Playback:_ (Index)JO_ (Magnify) (p. 55) i:_ _,., (Print/Share) Button -The following operations are accessible through one -...
- Page 17 Installing the Battery and SD Card Insert two (2) AA-size alkaline batteries (included with the camera) or two (2) AA-size Write Protect NiMH batteries (sold separately) and insert the SD card. The SD card has a write protect tab. Sliding the tab Check that the camera power is off.
- Page 18 Preparing the Camera Insert the SD card as shown and close the SD card slot/battery cover. • Insert the SD card as shown on the inside of the battery cover until you hear it click into place. • Do not touch or allow metal objects to contact the terminals on the back of the SD card.
- Page 19 Proper Battery Handling (+) and negative (-) ends in the right direction. • Never mix batteries of different types or from • Use AA-size alkaline or Canon AA-size NiMH different manufacturers. Both batteries batteries (sold separately) only. For information should be identical.
- Page 20 Preparing the Camera • If you do not plan to use the camera for a Iong Battery Status Indications time, remove the batteries from the camera and The LCD monitor displays an icon or message to store them in a safe place. Batteries may Ieak and damage the camera if Ieft installed during Iet you know when batteries are Iow or depleted.
- Page 21 Preparing the Camera Select [] (Format) Formatting an SD Card using • or • and You should always format an SD card when press the SET you wish to use a new one, or when you wish button. to delete not only the images in the SD card but also other data.
- Page 22 (MMC) with this camera. • Do not peel away the odginal label on the SD card or However, Canon makes no warranties concerning cover it with another label or sticker.
- Page 23 Preparing the Camera 4 Set the date and Setting the Date/Time time. The Date/Time menu will be displayed when • Use _ or b" to change camera power is turned on for the first time or the value of the with low date battery power.
- Page 24 Preparing the Camera Setting Language 4 Select a language using &, •, < or b, Sets the display language for LCD monitor menus and messages. press the SET button. Turn on the camera (p. 23). • The setting menu will reappear without Press the MENU changing the language setting if you press...
- Page 25 Turning the Power On/Off Turning Power a Press the ON/OFF button again to turn the Turning Power power off. Press the ON/OFF button until the upper indicator next to the a If the "Card locked!" message appears right after the power is turned on, the SD card cannot record (p.
- Page 26 Basic Functions Power Saving Function • Display Off The LCD monitor automatically shuts off This camera is equipped with a power saving approximately 1 minute* after the Iast time a function. Depending on the power saving setting camera control is accessed. (p.
- Page 27 Basic Functions Mode Switch Replay Mode Use the mode switch to select the camera's Replay Mode • Replay or delete images from the SD card (p. 55, operating mode. 61). • Download and display images on a connected computer (p. 95). •...
- Page 28 Basic Functions Using the LCD Monitor Use the LCD monitor to shoot and review images, for menu operations and playing back images. Pressing the DISP. button cycles the LCD monitor to the next mode. Shooting Mode DISR Button Standard (No Information) (information View) - AF Frame - Spot AE...
- Page 29 Basic Functions ] OWhen a Shooting mode setting is changed, the r_mmr_Q_ settings appear on the LCD monitor for about 6 Shooting Mode p. 35, 48 [] tie _ m E li;] seconds even if the LCD monitor is set to No m.-.m information or off.
- Page 30 Basic Functions Playback Mode Standard File Number DISP. B utton DISP.Button No Display Shooting Date/Time Image Number and Total (Display Image/Total) DISR Button ...._'e_Leng * Detailed Display is not available in index playback (9 images). ill image) 'm _ ._p=.37o.
- Page 31 Basic Fuo ion ii!i Shooting Mode p. 35, 48 m..tg...m ExposureCempensati0n p . 76 • The on/off setting of the LCD monitor r_DDKlm_m White Balance p. 77 display mode is memorized when the ISO Speed p. 79 camera is turned off. When the camera is Photo Effect p.
- Page 32 Basic Functions About the Histogram The histogram is a graph that allows you to judge the brightness of the shot image. The greater the bias toward the left in the graph, the darker the image. The greater the bias toward to the right, the brighter the image.
- Page 33 Use the zoom button to achieve Functions Available in Each Shooting Mode the desired composition (relative (p. 138) at the end of this manual to find out which subject size in the viewfinder). settings can be changed in which shooting modes, Lie: Magnifies the size of ..
- Page 34 Shooting - The Basics • Two beeps will sound when the camera has finished metering, and the indicator will light "_ o Functions Available in Each Shooting Mode (p. 138). green or orange. If the LCD monitor is on, • With the Review function, you can the AF frame will appear green.
- Page 35 Shooting - The Basics Shooting with Viewfinder About the AF Function You can save power by turning the LCD This camera employs AiAF (artificial monitor off and using the viewfinder to shoot. intelligence autofocus) technology, which uses a broad metering field to calculate the Compose the image so that the focal distance with high precision.
- Page 36 Shooting - The Basics AF-assist Beam Reviewing an Image Right After - The AF-assist beam will sometimes emit Shooting when the shutter button is pressed halfway to assist focusing in certain conditions, i.e. dark conditions. - The AF-assist beam can be turned off After a photo is taken, the image...
- Page 37 Shooting - The Basics Changing image Display Duration Selecting a Shooting Mode The length of time images are displayed after a The following modes are available with this photo has been taken can be changed from camera. between 3 seconds to 10 seconds or turned off. The camera automatically makes Press the MENU button.
- Page 38 Shooting - The Basics Selecting r;#l, [] or [] Selecting 1 Set the mode switch to []. Set the mode switch to a • This will switch to movie mode. press the FUNCo button. 2 Select the shooting mode using • or I_, and press the FUN(;.
- Page 39 Shooting - The Basics Changing the Resolution • The resolution is set to M1 (1600 x Compression 1200) and the compression is set to (Fine). • See page 51 for Postcard Print mode mmmQN_U_mm_;= information. I The Postcard Print mode is not available in B_], [] and E3.
- Page 40 Shooting - The Basics Quick Shots Press the FUNC. button. 2 Select rl* or I1. using • or V. You can reduce shutter lag time to capture those fleeting "photo opportunities". * The current setting is displayed, Example (excluding_,11_,, Compressbn 3 Select the compression or Press the DISP.
- Page 41 Shooting - The Basics Use4or>to _Using the Flash select [On] and press the MENU _r;1 m mmQ_EHiD_ button. J* InJ (Fireworks) mode, the flash s proh bted. • The display will return to Use the flash according to the guidelines below.
- Page 42 Shoo,,n0-The0os,cs ii!i • You can switch between settings by pressing the { button. When the red-eye reduction function is on Bi m--_ lalm --_ [_ ÷ When the red-eye reduction function is off • This operation may not work in certain Shooting modes (p.
- Page 43 Shooting - The Basics • The flash fires twice. A pre-flash will fire and will be followed by the main flash. • he red-eye reduction function cannot be set when the Special Scene mode The pre-flash is used by the camera to (p.
- Page 44 Shooting - The Basics _Macro/_ Infinity Modes ra, mo mu m Use this mode when the distance from the lens tip to the subject is in • Always use the LCD monitor to compose Macro the range of 5 to 47 cm (2.0 in. to 1.5 images in macro mode.
- Page 45 Shooting - The Basics To Cancel Self-timer _) Self-timer Press the I_/_) button to display m. With this function, images are shot 10 or 2 seconds Changing Self-timer Countdown after the shutter button is pressed. This is useful Time when you want to take a memorable photo with everyone including yourself in the picture.
- Page 46 Shooting - The Basics Digital Zoom Press the zoom button's E13. _JE_W r_ ra D r_ _ B _ I O _l • The lens will zoom to the maximum optical telephoto setting and stop. Press L_ again to Images can be zoomed with the combined further zoom the image digitally.
- Page 47 • Shooting will stop when the shutter button is released. • The shooting speed is approximately 1.3 frames per second (Large/Fine, LCD monitor off). * These figures reflect Canon's testing standard. The actual figures will vary according to the shooting conditions and settings.
- Page 48 Shooting - The Basics Shooting Panoramic Images To merge the images on a computer (Stitch Assist) PhotoStitch, one of the supplied programs. Framing a Subject Stitch Assist can be used to shoot The PhotoStitch program detects the overlapping overlapping images that can later be merged portions of adjoining images and merges them.
- Page 49 Shooting - The Basics 4 Compose and • Make the brightness in each image consistent. The final image will appear shoot the second unnatural if the difference in brightness image so that it is too great. overlaps the first. • Pan (swivel) the camera to take successive shots.
- Page 50 Shooting - The Basics SCNSpecial Scene Mode so.I By simply selecting one of the following 8 modes, you can shoot the image with the most appropriate settings for the scene. Use this mode when you want the Portrait subject to appear sharp and the background to blur.
- Page 51 Shooting - The Basics 1 Set the mode switch to _Fireworks Appropriate for shooting fireworks clearly with the optimal exposure. SCN (Special Scene mode). Appropriate for shooting images with the All Weather Case AW- Select Q* from the FUNC° button. DC20 (sold separately).
- Page 52 Shooting - The Basics Portrait Night Scene _I_ Foliage U Snow Indoor _ Underwater Fireworks _ Beach...
- Page 53 Shooting - The Basics • You can shoot the image right after selecting _Postcard Print Mode settings by pressing the shutter button. The menu displays again after the shot, allowing rao a mo l you to change the settings easily. You can shoot images with settings...
- Page 54 Shooting - The Basics Select [Off], [Date] Embedding Date in the Image Data or [Date & Time] using • or I_. You can embed the date on image data when is selected. The date will be printed • See Setting the Date/ your images even if it has not been set at the Time (p, 21 ),...
- Page 55 Shooting - The Basics ,m Movie Mode * Recording time vary by the SD card. See SD Cards and Estimated Capacities (p. 129). The maximum length of individual movie may vary with the subject and shooting conditions. Use this mode to shoot movies.
- Page 56 Shooting - The Basics :::::::_8_ 6_re ee page 138 for settings that can be changed in this mode. • Sound is recorded monaurally. • There is no shutter sound in movie mode. • QuickTime 3.0 or higher is required to playback movie tiles (AVI/Motion JPEG) on a computer.
- Page 57 Displaying Images Individually _Magnifying Images (Single Image Playback) Images can be magnified up to approximately You can view the recorded images on the 10 times during single image playback. LCD monitor. 1 Set the mode switch to I-;'L Setthe mode switch _: 2 Press the _, ....
- Page 58 Playback - The Basics Press the Q, button. Viewing Images in Sets of Nine (Index Playback) • Index playback cancels and the display reverts to single image playback. Up to 9 images can be viewed at once in index playback. "...
- Page 59 Playback - The Basics Jumping between Images Viewing/Editing Movies The display can be advanced or set back 9 Viewing Movies images when in index playback. You can play back the images shot in ,m Press the _ button in index mode.
- Page 60 • When amovie has f inished playing, itwill display the Iast frame. Ifthe SET button is pressed inthis state, the camera will r evert to the movie playback panel. Ifthe SET b utton ispressed again, the movie will s tart playing from the first f rame.
- Page 61 Playback - The Basics 2 Select I_ (Edit) using • or • 4 Select the deleting and press the SET button. position using • or •. • The movie editing panel and the movie editing bar will appear. 5 Select IDI (Play) using • or • 3 Select the editing and press the SET button.
- Page 62 Playback - The Basics 7' Select [Overwrite] or [New File] using • or • and press the SET button. • [Overwrite]: Saves the edited movie under the same file name as the original movie. The original data is deleted. • [New File]: Saves the edited movie under a new file name.
- Page 63 Eras!ng A!! !mag es In the [r_-I (Play)] Menu, select [] (Erase all) and _ Eras!ng s!ngle Image press the SET button. Set the mode switch to I-;-I. • A confirmation screen appears. Press • or • to 2 Press • or • to select [OK] and select the image press the SET button.
- Page 64 Selecting Menus and Settings Selecting Settings with FUNC. Button (Shooting Mode Only) Set to shooting mode (p. 35). 2 Press the FUNC. button. 3 Select a FUNC. menu option Items in ( ) show default using • or V. settings. Select the setting contents using •...
- Page 65 Shooting - Advanced Functions SelectingSettingswith the MENUButton Press the MENU button. 2 Use ,9 or • to switch between menus. • You can also switch between menus using the zoom button. 3 Use • or • to select a menu item. 4 Use _1or •...
- Page 66 Shooting - Advanced Functions ome menu items may not be available for selection according to the shooting mode (p. 138). • You can apply a desired image and sound to [_ and [_ in the My Camera menu. For details, see the Registering My Camera Settings (p.
- Page 67 Shooting - Advanced Functions Menu Settings and Default Settings Rec. Menu *Default Setting _eference Menu Items Setting Content Page _ff2] Q uick Shot Sets the Quick Shot option to on or off. • On / Off* Sets the AiAF to on (the camera automatically selects the AF frame [I_JAiAF when taking a picture) or off (AF frame is set to the center frame).
- Page 68 Advanced Functions Shooting Sets the duration images display on the LCD monitor after the shutter Review button is released. • Off / 3* - 10 sec. Sets the date format to be embedded in image data when _ Date Stamp selected.
- Page 69 Shooting - Advanced Functions Play Menu _eference Menu Items Setting Content Page Protect Protects images from accidental erasure. Rotate Rotates images 90 or 270 degrees clockwise in the display. Sound Memo Attaches a sound memo to images. Erase all Erases all images from an SD card (excluding protected images). Auto Play Plays images automatically one after the other.
- Page 70 Shooting - Advanced Functions Adjusts the volume of the start-up sound, operation sound, self-timer sound, shutter sound, or playback sound. The volume cannot be adjusted if [Mute] is set to [On]. • (Off) / (1) / (2)* / (3) / (4) / (5) Start-up Vol.
- Page 71 Shooting - Advanced Functions The Auto Power Down and Display Off settings can be set by pressing the SET button. Auto Power Down Sets whether or not the camera automatically powers down after a specified period of time elapses without camera operation. Power Saving "On* / Off Display Off...
- Page 72 Shooting - Advanced Functions Sets the language used in the menus and messages on the LCD monitor, • English*(English) • Norsk (Norwegian) • Deutsch(German) • Svenska (Swedish) • Fran(_ais (French) • Espa_ol (Spanish) • Nederlands (Dutch)• _ (Chinese) I['_Language • Dansk (Danish) •...
- Page 73 Shooting - Advanced Functions C u s to,_,_ m i z_in g_t h,_e_ c_,am e ra (M_,_,_,_y2ame raSet t i_,_,_,_ng You can select the theme, start-up image and sound, operation sound, self-timer sound shutter sound used on this camera. These are called My Camera settings.
- Page 74 Shoot,n0- Advanced Fuoct,ons ii!i Resetting the Settings to Default You can reset all of the menu and button operation settings to default. Turn on the camera. • Can be performed from Shooting or Playback mode. Press the MENU button for longer than 5 seconds.
- Page 75 Shooting - Advanced Functions Shooting Problem Subjects 2 Press and hold the shutter button the Autofocus halfway, and wait until the camera beeps twice. _1"_1 [] mr_o_H_Jmll 3 Re-aim the camera direction to The following types of subjects may not be compose the shot as desired and suited to autofocus photography.
- Page 76 Shooting - Advanced Functions Switch!n9 between Focus sett!ngs In the [ P_ (Rec.)] menu, select m (AiAF). r or aH aE • See Selecting Menus and Settings (p. 62). You can change the autofocus frame 2 Press _1 or I_ to frame) selection method.
-
Page 77: Switching Between Light Metering Modes
Shooting - Advanced Functions Switch!ng betweenLightMete,ng Modes spot AE point at the center of r-'_ Spot AE Meters the area within the the LCD monitor. Use this Evaluative metering is the default light backlit or surrounded L'_I Point mode when the subject is metering mode. -
Page 78: Adjusting The Exposure
Shooting - Advanced Functions • You can check the results of the compensation Adjust!ng the Exposure by viewing the image on the LCD monitor when it is on. • You can shoot the image right after selecting Adjust the exposure compensation setting to settings by pressing the shutter button. -
Page 79: Adjusting The Tone (White Balance)
Shooting - Advanced Functions 1 Select []* (Auto) from the FUNC. Adjusting the Tone !White Balance ) menu. mmm l • See Selecting Menus and Settings (p. 62). When the white balance is set to match * The current setting is displayed. light source, the camera can reproduce... - Page 80 Shooting - Advanced Functions Setting a Custom White Balance Aim the camera at a piece of In the following cases, the white balance white paper or cloth, or gray card not be correctly adjusted. Use [] (Custom) and press the SET button. adjust the white balance.
-
Page 81: Changing The Iso Speed
Shooting - Advanced Functions - The zoom is positioned to the Chang!ng the !so speed telephoto end setting. Set the digital zoom to [Off]. - A mode other than r_, [] is selected. Raise the ISO speed when you wish to In I_ [] mode, white balance data reduce camera... -
Page 82: Changing The Photo Effect
Shooting - Advanced Functions chang!ng the Photo Effect You can shoot with different saturation contrast color effects. Records normally with this iEffect Off setting. Emphasizes the contrast and IVivid color saturation to record in bold color. such as indoor settings by using the I1 (Indoor (p. -
Page 83: Setting The Auto Rotate Function
Shooting - Advanced Functions Setting the AUtO Rotate Funct!o n 2 Select the photo [] neBBD _i_H_l[]E effect using 4 or This camera is equipped with an Intelligent Orientation sensor that detects • tf the LCD monitor is orientation of an image shot with the camera on, you can check the held vertically... - Page 84 Shooting - Advanced Functions • When this function is on, an icon showing the orientation of the camera appears at the hen the camera is held vertically to shoot, the Intelligent Orientation sensor upper right comer of the LCD monitor (when judges the upper end to be "up"...
-
Page 85: Rotating Images In The Display
Rotating Images in the Disp!a¥ You can rotate an image by 90 ° or 270 ° clockwise in the LCD monitor. 55). • otated images can be magnified (p. Original 90 ° 270 ° • Images taken vertically with the auto rotate function (p. -
Page 86: Attaching Sound Memos To Images
Playback - Advanced Fun_ions Attaching Sound Memos to Images Select [] using • or • and press the SET button. In Playback mode (including single image playback, index playback, and magnified • The recording starts and the elapsed time is playback), you can attach sound... -
Page 87: Auto Play
Playback - Advanced Functions Auto Play Use this feature to automatically play back all of the images in the SD card (Auto Play). The LCD monitor displays each image approximately 3 seconds. In the [hi (Play)] menu, select [] (Auto Play). •... -
Page 88: Protecting Images
Playback - Advanced Fun_ions Protecting Images I--_ images. Use the protect feature to protect important • Movie images play for the length of time images from accidental erasure. that they were recorded. • The power saving function (p. 24) is In the [Ib-1 (Play)] menu, select [] disabled during Auto Play. - Page 89 Playback - Advanced Functions Press the MENU button. • The camera returns to the menu screen. Press the MENU button again to exit the menu screen.
-
Page 90: About Printing
Print Settings), and then take the SD card to a participating photo lab that supports DPOF to have them printed out later. "1 This camera complies with the industry standard PictBddge, therefore, you can connect the camera to non-Canon PictBddge compliant printers and print images. *2 Digital Print Order Format This manual explains the DPOF print settings. -
Page 91: Image Transmission
Can Be Used with this Camera • CP Printer • Bubble Jet CP Direct Compatible CP Printers Printer - See the System Map Direct Print Compatible Bubble Jet Printers • Non-Canon PictBridge - For more information, visit your nearest Canon retailer. comp!!ant p.nters... - Page 92 Vadous Functions Selecting Images for Printing DPOF Print Settings You can select images on an SD card for In the [_D--_ (Play)] menu, select printing and specify the number of print (Print Order) and press the SET copies in advance using the camera. This is button.
-
Page 93: Print Settings
Various Functions • When the print type When [Index] is selected, the print settings can be deleted. For the instructions on (p. 92) is set to [Index], select an image using 41 changing settings, please reread Step 3 from or _ and mark or the beginning. - Page 94 Vanous Functions Setting the Print Style Select [] (Print Type), [] (Date) or You can set up the print style as follows. [] (File No.) using • or V. Print one image per 4 Select a setting using • or •. sheet.
- Page 95 Various Functions Resetting Print Settings Press the MENU button. The Reset feature clears all print selections, • The set up menu will close and the Print Order menu will reappear. and resets Print Type to [Standard], Date to [On], and File No. to [Off]. In the [b-q (Play)] menu, select [] (Print Order) and press the SET button.
-
Page 96: (Dpof Transfer Order)
Various Functions Image Transmission Settings 2 Press • or • to (DPOF Transfer Order) select [Order] and press the SET You can use the camera to specify settings for button. images before downloading to a computer. Refer to the Software Starter Guide for instructions •... -
Page 97: Downloading Images To A Computer
Various Functions For setting all images on Downloading Images to a Computer the SD card The following methods can be used to • Switch to index playback download images recorded by the camera to (a set of 3 images) by a computer. -
Page 98: Computer System Requirements
Free Hard program) Windows 98 (Including Second Edition) Disk - PhotoStitch: 40 MB or more Windows Me • Canon Camera TWAIN Driver: Space Windows 2000 25 M B or more Windows XP (Home Edition, • Canon Camera WlA Driver: Professional) - Page 99 Various Functions 800 x 600 pixels/High Color (16bit) or better is required Display 1,024 x 768 pixels or better is recommended eMacintosh Mac OS 9.0 - 9.2, Mac OS X (v10.1/v10.2/v10.3) Computer The above OS should be pre- installed on computers with built-in Model USB ports.
- Page 100 Install the driver and the software 2.Insert the connector applications bundled on the with _ facing up. Canon Digital Camera Solution Disk (first time only). connector's sides to • Please see the Software Starter Guide for the Always grasp the remove the interface installation procedures.
- Page 101 Various Functions 5 Select [Canon CameraWindow] 6 Click [Set] in the [CameraWindow the events dialog that appears on - Set Auto-Launch] window (first the computer and click [OK] (first time only). time only). • The Download Image window will display.
- Page 102 Vanous Functions Downloading Images by Direct • Using the software and computer to Transfer download images: --*See the Software Starter Guide. Use this method to download images using • Using the Camera to Download Images camera operations. (Direct Transfer Function): Install the supplied software and adjust the...
- Page 103 Various Functions • To cancel the transfer, press the SET button. Transfers and saves single images to the computer as • The images will download and the Direct Transfer menu will reappear. Wallpaper you view and select them. The transferred images display on the computer Select &...
- Page 104 Direct Transfer without installing the software bundled on the Canon Digital Camera Solution Disk. This is useful menu is displayed. The image selection for downloading images to a computer in which the screen will appear directly when the software is not installed.
-
Page 105: Downloading Directly From A Sd Card
Various Functions Downloading Directly from a SD card Viewing !mages AV cable AVC-DC300 can be used to view Eject the SD card from the camera images as you shoot or play them back. and insert it into a SD card reader connected to the computer. - Page 106 Vanous Functions Plug the other ends of the AV • No image will appear on the LCD cable to the video in and audio in monitor when the camera is connected to a TV monitor. jacks on the 1%/. • If the TV is a stereo model, you can plug Yellow Plug to the Video In Jack the audio plug into either the left or right Audio In jack.
-
Page 107: Resetting The File Number
Various Functions Resetting the File Number • etting the File No. Reset to [Off] is useful for avoiding file name duplication You can select the way file numbers are assigned. when images are downloaded to a The camera resets the file number to computer. -
Page 108: Customizing The Camera (My Camera Settings)
Vanous Functions Customizing the Camera Folder File Capacity (My Camera Settings) Each folder usually contains up to 100 images. My Camera allows you to customize the start-up However, since images shot in Continuous image and start-up, shutter, operation and Shooting or Stitch Assist mode are always self-timer sounds. - Page 109 Various Functions Changing My Camera Settings Press the MENU button. • Pressing the button closes the menu and Press the MENU makes the settings take effect. button. • In Shooting mode, the menu can be closed • The [ _ (Rec.)] or [ [] by pressing the shutter button halfway.
-
Page 110: Registering My Camera Settings
Vanous Functions Registering My Camera Settings 2 Press the MENU button. Images recorded onto the SD card and newly • The [_](Play)] menu appears. recorded sounds can be added as My Camera settings to the [_ and [_ menu items. You can also use the supplied software to upload your computer's images and sounds to the camera. - Page 111 Various Functions Press the DISP. button. Select [] (Record) using • or • and press the SET button. • An image appears. • Recording starts. • Recording stops when the time is exceeded. Start-up Sound: 1 second 6a, 7a Start-up Image: Go to step Operation Sound: 0.3 seconds Start-up Sound, Shutter Sound, Operation Sound, Self-timer Sound: 2 seconds...
- Page 112 Vanous Functions • Start-up, Operation, Self-timer and Shutter Sounds • Recording Format WAVE (monaural) • Quantization Bits 8 bit • Sampling Frequency 11.025 kHz or 8.000 kHz • Recording Time 11.025 kHz 8.000 kHz File Format of My Camera Settings hml,_==,,_,me'-'-u* Sound 1.0 sec.
- Page 113 Various Functions they can strike a pose fitting the music. In these ways you can customize your camera by creating and adding new My Camera settings. more information on creating and adding to I See the supplied Software Starter Guide for the My Camera Settings files,...
- Page 114 Battery charge is insufficient to operate the camera. Replace both batteries at the Change the batteries same time with new AA-size alkaline batteries (p. 17) or fully recharged Canon NiMH batteries. No image No images recorded on SD card.
- Page 115 List of Messages Corrupted data You attempted to play back an image with corrupted data. You attempted to play back an image recorded in the RAW format. You attempted to play back an image that was recorded in a special format Unidentified Image (proprietary format used by the camera of another manufacturer)
- Page 116 • Reload the batteries in the correct direction. direction. Batteries are depleted. • Replace with unused alkaline (two AA-size batteries) or fully recharged Canon AA-size NiMH batteries. • Use a household power source. Batteries are not the right type. • Use only new AA-size alkaline batteries or Canon AA-size NiMH batteries.
- Page 117 • Format the SD card. (p. 19). correctly. • The card may be defective (its logical may be corrupted). Contact Canon Customer Help Desk. The SD card is write-protected. • Slide the write protect tab of the SD card upward (p. 15).
- Page 118 The batteries are Batteries are not the right type. • Use only new AA-size alkaline batteries or consumed quickly. Canon AA-size NiMH batteries. (For the information about alkaline batteries, see Proper Battery Handh'ng (p. 17)) Battery capacity drops due to low •...
- Page 119 Troubleshooting Problem Cause Solution Shots are blurry or The camera was moving when you • Hold the camera steady when shooting. unfocused. took the shot. • Be careful not to block the AF-assist beam Autofocus function hampered by obstruction to AF-assist beam. flash part with a finger or other object.
- Page 120 Troubleshooting Problem Cause Solution The subject comes The subject is too close to the flash. • When flash is used, the distance between lens and out overexposed subject should be no less than 30 cm (1.0 ft.). (too bright). The subject is brighter than the •...
- Page 121 Troubleshooting Problem Cause Solution Image not showing Incorrect video system setting. • Set the video system to the appropriate setting, on TV NTSC or PAL, for your TV (p. 70). Shooting mode set to I_ [] (Stitch • The output will not appear on a TV monitor in Assist).
- Page 122 Rep!ac!ng Date Batter Open the SD card slot/battery cover (p. 13, 15) and remove If the LCD monitor displays the Date/Time menu when you turn on the camera, this battery holder. means that the date battery has run down and the clock has stopped running. Please purchase a replacement battery (battery type CR1220) and install it as follows.
-
Page 123: Using The Power Kits (Sold Separately)
Appendix Using the Power Kits (Sold Replace the date battery holder Separately) back into its original position. Using Rechargeable Batteries 6 Set the date and time when the (Battery and €_,h_,_arger Kit CBK4-200) Date/Time menu is displayed on Included are the battery charger and four the LCD monitor (p. - Page 125 110 minutes when end of the charger and 250 minutes with four for the charger to fully recharge them (as determined by testing at Canon facilities). Please do not charge batteries in areas where the temperature outside the range of 0 to 35 °C (32 to 95 °F).
- Page 126 Appendix 2 Open the terminal cover, and Using A C Adapt r Kit j_jj._jCK8OjO ... connect the adapter's DC plug Use of the separately sold AC Adapter Kit ACK800 is recommended when using the camera into the camera's DC IN terminal. continuously for prolonged periods of time and when connecting to a computer.
-
Page 127: Camera Care And Maintenance
• Never use synthetic cleaners on the camera body or lens. If dirt remains, contact the closest Canon Customer Support Help Desk as listed on the separate Canon Customer Support leaflet. Use a lens blower brush to remove Monitor, dust and dirt. - Page 128 Alldata isbased o nCanon's standard testing methods. Subject tochange without notice. Camera Effective Pixels Approx. 3.2 million Image Sensor 1/3.2-inch CCD ( Total number ofpixels: Approx. 3.3 million) Lens 5.9 (W) -13.2 ( T) m m (35 mm film equivalent: 45(W) -100 ( T) r am), f3.8 Digital Zoom Up to approx.
- Page 129 Specifications White Balance TTL auto, pre-set (available settings: Daylight, Cloudy, Tungsten, Fluorescent, Fluorescent H) or Custom Flash Auto*, on*, off * Red-eye reduction available Flash Range Normal: 47 cm - 2.0 m (1.5 - 6.6 ft.) (W/T) Macro: 30 - 47 cm (1.0 - 1.5 ft.) (W/T) (ISO speed set to Auto) Shooting Modes Auto/Manual/Stitch...
- Page 130 Magnified (approx. 10x (max.) in LCD monitor), Auto play or Sound memos (up to 60 sec.). Direct Pdnt Canon Direct Print / Bubble Jet Direct / PictBridge compatible Display Languages 14 languages available for menus and messages (English, German,...
-
Page 131: Battery Performance
Specifications SD Cards Estimated Battery Performance Capacities (Recordable Images) Number of Shots [] SD card included with the camera Playback Baaed on Time the CIPA Monitor Off SDC-16M SDC-128M standard &A.Alkaline Batteries Approx Approx Approx ncluded wi_ the camera 100 shots 400 shots 180 rain, (2048 x 1536 pixels) - Page 132 Specifications oThe maximum movie clip length is 30 sec. ([])* Image File Size (Estimated) 3 min. ([], [])*. The times shown are the maximum continuous recording times. * When using the separately sold SDC-128M 1602KB 893KB 455KB card (not sold in some regions). (2048 x 1536 pixels) •...
- Page 133 Specifications NiMH Battery NB-2AH Dimensions 65.0 x 105.0 x 27.5 mm (2.6 x 4.1 x 1.1 in.) Supplied with the separately sold NiMH Battery CB-4AH: Approx. 95 g (3.4 oz.) NB4-200 set and the Battery!Charger Kit CBK4-200. Weight CB-4AHE: Approx. 97 g (3.4 oz.) Rechargeabie nickel metal...
- Page 134 This section offers photography tips. Underexposure The whole recorded image is dark, which makes white Using Self-timer (p. 43) elements of the image appear gray. Shooting bright subjects Normally, the camera shakes a little when you press or in backlt conditions may the shutter button.
- Page 135 Photo Tips and Information Speed The ISO speed is the numeric representation of the camera's sensitivity to light. The higher the ISO speed, the higher the sensitivity. A high ISO speed allows you to shoot images in dark indoor or outdoor conditions without a flash and atso helps prevent blurred images due to camera shake.
- Page 136 Continuous Mode ......A/V (AadioNideo) Out Terminal ....13, 103 Date ........AC Adapter Kit ACK800 ....... DC IN Terminal ....... Adjusting the Exposure ......AF ......... Default Settings ......65, 72 AF-assist Beam ......12, 34 DIGITAL Terminal ......AiAF ........
- Page 137 Index ON/OFF Button ....... Image File Size ......Image Transmission Settings (DPOF Transfer Order) . 94 Index Playback ....... Indicator ........Photo Effect ......... Infinity ........Play Menu ........ISO Speed ........Playback Auto Play ......... Displaying Images Individually ....LCD Monitor Movies ........
- Page 138 Index Speaker ........Special Scene Mode ......Stitch Assist ......... Quick Shots ......... Strap Mount ......... Rec. Menu ........Terminal Cover ......13, 98 Red-eye Reduction ......39, 41 Time ........Red-eye Reduction Lamp ....12, 41 Troubleshooting ......Replacing the Date Battery .....
- Page 139 If such changes modifications should be made, you could be required to stop operation of the equipment. Canon U.S.A. Inc. One Canon Ptaza, Lake Success, NY 11042, U.S.A. Tel No. (516) 328-5600 Canadian Radio Interference Regulations This Class B digital apparatus...
-
Page 140: Functions Available In Each Shooting Mode
Functions Available in Each Shooting Mode The following chart shows the functions and settings available in each shooting mode. teference Function P_lr_l • t,lm _ Large Medium 1 Medium 2 Small Resolution Postcard Print _ ..Movie Movie Movie Superfine Compression F ine Normal Auto... - Page 141 _ages Function Rilllg teference Red-eye Reduction Quick Shot AF-assist Beam ..Single Shot Shooting ContinuousMode_ Method Self4imer (10sec.)£_ Self-timer ( 2 sec.) _'_ AF System Selection Macro Mode Infinity Mode i i_ Digital Zoom I Oft 7o* Exposure Compensation _ Evaluative Light Metering...
- Page 142 _ages Function Rilli_l _eference White Balance (1) Photo Effect ISO Speed Ion 'o* o* ;o _ o* ;_ Auto Rotate PF_ ]Off The default for the settings changed by the menu and button operations can be restored all at once except for Shooting mode, [Date/Time] and [Language] (p.
- Page 143 C&flOfl CDI-E140-010 © 2004 CANON INC. PRINTED IN CHINA...
Need help?
Do you have a question about the PowerShot A400 and is the answer not in the manual?
Questions and answers