
Related Manuals for Emerson NR303TTC


Summary of Contents for Emerson NR303TTC
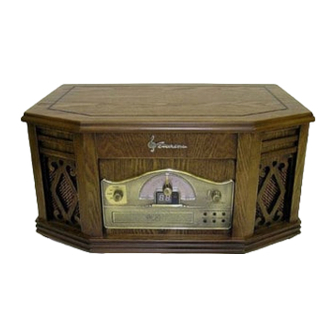
- Page 1 COMPLETE STEREO SYSTEM with AM/FM STEREO RADIO, CD and CASSETTE PLAYER, and FULL SIZE STEREO PHONOGRAPH O W N E R S M A N U A L N R 3 0 3 T T C Visit our web site at: www.emersonelectronics.ca...
-
Page 2: Important Safety Instructions
TO PREVENT FIRE OR SHOCK HAZARD, DO NOT USE THIS PLUG WITH AN EXTENSION CORD, RECEPTACLE OR OTHER OUTLET UNLESS THE BLADES CAN BE FULLY INSERTED TO PREVENT BLADE EXPOSURE. TO PREVENT FIRE OR SHOCK HAZARD, DO NOT EXPOSE THIS APPLIANCE TO RAIN OR MOISTURE. The lightning flash with arrow- WARNING : TO REDUCE THE head symbol, within an equi-... - Page 3 And please save this manual for future reference. It includes your warranty and important service information. Once again, thank you for purchasing this Emerson Heritage Series Complete Stereo System. The serial number of your system is located on the back panel. Please take a moment now to locate the serial number and write the number in the space provided below.
-
Page 4: Important Notes
IMPORTANT NOTES Avoid installing this unit in places exposed to direct sunlight or close to heat radiating appliances such as electric heaters, on top of other stereo equipment that radiates too much heat, places lacking ventilation or dusty areas, places subject to constant vibration and/ or humid or moist areas. - Page 5 IMPORTANT NOTES IMPORTANT Since digital circuitry may cause interference to other radio or television tuners nearby, switch this unit off when not in use or move it away from the affected radio/television tuner. NOTE: This digital apparatus does not exceed the Class B limits for radio noise emissions from digital apparatus as set out in the Radio Interference Regulations of Industry Canada.
-
Page 6: Preparation For Use
PREPARATION FOR USE UNPACKING AND SET UP Carefully remove the unit from the display carton and remove all packing material from the unit. Unwind the AC power cord and extend it to its full length. Unwind the FM Antenna wire and extend it to its full length. Place the unit on a stable, level surface, convenient to an AC outlet, out of direct sunlight, and away from sources of excess heat, dust, moisture, humidity, or strong magnetic fields. - Page 7 Remove the opaque white plastic stylus cover from the phonograph stylus by sliding it in the direction of the arrow. STYLUS COVER Discard the stylus cover. Remove the twist-tie that was used to secure the tone arm during shipment. Release the tone arm lock lever. TONE ARM LOCK LEVER Connect the plug to your AC outlet.
-
Page 8: Power Source
POWER SOURCE This system is designed to operate on normal 120V 60 Hz AC only. Attempting to operate from any other power source may cause damage to the system, and such damage is not covered by your warranty. NOTE: You will note that this system is equipped with a polarized AC power plug having one blade wider than the other. -
Page 9: Location Of Controls And Indicators
LOCATION OF CONTROLS AND INDICATORS FRONT PANEL 1.) Speakers. 2.) AM Dial Scale. 3.) Tuning Control. 4.) FM Dial Scale. 5.) Turntable. 6.) Phonograph Lid Support Bracket. 7.) Phonograph Lid. 8.) Cassette Player Slot. 9.) Cassette EJ/FF Button. (Eject/Fast Forward) 10.) OFF-VOLUME Control. -
Page 10: Back Panel
BACK PANEL 22.) AC Power Cord. 23.) FM Lead Wire Antenna. PHONOGRAPH 1.) Turntable. 2.) 45 rpm Adapter. 3.) Transit Screw. 4.) Cue Lever. 5.) Speed Selector (33/45/78 rpm). 6.) Tone Arm Lock. 7.) Tone Arm with Stylus. - Page 11 OPERATING INSTRUCTIONS Listening To The Radio To turn the system on , rotate the OFF-VOLUME control clockwise until a click is heard, and set the Volume to a low level. The POWER indicator lights up. Set the Function selector (AM/FM/TAPE/CD/PHONO) to the AM or FM band as desired .
-
Page 12: Playing Compact Discs
PLAYING COMPACT DISCS Turn the OFF-VOLUME control clockwise until a click is heard, and set the volume to a low level. S e t t h e F u n c t i o n s e l e c t o r (AM/FM//TAPE/CD/PHONO) to the CD position. - Page 13 Skipping Tracks And High Speed Music Search During CD Playback, repeatedly press the F. F (Forward Forward) or F.R (Fast Reverse) buttons to skip to higher or lower number tracks. When the desired track number appears on the display release the buttons and playback will begin on the desired track.
-
Page 14: Playing Cassette Tapes
PLAYING CASSETTE TAPES Note: Before inserting a tape in the player be sure that there is no excess slack in the cassette that could become jammed in the mechanism. Refer to the CARE AND MAINTENANCE section for instructions on removing excess slack from the cassette. -
Page 15: Playing Records
PLAYING RECORDS This system includes a full-size, 3-speed, belt-drive turntable. You can play 33, 45, and 78 rpm records. Turn the OFF-VOLUME control clockwise until a click is heard, and set the Volume to a low level. Set the Function (AM/FM/TAPE/CD/PHONO) selector to the PHONO position. - Page 16 IMPORTANT!! T O P R O T E C T T H E T U R N TA B L E F R O M D A M A G E D U R I N G TRANSPORTATION, A SILVER TRANSIT SCREW IS LOCATED AT THE UPPER RIGHT OF THE TURNTABLE PLATFORM.
-
Page 17: Care And Maintenance
CARE AND MAINTENANCE CASSETTE CARE Two common causes of trouble experienced when using cassettes are: Tape jamming - Leading to uneven speed in playback, and Tape tangling - Where the tape wraps itself around vital parts of the mechanism. To reduce the likelihood of these problems occurring, the following precautions should be observed: Check that there are no loose layers of tape visible through the cassette centre window (see... -
Page 18: Compact Disc Care
CARE AND MAINTENANCE COMPACT DISC CARE To remove a disc from its storage case, press down on the centre of the case and lift the disc out, holding it carefully by the edges. Fingerprints and dust should be carefully wiped off the discs recorded surface with a soft cloth. - Page 19 Thank you for choosing EMERSON! SYNNEX Canada Limited gives the following express warranty to the original consumer purchaser or gift recipient for this EMERSON product, when shipped in its original container and sold or distributed in Canada by SYNNEX Canada Limited or by an Authorized EMERSON Dealer.
- Page 20 EMERSON product or the loss of information. The purchaser will be responsible for any removal, reinstallation, transportation and insurance costs incurred.
- Page 21 EMERSON Part NO.: 16-2956EF 607-01 Printed in China...
Need help?
Do you have a question about the NR303TTC and is the answer not in the manual?
Questions and answers