
Related Manuals for Emerson MS9700


Summary of Contents for Emerson MS9700
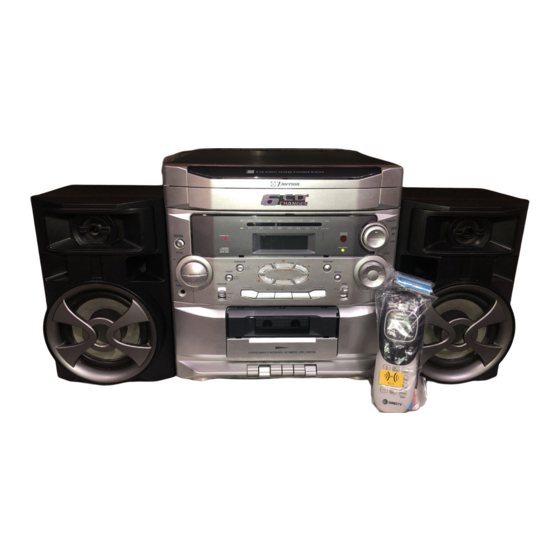
- Page 1 HOME AUDIO SYSTEM with 6 CD CHANGER and CASSETTE RECORDER OWNER'S MANUAL MS9700 Visit our web site at www.emersonradio.com MS9700_ib021903.p65 19/2/2003, 9:23...
-
Page 2: Important Safety Instructions
TO PREVENT FIRE OR SHOCK HAZARD, DO NOT USE THIS PLUG WITH AN EXTENSION CORD, RECEPTACLE OR OTHER OUTLET UNLESS THE BLADES CAN BE FULLY INSERTED TO PREVENT BLADE EXPOSURE. TO PREVENT FIRE OR SHOCK HAZARD, DO NOT EXPOSE THIS APPLIANCE TO RAIN OR MOISTURE. The lightning flash with arrow- WARNING: TO REDUCE THE head symbol, within an equi-... -
Page 3: Before We Begin
This product was manufactured using the highest quality components and standards of workmanship. It was tested by Emerson inspectors and found to be in perfect working order before it left our factory. However, there is always the chance that some problem may occur because of rough handling during shipment to the retail store or to the final consumer. -
Page 4: Important Notes
IMPORTANT NOTES Avoid installing the unit in locations described below : • Places exposed to direct sunlight or close to heat radiating appliances such as electric heaters, on top of other stereo equipment that radiates too much heat, places lacking ventilation or dusty areas, places subject to constant vibration and/ or humid or moist areas. -
Page 5: Preparation For Use
PREPARATION FOR USE UNPACKING • Remove the main unit and the speakers from the carton and remove all packing materials from the components. • Remove any descriptive labels from the fronts of the main unit and speakers. • Remove any small strips of tape that may have been used to secure the cassette door or CD drawer in transit. -
Page 6: Speaker Connection
SPEAKER CONNECTION The speaker cables and the speaker terminals on the back of the main unit are color coded for your convenience. Connect the cables from the left speaker to the “LEFT” terminals, and the cables from the right speaker to the “RIGHT” terminals. To connect the speaker cable to the terminal depress the plastic tab below the terminal, insert the bare wire at the end of the cable into the terminal opening, and release the plastic tab to lock the wire in place. -
Page 7: Connecting The Ac Power Cord
CONNECTING THE AC POWER CORD After connecting the speakers unwind the AC power cord fully and connect it to any convenient household AC outlet. This system is designed to operate on 120V 60Hz AC power only. Connecting this system to any other power supply may cause damage to the unit which is not covered by your warranty. -
Page 8: Antenna Information
ANTENNA INFORMATION This unit has an external lead wire FM antenna permanently attached to the back of the main cabinet. Unwrap this antenna wire, extend it to its full length, and allow it to hang down from the back of the set. In some cases you may have to vary the direction of this antenna until you find the position that provides the best reception, and then use a small piece of tape to secure the antenna in that position. -
Page 9: Location Of Controls And Indicators
LOCATION OF CONTROLS AND INDICATORS FRONT PANEL 1.) CD DIRECT ACCESS Buttons. 2.) Multifunction LCD Display. 3.) 6 CD Changer Tray. 4.) POWER ON Indicator. 5.) SURROUND ( ON / Button. 6.) POWER (On/Off) Button. 7.) VOLUME (UP/DN) Buttons. 8.) PHONES Jack. 9.) X-BASS ( ON / OFF) Button. -
Page 10: Back Panel
BACK PANEL 27.) FM Wire ANTENNA. 28.) Speaker Terminals. 29.) AC Power Cord. MS9700_ib021903.p65 RIGHT LEFT 19/2/2003, 9:23... - Page 11 MULTIFUNCTION LCD DISPLAY (For CD Operations Only) RANDOM INTRO MEMORY Disc location indicators Indicates Disc 1 is at back half of tray. Indicates Disc 1 is at front half of tray. Indicates Disc 1 is in play position. Indicates Disc 1 is playing. MS9700_ib021903.p65 19/2/2003, 9:23...
-
Page 12: Remote Control
REMOTE CONTROL 1.) OPEN/CLOSE (REAR) Button. 2.) Disc 2 Button. 3.) Disc 1 Button. 4.) Disc 6 Button. 5.) DISC SCAN Button. 6.) PROG (Program) Button. 7.) INTRO Button. 8.) REPEAT Button. 9.) RANDOM Button. 10.) CD STOP Button. 11.) CD PAUSE Button. - Page 13 B AT T E R Y I N S T AL L AT I O N Insert 2 ‘ AAA’ size alkaline batteries, not included, into the battery compartment of the remote handset, observing the battery polarity and replace the cover. B AT T E R Y R E P L AC E M E N T When the batteries become too weak, the operating distance of the remote handset is greatly reduced and you will need to replace the batteries.
-
Page 14: Sound Controls
OPERATING INSTRUCTIONS SOUND CONTROLS VOLUME Press the VOLUME UP or DN (Down) buttons on the front panel, or on the remote control to increase or decrease the volume level. The system memory remembers the volume level when the power is shut off and automatically returns to the same level when the power is switched on again. -
Page 15: Listening To The Radio
LISTENING TO THE RADIO 1.) Press the POWER button to turn the system ‘ On’ . The POWER ON indicator lights. 2.) Slide the FUNCTION selector to the ‘ TUNER’ position. 3.) Slide the BAND selector to the desired band, FM ST (Stereo), FM, or AM. 4.) Rotate the TUNING control to find the desired station. -
Page 16: Playing Compact Discs
PLAYING COMPACT DISCS This system features a unique “double decker” CD changer that holds 3 CDs in the upper tray and 3 CDs in the lower tray. When 6 CDs are loaded in the changer you can enjoy over 6 hours of uninterrupted music (depending on the length of the individual discs). -
Page 17: Normal Playback
As each disc plays and the drawer rotates the disc location icons will show which discs are at the back of the drawer and which discs are at the front of the drawer. NORMAL PLAYBACK 1.) Press the POWER button to turn the system ‘ On’ . The POWER ON indicator lights. - Page 18 4.) Press the lower half (FRONT) of the OPEN/CLOSE button on the front panel, or the FRONT open button on the remote control, to close the CD drawer. After the drawer closes the tray will rotate so that the 3 front pockets will move to the rear.
-
Page 19: Pause Control
6.) Press the lower half (FRONT) of the OPEN/CLOSE button on the front panel, or the FRONT open button on the remote control, to close the CD drawer. The player will read the disc that is in the play position and display the total tracks and playing time of that disc. - Page 20 TRACK SKIP AND MUSIC SEARCH During CD playback press the (Forward) or (Reverse) buttons to skip to higher or lower numbered tracks. Each time the buttons are pressed the player will skip one track and playback will begin on the new track. During CD playback depress and hold the (Forward) or (Reverse) buttons s...
- Page 21 RANDOM PLAYBACK (Remote Control Only) Press the RANDOM button on the remote control to play the tracks on each disc in random order. The RANDOM indicator appears in the display and random playback will begin with the disc that is in the play position. When all tracks on that disc have been played in random order the changer moves to the next disc and plays all the tracks on that disc in random order.
-
Page 22: Programmed Playback
PROGRAMMED PLAYBACK The CD changer has a 32 track programmable memory that allows you to select up to 32 of your favorite tracks from among all the discs in the changer for playback in any desired order. Note: You cannot program the changer while a disc is playing. If a disc is playing press the STOP button first before beginning the programming steps below. - Page 23 5.) When the desired Disc number and Track number appear on the display press the PROGRAM button to enter the info in memory. The track number returns to “00” and the program number advances to “P – 02” indicating that you can select the second disc number and track number to be memorized.
-
Page 24: Cassette Operation
CASSETTE OPERATION PLAYING CASSETTE TAPES 1.) Press the POWER button to turn the system ‘ On’ . The POWER ON indicator lights. 2.) Slide the FUNCTION selector to the ‘ TAPE’ position. 3.) Press the STOP/EJECT key to open the cassette door. 4.) Insert a prerecorded cassette into the slots on the door with the exposed tape facing down and the full reel on the left side. -
Page 25: Stereo Headphone Jack
MAKING A TAPE RECORDING This cassette recorder features an Automatic Recording Volume Level Control System that prevents overloaded or distorted recordings. You can change the volume level as often as you like during the recording process. It will not have any effect on the volume level of the recording itself. -
Page 26: Care And Maintenance
CARE AND MAINTENANCE ABOUT CASSETTE TAPES Whenever you record on a cassette any previously recorded material is erased as the new material is recorded. To prevent you from accidentally erasing material which you wish to save, blank cassettes are equipped with erase prevention tabs for each side of the tape. -
Page 27: Head Cleaning
• If the cassette feels “tight” while performing operation shown (see Fig. 2), the tape may be jamming due to “ridges” formed in the winding of the tape. (visible through the center window). These may be removed, in most cases, by fast winding of the cassette from one end to the other and back again. -
Page 28: Compact Disc Care
COMPACT DISC CARE • To remove a disc from its storage case, press down on the center of the case and lift the disc out, holding it carefully by the edges. • Fingerprints and dust should be carefully wiped off the disc’ s recorded surface with a soft cloth. - Page 29 FOR CUSTOMER SERVICE, PLEASE WRITE TO: Farmers Branch, TX 75234. MS9700_ib021903.p65 TO FIND THE LOCATION AND PHONE NUMBER OF YOUR NEAREST SERVICE CENTER PERMITTED TO PERFORM WARRANTY... 1-800-695-0098 PLEASE CALL: 1-800-898-9020 Emerson Radio Corp. Consumer Affairs Dept. 1901 Diplomat Drive, 19/2/2003, 9:23...
-
Page 30: Limited Warranty
For repair or replacement, pack your unit in a padded box, enclose your check or money order payable to Emerson Radio Corp. in the amount of $9.00 (not required by California residents) to cover shipping and handling costs, and enclose a copy of your proof of purchase. - Page 31 EMERSON RADIO CORP. EMERSON PART NO. 16-2888 PRINTED IN CHINA 302-01 MS9700_ib021903.p65 19/2/2003, 9:23...
Need help?
Do you have a question about the MS9700 and is the answer not in the manual?
Questions and answers
Am I able to use a aux cord for the head phones to play music through my phone to the system