
Related Manuals for Emerson MS9903TT


Summary of Contents for Emerson MS9903TT
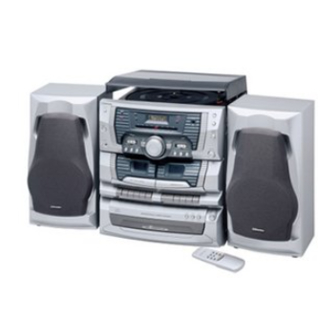
- Page 1 Home Audio System with 3 CD Changer, Belt-Drive Turntable, Dual Cassette Deck and Remote Control OWNER'S MANUAL MS9903TT Visit our web site at www.emersonradio.com MS9903TT_082205.p65 22/8/2005, 16:11...
-
Page 2: Important Safety Instructions
TO PREVENT FIRE OR SHOCK HAZARD, DO NOT USE THIS PLUG WITH AN EXTENSION CORD, RECEPTACLE OR OTHER OUTLET UNLESS THE BLADES CAN BE FULLY INSERTED TO PREVENT BLADE EXPOSURE. TO PREVENT FIRE OR SHOCK HAZARD, DO NOT EXPOSE THIS APPLIANCE TO RAIN OR MOISTURE. The lightning flash with arrow- WARNING: TO REDUCE THE head symbol, within an equi-... - Page 3 If you experience any problems with the set up or operation of this system please do not return it to the retail store. Please call the Emerson Customer Service Hotline toll free at 1-800-898-9020 and one of our service technicians will attempt to diagnose and correct the problem for you.
-
Page 4: Important Notes
IMPORTANT NOTES • Avoid installing this unit in places exposed to direct sunlight or close to heat radiating appliances such as electric heaters, on top of other stereo equipment that radiates too much heat, places lacking ventilation or dusty areas, places subject to constant vibration and/ or humid or moist areas. -
Page 5: Preparation For Use
PREPARATION FOR USE SPEAKER CONNECTION Connect each speaker to the corresponding speaker terminals on the back panel of the main unit. Make sure that the left speaker is connected to the left (L) speaker jack and the right speaker to the right (R) speaker jack. Right Speaker Left Speaker SPEAKER... -
Page 6: Protect Your Furniture
PROTECT YOUR FURNITURE !! This model is equipped with non-skid rubber 'feet' to prevent the product from moving when you operate the controls. These 'feet' are made from non-migrating rubber material specially formulated to avoid leaving any marks or stains on your furniture. However certain types of oil based furniture polishes, wood preservatives, or cleaning sprays may cause the rubber 'feet' to soften, and leave marks or a rubber residue on the furniture. -
Page 7: Location Of Controls And Indicators
LOCATION OF CONTROLS AND INDICATORS FRONT VIEW CONTROL PANEL MS9903TT_082205.p65 5 6 7 8 9 10 22/8/2005, 16:11... - Page 8 1.) POWER On/Off Button. 2.) PRESET EQ Button. 3.) FM STEREO Indicator. 4.) STANDBY/MUTE Indicator. 5.) ROCK Equalizer Indicator. 6.) POP Equalizer Indicator. 7.) Dial Scale. 8.) LCD Display. 9.) JAZZ Equalizer Indicator. 10.) CLASSIC Equalizer Indicator. 11.) Remote SENSOR. 12.) VOLUME UP Button.
-
Page 9: Back View
BACK VIEW 1.) FM Wire Antenna. 2.) Speaker L / R Jacks. 3.) AC Power Cord. MS9903TT_082205.p65 22/8/2005, 16:11... -
Page 10: Remote Control
REMOTE CONTROL 1.) STANDBY/ON Button. 2.) STOP Button. 3.) PROGRAM Button. 4.) PLAY/PAUSE Button. 5.) SKIP/SEARCH Button. 6.) SKIP/SEARCH Button. 7.) DISC Select Button. 8.) MUTE Button. 9.) VOLUME – Button. 10.) VOLUME + Button. 11.) Battery Compartment (Back Cabinet). B AT T E R Y I N S T AL L AT I O N 1.) Open the battery compartment cover. -
Page 11: General Controls
OPERATING INSTRUCTIONS GENERAL CONTROLS Preset Electronic Equalizer When the unit is switched ‘ On’ for the first time, the Equalizer will be in the “Flat” setting. Press the PRESET EQ button to select “ROCK”, “POP”, “CLASSIC” or “JAZZ” sound effect to suit your taste. The appropriate EQ Indicator lights to confirm your selection. -
Page 12: Listening To The Radio
LISTENING TO THE RADIO 1.) Slide the FUNCTION selector to the TUNER position. 2.) Slide the BAND selector to the desired band, FM or AM. 3.) Tune to your desired station with the TUNING control. If you have tuned to a FM Stereo station the FM STEREO LED Indicator will light. -
Page 13: Playing Compact Discs
PLAYING COMPACT DISCS IMPORTANT: This CD player can play normal CDs plus CD-R and CD-RW discs. However the playability of CD-R/RW discs may be affected by the type of software that was used in ‘ ripping’ the tracks from the original discs and ‘... - Page 14 TO BEGIN CD PLAYBACK After you have loaded up the 3 CDs in the changer: 1.) Press the PLAY/PAUSE for the first available disc in the tray and will begin playback from Track 1 on the first disc.T he number of the disc being played flashes on the display.
- Page 15 IMPORTANT!! If the disc is smudged or scratched it may skip or stop completely. This does not indicate a problem with the player. If this occurs, try playing another disc. If that disc plays properly, you may assume that the first disc is damaged and unplayable.
-
Page 16: Programmed Cd Playback
PROGRAMMED CD PLAYBACK You can program the CD changer to play up to a total of 32 tracks on all 3 discs in any desired order. NOTE: You can not program the CD changer during playback. If a disc is playing press the STOP 1.) Press the PROGRAM button once. - Page 17 5.) Use the DISC SKIP button or one of the three DISC buttons to select the disc containing the next track you wish to program. Example: Disc 3. 6.) Press the buttons to select the next track you wish to program. Example: Track 18.
- Page 18 REPEAT Playback (On Front Panel Only) This system has a four-way repeat function which allows you to continuously repeat one track, one disc, all discs, or all of the tracks which you have programmed. One Track Repeat 1.) Press the REPEAT button until the “REPEAT 1” Indicator appears in the CD display.
- Page 19 All Discs Repeat 1.) Press the REPEAT button until the “REPEAT ALL DISC” Indicator appears in the Display. 2.) Press the PLAY/PAUSE track of the disc which is in the play position. It will continue until it has played all tracks on all discs in the changer. When it has played the last track on the last disc it will begin playing again with the first track on the first disc.
- Page 20 INTRO Scan (On Front Panel Only) The Intro Scan feature lets you hear a 10 second introduction of each track on each disc. This feature is useful if you are trying to find a particular song but you do not know the title. 1.) Press the INTRO button once.
- Page 21 T U R N TAB L E 1.) 45 rpm LP Record Adapter. 2.) Platter. 3.) Transit Screw. 4.) Tone Arm Clamp. 5.) Tone Arm Lever (Cue Control). 6.) 33/45 rpm Speed Slide Switch. 7.) Tone Arm. 8.) Stylus and Protective Cover. IMPORTANT!! •...
- Page 22 STEREO PHONOGRAPH OPERATION 1.) Raise the turntable dust cover. 2.) Release the Tone Arm Clamp, and remove the stylus protector. 3.) Slide FUNCTION selector to PHONO position. 4.) Place a record on the turntable, over the central spindle. 5.) Place the 45 rpm adapter over the central spindle when playing 45 rpm records. Set the Speed Selector Switch to 33 or 45 rpm according to the record you are playing.
-
Page 23: Cassette Operation
CASSETTE OPERATION PLAYING CASSETTE TAPES 1.) Press the POWER button to turn the system ‘ On’ . 2.) Slide the FUNCTION selector to TAPE position to select the Tape mode. 3.) Press the Stop/Eject door. 4.) Insert a prerecorded cassette into the slots on the door with the exposed tape facing down and the full reel on the left side. - Page 24 Pause Control Press the key to stop the tape temporarily. The tape movement stops but the tape motors continue to run. Press the resume normal playback. CONTINUOUS PLAYBACK OF TWO CASSETTES 1.) Insert prerecorded tapes into both cassette compartments with the tape you want to play first in DECK B.
- Page 25 MAKING A TAPE RECORDING This cassette recorder features an Automatic Recording Volume Level Control System that prevents overloaded or distorted recordings. You can change the volume level as often as you like during the recording process. It will not have any effect on the volume level of the recording itself.
-
Page 26: Care And Maintenance
CARE AND MAINTENANCE ABOUT CASSETTE TAPES Whenever you record on a cassette any previously recorded material is erased as the new material is recorded. To prevent you from accidentally erasing material which you wish to save, blank cassettes are equipped with erase prevention tabs for each side of the tape. -
Page 27: Head Cleaning
• If the cassette feels “tight” while performing operation shown (see Fig. 2), the tape may be jamming due to “ridges” formed in the winding of the tape (visible through the center window). These may be removed, in most cases, by fast winding of the cassette from one end to the other and back again. -
Page 28: Compact Disc Care
COMPACT DISC CARE • To remove a disc from its storage case, press down on the center of the case and lift the disc out, holding it carefully by the edges. • Fingerprints and dust should be carefully wiped off the disc’ s recorded surface with a soft cloth. - Page 29 CENTER PERMITTED TO PERFORM SERVICE WARRANTY... CALL TOLL FREE: 1-800-695-0098 FOR ADDITIONAL SET-UP OR OPERATING ASSISTANCE PLEASE CALL: 1-800-898-9020 FOR CUSTOMER SERVICE, PLEASE WRITE TO: Emerson Radio Corp., Consumer Affairs Dept., 5101 Statesman Drive, Irving, TX 75063. MS9903TT_082205.p65 22/8/2005, 16:11...
-
Page 30: Limited Warranty
Emerson Radio Corp. in the amount of $9.00 (not required by California residents) to cover shipping and handling costs, and enclose a copy of your proof of purchase. - Page 31 EMERSON Part No. 16-2910 508-03 Printed in China MS9903TT_082205.p65 22/8/2005, 16:11...
Need help?
Do you have a question about the MS9903TT and is the answer not in the manual?
Questions and answers