Lexmark CS310 Quick Reference
Quick reference
Hide thumbs
Also See for CS310:
- Service manual (377 pages) ,
- User manual (200 pages) ,
- Quick refence manual (12 pages)
Table of Contents
Advertisement
Quick Links
Quick Reference
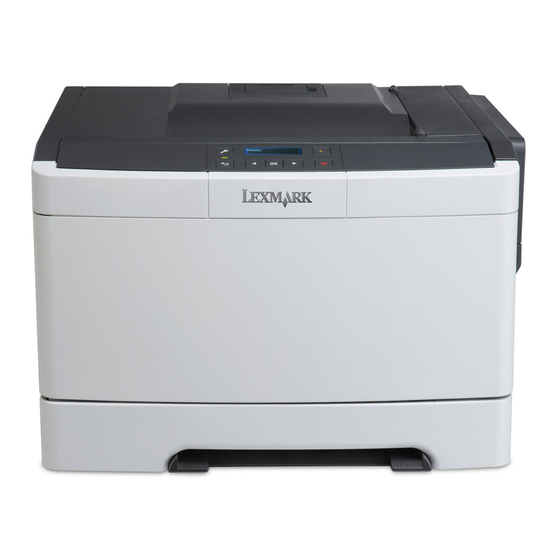
Learning about the printer
Using the printer control panel
1
2
9
8
7
6
5
Use the
To
1
Menus button
Open the menus.
Notes:
•
The menus are available only when the
printer is in Ready state.
•
Pressing the button while in a menu
item lets you return to the top level
menu screen.
2
Display
View printing options as well as status and
error messages.
3
Sleep button
Enable Sleep mode or Hibernate mode.
Notes:
•
Pressing any hard button, sending a
print job, or performing a power on
reset with the main power switch
wakes the printer from Sleep mode.
•
Pressing the Sleep button or
performing a power on reset with the
main power switch wakes the printer
from Hibernate mode.
4
Stop button
Stop printer activity.
Use the
5
Right arrow
button
6
Select button
7
Left arrow
button
3
8
Back button
9
Indicator light
Understanding the colors of the indicator
and Sleep button lights
The colors of the indicator and Sleep button lights on the printer control
4
panel signify a certain printer status or condition.
Indicator light color and its corresponding printer status
Indicator light
Off
Blinking green
Solid green
Blinking red
Sleep button light color and its corresponding printer status
Sleep button light
Off
Solid amber
Blinking amber
To
•
Scroll through menus or move between
screens and menu options.
•
Increase the numeric value of an option
or setting being displayed.
•
Select menu options.
•
Save settings.
•
Scroll through menus or move between
screens and menu options.
•
Decrease the numeric value of an option
or setting being displayed.
Return to the previous screen.
Determine the status of the printer.
Printer status
The printer is off or in Hibernate mode.
The printer is warming up, processing data,
or printing.
The printer is on, but idle.
The printer requires user intervention.
Printer status
The printer is idle or in Ready state.
The printer is in Sleep mode.
The printer is waking from or entering
Hibernate mode.
1
Sleep button light
Printer status
Blinking amber for 0.1
The printer is in Hibernate mode.
second, then goes
completely off for 1.9
seconds in pulsing
pattern
Using the Embedded Web Server
Note: This feature is available only in network printers or printers
connected to print servers.
If the printer is installed on a network, then you can use the Embedded
Web Server to do the following:
•
View the virtual display of the printer control panel.
•
Check the status of the printer supplies.
•
Configure supply notifications.
•
Configure printer settings.
•
Configure network settings.
•
View reports.
To access the Embedded Web Server for your printer:
1
Obtain the printer IP address:
•
From the TCP/IP section in the Network/Ports menu
•
By printing a network setup page or menu settings page, and
then finding the TCP/IP section
Notes:
–
An IP address appears as four sets of numbers separated
by periods, such as 123.123.123.123.
–
If you are using a proxy server, then temporarily disable
it to load the Web page correctly.
2
Open a Web browser, and then type the printer IP address in the
address field.
3
Press Enter.
The Embedded Web Server page appears.
Advertisement
Table of Contents

Related Manuals for Lexmark CS310


Summary of Contents for Lexmark CS310
-
Page 1: Quick Reference
Use the Sleep button light Printer status Quick Reference Right arrow Blinking amber for 0.1 The printer is in Hibernate mode. • Scroll through menus or move between button second, then goes screens and menu options. completely off for 1.9 •... -
Page 2: Loading Paper And Specialty Media
Note: Do not remove trays while a job is printing or while Busy Squeeze, and then slide the length guide tab to the correct position Loading paper and specialty appears on the display. Doing so may cause a jam. for the paper you are loading. media Setting the paper size and type From the printer control panel, navigate to:... -
Page 3: Loading The 650-Sheet Duo Tray
Note: Set the correct paper size and paper type to avoid paper Load the paper stack with the recommended printable side faceup. jams and print quality problems. Loading the 650‑sheet duo tray The 650‑sheet duo tray (Tray 2) consists of a 550‑sheet tray and an integrated 100‑sheet multipurpose feeder. -
Page 4: Loading The Multipurpose Feeder
Loading the multipurpose feeder Warning—Potential Damage: Never use envelopes with stamps, clasps, snaps, windows, coated linings, or self‑stick adhesives. These envelopes may severely damage the Push the multipurpose feeder latch to the left. printer. Locate the maximum paper fill indicator and tab. Note: Make sure the paper or specialty media is below the maximum paper fill indicator located on the paper guides. -
Page 5: Linking And Unlinking Trays
Load the paper, and then adjust the width guide to lightly touch • Printable side facedown for one-sided printing the edge of the paper stack. • Printable side faceup for two‑sided (duplex) printing • Load paper, card stock, and transparencies with the Note: There are different ways for loading letterhead depending recommended printable side facedown and the top edge on the mode of printing. -
Page 6: Printing A Document
Click Submit. Type a name for the paper type, and then click Submit. With a document open, choose File > Print. If necessary, click the disclosure triangle to see more Select a custom type, and then verify that the correct paper type Warning—Potential Damage: Paper loaded in the tray should match options. -
Page 7: Clearing Jams
Using Max Speed and Max Yield Canceling a print job from the computer Correct loading of paper Incorrect loading of paper Max Speed and Max Yield let you choose between a faster print speed For Windows users and a higher toner yield. Open the printers folder. - Page 8 • • Do not slide the paper into the tray. Load paper as shown in the Flex and straighten paper before loading it. Jam location Message on the What to do illustration. display Standard bin [x]‑page jam, clear Remove the jammed standard bin.
-
Page 9: X]-Page Jam, Clear Manual Feeder. [251.Xx]
[x]‑page jam, clear manual Reload paper into the multipurpose feeder. From the printer control panel, press to clear the message feeder. [251.xx] and continue printing. Pull out the standard 250-sheet tray (Tray 1) and manual feeder. [x]‑page jam, clear multipurpose feeder. -
Page 10: X]-Page Jam, Open Front Door To Clear Duplex. [23Y.xx]
Slide the paper guide until it lightly rests against the edge of the paper stack. From the printer control panel, press to clear the message and continue printing. Close the front door. [x]‑page jam, open front door. [20y.xx] Open the front door. CAUTION—HOT SURFACE: The inside of the printer might be hot. -
Page 11: X]-Page Jam, Open Front Door To Clear Fuser. [202.Xx]
Close the front door. Pull the green lever to open the fuser cover. Firmly grasp the jammed paper on each side, and then gently pull it out. Note: Make sure all paper fragments are removed. From the printer control panel, press to clear the message and continue printing. - Page 12 [x]‑page jam, open tray [x] [24y.xx] Pull the tray out completely. Note: The message on the printer display determines in which tray the paper jam is located. Firmly grasp the jammed paper on each side, and then gently pull it out. Note: Make sure all paper fragments are removed.
Need help?
Do you have a question about the CS310 and is the answer not in the manual?
Questions and answers