Table of Contents
Advertisement
Quick Links
Advertisement
Table of Contents

Related Manuals for CDA FWC151


Summary of Contents for CDA FWC151
- Page 1 Manual for Installation, Use and Maintenance Passionate about style Customer Care Department • The Group Ltd. • Harby Road • Langar • Nottinghamshire • NG13 9HY T : 01949 862 012 F : 01949 862 003 E : service@cda.eu W : www.cda.eu...
-
Page 2: Appliance Information
Do not let the mains cord hang over the edge of the table or worktop on which the appliance stands. Appliance information: Please enter the details on the appliance rating plate below for reference, to assist CDA Customer Care in the event of a fault with your appliance and to register your appliance for guarantee purposes. -
Page 3: Before First Use
Before first use You must allow the appliance to settle for at least twenty four hours prior to switching the power on. It is recommended that you remove all internal and external packaging and clean the interior of the appliance prior to first use, using a solution of bicarbonate of soda and warm water and then thoroughly dry the interior. -
Page 4: Use And Controls
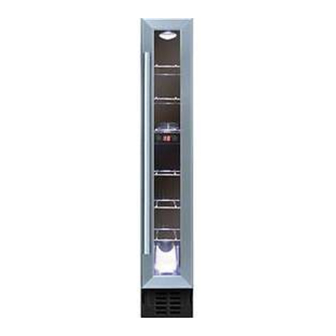
Use and Controls FWC151 Key: 1 – Power button 2 – Light button 3 – Up button 4 – Down button fig. 1 FWC301 Key: 1 – Power button 2 – Light button 3 – Up button 4 – Down button fig. -
Page 5: Optimal Temperature Selection
Use and Controls FWC601 Key: 1 – Light button 2 – Temperature set button 3 – Up button 4 – Down button fig. 3 To switch the power on/off Press and hold the light and temperature set buttons simultaneously for five seconds. To change the temperature •... - Page 6 Use and Controls FWC621 Left zone Right zone Temp. C/ F Temp. Key: Key: 1 – Power on/off 6 – °F/°C selection button 2 – Light button 7 – Light button 3 – Temperature display 8 – Temperature display 4 – Up button 9 –...
-
Page 7: Temperature Display
Humidity Control (all models except FWC151) The wine coolers are equipped with a humidity control system to maintain optimal humidity within the wine cooler. Fill the humidity reservoir approximately 3/4 full with water. Place the reservoir on the runners on the top shelf as shown in fig. -
Page 8: Care And Cleaning
Care and Cleaning Always disconnect the appliance from the mains electrical supply before any cleaning or maintenance. • Do not use abrasive products or detergents. After washing, rinse and dry thoroughly. • The exterior of the appliance and the door seal should be cleaned using mild soapy water and dried thoroughly. •... -
Page 9: Troubleshooting
• The light button is not set to off Please note: The LED lighting cannot be replaced without a service call. If the light fails, contact CDA Customer Care. The door will not close properly, check • The appliance is level and stable. -
Page 10: Installing The Wine Cooler
Installing the wine cooler This appliance is intended to be installed in a space between two units. The minimum space required is: FWC151 – 150 mm wide x 555 mm deep x 825 mm high FWC301 – 300 mm wide x 580 mm deep x 825 mm high FWC601 –... -
Page 11: Installation
Installation This appliance is designed to fit under worktops between 820 – 890mm in height, using one of two plinth plates to ensure that the feet are concealed from view. Installation under a kitchen worktop between 820-850 mm in height Install the wine cooler as described on page 9. -
Page 12: Reversing The Door
Reversing the door It is possible to reverse the door on this appliance, if required. To do so, follow the steps below: 1. Open the door and remove the screws (1) securing the bottom hinge to the appliance(6). Support the door to prevent it from falling. -
Page 13: Electrical Information
Electrical information Warning! This appliance must be earthed. The mains lead of this appliance has been fitted with a BS 1363A 13 amp fused plug. To change a fuse in this type of plug, follow the steps below: 1. Remove the fuse cover and fuse. 2. - Page 16 Passionate about style Customer Care Department • The Group Ltd. • Harby Road • Langar • Nottinghamshire • NG13 9HY T : 01949 862 012 F : 01949 862 003 E : service@cda.eu W : www.cda.eu...
Need help?
Do you have a question about the FWC151 and is the answer not in the manual?
Questions and answers