
Subscribe to Our Youtube Channel
Related Manuals for Lindy MC5-IP KVM


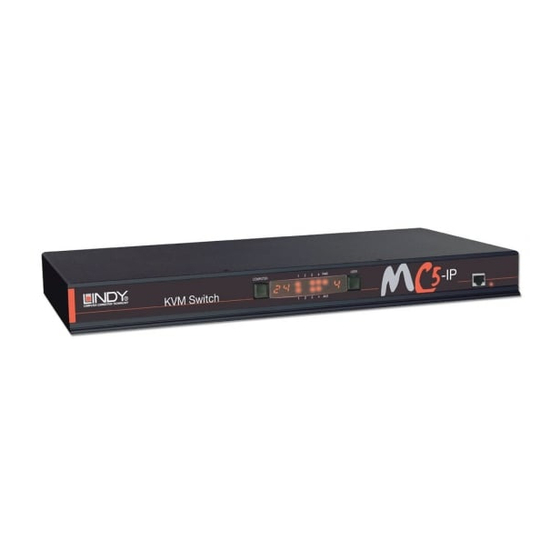
Summary of Contents for Lindy MC5-IP KVM
-
Page 1: User Guide
MC5-IP KVM Switch User Guide COMPUTER COMPUTER USER USER KVM Switch KVM Switch VNC 100 DA T LNK VNC 100 DA T LNK ... -
Page 2: Table Of Contents
Contents Introduction Configuration MC5 features - front and rear ............5 Overall initial configuration ............22 What’s in the box ................6 Configuration menus ..............23 What you may additionally need ..........6 Configuration menus layout ..........24 General security and configuration steps ........24 Installation Registering users (edit user list)..........25 Registering computers (edit computer list) ......26 Mounting ..................7 Video compensation..............27... - Page 3 Operation Further information The front panel controls ............48 Troubleshooting ................66 MC5 models ..............48 Getting assistance..............66 MC5-IP models..............48 Appendix 1 – Configuration menus .........67 Accessing the MC5..............48 Functions ................68 Local and remote user access............49 User Preferences ..............69 Selecting a computer............49 Global Preferences..............70 Logging in and out ...............52 Setup Options ...............72 Selecting cascaded computers ..........52...
- Page 4 Appendix 3 - VNC viewer connection options ......90 Appendix 7 – Cable and connector specifications ....100 Colour/Encoding ..............90 RS232 serial mouse to PS/2 converter cable .....100 Inputs..................91 RS232 serial flash upgrade cable........100 Scaling ...................92 MC5 to power switch cable ..........100 Misc..................92 Power switch to power switch daisy chain cable ....100 Identities................93...
-
Page 5: Introduction
Introduction Thank you for choosing the MC5 series from LINDY. This description, however, is far from sufficient to tell The MC5-IP variants introduce true global control for you that those four users can easily be situated up to the multiple host systems. Up to four global users can... -
Page 6: Mc5 Features - Front And Rear
MC5 features - front and rear Front panel buttons IP network port (MC5-IP only) The COMPUTER and USER buttons allow The port by which global users the local user to select the required are linked to the MC5 unit.This The MC5 units pack a great deal of functionality into a compact space. All combination. -
Page 7: What's In The Box
Part number: 32358 adapter and country- specific power lead Optional auxiliary power adapter (supplied with country-specific power lead) Call LINDY for details Slave power switches for connection to MC5-IP or master power switch Call LINDY for details Four self-adhesive CD-ROM... -
Page 8: Installation
Installation Mounting The MC5 units offer two main mounting methods: • Supplied four self-adhesive rubber feet • Supplied rack brackets Rack brackets The two supplied brackets (plus four screws), allow Connections the MC5 unit to be secured within a standard 1U rack slot. -
Page 9: Connections
Connections The MC5 and MC5-IP units provide a great deal of flexibility in their configurations. This chapter details the various connections that can be made to achieve the required installation. Local Remote user Global user REMOTE REMOTE user (via User Station) (IP network port) USER USER... -
Page 10: Local User
Local user LOCAL REMOTE GLOBAL A locally connected video monitor, To connect the local user port USER USER USER keyboard (and mouse) are required 1 Position a suitable video monitor, keyboard, mouse (and speakers, if during the initial configuration. required) in the vicinity of the MC5 unit such that their cables will easily reach. -
Page 11: Remote User (Via User Station)
Remote user (via User Station) LOCAL REMOTE GLOBAL Up to four users can be placed a 3 Lay a suitable length of category 5, 5e or 6 cabling between the User Station USER USER USER maximum of 300 metres (980 feet) module and the MC5 unit. -
Page 12: Global User (Ip Network Port)
Global user (IP network port) LOCAL REMOTE GLOBAL The MC5-IP models provide an To connect the Global user (IP network) port USER USER USER autosensing Ethernet IP port that 1 Depending upon where in the network the MC5-IP is being connected, run can operate at 10 or 100Mbps, a category 5, 5e or 6 link cable from the appropriate hub or router to the MC5-IP unit. -
Page 13: Computer System (Via Cam)
Computer system (via CAM) LOCAL REMOTE GLOBAL Each computer system is connected 4 Attach the connector of the cable USER USER USER to the MC5 unit via a Computer run to the socket of the CAM. Access Module (CAM) and standard category 5, 5e or 6 cabling. -
Page 14: Modem/Isdn Port
Modem/ISDN port LOCAL REMOTE GLOBAL The MC5-IP models provide a serial To connect a modem or ISDN adapter USER USER USER port to allow you to connect either 1 If possible, disconnect power from the MC5-IP and the modem or ISDN a modem or ISDN terminal adapter. -
Page 15: Power In Connection
Use only the adapter supplied with the unit or available from LINDY. Do not use the standard 10W adapters that are supplied with other LINDY products, such as the User Station. -
Page 16: Power Control Port
Power control port To connect and address the switch boxes Note: The MC5-IP unit can be powered on during this procedure, however, the LOCAL REMOTE GLOBAL The MC5-IP models provide a serial port USER USER USER switch boxes should be switched off. for connection to one or more optional 1 Mount up to four switch boxes in positions where they are close to the power control units. -
Page 17: Cascading Multiple Units
Cascade level within that cascade tree. LINDY MC5 or LINDY MC5-IP level 1 The maximum number of computer systems that can be controlled within a cascade... -
Page 18: How Cascade Connections Operate
How cascade connections operate The method for cascading MC5 units is straightforward and requires no hardware settings or lengthy configuration process. This is due to the Port Direct communication system that allows them to locate each other and share information. The method of linking MC5 units is the same regardless of the cascade level, or number of devices attached. -
Page 19: Addressing Computers In A Cascade
Each cascade level requires two digits, hence the computer marked in red requires a unique address with six digits because LINDY MC5 or LINDY MC5-IP Group 43 it is at cascade level 3, compared to the blue computer at level 2 at cascade with its four digit unique address. -
Page 20: Connecting Mc5 Units In Cascade
Connecting MC5 units in cascade To connect units in cascade Please consider the following when making cascade connections between MC5 units. 1 Ensure that power is disconnected from the MC5 and all other units to be connected. Tips for successful cascading 2 Connect one end of each •... -
Page 21: Using Cascaded Computers
Using cascaded computers In use, cascaded computers can be accessed using exactly the same methods as for those connected directly to the MC5. However, by far the easiest way is to use the on screen menu. This is because it displays the computer names and does not require any knowledge of port addresses, some of which (as discussed above) can be up to six digits long. -
Page 22: Multiple Video Head Connections
Multiple video head connections Two or more MC5 units can be connected together REMOTE REMOTE USER USER so that they operate in a synchronised manner. Synchronised operation is useful for applications that require multiple video signals to be switched together. This type of operation is usually required Serial synchronisation where each computer is fitted with multiple video... -
Page 23: Configuration
Configuration Almost all configuration and operational aspects of the MC5 units are controlled on-screen menu displays. Overall initial configuration When setting up a new installation, the following stages are recommended: Enable the general ‘Security’ option. With security disabled (default setting), all users attached to the MC5 have full and unrestricted access to all computers and all MC5 settings. -
Page 24: Configuration Menus
Security 1 If the main menu is not already displayed, press and hold and then Note: If the security option has been LINDY MC5 press using a keyboard attached to an MC5 user port. User Name: enabled, you will be asked for a valid... -
Page 25: Configuration Menus Layout
Send Data to RS232 port Modem Configuration 4 Now create a new password for the ADMIN user account. Read Data from RS232 port Reset Configuration LINDY MC5-IP only Routing status To set an ADMIN password User Preferences OSD Colour 1 Display the Configuration menu. -
Page 26: Registering Users (Edit User List)
1 Display the Configuration menu. Note: You must be logged-in as the 5 Press to display the ‘Edit Access Rights’ menu. ADMIN user. LINDY MC5 2 Highlight ‘Edit User List’ and press Edit access rights Computer 1 LINDY MC5 Computer 2... -
Page 27: Registering Computers (Edit Computer List)
5 When the port address is complete, press . The ‘Edit access rights’ menu ADMIN user. will be displayed. 2 Highlight ‘Edit Computer List’ and press LINDY MC5 Edit access rights LINDY MC5 Cross markers indicate which admin Edit Computer List... -
Page 28: Video Compensation
Video compensation It is important to note that, providing the cabling arrangements do not change, The MC5 units allow computer systems to be placed up to 50m (160 feet) away the various video compensations need to be applied only once to each computer and remote users to be extended by a maximum of 300m (980 feet). -
Page 29: Computer Video Compensation
Note: You must highlight the computer name and press to select it. 4 Press to access the compensation feature: LINDY MC5 Computer Port Ensure that the appropriate computer is Computer 1 marked by the arrow - if it is not marked,... -
Page 30: Remote User Video Compensation
Remote user video compensation To apply remote user video compensation Video compensation for each remote user is provided by their User Station 1 Ensure that the video image from the computer to be used has been modules, not by the MC5 unit itself. Using the User Station controls you can correctly compensated. -
Page 31: Remote User Skew Adjustment
Remote user skew adjustment The category 5, 5e and 6 cabling supported by the MC5 consists of four pairs of To use skew adjustment wires per cable. Three of these pairs are used to convey red, green and blue video 1 Display a skew pattern on the appropriate computer. - Page 32 3 As appropriate, press either the R, G or B keyboard keys to select the appropriate colour channel. Corresponding keyboard indicators will flash rapidly to show which channel is currently selected for adjustment: Num Lock for Red, Caps Lock for Green and Scroll Lock for Blue.
-
Page 33: Autoscanning
Autoscanning The MC5 provides an autoscan mode that switches between the connected To select an autoscan mode computers in sequence. This mode is useful to allow users and administrators 1 Display the Configuration menu. Note: You must be logged-in as the to sample activity among the connected machines. -
Page 34: Saving And Restoring Configuration Settings
Note: You must be logged-in as the ADMIN user for this procedure. Alan’s System 2102 Preparations for configuration save/load Comms Server • Contact LINDY support and obtain the files XPREAD.EXE and XPWRITE.EXE. Comms PC • Connect the serial port on the rear panel of the MC5, labelled COM1/ Gateway 1... -
Page 35: What To Do If The Admin Password Has Been Forgotten
What to do if the ADMIN password has been forgotten If the ADMIN password becomes mislaid or forgotten, you will not be able to access the MC5 to add or edit users and computer names. This situation may be resolved by performing a complete reset to return the MC5 or MC5-IP to its factory default state. -
Page 36: Hot Plugging And Mouse Restoration
Hot plugging and mouse restoration To restore mouse operation when hot plugging: It is strongly recommended that you switch off a computer before attempting 1 Using a suitable CAM (Computer Access Module) and category 5, 5e or 6 to connect it to the MC5. However, if this is not possible then you need to link cabling, carefully make the connections between the keyboard, monitor, ‘hot plug’... -
Page 37: Initial Ip Configuration
IP models of the MC5 family possess a further collection of configuration options related specifically to IP networking. It is important that the options Admin password LINDY MC5 are correctly set up for your installation BEFORE being connected to an open IP Unit Config Enter a password of at least six characters that has a mix network. -
Page 38: Ip Configuration By Global User
IP configuration by global user To configure IP details from a global user location Once the basic IP-related features have been configured using the MC5-IP 1 Use either the VNC viewer or a standard web browser to make remote configuration menus, further changes can be made by authorised global users Global user connections via the VNC interface. -
Page 39: Encryption Settings
Encryption settings The MC5-IP offers a great deal of flexibility in its configuration and this extends equally to its encryption settings that are used to prevent unauthorised interception of signals. Due to the variety of situations in which the MC5-IP might be used and the range of viewer applications that need to view it, a number of settings are available. -
Page 40: Networking Issues
Networking issues Thanks to its robust security the MC5-IP offers you great flexibility in how it integrates into an existing network structure. The MC5-IP is designed to reside either on an internal network, behind a firewall/router or alternatively with its own direct Internet connection. -
Page 41: Placing The Mc5-Ip Behind A Router Or Firewall
IMPORTANT: The correct configuration of routers and firewalls requires advanced The firewall/router would also need to be informed to transfer all traffic to the networking skills and intimate knowledge of the particular network. LINDY new port number through to the MC5-IP. - Page 42 To discover a DHCP-allocated IP address Once a DHCP server has allocated an IP address, you will need to know it in order to access the MC5-IP via a network connection. To discover the allocated IP address: standard configuration menus 1 In network section of either the or the configuration pages via...
-
Page 43: Placing The Mc5-Ip Alongside The Firewall
Placing the MC5-IP alongside the firewall Security can be further improved by using the following suggestions: MC5-IP is built from the ground-up to be secure. It employs a sophisticated 128bit public/private key system that has been rigorously analysed and found •... -
Page 44: Power Switching Configuration
Power switching configuration Power control sequences Power switch configuration comprises two main steps: Note: The settings given below are for the EPS-S8 power switch - other power switches may require different settings. Please refer to your power switch • Configure the serial port to the same speed as used by the POWER CONTROL documentation for details about codes required by other power switches. -
Page 45: The Kvmadmin Utility
The KVMADMIN utility Particularly useful for complex MC5 configurations and the control of remote installations, KVMADMIN is a powerful administration tool. KVMADMIN is based upon the successful VNC viewer and uses the same security system. Rather than a graphical interface usch as the standard viewer, KVMADMIN uses command line control to provide the following administration facilities: •... -
Page 46: Performing Upgrades
Windows-based computer system. Upgrading MC5 models and CAMs The KVM Firmware Uploader utility is available from the LINDY support. It allows you to check the current revision of the MC5 unit firmware as well as every Computer Access Module connected to it. - Page 47 ‘Unit Connected’ field. If these fields do not match then you may have an and prevents the upgraded code from being run. Running faulty or partially incorrect upgrade file, check with LINDY before proceeding. Check also that upgraded code may have unpredictable results and may damage your MC5 or the ‘New firmware version’...
-
Page 48: Upgrading Mc5-Ip Models
The MC5-IP models are upgraded via global connection (through the IP network 7 Click the Browse button and locate the .bin upgrade file that you port). Upgrades are digitally signed by LINDY using a secure key. This prevents downloaded earlier. The MC5-IP will show the following screen: unauthorised or altered firmware images being downloaded into the MC5-IP. -
Page 49: The Front Panel Controls
Operation The front panel controls button and numeric indicator MC5 models COMPUTER These items allow you to select any one of the MC5 computer ports. As you Computer button and User port mouse Power User button and press the button, the adjacent number will increment to the next COMPUTER numeric indicator activity indicators... -
Page 50: Local And Remote User Access
– this is a good method if you continually access a small 1 From a local or remote keyboard, press any key to display the login prompt: number of computers. LINDY MC5 Enter your Login • Using the on-screen menu –... - Page 51 To select a computer using hotkeys Standard hotkeys Simultaneously press and hold The range of hotkey combinations are as follows: Note: The keys when pressed in combination are called Note: If your hotkeys have been changed, substitute them for ‘hotkeys’ and they signal to the MC5 that you wish to control it, rather the examples given here.
- Page 52 To select a computer using the on-screen menu To select a computer using mouse buttons 1 Select the on-screen menu in one of three ways: Note: This procedure works only with three-button or IntelliMouse devices and only if the ‘Mouse Switching’ option has been enabled by your administrator. •...
-
Page 53: Logging In And Out
• The mouse method – this method is fine for small numbers of computers LINDY MC5 but can take too long to reach the required computer in an extensive User Name: configuration. Password: hotkey method •... -
Page 54: The Reminder Banner
The reminder banner Routing status As many computer screen layouts can appear very similar, the MC5 provides a On occasions it may be useful to know which computers are being accessed, reminder banner option that indicates which computer port you are currently in which modes and by whom. -
Page 55: Power Switching (Via Configuration Menu)
Power switching (via configuration menu) User preferences and functions When used in conjunction with optional power switch boxes, the MC5 allows In addition to customising the reminder banner as described earlier, you can you complete remote control over the connected computers. The primary also: function of the power switching option is to remotely power down and reset •... -
Page 56: Global User Access
Global user access Global users access the MC5-IP using a viewer and a link. There are two types of viewer and two types of link, which can be used in any combination. viewer Network link COMPUTER SYSTEM browser viewer Dial up link... -
Page 57: Global User Access Via Vnc Viewer
Global user access via VNC viewer The VNC viewer is a compact application that runs on your IP-connected ‘global’ system and allows you to view and use the MC5 and its host computer(s). VNC viewer is readily available from a number of different sources: •... -
Page 58: Global User Access Via Web Browser
Global user access via web browser You can use a standard Web browser (supported versions) to gain access to the MC5-IP and its host computer(s). As soon as you make contact with the MC5-IP it will begin downloading a small Java application to your browser, which will be used only for the duration of your connection. -
Page 59: Using The Viewer Window
Using the viewer window When using the viewer window The viewer window gives you the ability to view and control the MC5-IP and What is the best screen resolution to use? its host computer(s). Its operation is almost identical regardless of whether you The best resolution for your computer is one that is larger than the screen of the host used the VNC viewer or your Web browser to display it. -
Page 60: Mouse Pointers
Mouse pointers Host selection Both viewers provide a double mouse cursor to help overcome any delays The Hosts button on the menu bar provides the quickest and most efficient way caused by slow connections. When you move your mouse you will see two to switch between host computers. -
Page 61: Auto Calibrate
Re-synchronise mouse Auto calibrate When you visit a host computer for the very first time, your viewer needs to If you find that your local mouse pointer and that of the host are not correctly determine the optimum video and mouse settings for that particular computer. synchronised, use this feature to re-align their movements. -
Page 62: Controls
Controls When clicked, this button reveals a menu of options concerned with keyboard, video and mouse operation. Single Mouse Mode Mouse Control This mode is for fast network connections where the This option displays a mouse control dialog and is useful when the remote cursor is failing to respond correctly to your mouse movements, even after using cursor response is sufficient to provide instant visual feedback on the remote screen. - Page 63 Keyboard Control Info This option displays a keyboard control dialog and is useful for sending keyboard When selected, this option displays an information dialog showing the current combinations (to the host) that are needed regularly or that are trapped by the logged on users, the current host, its video mode and its mouse motion details.
- Page 64 Video Settings This dialog provides access to all of the key video settings that determine image Using automatic configurations quality and link performance. • Every setting can be individually subjected to an automatic configuration (click the appropriate ‘Auto’ button) or can also be manually adjusted. •...
-
Page 65: Access Via Dial Up (Modem Or Isdn) Link
Access via dial up (modem or ISDN) link If you need to enter a port number When you gain access via modem or ISDN link, the MC5-IP uses standard Usually, when you make a network connection to the MC5-IP (either using the network protocols to create a private two-device network. -
Page 66: Viewer Encryption Settings
Viewer encryption settings Supported web browsers The web browser viewers and VNC viewers (of level 4.0b5S or higher) offer four The following web browsers have been tested and found to work correctly with encryption options. The resulting actions of certain options depend upon how MC5. -
Page 67: Further Information
• Appendix 1 - Configuration menus • Appendix 2 - Configuration pages via viewer • LINDY website – www.lindy.com • Appendix 3 - VNC viewer connection options Check the Support section of our website for the latest solutions and driver VNC viewer window options •... -
Page 68: Appendix 1 - Configuration Menus
What to do if the ADMIN password has been forgotten. 2 Press to select ‘More menus’. The following items and menus are available in the Configuration menu: LINDY MC5 3 Use the following keys: Configuration Menu Functions • to highlight required options. -
Page 69: Functions
MC5 and the computer must run a custom routine This option is used to resume standard mouse operation if it has ceased to available from LINDY Technology Limited. The resulting download file can be operate, for instance, if it has been connected without rebooting the MC5. See optionally edited (using Microsoft Excel) and/or reloaded into the MC5. -
Page 70: User Preferences
User Preferences LINDY MC5 The User Preferences are system operating User Preferences parameters that are independently selectable OSD Colour : SCHEME 1 for each user and affect only their screen. Reminder Banner : ENABLED Reminder Colour : BLUE/TRANS Screen Saver type :... -
Page 71: Global Preferences
Global Preferences Autoscan Mode Global preferences are available only to the LINDY MC5 Settings: SCAN LIST, ACTIVE PCs, ALL PCs Global Preferences Admin user and allow settings to be made Mouse Switching : ENABLED that affect all users attached to the MC5. - Page 72 Global Preferences (continued) RS232 Mouse Type OSD Dwell Time Settings: 1, 2, 3, 5, 10 SECONDS Settings: INTELLIMOUSE, 2 BUTTON, 3 BUTTON After a successful computer channel change the MC5 will display a confirmation This setting controls the type of RS232 mouse that the MC5 reports to computers.
-
Page 73: Setup Options
Setup Options Setup options are available only to the LINDY MC5 Hotkeys Setup Options Admin user and consist of key settings that Settings: CRTL+ALT, CTRL+SHIFT, ALT+SHIFT, ALT GR, L+R ALT, L CTRL+ALT, Security : ENABLED are normally made only during the initial... - Page 74 Setup Options (continued) Automatic Logout Settings: DISABLED, ENABLED The MC5 enables you to restrict access to your computers on a login basis. If a user forgets to logout when they have finished accessing the MC5 then the user console may unintentionally be left with full access to all the computers. The MC5 can be set to automatically logout unattended user consoles when the screen saver kicks in.
-
Page 75: Advanced Options
Settings: AUTO, LOCAL, DEFAULT match the speed used by the connected power switche(s). Note: The PSU- 8MASTER and PSU-8SLAVE power switches supplied by LINDY require a setting Determines which user port monitor should be interrogated to discover its of 9600. -
Page 76: Configure Ip Port
Configure IP port Unit Configuration This page provides access to LINDY MC5 Available only on MC5-IP models, LINDY MC5 a selection of both basic and Unit Config Configuration the IP port configuration menu Hardware Rev 1 fundamental settings for the MC5-IP. -
Page 77: Network Configuration
Network Configuration Net Mask This page allows you to configure the LINDY MC5 Network Config various aspects of the IP port and its Also often called the ‘subnet-mask’, this value is used alongside the IP address Mac Addr 00:0F:58:40:07:FE relationship with the local network. -
Page 78: Modem Configuration
Reset Configuration This page allows you to configure the This option allows you to completely reset the IP portion of the MC5-IP unit. LINDY MC5 COM1 serial port located at the rear of Modem Config WARNING: This process will remove all network and modem/ISDN settings Server IP 192.168.3.1... -
Page 79: Clearing Ip Access Control
To clear IP access control 1 From a local or remote (not LINDY MC5 accessible from a global keyboard), Network Config log on as the ‘admin’ user. -
Page 80: Appendix 2 - Configuration Pages Via Viewer
Appendix 2 - Configuration pages via viewer This section covers the configuration pages that are available to global admin users, using either the VNC viewer or the browser methods of access. To access the remote configuration pages 1 Make a global connection to the MC5-IP unit and login as the admin user. -
Page 81: User Accounts
User accounts To get here This page allows you to manage up to sixteen separate accounts. 1 Using VNC viewer or a browser, log on as the ‘admin’ user. 2 Click the ‘Configure’ button in the top right corner. The first of the sixteen accounts is the admin account and is the only account with access rights to the configuration menus. -
Page 82: Unit Configuration
Unit configuration To get here This page provides access to a selection of both basic and advanced settings for 1 Using VNC viewer or a browser, log on as the ‘admin’ user. the MC5-IP. Many of the settings displayed here are also accessible through the 2 Click the ‘Configure’... -
Page 83: Advanced Unit Configuration
Advanced unit configuration Click this button to display advanced options that do not normally require alteration. Mouse Latency Allowance This option is used during calibration to account for latency delays (caused as signals pass through a device) introduced by some KVM switches from alternative manufacturers. -
Page 84: Time & Date Configuration
Time & date configuration This page allows you to configure all aspects relating to time and date within the Timezone specifier MC5-IP unit. Optionally enter a recognised timezone specifier related to the current position of the MC5-IP unit. When an NTP server is used, the specifier will be used to provide the correct real time. -
Page 85: Network Configuration
Network configuration To get here This page allows you to configure the various aspects of the IP port and its 1 Using VNC viewer or a browser, log on as the ‘admin’ user. relationship with the local network. 2 Click the ‘Configure’ button in the top right corner. 3 Click the ‘Network configuration’... -
Page 86: Setting Ip Access Control
Setting IP access control To define a new IP access control entry The golden rule with this feature is ‘Include before you exclude’ or to put it 1 Click the Add button to display a popup dialog: another way ‘Arrange allowed addresses in the list before the denied addresses’. This is because the positions of entries in the list are vitally important. -
Page 87: Serial Port Configuration
Serial port configuration This page provides all access to settings concerned with the two serial ports (modem and power control) that are situated at the rear of the MC5-IP unit. Modem port PPP Server IP Address / PPP Client IP Address When a user dials into the MC5-IP via a modem or ISDN adapter, the MC5-IP sets up a temporary two-device network using PPP (Point to Point Protocol). -
Page 88: Host Configuration
Host configuration This page provides the opportunity to configure various details for each of the To create a new host entry host systems that may be connected to the MC5-IP via one or more KVM switch 1 Click one of the host entries to reveal a Host configuration dialog. units. -
Page 89: Port Direct
Port Direct Port Direct is totally transparent communication system that allows supporting devices to communicate with each other. Using the keyboard connections that link each device, Port Direct allows: • A controlling device to provide address details of the required port, the user’s name and access rights, mouse calibration and video mode information. -
Page 90: Logging And Status
Logging and status This screen provides various details about the user activity on the MC5-IP unit. To copy and paste the log You can copy the information listed within the log and paste it into another application. Date and Type of event, user name and access 1 While viewing the log screen, press Ctrl and C, to copy the data into the time the method or remote IP address... -
Page 91: Appendix 3 - Vnc Viewer Connection Options
Appendix 3 - VNC viewer connection options Colour/Encoding When you are connecting to the MC5-IP using the VNC viewer, a Auto select number of options are available. When ticked, this option will examine the speed of your connection to the MC5-IP and Click here to apply the most suitable encoding access the options... -
Page 92: Inputs
Inputs Rate-limit mouse move events Enable all inputs When ticked, this feature reduces the mouse movement information that is sent When selected, allows keyboard, to the MC5-IP and host system. This is useful for slow connections and you will mouse and clipboard data to be notice that the remote cursor will catch up with the local cursor roughly once transferred between server and every second. -
Page 93: Scaling
Scaling Misc No Scaling Shared connection (do not dis- No attempt is made to make the connect other viewers) screen image fit the viewer window. This option does not apply to MC5- You may need to scroll horizontally IP connections. and/or vertically to view all parts of Full screen mode the screen image. -
Page 94: Identities
Identities Load / Save This feature helps your VNC viewer Configuration File - Reload to confirm that a revisited MC5-IP Allows you to load a configuration is genuine and not another device file saved from this, or another masquerading as an MC5-IP. The list viewer. -
Page 95: Appendix 4 - Vnc Viewer Window Options
Appendix 4 - VNC viewer window options Click the VNC icon in the top left corner of the viewer window (or press F8) to display the window options: Standard window control items Full screen Expands the VNC viewer window to fill the whole screen with no visible window edges or toolbar. -
Page 96: Appendix 5 - Browser Viewer Options
Appendix 5 - Browser viewer options Inputs When you are connecting to the View only (ignore mouse & keyboard) MC5-IP using a Web browser, a When ticked, the viewer will not send keyboard number of options are available. or mouse information to the MC5-IP or host computer. -
Page 97: Appendix 6 - Addresses, Masks And Ports
192.168.142.22. The sending device would perform several calculations: The important parts of the whole number depend on where you are. If you were based in the same local area as LINDY, there would be no point in dialling out of Sending Destination the UK, or even out of the area. -
Page 98: Net Masks - The Binary Explanation
Net masks - the binary explanation To really understand the operation of a net mask it is necessary to delve deeper into the life blood of computers – binary; this is native digital, where everything is either a 1 (one) or 0 (zero), on or off, yes or no. previous page The net mask operation described on the is known as a ‘bit-wise... -
Page 99: Calculating The Mask For Ip Access Control
Calculating the mask for IP access control The IP access control function uses a standard IP address and a net mask The permissible mask values (for all octets) are as follows: notation to specify both single locations and ranges of addresses. In order to Mask octet Binary Number of addresses encompassed... -
Page 100: Ports
IMPORTANT: The correct configuration of routers and firewalls requires advanced At the “border crossing” between the wider Internet and every local network networking skills and intimate knowledge of the particular network. LINDY attached to it, there is a router that is usually combined with a firewall. One of... -
Page 101: Appendix 7 - Cable And Connector Specifications
Appendix 7 – Cable and connector specifications MC5 to power switch cable RS232 serial mouse to PS/2 converter cable 6pin mini-DIN 9pin D-type 4pin RJ9 9pin D-type female female female -12V Power switch to power switch daisy chain cable TXD (-12V) Female 4pin RJ9 4pin RJ9... -
Page 102: Multi-Head Synchronisation Cable
Multi-head synchronisation cable MASTER end SLAVE end 9pin D-type male 9pin D-type male Use this cable when two MC5 devices are being synchronised. MASTER end SLAVE1 end 9pin D-type male 9pin D-type male Use this cable when three MC5 devices are being synchronised. SLAVE2 end 9pin D-type male... -
Page 103: Appendix 8 - Hotkey Sequence Codes
Appendix 8 – Hotkey sequence codes These codes are used when defining hotkey switching sequences (macros) for host computers and allow you to include almost any of the special keys on the keyboard. Permissible key presses Creating macro sequences Hot key macro sequences can be up to 256 characters long. All keys are Main control keys (see ‘Using abbreviations’) assumed to be released at the end of a line, however, you can also determine... -
Page 104: Appendix 9 - Supported Video Modes
Appendix 9 – Supported video modes The following video modes are supported and can be automatically configured by the MC5 units. If a recognised video mode cannot be found, the MC5 will gradually change some of the key parameters to discover whether a video lock can be achieved. -
Page 105: Warranty
Do not enclose them or place them period, LINDY will replace or repair it free of charge. Any faulty items are to locations where air cannot circulate to cool the equipment. Do not operate be returned to LINDY at the owner’s expense. -
Page 106: End User Licence Agreement
End user licence agreement Limitation on Liability UNDER NO CIRCUMSTANCES SHALL REALVNC BE LIABLE FOR ANY CONSEQUENTIAL INDIRECT OR INCIDENTAL DAMAGES WHATSOEVER PLEASE READ THIS AGREEMENT CAREFULLY. THIS AGREEMENT CONCERNS INCLUDING LOST PROFITS OR SAVINGS ARISING OUT OF THE USE OF THE ENHANCED VNC VIEWER SOFTWARE (“the SOFTWARE”) FOR USE WITH SOFTWARE, THE SERVICE OR THE INFORMATION, RELIANCE ON THE DATA THE MC5 PRODUCT (“the PRODUCT”). -
Page 107: Radio Frequency Energy
Radio Frequency Energy A Category 5 (or better) twisted pair cable must be used to connect the units in order to maintain compliance with radio frequency energy emission regulations and ensure a suitably high level of immunity to electromagnetic disturbances. All other interface cables used with this equipment must be shielded in order to maintain compliance with radio frequency energy emission regulations and ensure a suitably high level of immunity to electromagnetic disturbances. - Page 108 © 2004 LINDY Electronics Limited & LINDY Elektronik GmbH All trademarks are acknowledged. Documentation by: www.ctxd.com Release 1.0a July 2006 Great Britain & N. Ireland International & Eire North America LINDY Electronics Ltd LINDY International Ltd. LINDY Computer Connection Technology, Inc.
- Page 109 Index Colour level 90 Connector specifications 100 COM1 Controls Baud rate 74 Firewall 40 Access baud rate 86 viewer options 61 local setting 77 Firmware local and remote users 49 connection 13 Control menus via dial up link 64 remote setting 86 current version 81 COM2 for remote connection 58...
- Page 110 Hextile 90,95 IP network port 5 Modem Power control 5 Resync mouse 61 Hosts connecting 11 connecting 13 connection 15 RJ9 connector 15 changing between 58,59 IP port dial up link 64 options 74 Router 40 configuration 87 connection 11 port 5 Power strings Routing status 53...
- Page 111 Testing Video compensation 27 links to cascaded computers Video modes 103 Video settings 62 Threshold Viewer window 58 adjustment 63 VNC port Time initial setup 36 local setting 75 local setting 76 Time & date configuration 83 remote setting 84 Troubleshooting 66 when altered 40 VNC viewer...
Need help?
Do you have a question about the MC5-IP KVM and is the answer not in the manual?
Questions and answers