Table of Contents
Advertisement
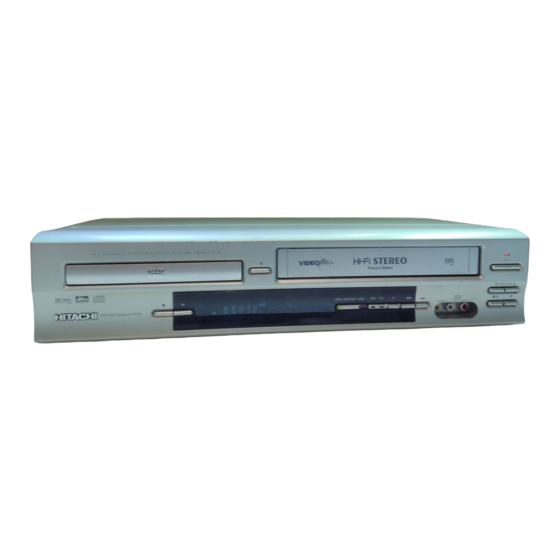
DVD/VCR Combo (DVD PLAYER with VIDEO CASSETTE RECORDER)
INSTRUCTION MANUAL
MODEL
DVPF3E
ReWritable
Recordable
PAL
DVD OUTPUT VCR
Instruction manual
To obtain the best performance and ensure years of trouble-
free use, please read this instruction manual completely.
S
V
is a
HOW
IEW
registered trademark of
Gemstar Development
Corporation.
The S
V
system is
HOW
IEW
manufactured under
licence from Gemstar
Development Corporation.
AV 3
TIMER
REC
VIDEO IN
L (mono) AUDIO IN R
R
PROGRAM
Advertisement
Table of Contents

Related Manuals for Hitachi DVPF3E


Summary of Contents for Hitachi DVPF3E
- Page 1 DVD/VCR Combo (DVD PLAYER with VIDEO CASSETTE RECORDER) INSTRUCTION MANUAL is a ReWritable Recordable registered trademark of Gemstar Development Corporation. The S system is manufactured under licence from Gemstar Development Corporation. MODEL DVPF3E PROGRAM AV 3 DVD OUTPUT VCR TIMER VIDEO IN L (mono) AUDIO IN R Instruction manual...
-
Page 2: I Laser Safety
WARNING : TO REDUCE THE RISK OF FIRE OR ELECTRIC SHOCK, DO NOT EXPOSE THIS APPLIANCE TO RAIN OR MOISTURE. The lightning flash with arrowhead symbol, CAUTION within an equilateral triangle, is intended to alert the user to the presence of uninsulated RISK OF ELECTRIC SHOCK “dangerous voltage”... -
Page 3: I Precautions
PRECAUTIONS CAUTION POWER SUPPLY 1) Do not attempt to open the cabinet. There are The main power supply is engaged when the no parts you can service inside. Refer all ser- main plug is plugged in a 220-240V ˜ 50Hz AC vicing to qualified service personnel. -
Page 4: I About Copyright
A NOTE ABOUT RECYCLING This product’s packaging materials are recyclable and can be reused. Please dispose of any materials in accordance with your local recycling regulations. Batteries should never be thrown away or incinerated but disposed of in accordance with your local regulations concerning chemical wastes. -
Page 5: Table Of Contents
TABLE OF CONTENTS I LASER SAFETY ........2 I PLAYING A DISC . -
Page 6: I Features
FEATURES ¡Disc Navigation Mode Displays the first scenes of each chapter in a title. ¡Dolby Digital sound ¡Resume Play This DVD/VCR can handle Dolby Digital surround sound ¡Virtual Surround with 5.1 channels when connected to a Dolby Digital decoder. ¡Bit rate indication ¡Still/fast/slow/step playback ¡DRC (Dynamic range control) ¡Random playback for audio CD and MP3... -
Page 7: I About The Discs
ABOUT THE DISCS PLAYABLE DISCS DISC TYPES The following discs can be played back on this DVD/VCR. [ DVD ] ¡ DVD video ¡ DVD-R* Data on a DVD is divided into sections called "titles", and then into subsections called "chapters", each of which is ¡... -
Page 8: I Operating Controls And Functions
OPERATING CONTROLS AND FUNCTIONS FRONT PANEL PROGRAM AV 3 DVD OUTPUT VCR TIMER VIDEO IN L (mono) AUDIO IN R 18 16 11. F.FWD Button (VCR) [page 22] REMOTE CONTROL Press to rapidly advance the tape, or view the picture rapidly in forward during playback. - Page 9 27. ZOOM Button [page 31] VCR mode [page 22] Enlarges part of a DVD-reproduced image. Press to rewind the tape, or to view the picture rapid- 28. CLEAR/C.RESET Button ly in reverse during the playback mode (Rewind DVD mode [page 31] Search).
-
Page 10: Tour Of The Remote Control
+10 Button: 53. OPEN/CLOSE Button (DVD) [page 29] Press to open or close the disc loading tray. When searching a TITLE, a CHAPTER, or a EJECT Button (VCR) TRACK, use this button to enter numbers 10 and Press to eject the video cassette from the VCR. above. - Page 11 Tour of the Remote Control • Clear the makers. CLEAR/C.RESET Button • To reset the tape counter. • Clear the makers. • Removes status No. CLEAR/C. RESET • Clear the number that is in program input. entered incorrectly. • Clear the number that is entered incorrectly.
-
Page 12: Display
DISPLAY DISPLAYS DURING OPERATION No disc inserted / can not read Lights up when a DVD is inserted into the tray. Stays on when the Stays on when repeat Tray open A-B repeat function track function is on. is on. Stays on when Stays on when the repeat chapter... -
Page 13: I Connections
CONNECTIONS REAR VIEW AV2 (DECODER) S-VIDEO ANALOG DIGITAL AUDIO OUT AUDIO OUT AERIAL DVD/VCR COAXIAL OPTICAL AV1 (TV) RF OUT 6 7 8 AERIAL Jack DIGITAL COAXIAL AUDIO OUT Jack (DVD only) Connect your antenna, Cable Box, or Direct Connect an optional coaxial digital audio cable Broadcast System. -
Page 14: Dvd/Vcr To Tv Connection
The following show examples of connections commonly used to connect the DVD/VCR to TV and other components. Notes Be sure to turn off the power to all components in the system before connecting another component. ¡ Refer to the Instruction Manuals for your TV, stereo system and any other components to be connected to the ¡... -
Page 15: Connection To An Audio System
CONNECTION TO AN AUDIO SYSTEM Method 1 Method 2 Digital Audio Audio Input Dolby Digital decoder, Stereo system Input Jacks Jacks DTS decoder, or AUDIO MPEG decoder COAXIAL OPTICAL DIGITAL ANALOG AUDIO OUT AUDIO OUT DVD/VCR COAXIAL OPTICAL Digital Audio Analog Audio (DVD only) •... -
Page 16: I Hi-Fi Stereo Sound System
Notes If you use the Euro audio/video cable, it is not necessary to connect the analog audio cable. ¡ Connect the DVD/VCR player directly to a TV. If the A/V cables are connected to a DVD/VCR, pictures may ¡ be distorted due to the copy protection system. HOW TO CONNECT TO A TV WITHOUT AUDIO/VIDEO INPUT JACKS If your TV does not have a Scart jack, it is still possible to connect this DVD/VCR player to your TV’s 75- ohm coaxial antenna terminal using a commercially available Stereo Audio/Video RF Modulator, not includ-... -
Page 17: I Preset For Use
PRESET FOR USE SELECTING THE LANGUAGE Select and adjust your TV to channel 36. • If the playback picture appears on the TV screen, continue with step 8. • If channel 36 is employed for broadcasting, or interference lines appear on the picture, the RF con- Follow the steps on this page only when you plug the verter must be set to a different channel between DVD/VCR for the first time. -
Page 18: Setting The Clock
SETTING THE CLOCK Likewise, set the relevant month, day, hour, and minute. Press MENU to start the clock. This DVD/VCR incorporates a 24-hour clock. The Notes clock must be set for the Automatic Timer Recording • In the steps 5 and 6, you can go back to the item you function to operate correctly. -
Page 19: Automatic Tuning
Press Arrow ( /p) to select “CH TUNING”, AUTOMATIC TUNING then press Arrow ( INITIAL CH TUNING CLOCK RF OUT You can programme the tuner to scan only the chan- LANGUAGE GUIDE CHANNEL nels that you can receive in your area. •... -
Page 20: To Skip A Preset Channel
TO SKIP A PRESET CHANNEL CHANNEL ORDER You can arrange the channels in any order you want as The channels you can no longer receive or seldom follows. watch can be set to be skipped when you access chan- • Use the remote control for this procedure. nels PROG (o/p). -
Page 21: I Playback Function
PLAYBACK FUNCTION NORMAL PLAYBACK Press Arrow ( /p) to select “SET UP”, then press Arrow ( Press Arrow ( /p) to select "AUTO Insert a prerecorded tape. The DVD/VCR will REPEAT", then press Arrow ( turn on. If the safety tab has been removed, the ¡... -
Page 22: Search Functions
Notes SEARCH FUNCTIONS Index Search can be set up to 20. ¡ This function will not operate in the Recording ¡ mode. Operations must be followed up within 30 seconds, ¡ PICTURE SEARCH from step 2 to 3. Otherwise the Index Search mode If you want to skip or repeat a scene during playback, will be cancelled. -
Page 23: I Recording Function
RECORDING FUNCTION OTR (One Touch Recording) It may be UNLAWFUL to record copyrighted materi- al without the consent of the copyright owner. This DVD/VCR will operate with any cassette that This feature allows you to set the recording length sim- ply by pressing REC on the VCR. - Page 24 Notes If you have not set the clock yet, “CLOCK” setting Press MENU to exit. menu appears. If so, follow the steps outlined in the To set another timer programme, repeat steps 3 to 11. “Setting the Clock” section. Then, set the timer. When you press Arrow ( ) after pressing Arrow ¡...
-
Page 25: Hints For Timer Recording
HINTS FOR TIMER RECORDING Select the programme number you want to check by pressing Arrow ( /p ) . The details of the selected programme appears on ¡ the TV screen. ¡ If there is a power failure or the DVD/VCR is ¡... -
Page 26: Timer Recording Using The Showview ® System
Now, compare the channel numbers you have written • Press Arrow (s) to go back one digit from current in the GUIDE Channel and VCR Channel columns. digit. You must set all of these channel numbers that don't • You can select guide channels 1-255. match using the following procedure before you pro- •... -
Page 27: Vps (Video Programme System) / Pdc (Programme Delivery Control)
• If the S number flashes when you press AUTO RETURN SHOWVIEW, this means that the S num- ber you entered was incorrect or the timer recording you just programmed and another timer recording overlap. When timer recording is finished, the DVD/VCR will automatically rewind the tape to the beginning where Confirm the channel it started recording. -
Page 28: Copying A Video Tape
Notes COPYING A VIDEO TAPE • For best results during dubbing, use the DVD/VCR’s front panel controls whenever possible. The remote control might affect the playback DVD/VCR's oper- ation. You can make copies of videotapes made by friends or • If video or colour fades in and out, you may be copy- relatives for your own enjoyment. -
Page 29: Auto Rewind
AUTO REWIND REAL TIME TAPE COUNTER When a tape reaches the end during recording, play- ¡ This shows the elapsed recording or playback time back, or fast-forward, the tape will automatically in hours, minutes, and seconds. (The displayed time rewind to the beginning. After rewinding finishes, the will not change during blank portions of the tape. -
Page 30: Pause
CALLING UP A MENU SCREEN Press ENTER or PLAY ( B). DURING PLAYBACK Playback of the selected chapter will start. ¡ For DVDs Notes Press MENU to call up the DVD menu. ¡ ¡Pressing DISC NAVIGATION before pressing ENTER or Press TOP MENU to call up the title menu. -
Page 31: Slow Forward / Slow Reverse
Using SKIP H , G SLOW FORWARD / During playback, press SKIP G to move the next SLOW REVERSE track. Press it repeatedly to skip subsequent tracks. Press SKIP H to go back to beginning of the current track. Press it repeatedly to go to the previous tracks. Track number will appear briefly on the DVD/VCR ¡... -
Page 32: Marker Setup Screen
REPEAT TRACK MARKER SETUP SCREEN To activate the repeat function, press REPEAT during playback. Use markers to memorise your favourite places on a The repeat mode changes as described below every ¡ disc. time you press the button. Press SEARCH MODE four times (CD: three TRACK (repeat off) (current track repeat) -
Page 33: Programme (Cd)
PROGRAMME MP3 PLAYBACK When a CD with MP3 files is inserted in the You may determine the order in which tracks will play. DVD/VCR, the MP3 menu will appear on the TV screen, and number of tracks is displayed on the front In stop mode, press MODE. -
Page 34: Track Selection
Some discs allow audio language setting on the disc ¡ TRACK SELECTION menu. (Operation varies between discs, so refer to the manual accompanying the disc.) If you choose a Language that has a 3 letter language ¡ code, the code will be displayed every time you Press SEARCH MODE during playback. -
Page 35: Camera Angle
CAMERA ANGLE PARENTAL CONTROL Parental Control limits the disc viewing that exceed Some DVD discs contain scenes which have been shot your settings. (with a password or playback will stop.) simultaneously from various angles. You can change This feature allows you to prevent discs with Adult the camera angle when the ( ) mark appears on the content being played back by your children. -
Page 36: I Dvd Setup
DVD SETUP AUDIO SETTINGS VIRTUAL SURROUND Choose the appropriate Audio settings for your equip- ment as it only affect during the playback of DVD discs. You can enjoy stereophonic Virtual Surround Effects from your existing stereo system. Press SETUP in STOP mode. Press SURROUND Press Arrow ( ) to select CUSTOM, then... -
Page 37: Language Setting
QUICK TV ASPECT: LANGUAGE SETTING ¡ Press Arrow (K/L) for an item selection, then press ENTER. Select 4:3 LETTER BOX for a black bars appears ¡ Language options are not available with some discs. on top and bottom of the screen. Select 4:3 PAN - SCAN for a full height picture ¡... - Page 38 Language Code Language Code Language Code Language Code French [FRE] 5264 Macedonian 5957 Siswat 6565 Abkhazian 4748 Frisian 5271 Malagasy 5953 Slovak 6557 Afar 4747 Galician 5358 Malay 5965 Slovenian 6558 Afrikaans 4752 Georgian 5747 Malayalam 5958 Somali 6561 Albanian 6563 German [GER] 5051...
-
Page 39: Troubleshooting Guide
TROUBLESHOOTING GUIDE If the DVD/VCR does not perform properly when operated as instructed in this Owner's Manual, check the DVD/VCR consulting the following checklist. PROBLEM CORRECTIVE ACTION No power. • Make sure the power plug is connected to an AC outlet. •... -
Page 40: I Maintenance
Hitachi dealer this Owner’s Manual, the laser optical pickup unit who supplied the product or call the Hitachi helpline may be dirty. Consult your dealer or an Authorized to locate an Authorized Service Center. -
Page 41: I Specifications
SPECIFICATIONS Product type: DVD/VCR Combo (DVD player with Video Cassette Recorder) Discs: DVD video Audio CD Video Cassette tape Converter output: UHF Channel 22 ~ 69 Power source: 220 - 240 V ~ +/- 10%, 50 Hz +/- 0.5% Power consumption: 30 W (standby: 9.0 W) Operating temperature: 41°F(5°C) to 104°(F40°C) -
Page 42: I Subsidiary Information
SUBSIDIARY INFORMATION SOME DOS AND DON’TS ON THE SAFE USE OF EQUIPMENT This equipment has been designed and manufactured to meet international safety standards but like any elec- trical equipment, care must be taken if you are to obtain the best results and safety is to be assured. ########### DO read the operating instructions before you attempt to use the equipment. - Page 43 MEMO – 43 – – 43 – 2C15 2C15...
- Page 44 Fax: +46 (0) 8 562 711 13 Tel: +39 02 38073415 Servizio Clienti Email: csgswe@hitachi-eu.com Fax: +39 02 48786381/2 Email: customerservice.italy@hitachi-eu.com HITACHI EUROPE S.A.S HITACHI EUROPE LTD (Norway) AB Lyon Office STRANDVEIEN 18 B.P. 45, 69671 BRON CEDEX 1366 Lysaker FRANCE...
Need help?
Do you have a question about the DVPF3E and is the answer not in the manual?
Questions and answers