Table of Contents
Advertisement
Quick Links
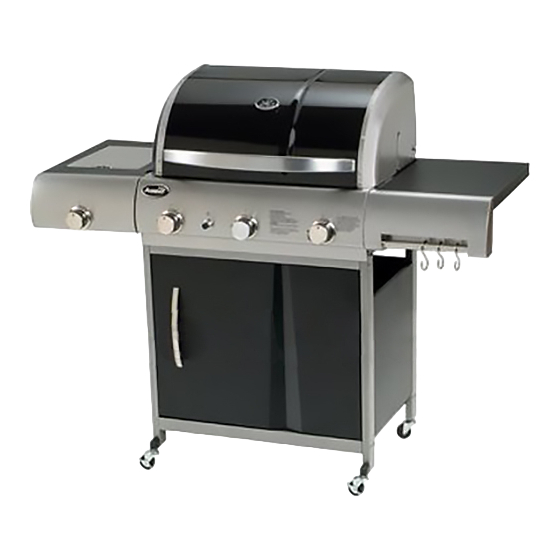
With the NEW Aussie
FLAVOR ACTIVATOR SYSTEM
(Patent Pending)
Provides:
- More even heat on the cooking surface
- Hotter temperature with the same fuel usage
- Longer cooking for the same amount of fuel
For Outdoor Household Use Only. Not for Commercial Use.
Need Help? Need to Register Your Grill? Looking for Aussie Parts & Accessories?
Visit us online at www.AussieGrills.com Or call Aussie Customer Service at 1-800-251-7558
WARNING
!
• Failure to follow these intructions could result in
fire or explosion which could cause death, serious
personal injury, or property damage.
• Read and follow instructions carefully before as-
sembly or use.
• Do not use this product for any other purpose than
which it is intended.
• These instructions must be kept with the user.
SAVE THESE INSTRUCTIONS.
WARNING
!
• Do not store or use gasoline or other flammable
vapors and liquids in the vicinity of this or any
other appliance.
• An LP cylinder not connected for use shall not be
stored in the vicinity of this or any other appliance.
LP Gas Grill Assembly and Use Manual
67C3C8KK81
67C3C8LK81
67C3C8MM81
D A N G E R
!
If you smell gas:
1. Shut off gas to the appliance.
2. Extinquish any open flame.
3. Open lid.
4. If odor continues, keep away from the appli-
ance and immediately call your gas supplier or
your fire department.
Advertisement
Table of Contents

Related Manuals for Meco Assie Vantage 67C3C8KK81


Summary of Contents for Meco Assie Vantage 67C3C8KK81
- Page 1 LP Gas Grill Assembly and Use Manual With the NEW Aussie FLAVOR ACTIVATOR SYSTEM (Patent Pending) Provides: - More even heat on the cooking surface - Hotter temperature with the same fuel usage - Longer cooking for the same amount of fuel 67C3C8KK81 67C3C8LK81 67C3C8MM81...
- Page 2 NOTICE Meco Corporation strives to be a quality supplier of consumer products. If we omitted any parts needed for assembly, or you need troubleshooting information, please contact us using our toll free number or visit our web site. It is important to register your grill and retain your receipt.
-
Page 3: Packing Lists
Packing List Description Warming Rack Cooking Grid, 3 pcs. Large Flavor Activator, 3 pcs. Small Flavor Activator, 4 pcs. Left Side Shelf with Side Burner Side Burner Control Knob Hood/Body Right Side Shelf Bottom Body Panel Grease Pan Foil Pan Front Crossbar Left Side Frame Back Panel... -
Page 4: Table Of Contents
Contents Packing Lists ..............3 Before Using Your Grill Installation Codes ............15 Preparation for Assembly .......... 4 Selecting a Location ........... 15 Assembly Instructions How to Perform a Leak Test ........16 Step 1 Caster Assembly ..........5 Lighting Grill Using the Pulse-Spark Ignitor ....18 Step 2 Back Panel to Bottom Shelf Assembly..... -
Page 5: Assembly Instructions
Assembly Instructions Step 1 Caster Assembly Identify Side Frame assemblies and lay on floor as shown. Thread stem of locking casters into nut on extension on bot- tom of front legs. Thread stems of non-locking casters into inserts in ends of back legs. Hole in side panel indicates Left Side Frame. -
Page 6: Step 3 Cart Frame Assembly
Step 3 Cart Frame Assembly Attach Left Leg Frame and Right Leg Frame to Cart Bottom Panel with eight 1/4-20 x 1.50” Bolts. Fit one Frame onto Bottom Panel at a time and insert the 1.50” bolts through the Legs into the sides of the Bottom Panel. Attach the Back legs to the Back Panel with four 5/32-30 x .31”... -
Page 7: Front Crossbar & Caster Cap Assembly
Step 5 Front Crossbar and Caster Cap Assembly Attach the Front Crossbar between the Front Legs with four 1/4-20 x 1.50” bolts. Insert the bolts throught he out- side of the legs and into the threaded holes in the crossbar ends. Front crossbar should be oriented with the open side facing the inside of the cabinet and the hinge pin hole on the bottom. -
Page 8: Step 7 Hood/Body To Cart Assembly
CAUTION To reduce the risk of bodily injury from lifting, the following assembly steps #s 7 and 8 will require two people. Step 7 Hood/Body To Cart Assembly Lift the Hood/Body Assembly over the cart assembly and set it down until it rests on the top of the cart legs. Align the holes in the side of the Body with the holes in the legs. -
Page 9: Step 8 Side Table Assembly
CAUTION Prior to performing any further assembly, PERFORM “FIRST TIME USE” LEAK TEST as detailed on pages 16-17. If the grill is fully assembled before performing the First Time Use leak test, the side tables will need to be removed in order to perform the leak test on the main burner valves inside the control panel, behind the knobs, . -
Page 10: Step 9 Side Burner Valve Assembly
Step 9 Side Burner Valve Assembly NOTE: Side Burner Valve is already attached to the regulator hose. Hose is not shown in some illustrations for clarity. Install the Side Burner Valve from underneath the LEFT Side Table. Remove the screws from the side burner bracket and set aside with bracket. -
Page 11: Step 11A Side Burner Control Knob Assembly
Step 11 A. Side Burner Control Knob Assembly Align the flat keyed hole in the Control Knob with the keyed stem of the Side Burner Valve. Push the Control Knob onto the Side Burner Valve stem. B. Side Burner Grid Assembly Place the Side Burner Grid onto Side Burner Table, allowing the three protruded ends to fall into the three holes around the Side Burner. -
Page 12: Step 13A Warming Rack Assembly
CAUTION To reduce the risk of a laceration hazard: • Wear protective gloves when installing warming rack. Hood and Bowl edges could be sharp. Step 13 Warming Rack / Flavor Activator / Cooking Grid Assembly Insert Warming Rack leg ends into holes on top edge of firebox. Seat securely. Lay a large Flavor Activator over each Burner on the lower body ridges. -
Page 13: Connecting/Disconnecting The Gas
Connecting/Disconnecting the Gas Using Gas D A N G E R Carbon Monoxide Hazard • This appliance can produce carbon monoxide which has no odor. Using it in an enclosed space can kill you. • Never use this appliance indoors, on recreational vehicles, or boats. WARNING To reduce the risk of serious bodily injury or death from fire or explosion: •... -
Page 14: Lp Hose & Regulator
LP Hose and Regulator NOTE: WARNING If the hose/regulator assembly is not working properly and you need a replacement, contact Customer Service To reduce the risk of serious bodily injury or death at 1-800-251-7558 or go to www.aussiegrills.com. from fire or explosion: Be sure to have the grill model number and serial •... -
Page 15: Before Using Your Grill
Before Using Your LP Gas Grill Installation Codes WARNING To reduce the risk of serious bodily injury or death from fire or explosion: • This installation must conform with local codes or, in the absence of local codes, with either the National Fuel Gas Code, ANSI Z223.1/NFPA 54 Natural Gas and Propane Installation Code, CSA B149.1, or Propane Storage and Handling Code, B149.2 or the Standard for Recreational Vehicles, ANSI A 119.2/NFPA 1192 and CSA Z240 RV Series, recreational Vehicle Code, as applicable. -
Page 16: How To Perform A Leak Test
How to Perform A Leak Test “FIRST TIME USE” and as required Supplies Needed for a Leak Test: • Clean paint brush • Water • Dish washing liquid 1. Use an LP Gas Cylinder equipped with an OPD (Overfill Prevention Device) and have it filled at an authorized LP gas dealer by a qualified attendant. - Page 17 6. Check for leaks by brushing the soap solution on all gas valves, hose connections and fittings. (Shown by the heavy arrows in Fig. 4, 5, and 6) Make sure you generously brush the locations with the soap solution, completely sur- rounding the connections and fittings.
-
Page 18: Lighting The Grill Using The Pulse-Spark Ignitor
Lighting the Grill Using the Pulse-Spark Ignitor WARNING To reduce the risk of death or serious injury from an explosion or a fire beneath the grill: • Inspect and clean Burner/Venturi Tubes for insects or insect nests. Spiders or small insects can build nests, webs, and lay eggs in the grill’s Venturi Tubes, (Fig 15, page 27) obstructing the flow of gas to the Burner. - Page 19 5. Push the Igniter Button in until the Burner is lit. Listen for the spark ignition, and look to make sure the Burner is lit. If no spark, see Troubleshooting Section on page 30. 3/16” gap Gas Collector Box - If no spark, pinch together or open Gas Collector Box to adjust 3/16”...
-
Page 20: Manually Lighting The Grill
Manually Lighting the Grill WARNING To reduce the risk of serious bodily injury or death from fire or explosion: • Open Hood before lighting the grill to prevent an explosion from gas build-up. 1. Open the Hood. 2. IMPORTANT: Make sure Control Knobs are turned “Off.” (Fig. 7 - P.18) 3. -
Page 21: Lighting The Side Burner
Lighting the Side Burner WARNING To reduce the risk of serious bodily injury or death from fire or explosion: • Open Side Burner Lid before lighting the grill to prevent an explosion from gas build-up. 1. Open the Side Burner Lid. (Fig. 13) NOTE: Side Burner Lid is to remain open while the Side Burner is on or hot. 2. -
Page 22: Manually Lighting The Side Burner
Manually Lighting the Side Burner WARNING To reduce the risk of serious bodily injury or death from fire, explosion or burn hazard: • Open Side Burner Lid before lighting the grill to prevent an explosion from gas build-up. • When manually lighting Side Burner, use Matchlight Holder. 1. -
Page 23: Cooking On The Gas Grill
Cooking On the Gas Grill WARNING To reduce the risk of serious bodily injury or death from fire, explosion or burn hazard: • Never use charcoal or lighter fluid in your gas grill. Keep this outdoor cooking appliance clear and free from combustible materials, gasoline, and other flammable vapors and liquids. -
Page 24: Roasting (Indirect Method)
Grill Cooking (Direct Method) Direct Cooking on the Grids: Food is cooked directly over the heat source. The Burners heat up the Flavor Activators under the Cooking Grids, which in turn heat the food on the grill. The natural food juices from cooking fall onto the hot Flavor Activators below and vaporize. -
Page 25: Warming Rack
Warming Rack WARNING To reduce the risk of fire or flare-up from grease drippings: • When cooking food on the warming rack, make sure no Burners are on directly under the Drip Pan. • Clean grease drippings away from grill after each use. Warming Racks are a convenient way to cook food, keep cooked food warm or to warm items such as bread or rolls. -
Page 26: Care And Maintenance
Care and Maintenance CAUTION To reduce the risk of a laceration hazard, wear protective gloves when handling parts that have sharp edges. Cleaning the Grill Bottom Panel, Grease Pan, Foil Pan: Remove the two bolts on the sides securing the Bottom Panel. (Step 12, page 11) Scrape away food and fat residue from the Bottom Panel. -
Page 27: How To Clean The Burners
In order to prevent flashbacks, the Burner(s) should be removed from the grill and cleaned periodically, especially if the grill has been stored for an extended period of time. Valve Control Knob Burner Spide webs or nest inside Venturi Tube Fig. - Page 28 5. Use a pipe cleaner to clear insect nests from the inlet hole of Main Burner (Fig. 19) and Side Burner tube. (Fig. 20) 6. Open up the Main Burner holes (Fig. 19) and the Side Burner holes (Fig. 21) with a small nail or wire. Use a non- metallic brush to remove food particles and corrosion from the Burner surfaces.
-
Page 29: Storage
Storage WARNING To reduce the risk of serious bodily injury or death: • Store your LP gas grill in a cool dry place. Do not store an LP Gas Cylinder in a space greater than 125 degrees Fahrenheit. Never store a connected LP Gas Cylinder in a building, garage, or any enclosed area. •... -
Page 30: Emergencies
Emergencies Problem Possible Cause Solution Gas leaking from Damaged hose Turn off gas at the LP Gas Cylinder. Replace valve/hose cracked/cut/burned hose regulator before continuing use. Gas leaking from Mechanical failure due to rust Replace LP Gas Cylinder. LP Gas Cylinder or mishandling Gas leaking from LP Gas Failure of valve from mishan-... - Page 31 Troubleshooting Problem Possible Cause Solution Regulator coupling nut is not Tighten coupling nut by hand about one-half to three quar- fully connected to LP cylinder ters additional turn. Do not use tools. LP-Excess flow valve tripped in Turn Control Knobs to “Off” position and turn LP Gas Cyl- regulator inder handle clockwise until it stops.
-
Page 32: Important Notice- Lp Cylinder With Opd
Problem Possible Cause Solution Flare up Grease build-up Clean grill. Excessive fat in meat Trim fat from meat before grilling. Persistent grease fire Grease trapped around burner Turn Control Knobs “Off” and turn handle of LP Gas Cylinder system clockwise until it stops. Open Hood carefully and let fire burn out. -
Page 34: Replacement Parts Parts Illustrations
Parts Illustration - Model 67C3 If you need replacement parts, refer to the Parts Illustrations to find the exact parts you need. If you have any questions or need help, contact Cus- tomer Service at 1-800-251-7558 or go to www. aussiegrills.com. -
Page 35: Parts List
Parts List- Model 67C3 Description Quantity Side Burner Cover Side Burner Cooking Grid 1 Left Side Table Side Burner Valve Side Burner Knob Bezel Control Knob Cast Iron Side Burner Side Burner Bracket S.B. Venturi Wind Shield Control Panel Main Knob Bezel Back panel Left Back Leg Left Side Panel... -
Page 36: Limited Warranty
MECO CORPORATION at the customer service number listed below. MECO CORPORATION requires proof of purchase and we suggest that you keep your receipt. If you need a replacement part under warranty, a proof of purchase will be necessary. Damages caused by commercial or institutional use, accidental or intentional damage, repairs made or attempted by unauthorized persons, or misuse are not covered by this warranty.
Need help?
Do you have a question about the Assie Vantage 67C3C8KK81 and is the answer not in the manual?
Questions and answers