
Subscribe to Our Youtube Channel
Related Manuals for Hanna Instruments HI 98180


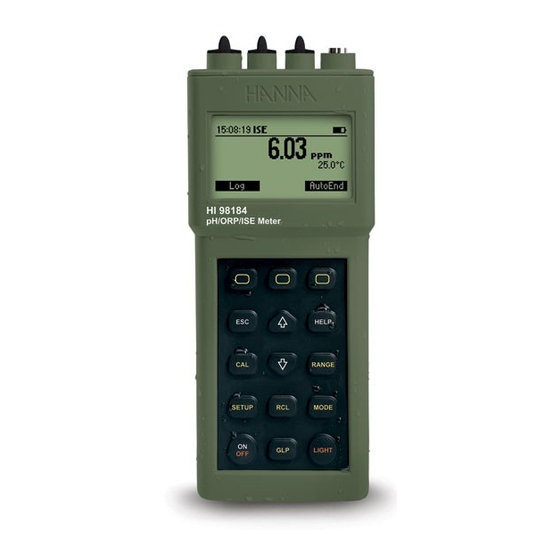
Summary of Contents for Hanna Instruments HI 98180
- Page 1 Instruction Manual HI 98180 HI 98181 HI 98182 HI 98183 HI 98184 HI 98185 Calibration Check Waterproof pH/mV/ISE/Temperature Meters w w w. h a n n a i n s t . c o m...
-
Page 2: Table Of Contents
If the repair is not covered by the warranty, you will be notified of the charges incurred. If the instrument is to be returned to Hanna Instruments, first obtain a Returned Goods Authori- zation number from the Technical Service department and then send it with shipping costs prepaid. -
Page 3: Preliminary Examination
• User-selectable “calibration time out” to remind when a new calibration is necessary. Moreover, they offer an extended temperature range from –20 to 120 ºC Hanna Instruments reserves the right to modify the design, construction and appearance of its products without advance notice. - Page 4 (–4 to 248 ºF), using HI 7662 interchangeable temperature probes or temperature sensor inside pH electrode. These instruments can also measure with ORP electrodes, thanks to their capability to measure mV with a resolution up to 0.1 mV (not for HI 98180). HI 98184 and HI 98185 can also measure with ISE electrodes on ppm scale.
-
Page 5: Hi 98180 And Hi 98181 Functional Description
HI 98180, HI 98181 HI 98180, HI 98181 HI 98180, HI 98181 HI 98180, HI 98181 HI 98180, HI 98181 F U N C T I O N A L D E S C R I P T I O N F U N C T I O N A L D E S C R I P T I O N F U N C T I O N A L D E S C R I P T I O N F U N C T I O N A L D E S C R I P T I O N... - Page 6 Top view Top view Top view Top view Top view 14) BNC electrode connector. 15) Temperature socket.
-
Page 7: Hi 98182, Hi 98183, Hi 98184 And Hi 98185 Functional Description
HI 98182, HI 98183, HI 98182, HI 98183, HI 98182, HI 98183, HI 98182, HI 98183, HI 98182, HI 98183, HI 98184, AND HI 98185 HI 98184, AND HI 98185 HI 98184, AND HI 98185 HI 98184, AND HI 98185 HI 98184, AND HI 98185 F U N C T I O N A L D E S C R I P T I O N F U N C T I O N A L D E S C R I P T I O N... - Page 8 Top view Top view Top view Top view Top view 14) BNC electrode connector. 15) Reference socket (HI 98184/5). 16) Reference socket rubber stopper (HI 98184/5). 17) Temperature socket 18) Temperature socket rubber stopper (HI 98183/4/5). 19) Temperature measurement rubber cork (HI 98183/4/5) 20) Serial communication rubber stopper (HI 98183/4/5).
-
Page 9: Hi 98180 And Hi 98181 Specifications
HI 98180 AND HI 98181 HI 98180 AND HI 98181 HI 98180 AND HI 98181 HI 98180 AND HI 98181 HI 98180 AND HI 98181 SPECIFICATIONS SPECIFICATIONS SPECIFICATIONS SPECIFICATIONS SPECIFICATIONS – 0 . 6 2 – 0 0 . 0 0 . ±... -
Page 10: Hi 98182 And Hi 98183 Specifications
HI 98182 AND HI 98183 HI 98182 AND HI 98183 HI 98182 AND HI 98183 HI 98182 AND HI 98183 HI 98182 AND HI 98183 SPECIFICATIONS SPECIFICATIONS SPECIFICATIONS SPECIFICATIONS SPECIFICATIONS – – – ± – C º – ( ) F º C º... -
Page 11: Hi 98184 And Hi 98185 Specifications
HI 98184 AND HI 98185 HI 98184 AND HI 98185 HI 98184 AND HI 98185 HI 98184 AND HI 98185 HI 98184 AND HI 98185 SPECIFICATIONS SPECIFICATIONS SPECIFICATIONS SPECIFICATIONS SPECIFICATIONS – – – ± – C º – ( º s t i , 1 . -
Page 12: Operational Guide
OPERATIONAL GUIDE OPERATIONAL GUIDE OPERATIONAL GUIDE OPERATIONAL GUIDE OPERATIONAL GUIDE INITIAL PREPARATION The instrument is supplied complete with rechargeable batteries. Proceed with a complete charging process before starting (see page 58). To prepare the instrument for field measurements close the serial communica- tion socket and all unused connector sockets with proper stopper (to ensure waterproof protection) (HI 98183/4/5 only). - Page 13 Allow for the electrode to adjust and reading to stabilize (hourglass symbol turns off). On the pH screen are displayed: • pH reading with the selected resolution. • Temperature reading in the selected unit (ºC or ºF). • Temperature compensation mode (MTC - manual, ATC - automatic). While in MTC mode the indicate that the temperature can be manually changed using ARROW keys.
- Page 14 ORP MEASUREMENTS (not for HI 98180) To perform ORP measurements, connect an optional ORP electrode (see “Accessories“ section) to the instrument and turn it ON. If necessary, enter the mV mode by pressing RANGE until the display changes to mV. Submerge the ORP electrode tip (4cm/1½”) into the sample to be tested and wait a few seconds for the reading to stabilize.
- Page 15 Enter the ISE mode by pressing RANGE until the display changes to ISE range. Submerge the ISE electrode tip (4cm/1½”) into the sample to be tested and wait a few seconds for the reading to stabilize. The ISE reading will be displayed along with the current temperature reading.
-
Page 16: Ph Calibration
p p p p p H CALIBRATION H CALIBRATION H CALIBRATION H CALIBRATION H CALIBRATION It is recommended to calibrate the instrument frequently, especially if high accuracy is required. The pH range should be recalibrated: • Whenever the pH electrode is replaced. •... - Page 17 • Press CAL. The instrument will display the measured pH, the LCD first expected buffer and the temperature reading. • If necessary, press the ARROW keys to select a different buffer value. • The “ ” tag will blink on the LCD until the reading is stable. •...
- Page 18 • When the reading is stable and close to the selected buffer, the CFM functional key is displayed. • Press CFM to confirm calibration. • The calibrated value and the third expected buffer value will be dis- played. • After the second calibration point is confirmed, immerse the pH electrode and the temperature probe approximately 4 cm (1½”) into the third buffer solution and stir gently.
- Page 19 • After the third calibration point is confirmed, immerse the pH electrode and the temperature probe approximately 4 cm (1½”) into the fourth buffer solution and stir gently. The temperature probe should be close to the pH electrode. • If necessary, press the ARROW keys to select a different buffer value. •...
- Page 20 • Press CFM to confirm calibration. • The instrument stores the calibration values and returns to normal mea- surement mode. FOUR, THREE or TWO-POINT CALIBRATION • Proceed as described in “FIVE-POINT CALIBRATION” section. • Press CAL or ESC after the appropriate accepted calibration point. The instru- ments will return to measurement mode and will memorize the calibration data.
- Page 21 ERROR SCREENS Wrong buffer The calibration cannot be confirmed. The pH reading is not close to the selected buffer. Select another buffer using the ARROW keys or change the buffer. Electrode Dirty/Broken alternatively with Buffer Contaminated The calibration cannot be confirmed. The offset of the electrode is not in the accepted range.
- Page 22 Wrong old slope An inconsistency between new and previous (old) calibration is detected. Clear old calibration parameters and proceed calibration from the current point. The instrument will keep all confirmed values during current calibration. Note: For one-point calibration the electrode condition is not displayed in the measurement screen.
- Page 23 WORKING WITH CUSTOM BUFFERS If at least one custom buffer was set in SETUP menu, it can be selected for calibration by pressing the ARROW keys. The Custom functional key will be displayed. Press Custom if you want to adjust the buffer value according with current temperature.
- Page 24 CLEAR CALIBRATION Press Clear functional key when displayed or CLR key (HI 98180 & HI 98181) to clear old calibrations. All old calibrations, are cleared and the instrument continues calibration. The points confirmed in current calibration are kept. Note: If Clear calibration is invoked during the first calibration point, the instrument returns to measurement mode.
-
Page 25: Ph Buffer Temperature Dependence
p p p p p H BUFFER TEMPERATURE H BUFFER TEMPERATURE H BUFFER TEMPERATURE H BUFFER TEMPERATURE H BUFFER TEMPERATURE D E P E N D E N C E D E P E N D E N C E D E P E N D E N C E D E P E N D E N C E D E P E N D E N C E... -
Page 26: Relative Mv Calibration Hi 98181 & Hi 98182
RELATIVE RELATIVE m m m m m V CALIBRATION RELATIVE V CALIBRATION V CALIBRATION V CALIBRATION RELATIVE RELATIVE V CALIBRATION ( ( ( ( ( not for not for not for HI 981 HI 981 HI 981 8 0 8 0 8 0 8 0 8 0) ) ) ) ) not for not for HI 981 HI 981... -
Page 27: Ise Calibration Hi 98184 & Hi 98185
I I I I I S E S E S E S E S E CALIBRATION CALIBRATION CALIBRATION CALIBRATION CALIBRATION (HI 981 (HI 981 84 & 84 & HI 981 HI 9818 5 8 5 8 5 8 5 8 5) ) ) ) ) HI 981 (HI 981 (HI 981... - Page 28 • Press CAL. The primary LCD will displays the ion concentration in the selected unit or “---” if not calibrated and first standard value. • If necessary, press the ARROW keys to select a different standard value. • The “ ” tag will blink on the LCD until the reading is stable. •...
- Page 29 • Press CFM to confirm calibration. • The calibrated value and the fourth expected standard value will be displayed. • After the third calibration point is confirmed, immerse the ISE electrode approximately 4 cm (1½”) into the fourth calibration solution. •...
- Page 30 Wrong slope The calibration cannot be confirmed. This message is displayed if slope is out of the accepted range. Slope under accepted value (30 % default slope). Slope over accepted value (130 % default slope). Wrong old slope An inconsistency between new and previous (old) calibration is detected. Clear old calibration parameters and proceed calibration from the current point.
-
Page 31: Good Laboratory Practice (Glp)
GOOD LABORATORY PRACTICE (GLP) GOOD LABORATORY PRACTICE (GLP) GOOD LABORATORY PRACTICE (GLP) GOOD LABORATORY PRACTICE (GLP) GOOD LABORATORY PRACTICE (GLP) GLP is a set of functions that allows storage and retrieval of data regarding the maintenance and status of the electrode. All data regarding pH, Rel mV or ISE calibration is stored for the user to review when necessary. - Page 32 LAST RELATIVE mV CALIBRATION DATA Last Relative mV calibration data is stored automatically after a successful calibration. To view the Relative mV calibration data, press GLP key while in Relative mV measurement mode. The instrument will display the Relative mV GLP information: calibration date, time and offset.
-
Page 33: Setup
S E T U P S E T U P S E T U P S E T U P S E T U P Setup mode allows viewing and modifying the measurement parameters. These are general SETUP parameters for all the ranges and range specific parameters. - Page 34 The following table lists the specific range parameters. Item Description Valid value Default Calibr. Number of days after Disable, 1 to 7 days Disable Timeout Calibration warning (pH & ISE) is displayed First point Management of 1 point Replace or offset Replace mode (pH) calibration...
- Page 35 GENERAL PARAMETER SCREENS Backlight Focus on the Backlight item. Press Modify. keys to change the intensity then press Accept to confirm. Press ESC to leave without changing. Contrast Focus on the Contrast item. Press Modify. keys to change contrast then press Accept to confirm. Press ESC to leave without changing.
- Page 36 Auto Light Off Focus on the Auto Light Off item. Press 5, 10 or 30 to change settings. Auto Power Off Focus on the Auto Power Off item. Press Modify. Press ARROW keys to select interval then press Accept. Press ESC to leave without changing. Date/Time Focus on the Date/Time item.
- Page 37 Press Modify. keys to select item. Use ARROW keys to change focused values. Press Accept to confirm new setting, or ESC to leave without changing. Time Format Focus on the Time Format item. Press functional key to change the option. Date Format Focus on the Date Format item.
- Page 38 Language Focus on the Language item. Use the desired functional key to change the option. Wait until new language is loaded. If language load fails the instrument will try to reload current language. If any language can’t be loaded, the instrument will work in safe mode. In this mode all messages are displayed in English and Help is not available.
- Page 39 Instrument ID Focus on the Instrument ID item. Press Modify. Use ARROW keys to change the instrument ID. Press Accept to confirm or ESC to exit without saving. Baud Rate Focus on the Baud Rate item. Press Modify. Use ARROW keys to select the desired communication baud. Press Accept to confirm or ESC to exit.
- Page 40 Meter information Focus on the Meter Information item. Press Select. The meter informations are displayed: -firmware version -language version -mV and temperature factory calibration time/date -battery capacity RANGE SPECIFIC PARAMETERS SCREENS Calibration Timeout Focus on the Calibration Timeout item. Press Modify. Use ARROW keys to set desired value.
- Page 41 Note: If enabled “CAL DUE” warning will be displayed, the set number of days after calibration is over passed. First point mode Focus on the First Point item. Press the displayed functional key in order to change the option. First point mode refers to the behaviour of the instrument regarding “One point calibration”.
- Page 42 Press Modify to set custom buffer value. Use ARROW keys to change the value. Press Accept to confirm custom buffer value or ESC to exit without saving. View Calibration Points Focus on the Calibration Point item. Press the displayed functional key to change option. If option is enabled the calibration buffers corresponding to the last calibration are displayed in the pH measurement screen.
- Page 43 ISE probe Focus on the ISE probe item. Press Custom in order to set the parameters for a custom probe. Press Standard in order to select one probe from the standard probes list. If Custom is pressed: Use ARROW keys to focus on the parameter to be changed (“Change Slope” or “Molar Weight”).
- Page 44 Focus on Molar Weight . Press Modify in order to change molar weight. Use ARROW keys to change the value. Press Accept to confirm or ESC to exit. If Standard was pressed. Use ARROW keys to focus on the desired electrode. Press Accept to confirm setting or ESC to exit.
- Page 45 Press Modify. Use ARROW key to select unit. Press Accept to confirm selection or ESC to exit. Note:• If the unit is changed or “User” is selected a warning message will be displayed to alert that the ISE range must be calibrated. •...
-
Page 46: Logging
L O G G I N G L O G G I N G L O G G I N G L O G G I N G L O G G I N G This feature allows the user to log pH, Rel mV or ISE measurements. All logged data can be transferred to a PC through the USB (RS232) port. -
Page 47: Memory Function
More is pressed. Use ARROW keys to scroll between complete log information. If Delete is pressed. Use ARROW key to focus the record to be deleted and then press CFM. Press ESC to exit. If Delete All is pressed the instrumet asks for confirmation. Press CFM to confirm or ESC to exit without deleting. -
Page 48: Autoend
A A A A A u t o E n d u t o E n d u t o E n d u t o E n d u t o E n d To freeze the first stable reading on the LCD press AutoEnd while the instru- ment is in measurement mode. -
Page 49: Mv And Temperature Calibration (For Technical Personnel Only)
m m m m m V V V V V and TEMPERATURE CALIBRATION TEMPERATURE CALIBRATION and TEMPERATURE CALIBRATION TEMPERATURE CALIBRATION TEMPERATURE CALIBRATION (for technical personnel only) All the instruments are factory calibrated for mV and temperature. Hanna’s temperature probes are interchangeable and no temperature calibration is needed when they are replaced. - Page 50 • Press CFM to confirm. • The second expected calibrated point is displayed. • Immerse the temperature probe into the second vessel as close as possible to the reference thermometer. Allow a few seconds for the probe to stabilize. • Use the ARROW keys to set the calibration point value to that of the hot water.
- Page 51 displayed. • Set 1800.0 mV on the simulator. • When the reading is stable and close to the selected calibration point, the CFM functional key is displayed. • Press CFM to confirm. The instrument returns to calibration screen. • Press ESC to return to measurement mode. Notes:•If the reading is not close to the selected calibration point, “WRONG”...
-
Page 52: Pc Interface (Not For Hi 98180 And Hi 98181)
USB socket and the other to the serial or USB port of your PC. Note: • If you are not using Hanna Instruments HI 92000 software, please see the following instructions. - Page 53 Is equivalent to pressing OFF key CHR xx Change the instrument range according with the parameter value (xx): • xx=00 pH range/0.001 resolution • xx=01 pH range/0.01 resolution • xx=02 pH range/0.1 resolution • xx=03 mV range • xx=04 Relative mV range •...
- Page 54 • 05 - ISE range • Meter status (2 chars of status byte): represents a 8 bit hexadecimal encoding. • 0x10 - temperature probe is connected • 0x01 - new GLP data available • 0x02 - new SETUP parameter • 0x04 - out of calibration range •...
- Page 55 • buffer value, with sign and decimal point and expo- nent (11 chars). • calibration time, yymmddhhmmss (12 chars). • electrode condition, with sign (3 chars). The “-01” code means not calculated. • Rel mV calibration data (if available), which contains: •...
- Page 56 • The ion charge (2 chars) • The ISE unit (2 chars) • The short name of the selected language (3 chars) NSLx Requests the number of logged samples (4 chars). The command parameter (1 char): • P - request for pH range •...
- Page 57 Notes: • “Err8” is sent if the instrument is not in measurement mode. • “Err6” is sent if the requested range is not available. • “Err4” is sent if the requested set parameter is not available. • “Err3” is sent if the Log on demand is empty. •...
-
Page 58: Batteries Recharging/Replacement
B A T T E R I E S B A T T E R I E S B A T T E R I E S B A T T E R I E S B A T T E R I E S R E C H A R G I N G / R E P L A C E M E N T R E C H A R G I N G / R E P L A C E M E N T R E C H A R G I N G / R E P L A C E M E N T... - Page 59 To recharge the rechargeable batteries, follow the next steps: • Connect the 12VDC power adapter to the main line and to the main line of the battery recharger. The front LED will turn ON. • Place the instrument in the battery recharger case. A charging animation will be displayed if the battery capacity is less than 100 %.
-
Page 60: Temperature Correlation For Ph Sensitive Glass
TEMPERATURE CORRELATION TEMPERATURE CORRELATION TEMPERATURE CORRELATION TEMPERATURE CORRELATION TEMPERATURE CORRELATION FOR p p p p p H SENSITIVE GLASS H SENSITIVE GLASS H SENSITIVE GLASS H SENSITIVE GLASS H SENSITIVE GLASS The resistance of glass electrodes partially depends on the temperature. The lower the temperature, the higher the resistance. -
Page 61: Electrode Conditioning & Maintenance
E L E C T R O D E C O N D I T I O N I N G E L E C T R O D E C O N D I T I O N I N G E L E C T R O D E C O N D I T I O N I N G E L E C T R O D E C O N D I T I O N I N G E L E C T R O D E C O N D I T I O N I N G... - Page 62 For refillable electrodes: For refillable electrodes: For refillable electrodes: For refillable electrodes: For refillable electrodes: If the filling solution (electrolyte) is more than 2½ cm (1”) below the fill hole, add HI 7082 or HI 8082 3.5M KCl Electrolyte Solution for double junction or HI 7071 or HI 8071 3.5M KCl+AgCl Electrolyte Solution for single junction electrodes.
- Page 63 Follow the Storage Procedure above. pH CLEANING PROCEDURE • General Soak in Hanna HI 7061 or HI 8061 General Cleaning Solution for approximately ½ hour. • Protein Soak in Hanna HI 7073 or HI 8073 Protein Cleaning Solution for 15 minutes. •...
-
Page 64: Troubleshooting Guide
T R O U B L E S H O O T I N G G U I D E T R O U B L E S H O O T I N G G U I D E T R O U B L E S H O O T I N G G U I D E T R O U B L E S H O O T I N G G U I D E T R O U B L E S H O O T I N G G U I D E... -
Page 65: Accessories
A C C E S S O R I E S A C C E S S O R I E S A C C E S S O R I E S A C C E S S O R I E S A C C E S S O R I E S pH CALIBRATION SOLUTIONS HI 50004-01 pH 4.01 Buffer Solution, 20 mL sachet, 10 pcs... - Page 66 HI 8082 3.5M KCl Electrolyte in FDA approved bottle, 4x30 mL, for double junction electrodes HI 8093 1M KCl+AgCl Electrolyte in FDA approved bottle, 4x30 mL ORP PRETREATMENT SOLUTIONS HI 7091L Reducing Pretreatment Solution, 500 mL bottle HI 7092L Oxidizing Pretreatment Solution, 500 mL bottle ORP SOLUTIONS HI 7020L Test Solution 200-275 mV, 500 mL bottle...
- Page 67 HI 1131B Glass-body, single junction, refillable, combination pH electrode. Use: general purpose. HI 1330B Glass-body, semimicro, single junction, refillable, combination pH electrode. Use: laboratory, vials. HI 1331B Glass-body, semimicro, single junction, refillable, combination pH electrode. Use: flasks. HI 1230B Plastic-body (PEI), double junction, gel-filled, combination pH electrode. Use: general, field.
- Page 68 HI 1332B Plastic-body (PEI), double junction, refillable, combination pH electrode. Use: general purpose. FC 100B Plastic-body (PVDF), double junction, refillable, combination pH electrode. Use: general purpose for food industry. FC 200B Plastic-body (PVDF), open junction, conic, Viscolene, non-refillable, combination pH electrode.
- Page 69 FC 911B Plastic-body (PVDF), double junction, refillable with built-in amplifier, combination pH electrode. Use: very high humidity. HI 1413B Glass-body, single junction, flat tip, Viscolene, non-refillable, combination pH electrode. Use: surface measurement. ORP ELECTRODES HI 3131B Glass-body, refillable, combination platinum ORP electrode. Use: titration.
- Page 70 EXTENSION CABLE FOR SCREW-TYPE ELECTRODES (SCREW TO BNC ADAPTER) HI 7855/1 Extension cable 1 m (3.3') long HI 7855/3 Extension cable 3 m (9.9') long OTHER ACCESSORIES HI 710042 Inductive Recharger HI 721317 Rugged carrying case HI 740157 Plastic electrode refilling pipet (20 pcs) HI 76405 Electrode holder HI 7662 Stainless steel Temperature probe with 1 m (3.3') screened cable...
- Page 71 To avoid electrical shock, do not use these instruments when voltages at the measurement surface exceed 24 VAC or 60 VDC. To avoid damage or burns, do not perform any measurement in microwave ovens. Hanna Instruments reserves the right to modify the design, construction and appearance of its products without advance notice.
- Page 72 SALES AND TECHNICAL SERVICE CONTACTS Australia: Tel. (03) 9769.0666 • Fax (03) 9769.0699 China: Tel. (10) 88570068 • Fax (10) 88570060 Egypt: Tel. & Fax (02) 2758.683 Germany: Tel. (07851) 9129-0 • Fax (07851) 9129-99 Greece: Tel. (210) 823.5192 • Fax (210) 884.0210 Indonesia: Tel.
Need help?
Do you have a question about the HI 98180 and is the answer not in the manual?
Questions and answers